
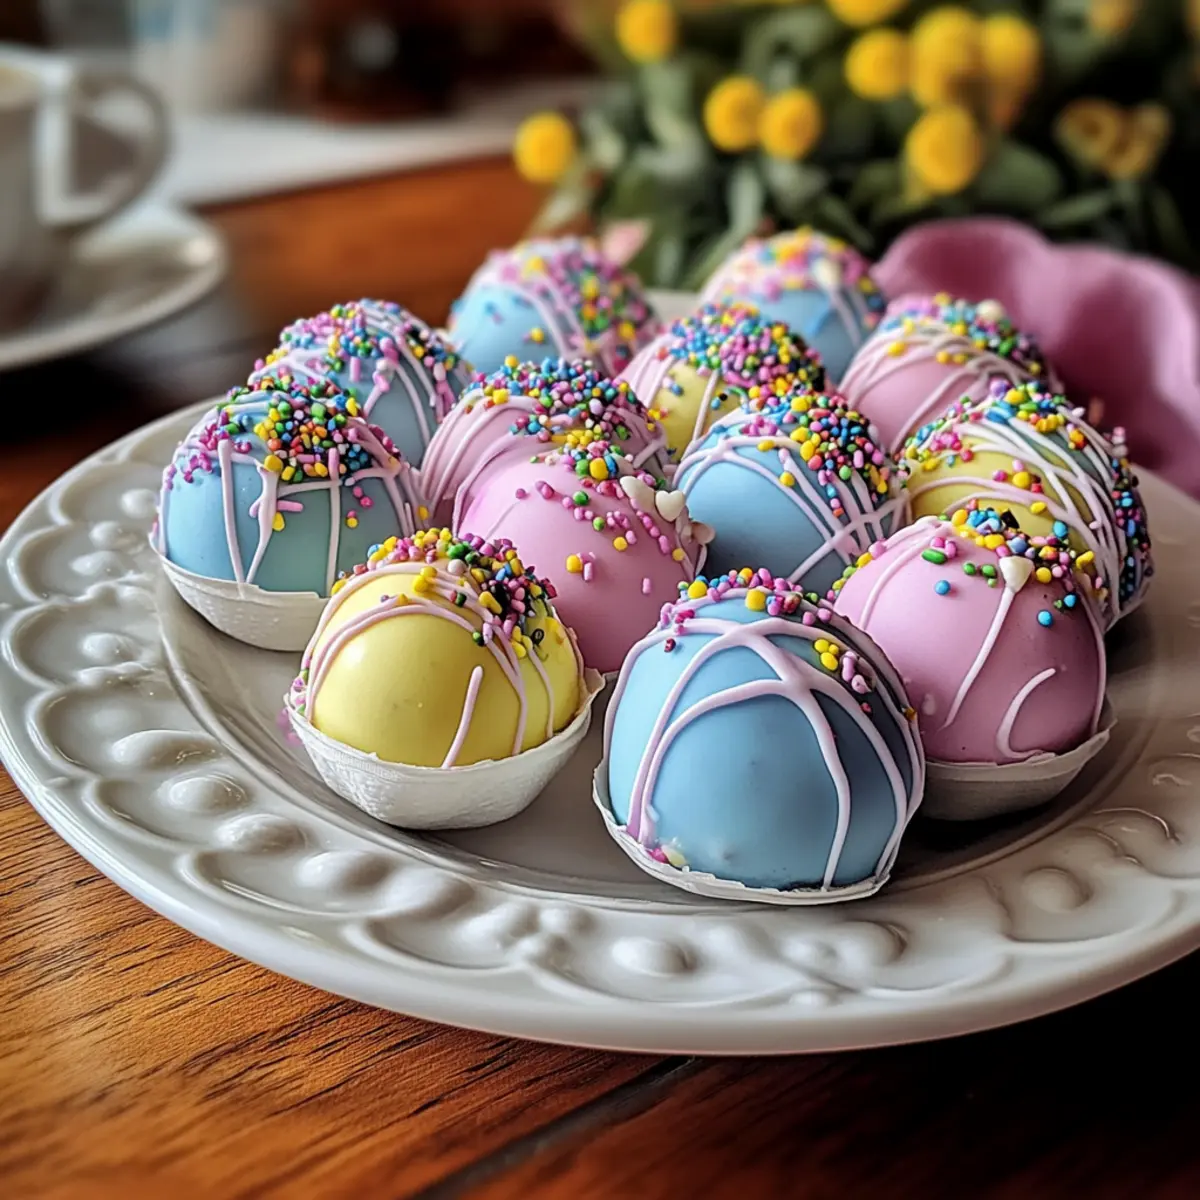
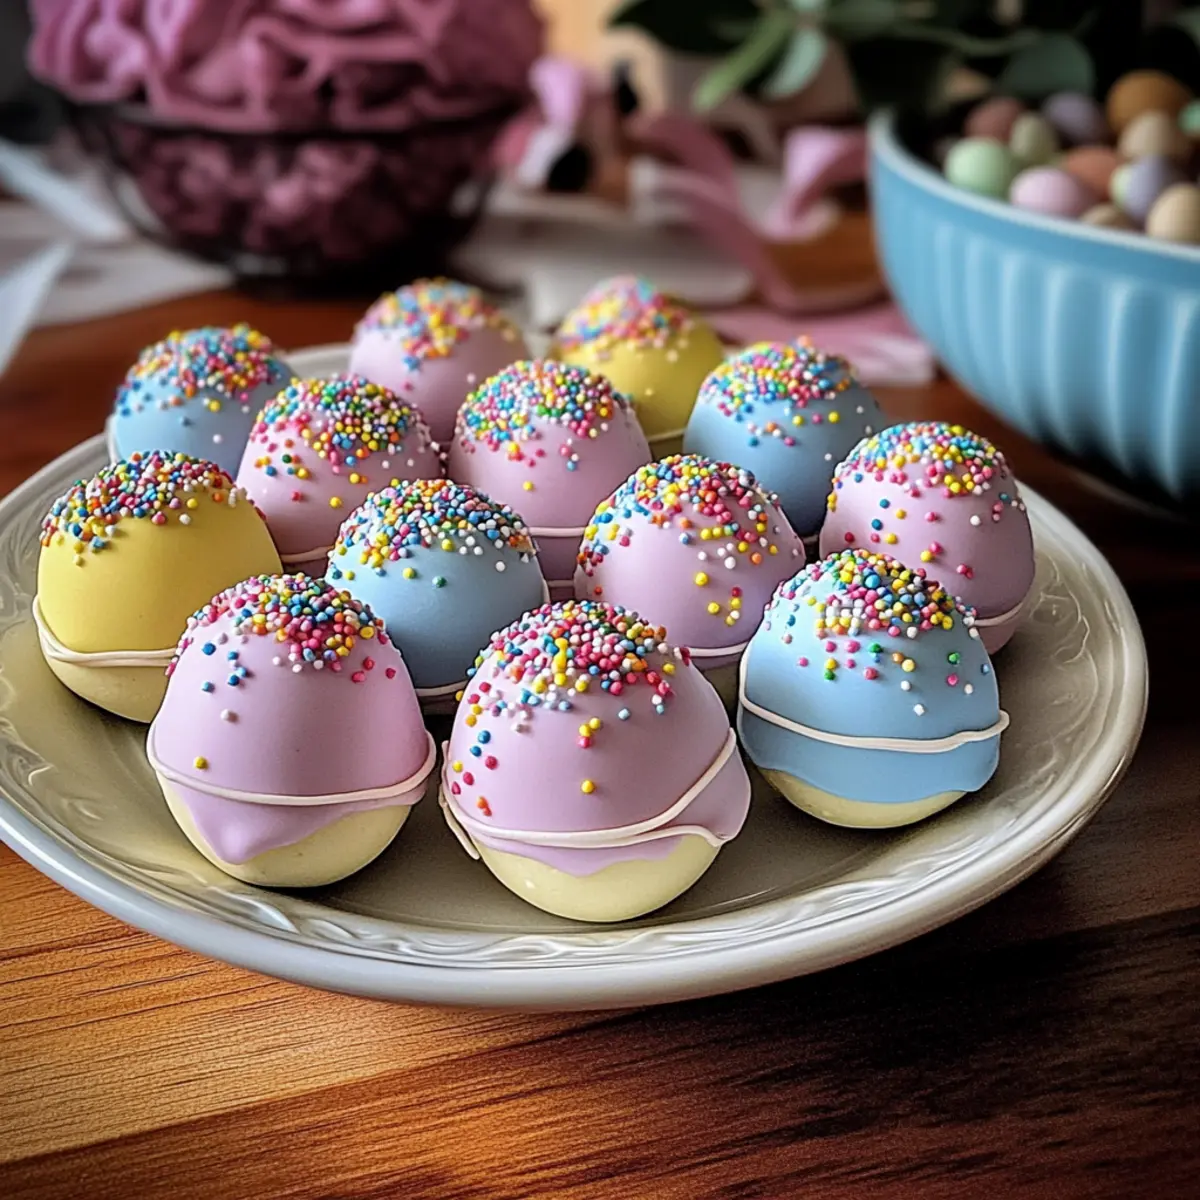
As spring rolls in and the decorations start to bloom, there’s a delightful little secret I’m eager to share: Festive No-Bake Easter Egg Oreo Balls! These treats transform simple Oreo cookies into vibrant, egg-shaped confections that are as fun to make as they are to eat. The joy of mixing creamy filling with crushed chocolatey goodness comes alive in this no-bake dessert, making it an ideal project to tackle with family or friends. Plus, they’re fully customizable, so you can play with flavors and colors, creating a festive treat that’s sure to be a hit at any spring gathering. Ready to whip up some playful Easter magic in your kitchen? Let’s dive in!
Why are Easter Egg Oreo Balls a Must-Try?
Simplicity makes this recipe a breeze! With no baking required, you can whip up these festive treats in no time. Customizable to suit every taste, swap in your favorite cookies or colors for a personal touch. Crowd-pleasing and fun to make, they’re perfect for family gatherings or as sweet gifts. Plus, if you love easy desserts, don’t miss my Oreo Cheesecake Cookie recipe for another delightful treat! Enjoy the rich, chocolatey goodness that everyone will adore!
Easter Egg Oreo Balls Ingredients
Get ready to create your festive treats!
For the Filling
• Oreo Cookies – The base ingredient providing a rich chocolate flavor; try Golden Oreos for a twist!
• Cream Cheese – Adds creaminess and helps bind everything together; consider using dairy-free cream cheese for a lighter option.
• Vanilla Extract (optional) – Enhances the flavor; you can omit it if you prefer a simpler taste.
For the Coating
• White Candy Melts – Perfect for a smooth candy coating; substitute with white chocolate chips mixed with coconut oil for melting.
• Pastel Food Coloring – Brightens your treats for that Easter theme; gel food coloring works best for vibrant hues.
For Decoration
• Sprinkles/Sanding Sugar – Add a festive touch to your eggs; they’re optional but make for a delightful presentation.
Whip up these delightful Easter Egg Oreo Balls that everyone will love!
Step‑by‑Step Instructions for Easter Egg Oreo Balls
Step 1: Crush the Oreos
Begin by placing the Oreo cookies in a food processor, pulsing them into fine crumbs for about 30 seconds. Alternatively, if you don’t have a processor, put the cookies in a zip-top bag and crush them with a rolling pin until they resemble sand. This will create the delicious chocolatey base for your Easter Egg Oreo Balls.
Step 2: Mix Ingredients
In a medium mixing bowl, combine the crushed Oreos with softened cream cheese, and if desired, add a splash of vanilla extract for extra flavor. Use a spatula or your hands to mix thoroughly until the mixture becomes thick and dough-like, ensuring there are no lumps. This creamy filling will enrich your Easter Egg Oreo Balls, creating a delightful texture.
Step 3: Shape Balls
Scoop about 1 tablespoon of the Oreo-cream cheese mixture and roll it in your hands to form egg shapes—aim for about 1 to 1.5 inches in length. Place each shaped egg onto a parchment-lined baking sheet, ensuring they’re spaced out to avoid sticking. This is where the fun begins, as you create the charming Easter Egg Oreo Balls!
Step 4: Chill
Refrigerate the baking sheet with your shaped eggs for at least 30 minutes, or place them in the freezer for 15 minutes until they firm up. This chilling step is crucial as it helps the balls maintain their shape when coated and makes them easier to handle, resulting in perfectly finished Easter Egg Oreo Balls.
Step 5: Melt Coating
Using a microwave-safe bowl, melt the white candy melts according to the package instructions, heating in 30-second intervals and stirring until smooth. If you prefer to use white chocolate chips, melt them together with a teaspoon of coconut oil to achieve a silky consistency for coating your Easter Egg Oreo Balls.
Step 6: Add Color
Once melted, divide the white coating into separate bowls if you want to create multiple colors. Add a few drops of pastel food coloring to each bowl, stirring until you achieve your desired vibrant hues. This colorful step is what will bring your Easter Egg Oreo Balls to life, making them festive and appealing.
Step 7: Coat Eggs
Carefully dip each chilled egg shape into the colored coating, ensuring it’s fully covered, then gently tap off any excess. Return the coated eggs to the lined baking sheet, making sure they are not touching. This process will give your Easter Egg Oreo Balls a beautiful, glossy finish that looks as delightful as it tastes.
Step 8: Decorate
Before the candy coating sets, sprinkle your coated eggs with colorful sprinkles or sanding sugar for a festive touch. Alternatively, drizzle some extra melted chocolate on top for an elegant detail. This decorative step is totally optional, but it adds a personal touch and enhances the visual appeal of your Easter Egg Oreo Balls.
Step 9: Set
Allow the decorated Easter Egg Oreo Balls to harden at room temperature for about 15 minutes, or place them in the refrigerator for 10 minutes if you want to speed up the process. Once set, these creamy confections are ready to be served and enjoyed, making them a perfect addition to your spring celebrations!

Expert Tips for Easter Egg Oreo Balls
-
Softened Cream Cheese: Make sure your cream cheese is at room temperature to ensure a smooth, lump-free filling. Cold cream cheese will make mixing difficult for your Easter Egg Oreo Balls.
-
Crush Evenly: Aim for fine crumbs when crushing your Oreos; bigger chunks can lead to a gritty texture. Ensure your food processor is clean and dry for the best results.
-
Chill Properly: Don’t skip chilling! Ensuring your egg shapes are firm before coating is key to getting a smooth finish. It keeps them from melting and maintains their delightful shape.
-
Avoid Overheating: When melting the coating, use short bursts in the microwave and stir in between. Overheating can cause the chocolate to seize, ruining your Easter Egg Oreo Balls.
-
Customize Colors: Experiment with different pastel shades for a vibrant look. Remember that gel food coloring provides the best results for bright, bold hues.
-
Decorate Before Setting: Add sprinkles or drizzle melted chocolate while the coating is still wet, as this will help the decorations adhere better, making your Easter Egg Oreo Balls truly festive.
How to Store and Freeze Easter Egg Oreo Balls
Room Temperature: Keep them in an airtight container for up to 2 days if you plan to serve immediately, but they taste best chilled.
Fridge: Store in the refrigerator for up to 5 days in a sealed container to maintain freshness and creaminess, making them a great make-ahead treat!
Freezer: For long-term storage, freeze them in an airtight container for up to 2 months. Thaw in the fridge overnight before serving for optimal texture.
Reheating: There’s no need to reheat these no-bake Easter Egg Oreo Balls—enjoy them cold for a refreshing treat!
Make Ahead Options
These Festive No-Bake Easter Egg Oreo Balls are perfect for meal prep, saving you time during busy holidays! You can prepare the filling (crushed Oreos mixed with cream cheese) up to 3 days in advance; simply cover and refrigerate it to maintain freshness. If you’d like, you can also shape the balls and chill them up to 24 hours ahead, making the coating process a breeze when it’s time to serve. Just remember to store them in an airtight container to keep them from drying out. When you’re ready to enjoy, melt your candy coating, dip the chilled balls, and decorate them for that festive flourish—ensuring they’ll be just as delicious as if made fresh!
Easter Egg Oreo Balls Variations
Let your creativity shine by customizing these delightful treats with your unique twists and flavor profiles!
-
Dairy-Free Cream Cheese: Substitute with a dairy-free alternative to keep it suitable for a vegan diet. They’ll still be creamy and delicious!
-
Chocolate Cookies: Use chocolate chip cookies instead of Oreos for a rich, homemade touch. The outcome is equally delightful yet distinct.
-
Nutty Delight: Add chopped nuts like almonds or walnuts to the filling for a satisfying crunch. This adds an exciting texture that everyone will enjoy.
-
Coconut Coating: Instead of candy melts, roll the balls in sweetened shredded coconut after chilling for an island-inspired twist. It’s a fun option that’ll transport you to tropical vibes!
-
Crunchy Pretzel Coating: Dip in melted chocolate and then roll in crushed pretzels for a sweet-salty combination. This adds an addictive crunch and elevates the flavor experience.
-
Dark Chocolate: Swap white candy melts for dark chocolate coating for a richer flavor. The contrast with the sweet filling will have chocolate lovers swooning!
Don’t forget to serve your Easter Egg Oreo Balls alongside a platter of my Garlic Butter Meatballs or share them as sweet surprises in gift baskets, just like my lovely Greek Turkey Meatballs with Tzatziki that bring joy to any gathering!
What to Serve with Easter Egg Oreo Balls
These delightful treats are just the beginning of your festive gathering, inviting a balance of flavors and textures that complement each bite.
- Fresh Fruit Salad: A colorful medley of seasonal fruits adds a refreshing contrast to the rich sweetness of the Oreo balls.
- Chocolate Dipped Strawberries: The indulgence of chocolate-covered strawberries elevates the dessert table with elegance and a burst of flavor.
- Carrot Cake: The warm spices and moist texture of this classic cake harmonize beautifully with the creamy sweetness of the Easter Egg Oreo Balls.
- Vanilla Ice Cream: Creamy vanilla ice cream provides a cool, smooth counterpoint that enhances the overall dessert experience.
- Mint Lemonade: This refreshing drink offers a zesty kick, cleansing the palate and balancing the sweet richness of the Oreo balls.
- Pistachio Cookies: These nutty, crunchy cookies create a delightful textural contrast that pairs wonderfully with the smooth Oreo balls.
- Coffee or Espresso: Rich, robust coffee enhances the flavors of the chocolate and adds a sophisticated touch to your dessert spread.
- Mini Cupcakes: Small, whimsical cupcakes can add variety without overwhelming sweetness, inviting guests to indulge even further.
- Whipped Cream: A light dollop on the side can offer extra creaminess, perfect for dipping or savoring alongside the Oreo balls.

Easter Egg Oreo Balls Recipe FAQs
How do I choose the best Oreos for my Easter Egg Oreo Balls?
Absolutely! For a classic chocolate flavor, regular Oreos work beautifully. However, if you’re feeling adventurous, you can swap in Golden Oreos for a slightly different taste. Just ensure they are fresh, as any stale cookies will affect the texture and flavor of your filling.
What’s the best way to store Easter Egg Oreo Balls?
For short-term storage, keep your Easter Egg Oreo Balls in an airtight container at room temperature for up to 2 days. However, they are best served chilled, so refrigerate them for up to 5 days in a sealed container for the freshest taste.
Can I freeze Easter Egg Oreo Balls?
Yes! Freezing is a great option for these treats. Place your shaped and decorated Easter Egg Oreo Balls in an airtight container, layering them with parchment paper to prevent sticking. You can freeze them for up to 2 months. When you’re ready to enjoy them, simply thaw them in the refrigerator overnight for the best texture.
What if my coating is too thick when melting?
Very! If you find your coating too thick while melting, don’t worry. Simply add a teaspoon of coconut oil or shortening to help thin it out as you melt. Heat it in short bursts, stirring in between until it’s perfectly smooth and dip-ready!
Are Easter Egg Oreo Balls safe for pets or those with allergies?
It’s essential to consider allergies and dietary restrictions. The main ingredients—Oreos and cream cheese—are not suitable for pets, especially dogs, as chocolate can be toxic. For those with allergies, substituting dairy-free cream cheese is a good option. Always check ingredient labels for any allergic reactions.
How long will Easter Egg Oreo Balls stay fresh after making them?
Enjoy these delightful treats within 5 days if refrigerated, but they can also be frozen for up to 2 months for longer storage. Just remember to let them sit at room temperature for a few minutes after freezing for the best flavor and texture when serving.
Delicious Easter Egg Oreo Balls for a Spring Celebration
Ingredients
Equipment
Method
- Crush the Oreos in a food processor or zip-top bag until fine crumbs.
- In a bowl, mix crushed Oreos with softened cream cheese and optional vanilla extract until thick.
- Scoop about 1 tablespoon of the mixture and shape into egg shapes, placing on a parchment-lined baking sheet.
- Chill the shaped eggs in the refrigerator for at least 30 minutes or freeze for 15 minutes.
- Melt the white candy melts in a microwave-safe bowl, stirring until smooth.
- Add pastel food coloring to separate bowls of melted coating and mix.
- Dip each egg into the colored coating, tapping off excess, and return to the lined baking sheet.
- Before the coating sets, decorate with sprinkles or drizzled chocolate.
- Allow the finished eggs to set at room temperature for 15 minutes or refrigerate for 10 minutes.
Leave a Reply