
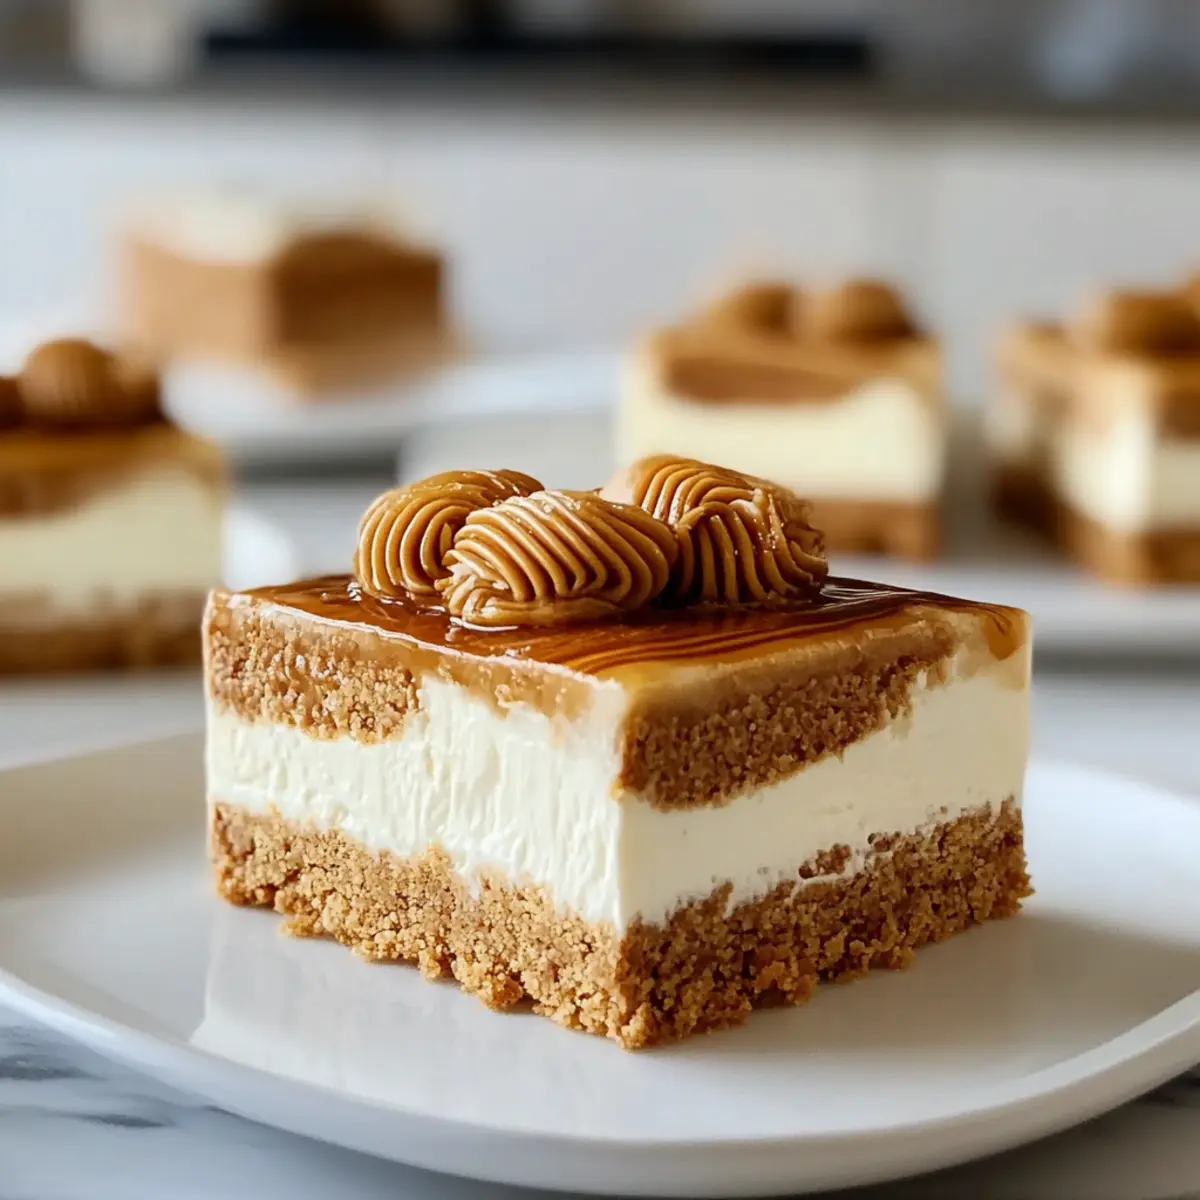
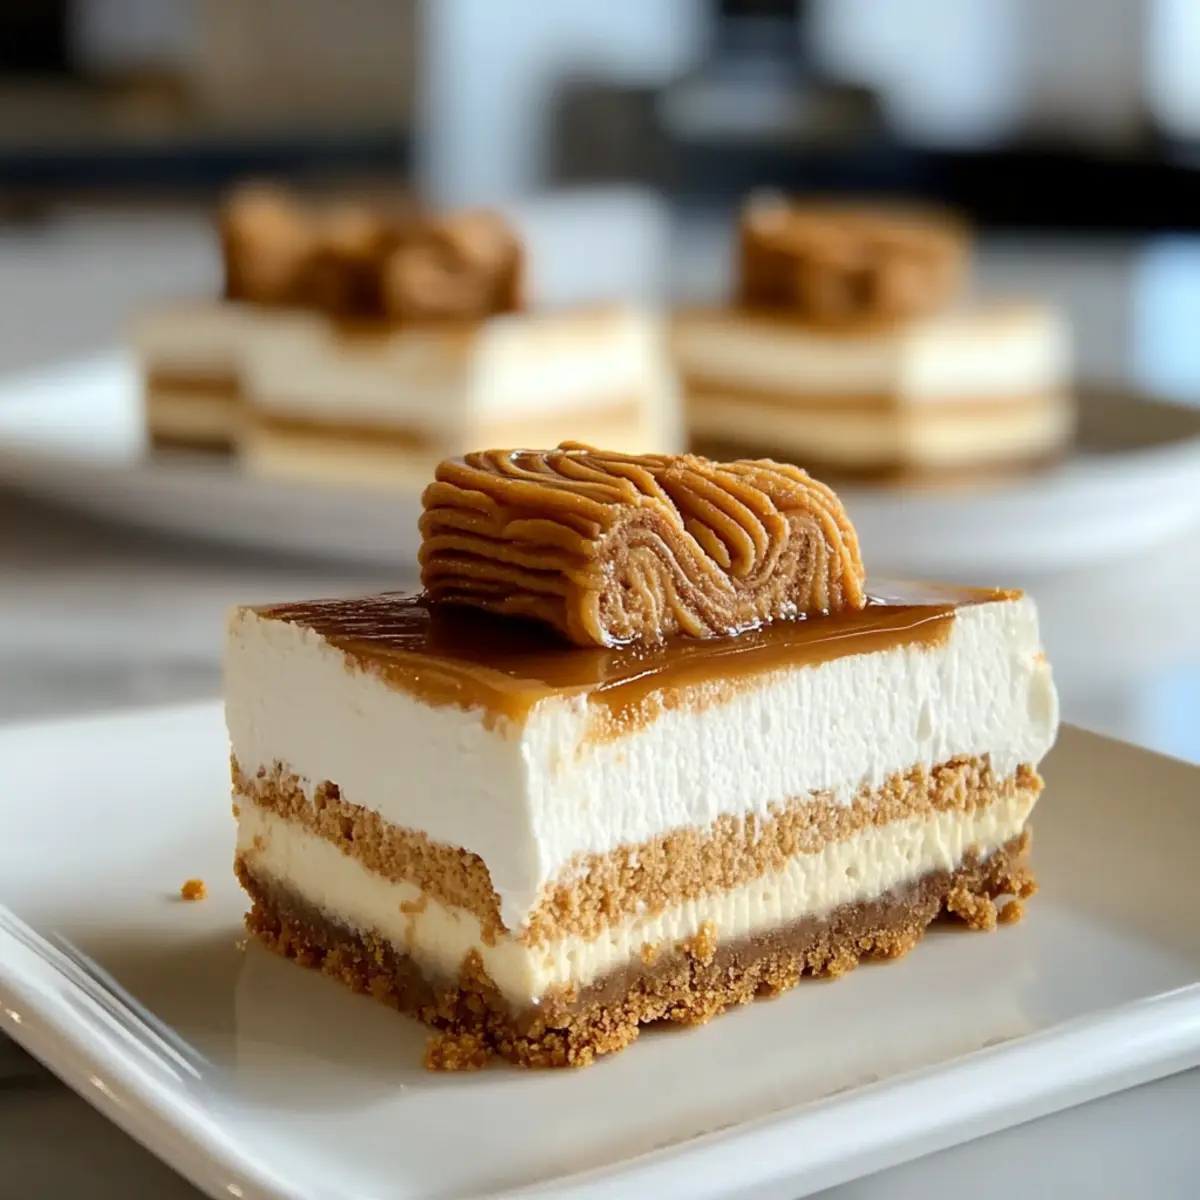
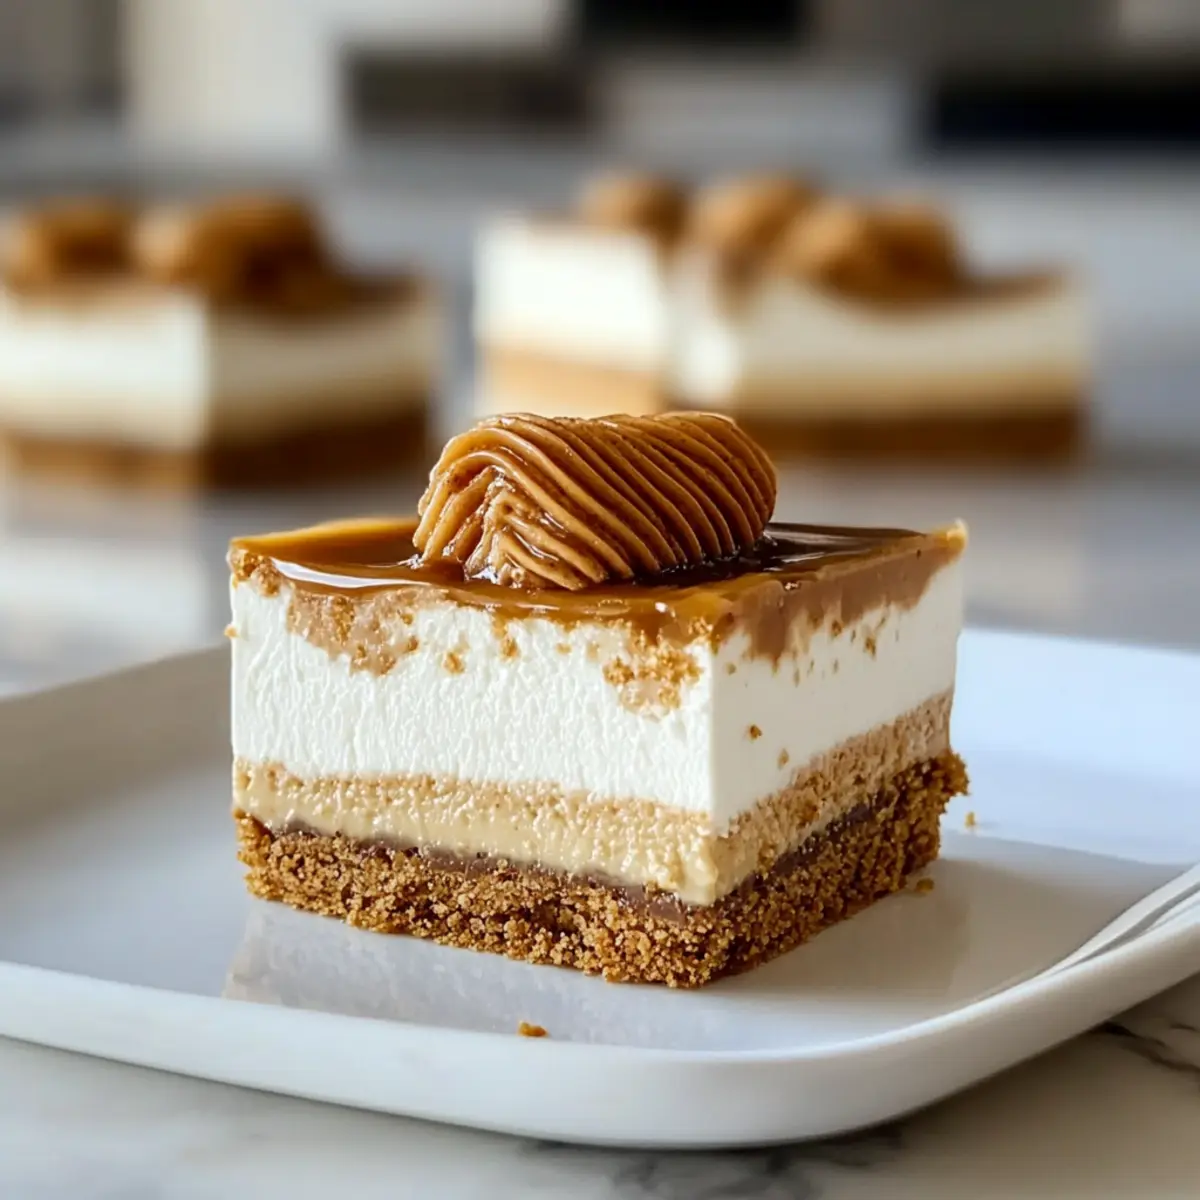
A tiny crumble of cookie falls to the counter, a reminder of the delightful mess that can come with indulgence. Today, I’m thrilled to share my favorite No-Bake Biscoff Cheesecake Bars—a dessert that promises creamy, caramelized goodness without requiring an oven! With their luxurious flavor profile and a crunchy cookie crust, these bars are not just easy to make but also family-approved, ensuring they’re the star at any gathering. Plus, you can prepare them ahead of time, making entertaining a breeze. Imagine the smiles when you serve these decadent little squares, each bite transporting you to a dessert dream. Ready to dive into a treat that feels fancy but is incredibly simple? Let’s get started!

Why Crave No-Bake Biscoff Cheesecake Bars?
Indulgent flavors await: These No-Bake Biscoff Cheesecake Bars offer a harmonious blend of creamy cheesecake enriched by the unique taste of Biscoff cookies. Time-saving treat: No need for an oven—just chill and serve! Versatile dessert: Perfect for any occasion, and easy to personalize with chocolate ganache or fresh berries. Family-approved and loved by all, they add a touch of sophistication to casual gatherings. Plus, you can prepare them ahead of time, leaving you free to enjoy the festivities! If you’re looking for more delightful options, be sure to check out my Oreo Cheesecake Cookie or Millionaires Cheesecake recipes!
No-Bake Biscoff Cheesecake Bars Ingredients
For the Crust
- Biscoff Cookies – The base of the crust, providing a delightful spiced flavor; can substitute with digestive biscuits or graham crackers if needed.
- Unsalted Butter – Binds the cookie crust together; for a dairy-free version, consider using margarine or coconut oil.
For the Filling
- Cream Cheese – Provides structure and a creamy texture to the filling; ensure it’s at room temperature for smooth blending, or use mascarpone for a richer flavor.
- Powdered Sugar – Sweetens the filling; granulated sugar can work if powdered sugar isn’t on hand but may alter the texture slightly.
- Biscoff Cookie Butter Spread – Adds a deep, caramelized flavor; alternative nut butters can bring new taste experiences.
- Vanilla Extract – Enhances the flavor profile; feel free to omit in case of allergies.
- Salt – Balances the sweetness in the filling; use kosher or sea salt for the best results.
For the Whipped Cream
- Heavy Whipping Cream – Provides lightness and aeration to the cheesecake filling; coconut cream can be a great non-dairy substitute.
- Granulated Sugar – Sweetens the whipped cream; optional if you prefer pure whipped cream or want to use a sweetener of your choice.
For the Final Touches
- Additional Biscoff Spread – Perfect for drizzling on top; chocolate or caramel sauce are tasty alternatives for variations.
- Extra Biscoff Cookies – Great for garnish; any cookie can be used to add a decorative touch.
These No-Bake Biscoff Cheesecake Bars are a delightful way to indulge without the oven, making them perfect for any occasion!
Step‑by‑Step Instructions for No-Bake Biscoff Cheesecake Bars
Step 1: Prepare the Pan
Start by lining a 9×13-inch baking pan with parchment paper, allowing some overhang for easy removal later. Lightly grease the parchment with non-stick spray or butter to ensure the cheesecake bars release smoothly. Set the pan aside while you prepare the crust, which will be the crunchy foundation for your No-Bake Biscoff Cheesecake Bars.
Step 2: Make the Crust
In a food processor, blend Biscoff cookies until they resemble fine crumbs. Melt unsalted butter in the microwave until fully liquid, then combine it with the cookie crumbs in a mixing bowl. Press the mixture evenly into the bottom of your prepared pan, making sure it’s tightly packed. Chill in the refrigerator for 30 minutes to set the crust’s shape and texture before adding the creamy filling.
Step 3: Prepare the Filling
While the crust chills, take room temperature cream cheese and beat it in a mixing bowl with an electric mixer until smooth and creamy. Gradually sift in powdered sugar, add Biscoff cookie butter, vanilla extract, and salt, mixing until fully incorporated. The mixture should be rich and luxurious, just right for spreading over the crust of your No-Bake Biscoff Cheesecake Bars.
Step 4: Whip Cream
In a separate clean mixing bowl, pour in heavy whipping cream and granulated sugar. Using a hand mixer or stand mixer, beat the cream on medium-high speed until stiff peaks form, which will take around 3-5 minutes. Be careful not to over-whip, as you want the cream to be light and airy—this will help create a fluffy cheesecake filling.
Step 5: Combine and Spread
Gently fold the whipped cream into the cream cheese mixture, taking care to maintain the airiness. Once well combined, scoop the filling over the chilled crust, spreading it evenly to achieve a smooth top. For a decorative touch, warm some additional Biscoff spread in the microwave and drizzle it over the filling, then use a knife or skewer to create swirls for a beautiful finish.
Step 6: Chill
Cover the pan with plastic wrap and refrigerate the No-Bake Biscoff Cheesecake Bars for at least 4 hours, or ideally overnight. This chilling time allows the flavors to meld beautifully and the bars to set up perfectly. Once you’re ready to serve, remove from the fridge, lift the bars out using the parchment overhang, and slice them into squares for serving.
How to Store and Freeze No-Bake Biscoff Cheesecake Bars
- Fridge: Store the bars in an airtight container in the refrigerator for up to 5 days. This helps the flavors to meld beautifully while keeping them fresh and creamy.
- Freezer: For longer storage, freeze the No-Bake Biscoff Cheesecake Bars wrapped tightly in plastic wrap and then in foil for up to 2 months. Thaw in the fridge before serving for the best texture.
- Reheating: These bars are served cold and do not require reheating. Just slice from the fridge and enjoy the creamy indulgence!
- Make-Ahead: Feel free to prepare these bars up to 3 days in advance, allowing for a convenient and delicious dessert option when entertaining guests.
Expert Tips for No-Bake Biscoff Cheesecake Bars
- Soften Cream Cheese: Ensure cream cheese is completely softened to avoid lumps in your filling. A smooth mixture is key to delicious No-Bake Biscoff Cheesecake Bars.
- Gentle Folding: When combining the whipped cream with the cream cheese mixture, fold gently to preserve the airiness. This ensures a light, fluffy texture for your bars.
- Chill Properly: Allow the bars to chill for at least 4 hours or overnight for best results. This helps the flavors meld and the bars set perfectly for slicing.
- Warm Knife for Slicing: Use a warm, clean knife to cut the bars. This prevents the filling from sticking and results in clean, beautiful slices.
- Make Ahead: These bars can be made 3 days in advance, and they freeze well, so you can prepare them ahead of time for stress-free entertaining!
Make Ahead Options
These No-Bake Biscoff Cheesecake Bars are perfect for meal prep, allowing busy home cooks to enjoy a delicious dessert without the last-minute scramble! You can prepare the crust and filling separately and refrigerate them for up to 3 days before serving. Simply bake the crust, let it cool, then spread the filling on top and chill overnight for best flavor. This way, the texture remains wonderfully creamy, and flavors meld beautifully. When ready to serve, just slice and optionally drizzle with extra Biscoff spread. You’ll have an indulgent dessert that’s just as delicious and ready to impress your family at any gathering!
No-Bake Biscoff Cheesecake Bars Variations
Feel free to get creative and customize your No-Bake Biscoff Cheesecake Bars to suit your taste or dietary needs!
- Dairy-Free: Replace cream cheese and heavy cream with vegan cream cheese and coconut cream for a delightful plant-based twist.
- Nutty Flavor: Use almond or hazelnut butter in place of Biscoff spread for an unexpected nutty richness. Each bite will be a new flavor journey!
- Chocolate Lovers: Add a layer of chocolate ganache on top before chilling for an indulgent chocolatey experience. This is a heavenly pairing with the spiced Biscoff cookie flavor.
- Spice It Up: Incorporate ground cinnamon or ginger with the filling to enhance the warm flavors, especially great for fall gatherings. A little pinch goes a long way!
- Top It Off: Garnish with fresh berries like raspberries or strawberries to add a bright, fruity contrast. Not only beautiful, but they also balance out the richness beautifully.
- Caramel Drizzle: Drizzle some caramel sauce over the top before serving for a luscious sweet finish that you won’t be able to resist.
- Crunchy Topping: Add crushed nuts or a sprinkle of toffee bits on top for an added crunch that will make every bite interesting.
- Try Different Cookies: Swap Biscoff cookies with your favorite cookies like Oreos for a fun flavor change—consider it a cookie adventure of taste!
With these delightful variations, your No-Bake Biscoff Cheesecake Bars will never get boring! For even more delightful desserts, don’t forget to check out my recipe for Marshmallow Whip Cheesecake or the indulgent Hot Fudge Cheesecake. Let your culinary imagination run wild!
What to Serve With No-Bake Biscoff Cheesecake Bars
Elevate your dessert experience with delightful pairings that complement these luxurious bars perfectly.
-
Fresh Berries: The tartness of strawberries or raspberries cuts through the sweetness, adding a refreshing contrast. It’s a lovely way to balance indulgence with a burst of freshness.
-
Coffee or Espresso: Rich, warm coffee intensifies the caramel flavors of the cheesecake, creating a delightful afternoon treat. Imagine savoring a bite of the cheesecake with a sip of freshly brewed espresso; pure bliss!
-
Whipped Cream: A dollop of lightly sweetened whipped cream adds a fluffy texture and creaminess that enhances every bite. Just picture it—the perfect finishing touch for an already delicious dessert.
-
Chocolate Sauce: Drizzling warm chocolate sauce over the bars will not only make them visually stunning but will also intensify the indulgent experience. For chocolate lovers, this is a dream come true!
-
Vanilla Ice Cream: Serve up a scoop of creamy vanilla ice cream on the side. The cold, smooth texture will complement the dense filling beautifully, creating a rich and satisfying contrast.
-
Port or dessert wine: A glass of sweet dessert wine, like Port, pairs exquisitely with the spiced flavor profile of Biscoff, heightening the entire experience. It’s like a mini celebration in every bite!
-
Chopped Nuts: Sprinkle some crushed almonds or hazelnuts on top for added crunch and nuttiness. This textural contrast enhances the overall dessert experience with each delightful mouthful.
No-Bake Biscoff Cheesecake Bars Recipe FAQs
How do I know if my Biscoff cookies are fresh?
Absolutely! Look for cookies that are not stale or broken. Fresh Biscoff cookies should have a firm texture and a fragrant aroma, free from any dark spots or signs of moisture. If they crumble easily and smell delightful, you’re good to go!
What is the best way to store No-Bake Biscoff Cheesecake Bars?
Store these luscious bars in an airtight container in the refrigerator for up to 5 days. This not only keeps them fresh but also allows the flavors to meld even more beautifully. If you’re making them ahead of time, they taste best after sitting for a day!
Can I freeze No-Bake Biscoff Cheesecake Bars?
Yes, they freeze fabulously! Wrap the bars tightly in plastic wrap and then cover them in aluminum foil to prevent freezer burn. They can be stored for up to 2 months. When you’re ready to indulge, simply thaw in the refrigerator for a few hours before serving.
What should I do if my cream cheese filling is lumpy?
Very! If you notice lumps in your filling, the cream cheese may not have been soft enough. To remedy this, mix the cream cheese separately with a hand mixer until it becomes smooth before adding it to the rest of the ingredients. Also, gradually adding the powdered sugar while mixing helps eliminate lumps.
Are there any dietary considerations to keep in mind?
Definitely! If anyone has dairy allergies, you can easily substitute the cream cheese and heavy cream with dairy-free alternatives like coconut cream and nut-based cream cheeses. Additionally, always check the labels of your Biscoff cookies for allergens, and feel free to use nut butters if needed!
Decadent No-Bake Biscoff Cheesecake Bars You’ll Love
Ingredients
Equipment
Method
- Prepare the pan by lining a 9x13-inch baking pan with parchment paper and greasing it lightly.
- In a food processor, blend Biscoff cookies until fine crumbs. Melt butter and mix with crumbs, then press into the pan. Chill for 30 minutes.
- Beat softened cream cheese in a mixing bowl until smooth. Gradually sift in powdered sugar, then add cookie butter, vanilla, and salt.
- In a separate bowl, beat heavy whipping cream with granulated sugar until stiff peaks form. Be careful not to over-whip.
- Gently fold whipped cream into the cream cheese mixture until well combined. Spread the mixture over the chilled crust.
- Drizzle warmed Biscoff spread over the filling, swirled for a decorative finish. Cover with plastic wrap and refrigerate for at least 4 hours.
Leave a Reply