
As the leaves turn and the air becomes crisp, it’s time to channel your inner ghoulish chef with these adorable Mini Halloween Pizzas! Not only are they a delight to make, but they also serve as a canvas for your creativity, whether you’re crafting ghostly mozzarella figures or playful jack-o’-lantern faces. These easy, family-friendly treats are perfect for gatherings, offering customizable toppings that will satisfy even the pickiest eaters. Picture the joy on your loved ones’ faces as they unveil these spooky creations that are as fun to eat as they are to make. Curious about how to whip up your own festive masterpieces? Let’s get cooking!
Why Make Mini Halloween Pizzas?
Fun and Festive: These Mini Halloween Pizzas are not just snacks; they’re a festive experience that brings everyone together in the kitchen!
Customizable Toppings: Let your creativity soar with a variety of toppings, from traditional pepperoni to colorful veggies, ensuring everyone can design their perfect pizza.
Quick and Easy: Preparing these delightful treats takes just a few simple steps—perfect for busy parents or last-minute party planners who want to impress.
Kid-Friendly Fun: Your little ones will love helping out! Making these pizzas can be a memorable activity, sparking laughter and joy as they create their spooky designs.
Crowd-Pleaser: Ideal for parties, they’ll wow your guests with their charm and delicious flavors, making them a top choice for your Halloween gatherings. Plus, you can easily pair them with themed drinks and dips for added fun!
Get ready to enjoy a delicious and entertaining Halloween experience with these Mini Halloween Pizzas!
Mini Halloween Pizzas Ingredients
For the Crust
• Mini Pizza Crusts – Use store-bought for convenience or whip up a homemade version for a personal touch.
For the Sauce
• Pizza Sauce – A classic tomato sauce adds the perfect zip; garlic butter can offer a delightful twist if you’re feeling adventurous.
For the Cheese
• Shredded Mozzarella Cheese – This is your go-to cheese for that melty goodness, but feel free to substitute with any cheese that melts beautifully.
• Mozzarella Slices – Cut into ghost shapes that make your Mini Halloween Pizzas come alive!
For the Toppings
• Pepperoni – A favorite that brings protein and flavor, or swap it out for your preferred meat or keep it vegetarian.
• Black Olive – Perfectly sliced to create spooky eyes on ghost pizzas—just the right touch of creepiness!
• Orange Bell Pepper – Slice them into festive shapes to create cheerful jack-o’-lantern faces that add crunch and color to your pizzas.
Step‑by‑Step Instructions for Mini Halloween Pizzas
Step 1: Preheat the Oven
Begin by preheating your oven to 400°F (200°C). While the oven warms up, grab a baking sheet and line it with parchment paper to prevent the pizzas from sticking. This simple preparation will ensure your Mini Halloween Pizzas bake evenly, leading to a crispier crust and perfectly melted cheese.
Step 2: Prepare the Pizza Crusts
Once the oven is preheated, take your mini pizza crusts and place them on the lined baking sheet, leaving space between each crust. Using a spoon, spread a generous amount of pizza sauce evenly over the surface of each crust. This layer of sauce not only adds flavor but also acts as the base for your spooky designs.
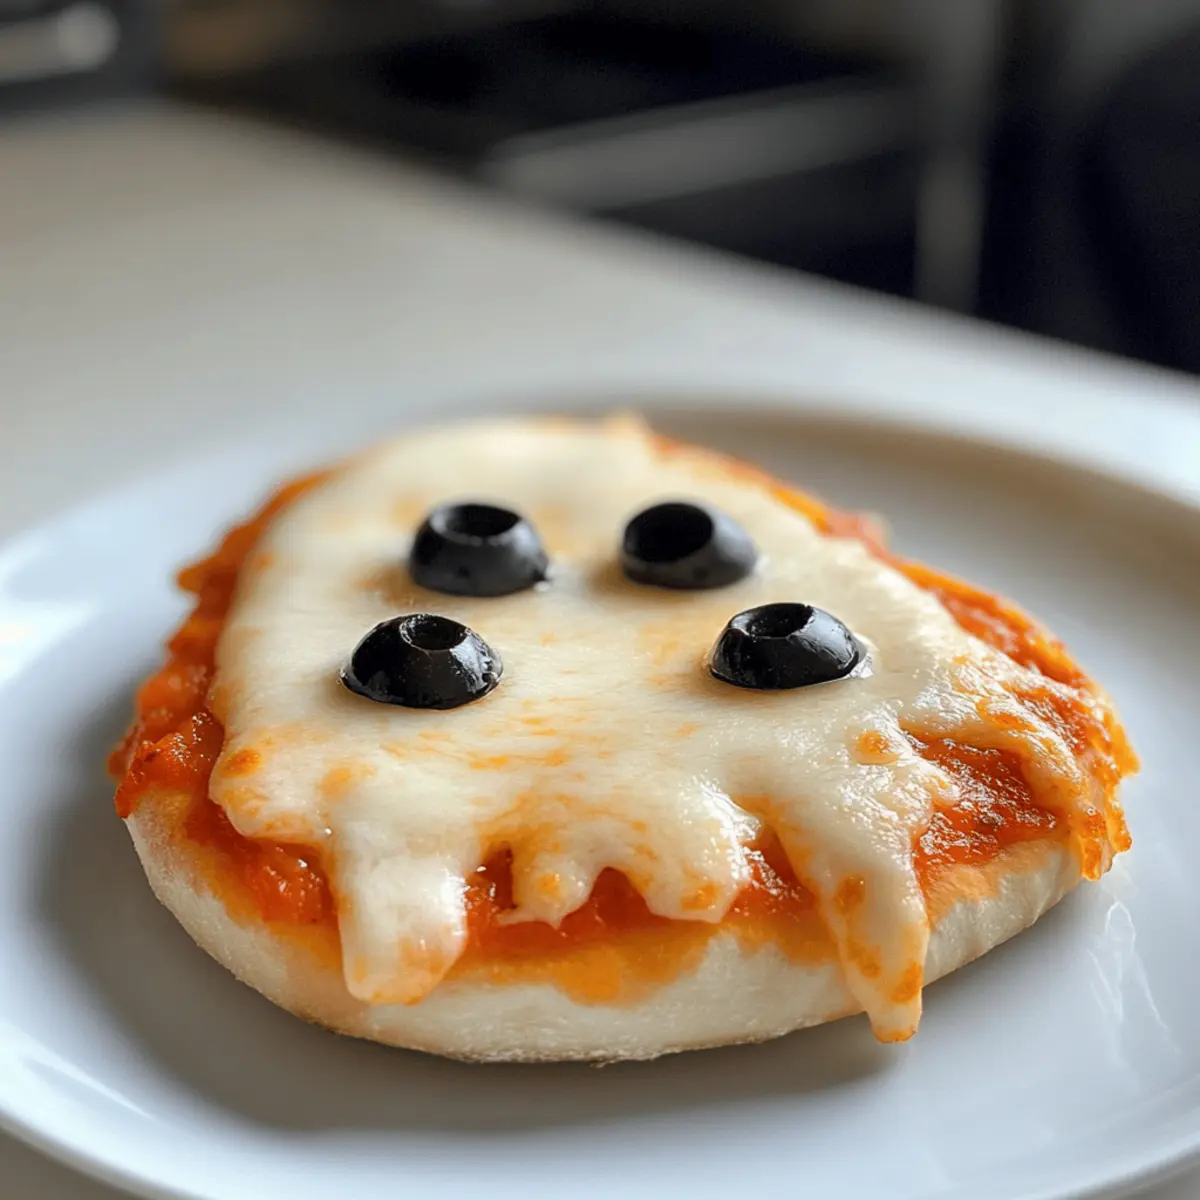
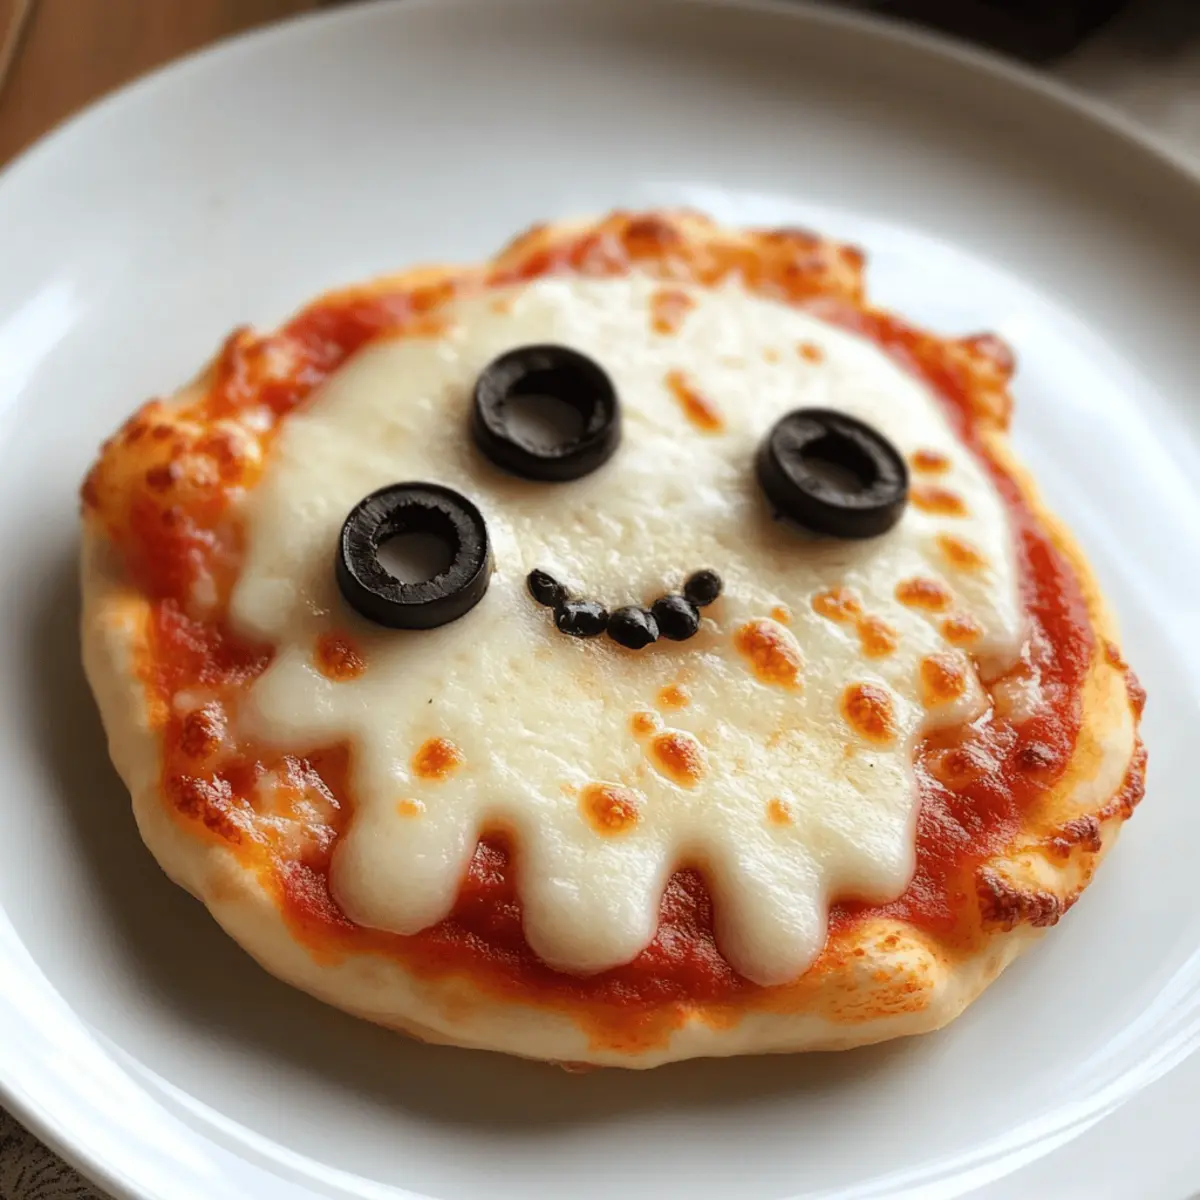
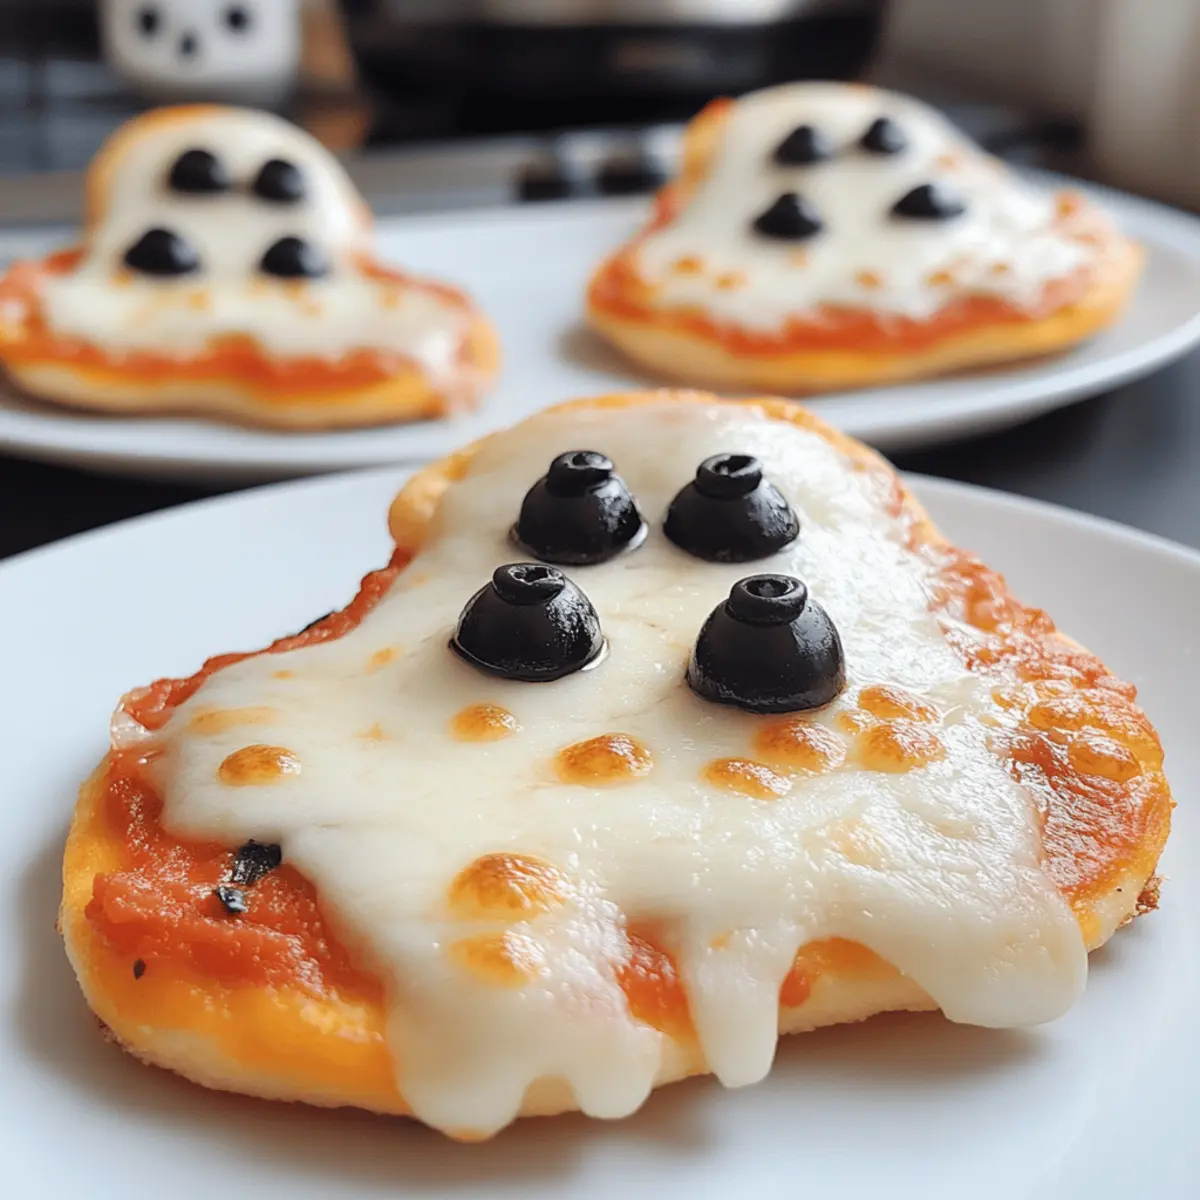
Step 3: Create Ghost Pizzas
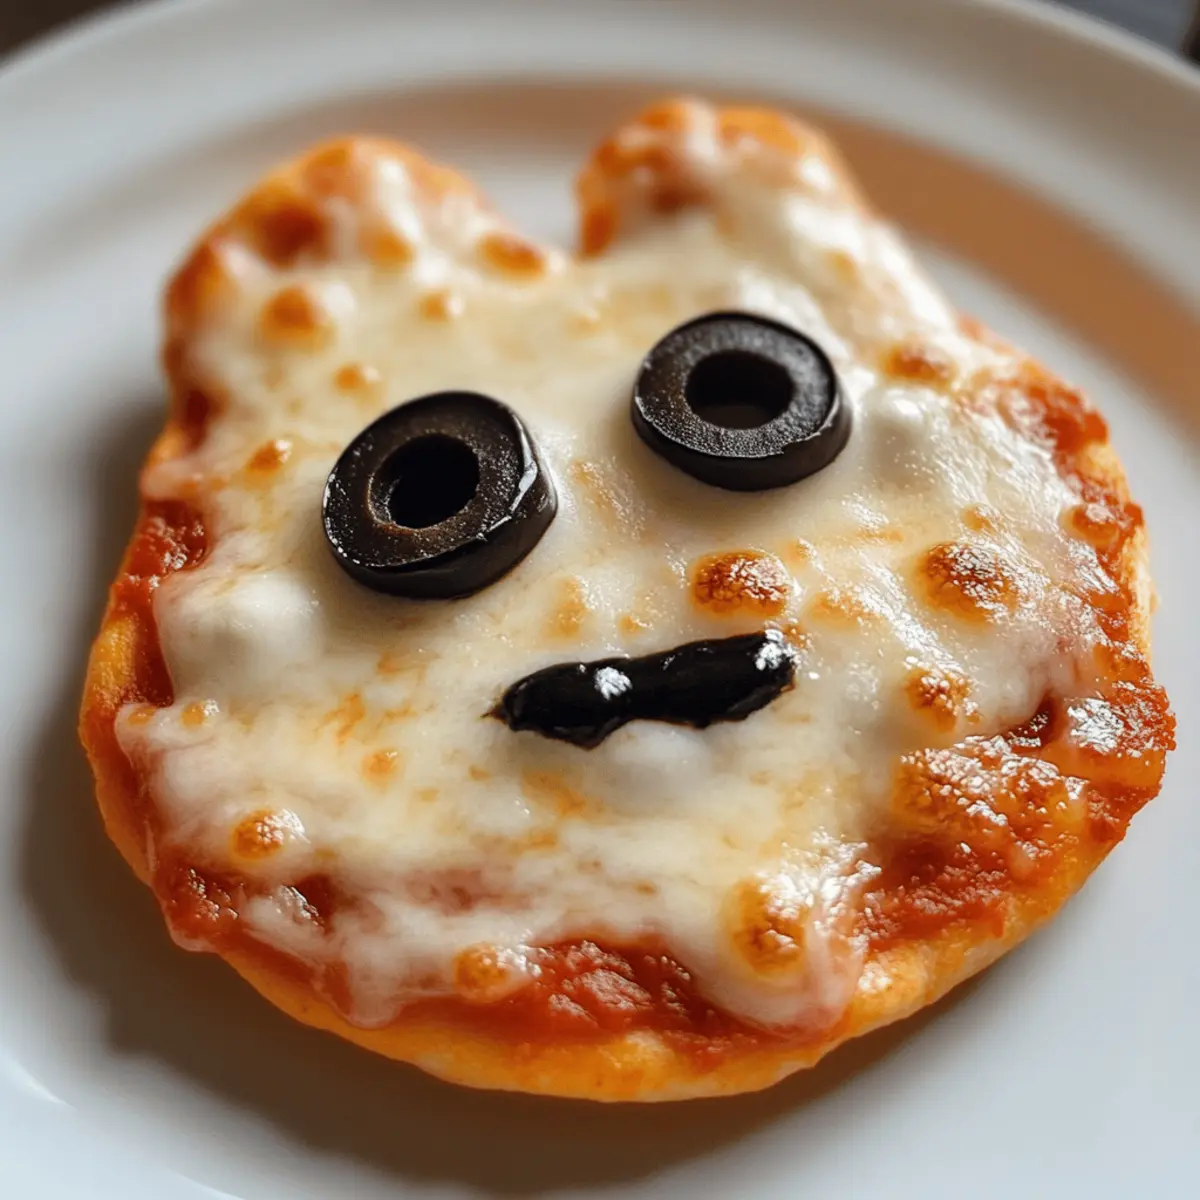
To make ghost-shaped pizzas, cut out ghost figures from mozzarella slices using a knife or cookie cutter. Place these ghost shapes strategically on top of the sauce-covered crusts. For an eerie touch, add sliced black olives as eyes, ensuring they stick well to the cheese, making your Mini Halloween Pizzas look spookily delightful.
Step 4: Assemble Mummy Pizzas
Next, layer strips of mozzarella cheese over the sauce on another set of mini crusts, crisscrossing them to create a mummy design. Leave gaps to allow sauce to peek through, enhancing the visual appeal. Don’t forget to add olive slices for eyes to give your mummy pizzas a fun and slightly creepy personality.
Step 5: Craft Jack-o’-Lantern Pizzas
For the jack-o’-lantern pizzas, sprinkle a generous layer of shredded mozzarella cheese over the sauce on the remaining crusts. Arrange orange bell pepper slices into cheerful jack-o’-lantern faces, ensuring to have a smiling expression to bring your Mini Halloween Pizzas to life. Their vibrant color will make them especially inviting.
Step 6: Bake the Pizzas
Carefully place the prepared baking sheet into the oven and bake the Mini Halloween Pizzas for about 8-10 minutes. Keep an eye on them as they bake; you’ll know they’re ready when the cheese is bubbly and golden brown while the crust turns crispy. This will give you a delightful texture that everyone will love.
Step 7: Serve and Enjoy
Once baked, remove the Mini Halloween Pizzas from the oven and allow them to cool slightly before serving. They’re best enjoyed warm, making them perfect for gatherings. Arrange them on a festive platter, and watch as your friends and family delight in these creatively spooky treats!
What to Serve with Mini Halloween Pizzas
Looking to complement your festive Mini Halloween Pizzas with the perfect sides and drinks?
- Crispy Garlic Bread: The buttery, garlicky flavors offer a delightful contrast to the cheesy pizzas and are always a family favorite.
- Colorful Veggie Platter: Crunchy carrots, sweet bell peppers, and tangy cucumbers add a fresh, healthful element to balance the richness of the pizzas.
- Sweet Potato Fries: Their natural sweetness pairs wonderfully with savory pizzas, providing a satisfying texture and flavor addition to your spread.
- Witch’s Brew Drinks: A fun, green ginger ale mixed with food coloring brings a touch of whimsy and festive flair that kids and adults will love!
- Chocolate-Covered Pretzels: These add a sweet and salty crunch that serves as a great contrast to your savory pizzas, delighting everyone with their unique taste.
- Spooky Fruit Skewers: Thread some grapes, melon balls, and strawberries on skewers for a fun and healthy treat—perfect for fueling your Halloween festivities.
- Pumpkin Spice Milkshake: A seasonal treat that offers a creamy, sweet finish to your meal, tying in the festive flavor of fall.
- Salty Popcorn: Lightly seasoned or dressed with cinnamon sugar for a festive twist, popcorn is an easy-to-make snack that guests can nibble on while enjoying their pizzas.
Mini Halloween Pizzas: Spooky Twists Await
Get creative with these festive pizzas that encourage you to personalize and enjoy every bite!
- Gluten-Free: Swap the mini pizza crusts with gluten-free options like cauliflower crust or pre-made gluten-free dough to cater to dietary needs.
- Veggie Delight: Switch out meats for a medley of veggies like sliced zucchini, spinach, or colorful bell peppers to pack in more nutrients and flavor.
- Non-Dairy: Use dairy-free cheese alternatives for a vegan-friendly version, ensuring your Mini Halloween Pizzas remain irresistibly cheesy and delicious.
- Spicy Kick: Add sliced jalapeños or a sprinkle of crushed red pepper flakes for those who crave a little heat in their spooky snacks.
- Sweet Treats: Transform your Halloween pizzas into dessert by using sweet pizza dough topped with cream cheese frosting and seasonal fruits, such as sliced strawberries or oranges.
- Herbed Flair: Incorporate fresh herbs like basil or oregano into your sauce for a burst of freshness that brightens each pizza.
- Pizza Shapes: Use different shaped cookie cutters on your crusts and toppings to bring even more variety and fun to each pizza’s presentation.
- Multi-Cultural Twist: Try adding toppings inspired by international cuisines, such as feta cheese and olives for a Mediterranean flair or barbecue chicken for a smoky twist.
These variations allow you to mold your Mini Halloween Pizzas into something uniquely yours while adding joyous surprises to your festive celebrations! For even more inspiration, you might enjoy our easy DIY Halloween treats or learn how to whip up a delightful pizza sauce that complements every spooky creation.
How to Store and Freeze Mini Halloween Pizzas
Fridge: Store leftover Mini Halloween Pizzas in an airtight container for up to 3 days. This will keep them fresh without drying out.
Freezer: For longer storage, you can freeze the baked Mini Halloween Pizzas for up to 2 months. Place them in a single layer on a baking sheet to freeze first, then transfer them to a freezer-safe container.
Reheating: To enjoy your Mini Halloween Pizzas again, reheat in the oven at 350°F (175°C) for about 10-15 minutes, or until heated through and the cheese is melty. Avoid microwaving as it may result in a soggy crust.
Make-Ahead: Prepare toppings and sauce in advance, storing them separately. Assembling and baking them fresh right before serving makes for delightful treats!
Expert Tips for Mini Halloween Pizzas
• Creative Cheese Shapes: Use cookie cutters to create fun shapes from the mozzarella slices, adding a playful touch to your Mini Halloween Pizzas.
• Layer Flavors: Don’t skimp on the sauce—spread it generously to ensure every bite is packed with flavor. This prevents dryness and enhances the overall taste.
• Monitor Baking Time: Ovens can vary—start checking your pizzas a minute or two earlier to avoid overcooking. Look for melted cheese and a golden crust for perfect results.
• Customize Toppings: Feel free to mix and match toppings that your family loves. Including different vegetables and proteins can make the Mini Halloween Pizzas even more appealing!
• Cool Before Serving: Allow the pizzas to rest for a couple of minutes after baking; this lets the cheese set slightly, making them easier to slice and serve.
• Store Properly: If you have leftovers, store them in an airtight container for up to 3 days to enjoy your delicious Mini Halloween Pizzas later!
Make Ahead Options
These Mini Halloween Pizzas are a fantastic candidate for meal prep, saving you valuable time on busy weeknights or party days! You can prepare the pizza sauce and assemble the pizzas up to 24 hours in advance. Simply spread the sauce on the crusts, decorate them with cheese and toppings, then cover tightly with plastic wrap and refrigerate. To maintain their quality, keep the toppings separate if they include fresh ingredients (like bell peppers) until you’re ready to bake. When it’s time to serve, preheat your oven and bake directly from the fridge for about 10 minutes, ensuring they’re just as delicious as if made fresh!
Mini Halloween Pizzas Recipe FAQs
What type of mini pizza crust should I use?
You can use store-bought mini pizza crusts for convenience, or make your own if you’re feeling adventurous! A homemade crust allows for customization in thickness and flavor. If you prefer a gluten-free option, many brands offer excellent gluten-free dough that can also give you delicious mini pizzas.
How should I store leftover Mini Halloween Pizzas?
After cooling, you can store leftover Mini Halloween Pizzas in an airtight container for up to 3 days in the fridge. This keeps them fresh and tasty for your next munch! When you want to enjoy them again, reheating them in the oven will ensure the crust remains crisp and the cheese gets all melty again.
Can I freeze Mini Halloween Pizzas?
Absolutely! To freeze, place the baked Mini Halloween Pizzas in a single layer on a baking sheet first, letting them freeze for about an hour. This prevents them from sticking together. Then, transfer the frozen pizzas to a freezer-safe container or zip-top bag, where they can be stored for up to 2 months. When ready to enjoy, reheat them in the oven at 350°F (175°C) for about 10-15 minutes.
What should I do if my pizza crust is soggy?
If your crust turns out soggy, it might be due to excess sauce or baking time. Ensure you spread the sauce evenly but not too thick. Monitoring the baking time is crucial too; if the crust doesn’t turn golden brown, it needs a bit more time. You can also try pre-baking the crusts for about 3-4 minutes before adding toppings to give them a head start and prevent sogginess.
Are Mini Halloween Pizzas suitable for people with dietary restrictions?
Yes, indeed! You can cater to various dietary needs by using gluten-free crust options and substituting cheeses or meats according to allergies or preferences. For a vegetarian version, simply omit the pepperoni, and load up the veggies on your pizzas. Always check ingredient labels if allergies are a concern!
Can I make the toppings in advance?
Certainly! You can prepare your toppings and sauces a day ahead. Just store them separately in the fridge until you’re ready to assemble your Mini Halloween Pizzas. This makes the final assembly process quick and easy, ensuring more time for fun with family and friends during your Halloween celebrations!
Mini Halloween Pizzas: Spooky Treats for Your Festive Feast
Ingredients
Equipment
Method
- Preheat your oven to 400°F (200°C) and line a baking sheet with parchment paper.
- Place mini pizza crusts on the baking sheet and spread pizza sauce over each.
- Cut mozzarella slices into ghost shapes and place on the crusts. Add olive slices as eyes.
- For mummy pizzas, layer mozzarella strips crisscross on another set of crusts and add olive eyes.
- For jack-o'-lantern pizzas, sprinkle shredded mozzarella over the sauce and arrange bell pepper slices for faces.
- Bake for about 8-10 minutes until cheese is bubbly and crust is crispy.
- Remove from oven and cool slightly before serving.
Leave a Reply