
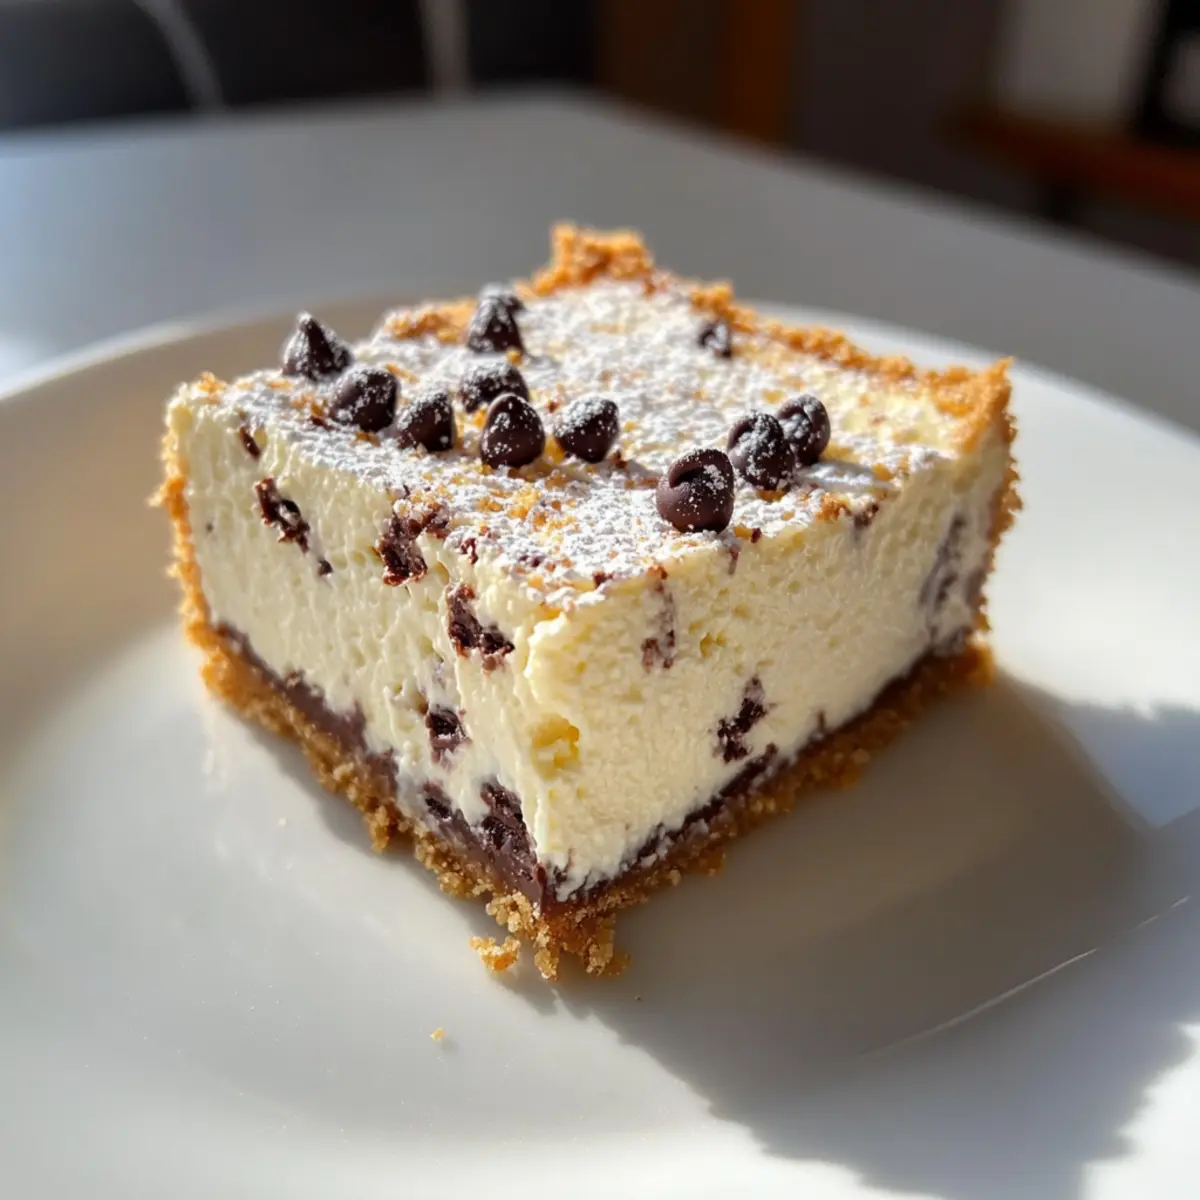
With each bite, I’m transported back to the family gatherings where laughter and rich aromas filled the air. These Cannoli Cheesecake Bars combine the nostalgia of classic Italian desserts with the convenience of a modern treat, all in just 15 minutes of hands-on time. Creamy ricotta blends seamlessly with chocolate chips, creating an indulgent yet refreshing flavor that’s hard to resist. Not only are they easy to whip up, but they also present beautifully, making them a perfect choice for entertaining or a cozy night in. Whether you’re a seasoned chef or a passionate home-cook, this recipe will surely impress. Ready to dive into a slice of heaven?
Why are Cannoli Cheesecake Bars a Must-Try?
Irresistible Flavor: Each bite of these Cannoli Cheesecake Bars brings a delightful fusion of creamy ricotta and sweet chocolate chips, reminiscent of classic Italian desserts.
Quick and Easy: Just 15 minutes of hands-on preparation makes this recipe a breeze, perfect for busy weeknights or last-minute gatherings.
Stunning Presentation: With a dusting of powdered sugar, these bars look as good as they taste, making them an ideal dessert for entertaining.
Versatile Twist: Feel free to experiment—add orange zest or swap in almond flour for a gluten-free version.
Crowd-Pleaser: Perfect for any occasion, these bars will wow your guests and become the highlight of your dessert table, just like my Cannoli Squares Deliciously or Oreo Cheesecake Cookie!
Cannoli Cheesecake Bars Ingredients
For the Crust
• Graham Cracker Crumbs – Provides structure for the crust; for a gluten-free option, substitute with 1 ¼ cups almond flour mixed with 2 tablespoons sugar.
• Sugar – Sweetens both the crust and filling, balancing the flavors perfectly.
• Unsalted Butter (melted) – Binds the crust ingredients together, ensuring a firm base for the bars.
For the Filling
• Cream Cheese – Creates a rich, velvety texture for the filling; using full-fat yields the best results.
• Granulated Sugar (for filling) – Adds sweetness to the cheesecake mixture, enhancing the overall flavor.
• Eggs – Provide structure and stability to the filling, ensuring it holds its shape when cut.
• Vanilla Extract – Enhances the flavor of the cheesecake filling, adding depth to the taste.
• Ricotta Cheese – Contributes to the creamy texture and traditional cannoli flavor; make sure it’s at room temperature for smooth mixing.
• Mini Chocolate Chips – Adds pockets of sweetness and texture; using mini chips prevents sinking in the filling.
For Serving
• Powdered Sugar – For dusting before serving, ensuring an attractive finish; dust right before serving to keep it visible.
Step‑by‑Step Instructions for Cannoli Cheesecake Bars
Step 1: Crust Preparation
Begin by preheating your oven to 325°F (163°C). In a medium bowl, combine graham cracker crumbs, sugar, and melted butter, mixing until the texture resembles wet sand. Line an 8×8-inch baking dish with parchment paper, then firmly pack the crumb mixture into the bottom, creating a slight lip around the edges. Bake for 10 minutes until set and lightly golden.
Step 2: Filling Preparation
While the crust is baking, prepare the creamy filling for your Cannoli Cheesecake Bars. In a large mixing bowl, beat the room-temperature cream cheese and granulated sugar with an electric mixer on medium speed until smooth and creamy, about 2-3 minutes. Add the eggs one at a time, mixing well after each addition. Finally, blend in the vanilla extract until fully incorporated and silky.
Step 3: Incorporate Ricotta
Next, gently fold the ricotta cheese into the cream cheese mixture, ensuring it remains lump-free and creamy. Use a spatula to mix in the mini chocolate chips, folding them in carefully to avoid overmixing. This will help preserve the light and airy texture of the filling, perfect for your Cannoli Cheesecake Bars.
Step 4: Baking
Once your filling is ready, pour it evenly over the pre-baked crust, smoothing it out with a spatula. Bake the entire dish in the oven at 325°F (163°C) for 40-45 minutes, or until the edges are set and the center has a slight jiggle. A toothpick should come out clean from the edges but slightly wet from the center, indicating that it’s perfectly baked.
Step 5: Cooling
After baking, remove the Cannoli Cheesecake Bars from the oven and allow them to cool at room temperature for about 1 hour. Once cooled, cover the pan with plastic wrap and refrigerate for at least 4 hours or overnight. Chilling helps the flavors meld and ensures that the bars slice beautifully when you’re ready to serve.
Step 6: Serving
When ready to serve, gently lift the cooled bars out of the pan using the parchment paper. Dust the top with powdered sugar for a beautiful finish just before slicing. Cut into squares and enjoy your delightful Cannoli Cheesecake Bars, making sure to impress your family and friends with this simple yet indulgent dessert!
How to Store and Freeze Cannoli Cheesecake Bars
Fridge: Store leftover Cannoli Cheesecake Bars in an airtight container for up to 5 days to keep them fresh and delicious.
Freezer: For longer storage, wrap individual bars in plastic wrap, followed by foil, and freeze for up to 2 months.
Thawing: When ready to enjoy, simply transfer the bars to the fridge for several hours, or overnight, to thaw gently.
Reheating: Enjoy the bars cold, or if you prefer them slightly warmed, place them in the microwave for a few seconds.
What to Serve with Cannoli Cheesecake Bars
The perfect Cannoli Cheesecake Bars deserve a delightful array of sides and complements to create a memorable meal experience.
- Fresh Berries: A medley of strawberries, raspberries, and blueberries add a refreshing contrast, balancing the richness of the cheesecake bars.
- Espresso or Coffee: A robust cup of espresso enhances the sweet flavors of the cheesecake, providing a beautiful after-dinner pick-me-up.
- Vanilla Ice Cream: Creamy vanilla ice cream offers a deliciously cool pairing, making each bite of the cheesecake bars even more indulgent.
- Chocolate Drizzle: A warm chocolate drizzle adds a decadent touch, turning your slice into a truly luxurious dessert experience.
- Candied Orange Peels: The zesty sweetness of candied orange peels brightens the dessert, echoing traditional cannoli flavors with a modern twist.
- Whipped Cream: Lightly sweetened whipped cream enhances the creamy texture of the bars, making every bite heavenly and airy.
- Mint Leaves: Fresh mint leaves provide a pop of freshness and color, elevating the presentation while adding a refreshing aroma to the dessert.
- Prosecco: A light and bubbly Prosecco pairs perfectly with the sweet and creamy bars, adding a celebratory touch to your dessert.
- Nutty Biscotti: Crunchy biscotti adds texture and a touch of warmth, perfect for dipping alongside these rich bars.
Expert Tips for Cannoli Cheesecake Bars
-
Room Temperature Ingredients: Ensure your cream cheese and ricotta cheese are at room temperature. This step prevents lumps and guarantees a smooth, creamy filling for your Cannoli Cheesecake Bars.
-
Gentle Mixing: When folding in the ricotta and chocolate chips, stir gently. Overmixing can lead to a dense filling rather than the light and airy texture you want.
-
Avoiding Cracks: To prevent cracks in your cheesecake, cool it slowly. After baking, turn off the oven and leave the door slightly ajar for 30 minutes before removing it.
-
Perfect Storage: Leftovers can be stored in an airtight container in the refrigerator for up to 5 days. For longer storage, wrap in plastic and foil and freeze for up to 2 months.
-
Proud Presentation: Dust with powdered sugar just before serving for a beautiful finish. Consider adding extra mini chocolate chips or a sprinkle of orange zest for a pop of color and flavor!
Make Ahead Options
These Cannoli Cheesecake Bars are perfect for meal prep! To save time, you can prepare the crust and filling separately up to 24 hours in advance. For the crust, simply bake and let it cool completely, then cover it tightly to prevent it from drying out. The filling can be mixed and stored in an airtight container in the refrigerator until you’re ready to bake. When you’re ready to enjoy your Cannoli Cheesecake Bars, pour the filling over the prepared crust, and bake as directed. Let cool, refrigerate for at least 4 hours or overnight, and you’ll have a delicious dessert ready with minimal effort—just as delightful as when freshly made!
Cannoli Cheesecake Bars Customization Ideas
Feel free to switch things up and make these Cannoli Cheesecake Bars your own with these delightful variations!
- Gluten-Free: Substitute almond flour for graham cracker crumbs in the crust for a gluten-free option that still delivers on flavor.
- Citrus Burst: Add a tablespoon of orange zest to the filling for a refreshing twist that brightens the creamy flavors.
- Chocolate Lovers: Substitute dark chocolate chips for mini chocolate chips for a richer, more indulgent chocolate experience.
- Nutty Texture: Fold in crushed pistachios or almonds to the filling for an added crunch that evokes classic cannoli textures.
- Flavorful Extracts: Experiment with almond or hazelnut extract instead of vanilla to give your bars a unique flavor dimension.
- Less Sweet: Reduce the sugar slightly in both the crust and filling if you prefer a less sweet dessert.
- Layered Delight: Create a layered effect by mixing and matching fillings, such as ricotta mixed with mascarpone, for an ultra-rich cheesecake variation.
- Spiced Twist: Add a sprinkle of cinnamon to the filling for a warm, comforting flavor that works well with the creamy textures.
For even more decadent desserts, don’t miss my Millionaires Cheesecake Millionaire or the delightful Marshmallow Whip Cheesecake recipes!
Cannoli Cheesecake Bars Recipe FAQs
How do I choose the right ricotta cheese?
Absolutely! When selecting ricotta cheese, look for one that’s labeled as whole milk or full-fat for the best creamy texture. Avoid ricotta that appears watery or grainy; a thicker and smoother consistency will yield a richer filling. I often check for freshness by noting the expiration date and choosing the one with the furthest date.
What’s the best way to store Cannoli Cheesecake Bars?
Very! To keep your Cannoli Cheesecake Bars fresh, store them in an airtight container in the refrigerator for up to 5 days. If you want to prolong their shelf life, wrap them tightly in plastic wrap and then foil to freeze for up to 2 months. When you’re ready to enjoy, just thaw them in the fridge overnight for the best texture.
Can I freeze Cannoli Cheesecake Bars?
Absolutely! For freezing, wrap individual bars securely in plastic wrap and then in foil, ensuring no air can get in. This will protect them from freezer burn and maintain their flavor. When ready to enjoy, place the bars in the fridge to thaw for a few hours or overnight, then serve chilled or slightly warmed.
What if my filling is too thick or lumpy?
Not to worry! If your filling appears too thick or lumpy after mixing, try adding a tablespoon of milk or cream and beating it with an electric mixer until smooth. Ensure all ingredients, especially cream cheese and ricotta, are at room temperature before mixing to achieve that lush, creamy texture we love in Cannoli Cheesecake Bars.
Can I substitute any ingredients for dietary restrictions?
Absolutely! For a gluten-free option, substitute graham cracker crumbs with almond flour mixed with a bit of sugar. Plus, you can use dairy-free cream cheese and ricotta alternatives if you’re looking for a non-dairy version. Just make sure to check the labeling for any other allergies you or your guests may have.
How can I prevent cracks in my cheesecake bars?
Very! To prevent cracks, ensure your oven’s temperature is accurate; using an oven thermometer can help. After baking, turn off the oven and crack the door open to allow gradual cooling. This method reduces sudden temperature changes and helps keep your Cannoli Cheesecake Bars intact and beautiful!
Decadent Cannoli Cheesecake Bars for Your Sweet Tooth Cravings
Ingredients
Equipment
Method
- Preheat your oven to 325°F (163°C). In a medium bowl, combine graham cracker crumbs, sugar, and melted butter until resembling wet sand. Line an 8x8-inch baking dish with parchment paper and pack the crumb mixture into the bottom. Bake for 10 minutes until set.
- While the crust is baking, beat the cream cheese and granulated sugar with an electric mixer on medium speed until smooth (about 2-3 minutes). Add eggs one at a time, mixing well after each. Blend in vanilla extract until fully incorporated.
- Fold the ricotta cheese into the cream cheese mixture, ensuring it's lump-free. Carefully fold in mini chocolate chips.
- Pour the filling evenly over the pre-baked crust and smooth it out. Bake at 325°F (163°C) for 40-45 minutes until edges are set with a slight jiggle in the center.
- Cool the bars at room temperature for 1 hour, then cover with plastic wrap and refrigerate for at least 4 hours or overnight.
- Lift the cooled bars out using the parchment paper. Dust with powdered sugar before slicing.
Leave a Reply