
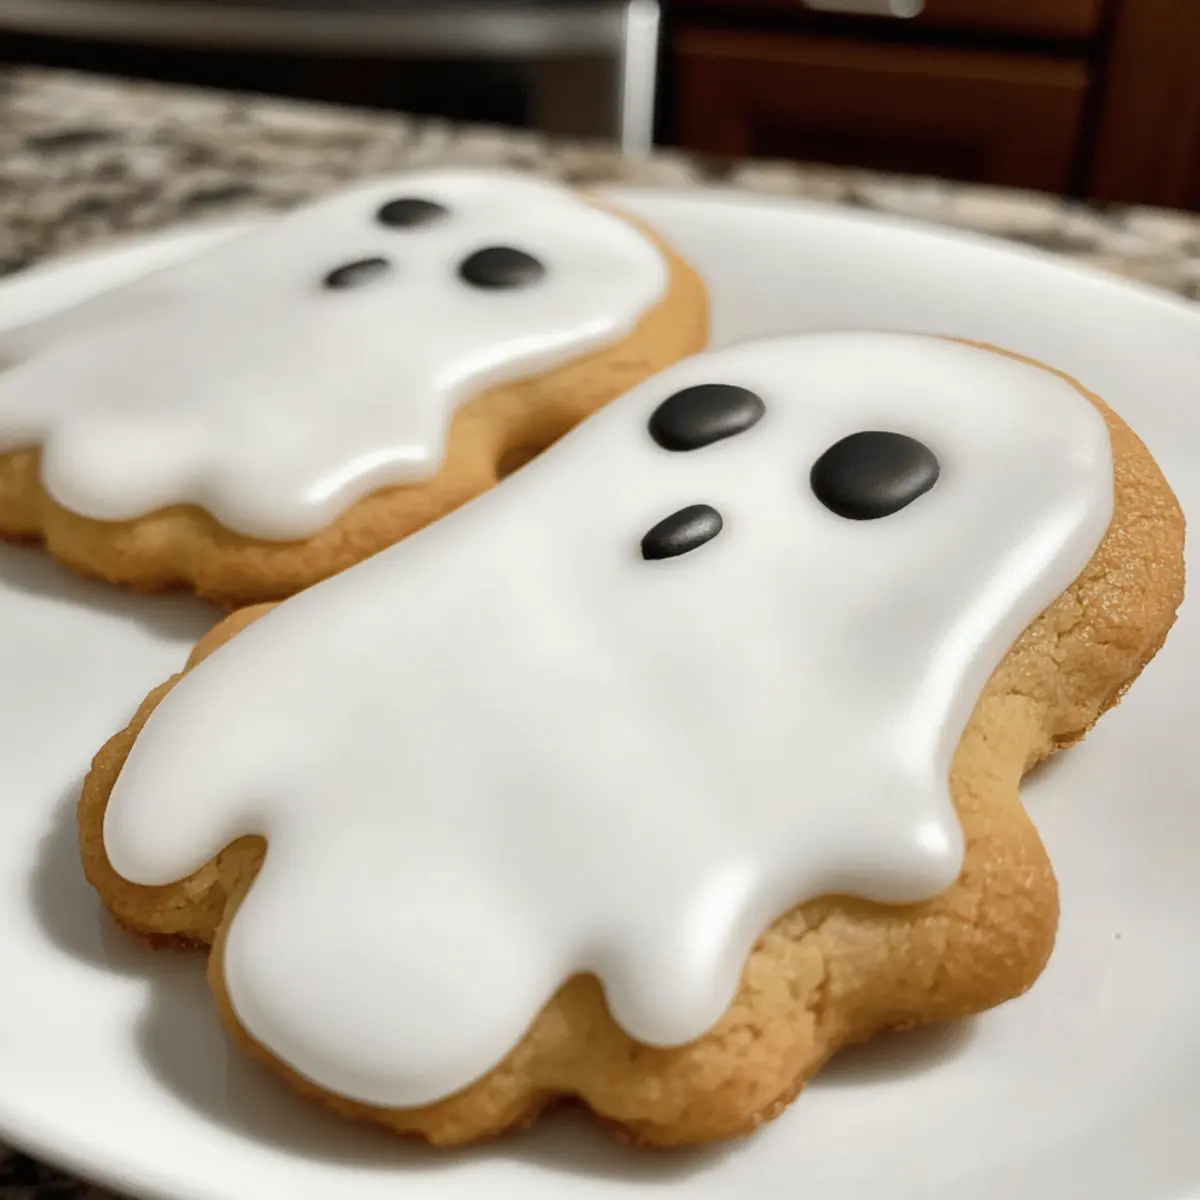
As I rummaged through my pantry, a bright idea struck me that was the perfect match for the upcoming Halloween fun: Spooky Ghost Cookies! These delightful little treats not only boast a light, chewy texture but also have an adorable ghostly charm that makes them the star of any holiday gathering. What’s more, you can whip up these festive cookies in no time, impressing friends and family without the fuss of complicated recipes. Trust me; these ghostly sweets are a wonderful way to bring some joy and creativity to your cooking adventures. Ready to bring some ghoulishly good vibes to your kitchen? Let’s dive into this spine-tingling recipe that will have everyone begging for seconds!
Why Are Ghost Cookies So Special?
Adorably Spooky: These Spooky Ghost Cookies are not just treats; they’re a fun way to celebrate Halloween with a playful twist that kids and adults alike will love.
Quick and Easy: With a simple recipe that doesn’t require advanced baking skills, you can create these delightful cookies in a flash, leaving more time for Halloween festivities!
Deliciously Chewy: Expect a perfect blend of soft, chewy texture and subtly sweet flavor, making each bite as enjoyable as the last.
Customizable Icing: Feel free to get creative with your icing! Experiment with different colors to craft unique designs or use the same recipe for decorating treats like Cinnamon Roll Cookies for more festive fun.
Perfect for Sharing: Whether it’s a Halloween party or a spooky gathering, these cookies are a hit that everyone will want to take home. Just make sure to keep them in an airtight container to preserve their freshness!
Ghost Cookies Ingredients
Unleash your creativity with these delightful ghost cookies!
For the Cookie Batter
- All-Purpose Flour – Provides structure and stability to the cookies; remember to dust your surfaces with extra flour!
- Baking Powder – Helps the cookies rise, making them soft and airy.
- Kosher Salt – Balances the sweetness and enhances flavor.
- Butter (2 sticks, softened) – Adds richness and moisture; ensure it’s at room temperature for easy creaming.
- Granulated Sugar – Sweetens the cookies and aids in texture perfection.
- Large Egg – Acts as a binder and adds moisture to the dough.
- Milk (1 Tbsp + more for thinning) – Essential for both the cookie dough and the smooth icing.
- Pure Vanilla Extract – Introduces depth of flavor to your ghost cookies!
For the Icing
- Powdered Sugar – The base ingredient for icing, offering sweetness and a smooth finish.
- Light Corn Syrup – Gives the icing a beautiful shine and pliability for easier decorating.
- Almond (or Vanilla) Extract – Enhances the overall flavor profile beautifully.
- Black Food Coloring – Ideal for doodling those spooky ghost faces!
With these ingredients, you’re all set to create irresistibly charming Ghost Cookies that will delight everyone this Halloween!
Step‑by‑Step Instructions for Ghost Cookies
Step 1: Prepare Dough
In a large mixing bowl, whisk together 2 cups of all-purpose flour, 1 teaspoon of baking powder, and ½ teaspoon of kosher salt. In another bowl, cream 2 sticks of softened butter with 1 cup of granulated sugar until light and fluffy. Beat in 1 large egg and 1 teaspoon of pure vanilla extract, then gradually stir in the dry mixture until a soft dough forms.
Step 2: Chill Dough
Once your dough is mixed, wrap it in plastic wrap and refrigerate for at least 1 hour. This chilling step is crucial for the dough to firm up, which helps maintain shape during baking. You’ll know it’s ready when it feels firm yet pliable.
Step 3: Shape Cookies
Preheat your oven to 350°F (175°C) and lightly flour your countertop. Roll out the dough to about ¼ inch thick and use a ghost-shaped cookie cutter to cut out the cookies. For best results, place the cut-out shapes on a baking sheet lined with parchment paper and freeze them for 10 minutes before baking to set the shape.
Step 4: Bake Cookies
After chilling the cookies, place the baking sheet in the preheated oven and bake for 10-12 minutes, or until the edges are lightly golden. Keep an eye on them! They should puff slightly and remain soft in the center. Once baked, remove them from the oven and let them cool on the sheet for a few minutes before transferring to a wire rack.
Step 5: Cool Cookies
Allow your ghost cookies to cool completely on the wire rack. This step is essential for the icing to adhere properly later on. Letting them cool for about 30 minutes will ensure they are firm enough to handle and decorate.
Step 6: Prepare Icing
In a medium bowl, combine 2 cups of powdered sugar, 2 tablespoons of light corn syrup, and 1 tablespoon of milk. Stir until smooth; you want a thick yet spreadable consistency. If necessary, add more milk a teaspoon at a time until desired consistency is achieved, perfect for ghostly decorations!
Step 7: Decorate
Using a piping bag or a zip-top bag with a corner snipped off, pipe the edges of each cookie with icing, then flood the middle to create an even surface. Allow this first layer to set for about 30 minutes, creating a nice base for the black food coloring ghost faces.
Step 8: Add Ghost Faces
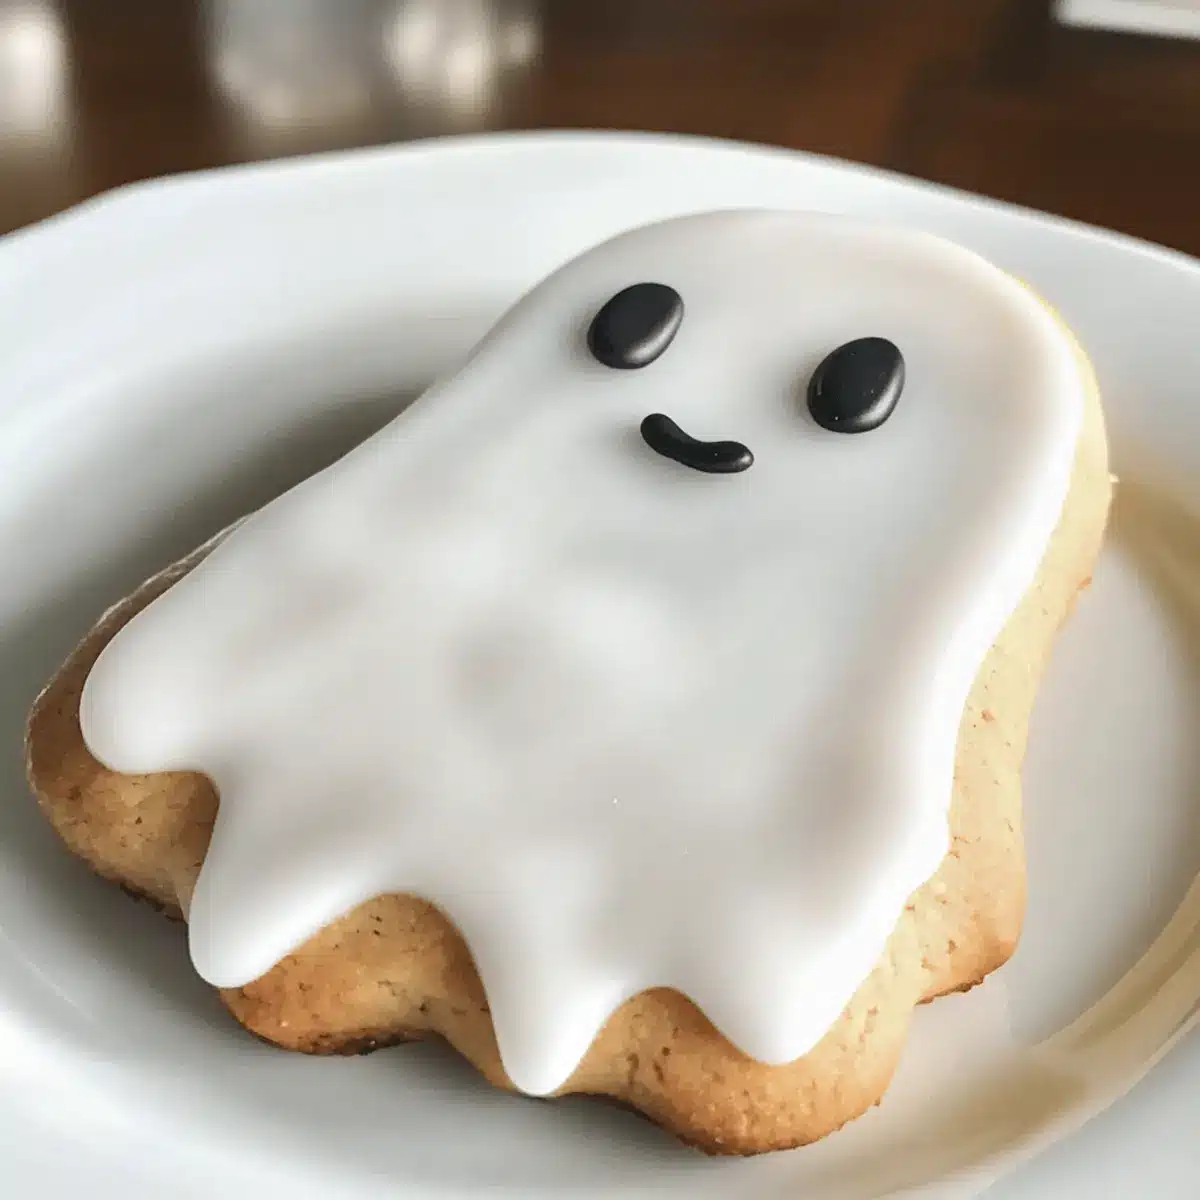
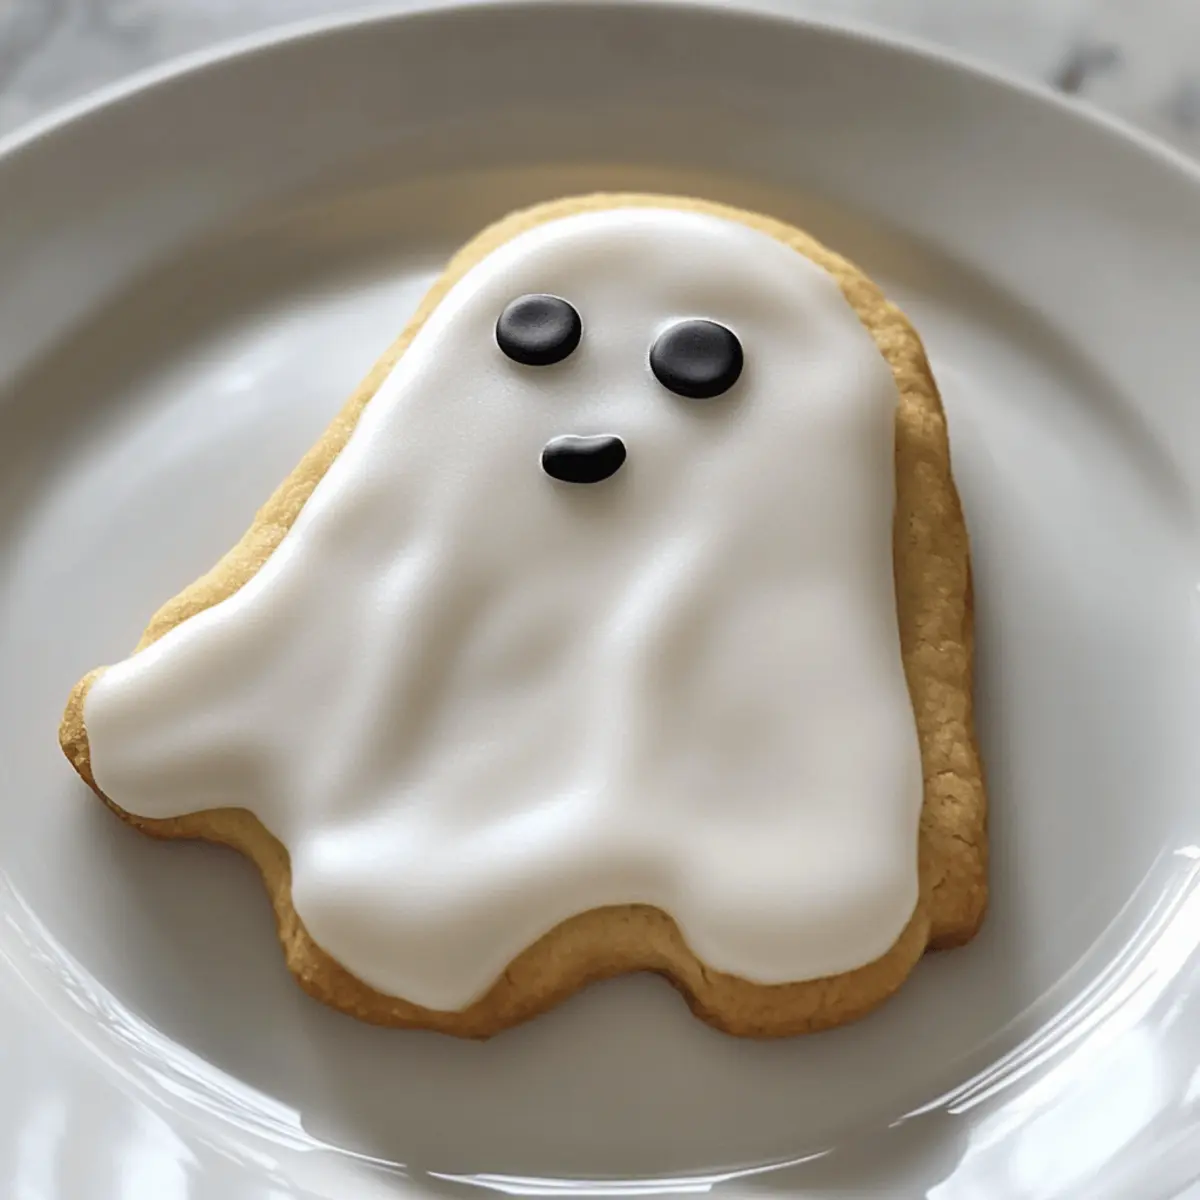
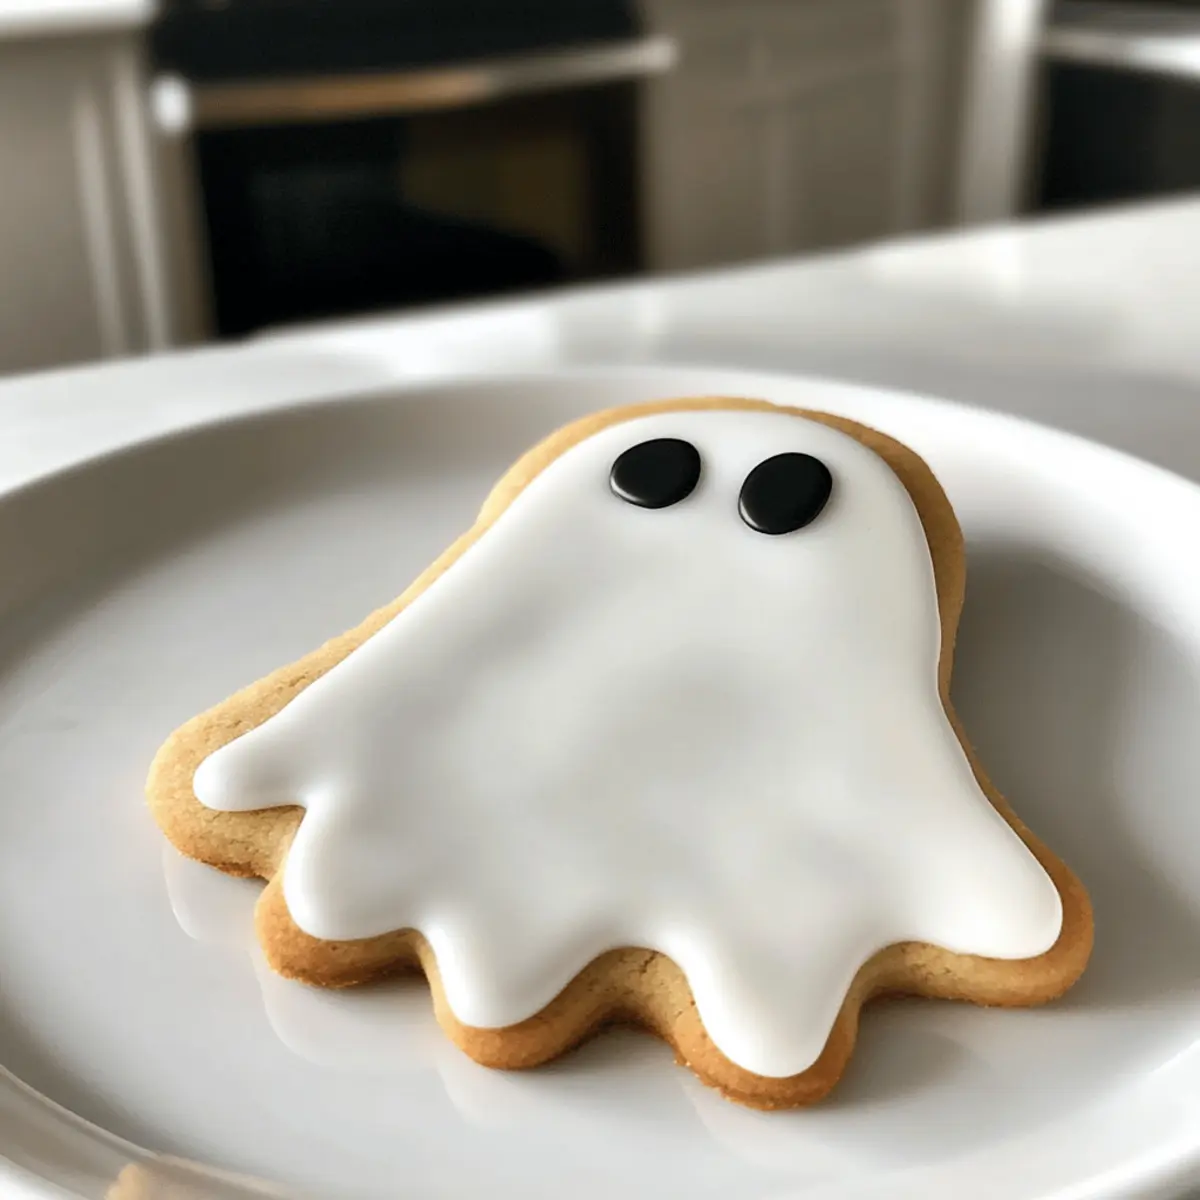
Once the icing sets, use black food coloring to pipe spooky faces onto each ghost cookie. Be creative! Turn them into friendly or frightful faces—it’s a fun way to personalize your ghost cookies! Let them dry completely before serving or storing them in an airtight container for up to 4 days.
What to Serve with Spooky Ghost Cookies
Looking to elevate your Halloween gathering with delightful accompaniments that perfectly pair with these cute ghostly treats?
-
Pumpkin Spice Latte: This warm, cozy drink matches the festive spirit, enhancing the sweet flavors of your cookies with hints of cinnamon and nutmeg.
-
Caramel Apples: Crunchy and sweet, caramel-coated apples offer a great textural contrast to the chewy ghost cookies while sticking to the Halloween theme.
-
Ghoulish Fruit Platter: An assortment of dark fruits like blackberries and plums adds a fresh twist and bursts of flavor, creating a colorful, spooky presentation.
-
Hot Chocolate Bar: Setting up a hot chocolate station allows guests to customize their drinks! The rich, creamy texture complements the airy softness of your ghost cookies beautifully.
-
Vanilla Ice Cream: A scoop of creamy vanilla or pumpkin-flavored ice cream is a delightful pairing, adding a chilled contrast that makes each bite of your ghost cookies even more delightful.
-
Witch’s Brew: Serve up a fun Halloween punch made with fruit juices and soda to balance out the sweetness. Its refreshing taste is perfect alongside your cookies!
-
Chocolate-Dipped Pretzels: These salty-sweet bites bring crunch and an extra layer of flavor that’s wonderfully tempting next to your spooky ghost cookies.
-
Candy Corn: This classic Halloween candy adds a pop of color and sugary nostalgia, making it a bite-sized treat that everyone can enjoy along with those ghostly cookies.
-
Spooky Cupcakes: Decorate chocolate or vanilla cupcakes with Halloween-themed icing to create a deliciously whimsical vibe that matches the spirit of your cookies!
Ghost Cookies: Fun Variations Ahead!
Feel free to let your culinary creativity shine as you explore these delightful variations for your ghostly treats!
-
Vanilla Twist:
Replace almond extract with vanilla for a sweeter, more classic cookie flavor. This subtle change can create a warmer, inviting taste. -
Pumpkin Spice Ghosts:
Add a teaspoon of pumpkin spice to the dough for a hint of fall warmth. These ghost cookies will have a festive cheer that’s perfect for the holiday season. -
Chocolate Chip Surprise:
Incorporate mini chocolate chips into the dough for chocolatey bites in each ghost. This small addition can bring happiness to any chocolate lover. -
Nut-Free Version:
Simply omit almond extract and use vanilla in its place for a nut-free option. Everyone can now enjoy these spooky treats at your Halloween gathering! -
Colorful Icing:
Instead of just black, use various food coloring shades to create a whole cast of characters on your cookies—think friendly monsters or creepy pumpkins. Kids will love participating! -
Boozy Ghosts:
Add a splash of your favorite liqueur—like Irish cream or orange liquor—into the icing for an adult twist. Just remember to keep it to a minimum for the kids! -
Toasty Add-In:
Fold in toasted coconut flakes into the dough for a crunchy texture. The coconut complements the sweetness beautifully and adds an exciting twist. -
Gingerbread Ghosts:
Substitute half of the flour with whole wheat flour and add a teaspoon of ground ginger or cinnamon for a spicier, autumnal flavor that’s perfect for Halloween festivities.
No matter which variation you try, each bite of these ghost cookies will be filled with love and laughter, making them a fantastic addition to your Halloween celebrations! Create even more spooky goodies by trying out some of my favorite Chocolate Chip Cookies or indulging in these fun Cinnamon Roll Cookies. Happy baking!
Make Ahead Options
These Spooky Ghost Cookies are perfect for busy home cooks looking to save time during Halloween festivities! You can prepare the cookie dough up to 24 hours in advance. Simply mix the ingredients, wrap the dough tightly in plastic wrap, and refrigerate. Additionally, you can cut out the ghost shapes and freeze them for up to 3 days before baking; just place them on a baking sheet and freeze for about 10 minutes before baking to maintain their shape. To finish, bake the cookies directly from the fridge or freezer, cool, and then decorate as desired. This way, you’ll have deliciously spooky treats with minimal effort when it’s time to celebrate!
How to Store and Freeze Ghost Cookies
Room Temperature: Keep uneaten ghost cookies in an airtight container at room temperature for up to 4 days to maintain their delightful chewy texture.
Fridge: For longer storage, place the cookies in an airtight container in the fridge, where they can last for up to a week. Just remember to let them come to room temperature before enjoying!
Freezer: If you want to prep in advance, wrap the baked cookies individually in plastic wrap and store in a freezer bag for up to 3 months. Thaw at room temperature when ready to indulge in your ghostly treats.
Reheating: To enjoy the cookies warm, pop them in the microwave for 10-15 seconds. This will revive their softness and enhance the flavors of your delicious ghost cookies!
Expert Tips for Ghost Cookies
-
Chill is Key: Ensure your dough is well-chilled before baking to prevent spreading. This retains those adorable ghost shapes while they bake.
-
Consistent Icing: Aim for a thick icing that holds its shape without being too stiff. Adjust with small amounts of milk for the perfect piping consistency.
-
Creative Faces: Get playful with the ghost faces! Use varying expressions to make your cookies whimsical or spooky, keeping it engaging for everyone.
-
Airtight Storage: Store uneaten ghost cookies in an airtight container to maintain their chewiness and flavor for up to 4 days.
-
Roll Evenly: When rolling out dough, try to keep it at an even thickness of ¼ inch for consistent baking. This ensures all cookies are perfectly soft and chewy.
Spooky Ghost Cookies Recipe FAQs
How do I choose ripe ingredients for my Ghost Cookies?
Absolutely! For the best results, ensure your butter is softened to room temperature, which helps achieve that delightful creaminess. As for the eggs, large eggs are preferred; check for freshness by submerging them in water—if they sink, they’re good!
What’s the best way to store my Ghost Cookies?
Keep those spooky treats in an airtight container at room temperature for 3-4 days. If you’d like them to last longer, consider refrigerating them for up to a week. Just be sure to bring them to room temperature before indulging!
Can I freeze Ghost Cookies for later use?
Yes! Wrap each baked Ghost Cookie individually in plastic wrap and place them in a freezer bag. They can be frozen for up to 3 months. When you’re ready to enjoy, simply thaw them at room temperature or warm them in the microwave for 10-15 seconds to regain their soft texture.
What if my cookie dough is too sticky or crumbly?
If your dough feels too sticky, try adding a little more flour, one tablespoon at a time, until it’s workable. Conversely, if it’s too crumbly, incorporate a little more milk or a bit of softened butter to achieve the right consistency. Remember, chilling the dough can also help with these issues!
Are Ghost Cookies safe for pets?
While these cookies are delicious for humans, they are not suitable for pets. Ingredients like sugar can be harmful to dogs and cats, so it’s best to keep these sweet treats away from your furry friends.
Can I substitute ingredients in the Ghost Cookies?
Very! If you or someone has a nut allergy, feel free to swap almond extract with more vanilla extract. You can also use gluten-free all-purpose flour if you’re catering to gluten sensitivities. Adjustments like these ensure everyone can enjoy your Halloween treats!
Delightful Ghost Cookies: Sweet Treats for Halloween Fun
Ingredients
Equipment
Method
- In a large bowl, whisk together 2 cups of all-purpose flour, 1 teaspoon of baking powder, and ½ teaspoon of kosher salt.
- In another bowl, cream 2 sticks of softened butter with 1 cup of granulated sugar until light and fluffy.
- Beat in 1 large egg and 1 teaspoon of vanilla extract, then gradually stir in the dry mixture until a soft dough forms.
- Wrap the dough in plastic wrap and refrigerate for at least 1 hour.
- Preheat your oven to 350°F (175°C) and roll out the dough to about ¼ inch thick.
- Use a ghost-shaped cookie cutter to cut out shapes and freeze for 10 minutes.
- Bake the cookies for 10-12 minutes or until the edges are lightly golden.
- Let the cookies cool on the sheet for a few minutes before transferring to a wire rack.
- Combine 2 cups of powdered sugar, 2 tablespoons of corn syrup, and 1 tablespoon of milk, stirring until smooth.
- Pipe the edges with icing, flood the middle, and let set for 30 minutes.
- Pipe black food coloring faces onto each cookie.
Leave a Reply