
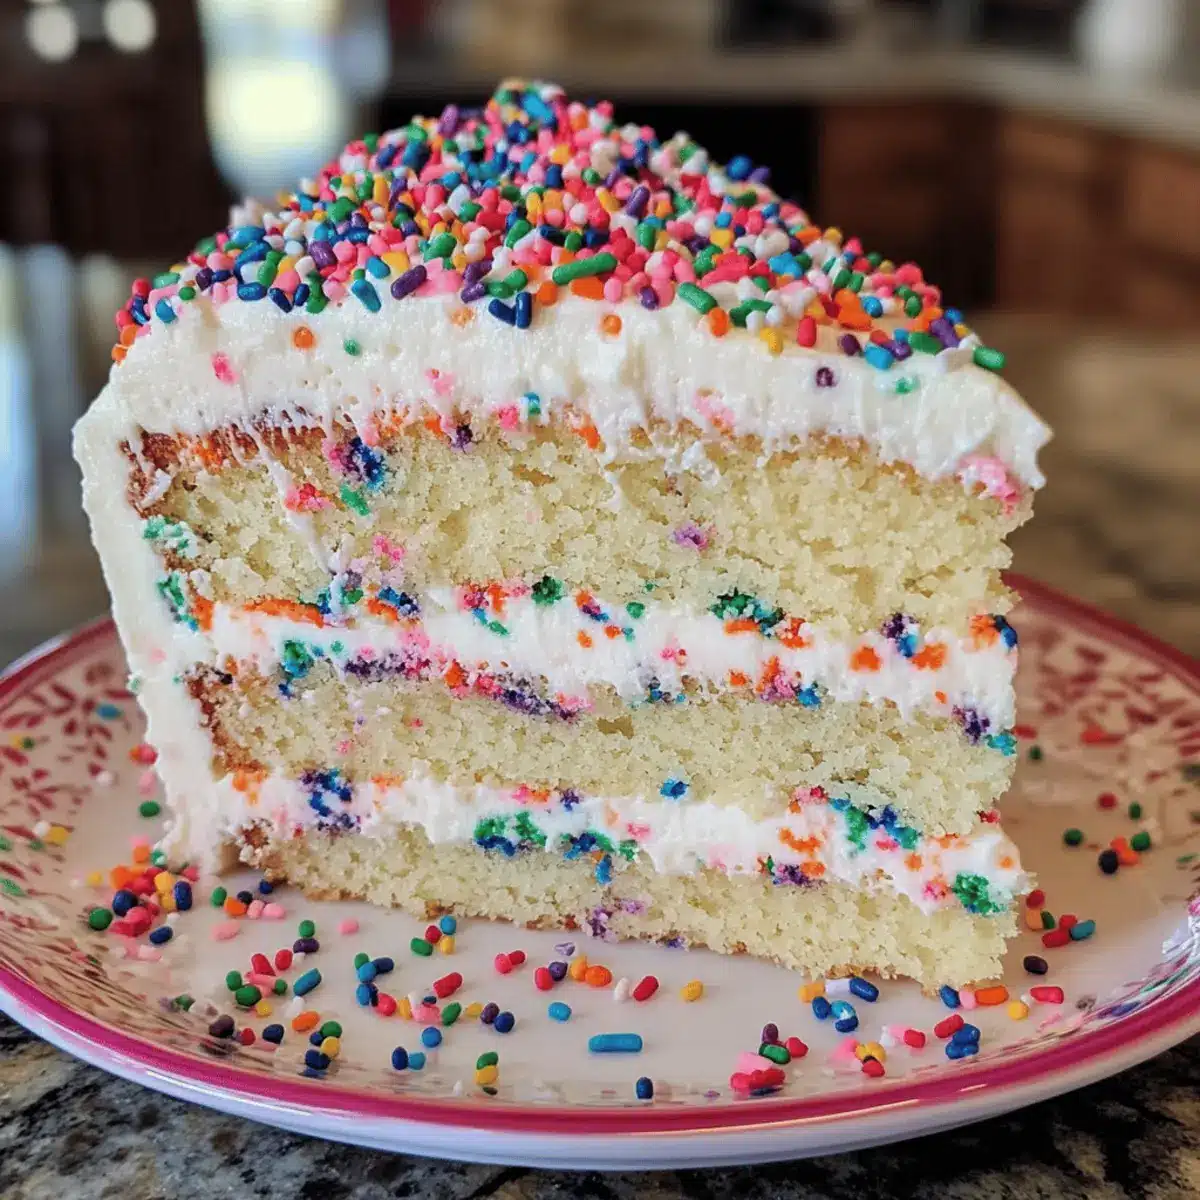
As I sifted through the colorful sprinkles, I couldn’t help but think back to the countless birthday parties and celebrations where a moist, homemade Funfetti Cake took center stage. This Ultimate Funfetti Cake isn’t just a dessert; it’s a heartfelt tribute to joyful moments and shared laughter. With its fluffy vanilla base and cheerful bursts of color, it’s perfect for any occasion demanding a sprinkle of happiness. Whether you’re whipping it up for a birthday bash or a cozy gathering, this cake offers a quick and delightful way to impress your loved ones while keeping things simple. Who could resist the allure of a vibrant, homemade celebration cake? Let’s dive into how you can create this lovely masterpiece that promises smiles and sweet memories!
Why is Funfetti Cake So Special?
Nostalgic Delight: This funfetti cake evokes sweet memories of joyful celebrations and brings a touch of whimsy to any gathering.
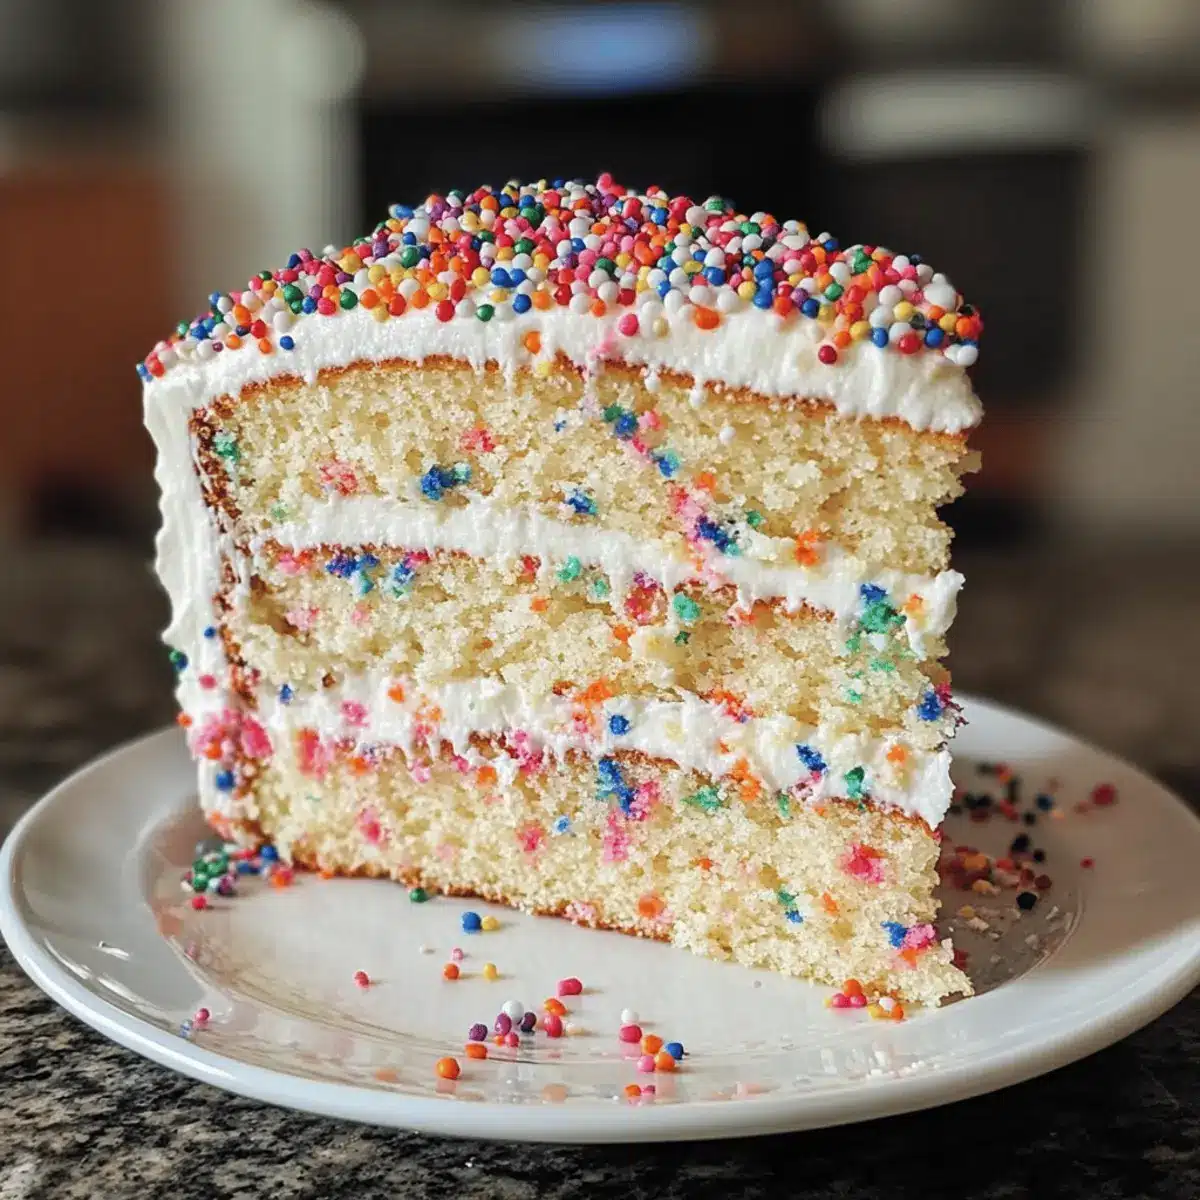
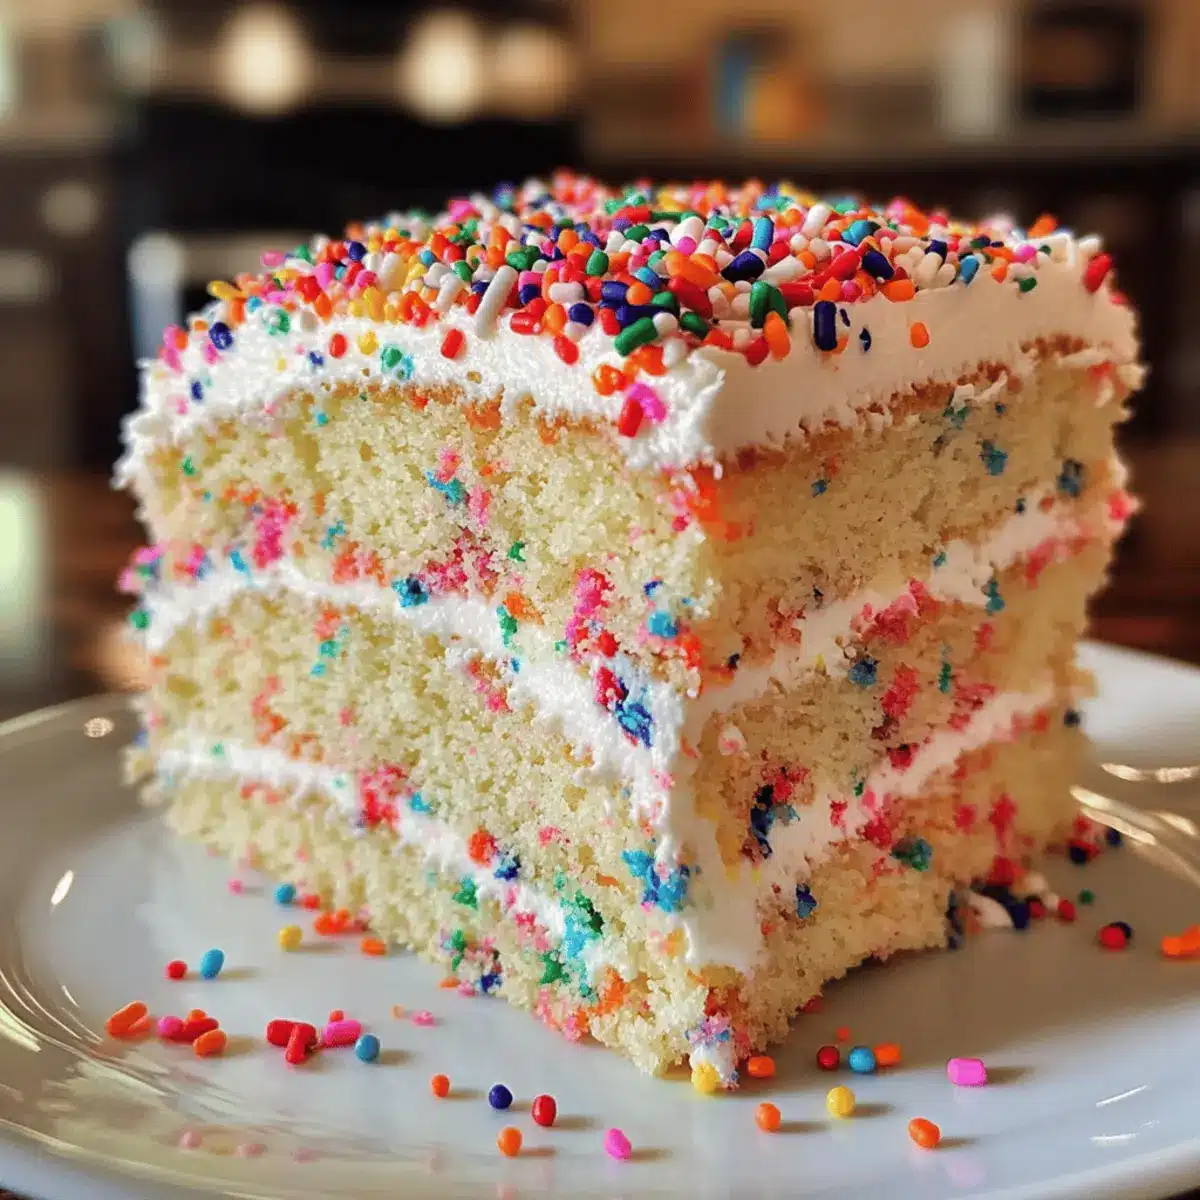
Vibrant Appearance: Loaded with colorful sprinkles, this cake is a visual feast that turns every bite into a festive experience.
Easy to Make: No complicated techniques here! This recipe is straightforward, making it perfect for bakers of all levels.
Versatile Joy: Customize it for various occasions—change the sprinkle colors for holidays or pair it with a scoop of ice cream for extra indulgence!
Family Favorite: Everyone loves a sprinkle-filled cake, making it an instant hit for birthday parties or family get-togethers.
With all these delightful reasons, you’ll be making this homemade funfetti cake for every special occasion!
Homemade Funfetti Cake Ingredients
• Get ready to create a celebration in every bite!
For the Cake Batter
- All-Purpose Flour – Provides structure and texture; substitute with cake flour for an ultra-light cake.
- Cornstarch – Helps tenderize the cake, giving it that soft, delicate crumb.
- Baking Powder – Acts as a leavening agent to ensure your cake rises beautifully.
- Salt – Enhances flavor; if using salted butter, you can omit this ingredient.
- Milk – Adds moisture and tenderness; make sure it’s at room temperature for best results.
- White Vinegar – Reacts with the milk to create a homemade buttermilk that yields a tender crumb.
- Egg Whites – Contributes to the cake’s volume and lightness; use large eggs, preferably at room temperature.
- Unsalted Butter – Delivers a rich flavor; make sure it’s softened for easy creaming.
- Vegetable Oil – Adds moisture and a tender texture; can swap for canola oil if preferred.
- Granulated Sugar – Sweetens the cake while helping to retain moisture.
- Vanilla Extract – Heights flavor depth; a high-quality extract will yield the best taste experience.
- Rainbow Sprinkles – Infuses joy and color; thin, long sprinkles help prevent bleeding into the batter.
Now you have all the essential ingredients laid out for your delightful homemade Funfetti Cake!
Step‑by‑Step Instructions for Homemade Funfetti Cake
Step 1: Preheat and Prepare
Begin by preheating your oven to 180°C (350°F). While it heats up, grease and line two 8-inch round cake pans with parchment paper to ensure easy removal later. This preparation step is essential as it helps the cake layers rise evenly while baking and prevents sticking.
Step 2: Sift Dry Ingredients
In a medium bowl, sift together 2 cups of all-purpose flour, 1/4 cup of cornstarch, 1 tablespoon of baking powder, and a pinch of salt. This step aerates the flour and combines the dry ingredients for your homemade funfetti cake. Set this mixture aside, ensuring it’s well integrated for a fluffy end result.
Step 3: Make Buttermilk Substitute
In a separate bowl, combine 1 cup of milk with 1 tablespoon of white vinegar. Let this mixture sit for about 5 minutes to create a homemade buttermilk. This interaction softens the cake’s texture, giving it the delightful moistness you’ll love in your funfetti cake.
Step 4: Cream Butter and Sugar
Using a stand mixer fitted with the paddle attachment, cream together 1/2 cup of unsalted butter and 1/2 cup of vegetable oil with 1 cup of granulated sugar on medium speed for about 3 minutes until light and fluffy. This step incorporates air into the mixture, enhancing the cake’s rise and texture.
Step 5: Add Egg Whites
Gradually add 4 large egg whites, incorporating them one at a time, mixing well after each addition. Scrape down the sides of the bowl as needed to ensure everything combines properly. This step helps create a light and airy texture in your homemade funfetti cake.
Step 6: Incorporate Vanilla and Milk Mixture
Once the egg whites are fully mixed in, add 1 tablespoon of vanilla extract and half of the milk-vinegar mixture. Blend everything on low speed just until combined. The addition of vanilla will give your cake a rich flavor that complements the funfetti magic!
Step 7: Add Dry Ingredients
Gradually fold in half of the prepared dry ingredient mixture using a spatula until just combined. Then, introduce the remaining milk mixture, followed by the rest of the dry mix. Be careful not to overmix; you want to keep the batter light and airy for your funfetti cake.
Step 8: Fold in Sprinkles
Gently fold in 1 cup of rainbow sprinkles, being careful not to overmix. The sprinkles should be well dispersed throughout the batter, adding joyful color without bleeding. This step is where the fun truly begins, making your funfetti cake vibrant and festive!
Step 9: Bake the Cake
Divide the batter evenly between the prepared cake pans. Bake in the preheated oven for about 30 minutes, or until a toothpick inserted into the center comes out clean. This visual cue tells you the cake is ready, and the delightful aroma will fill your kitchen!
Step 10: Cool the Cakes
Once baked, remove the cakes from the oven and let them cool in the pans for 15-20 minutes. After this time, carefully invert them onto wire racks to cool completely. Cooling allows the flavors to settle and ensures the cake maintains its moist texture.

Homemade Funfetti Cake Variations & Substitutions
Get ready to personalize your delightful Funfetti Cake with these fun and tasty twists!
-
Almond Extract: Swap out vanilla for almond extract to give your cake a fragrant nutty flavor.
The addition of almond can elevate the taste, creating a new layer of deliciousness that will surprise your loved ones. -
Gluten-Free: Use a gluten-free all-purpose flour blend as a 1:1 replacement to cater to gluten-sensitive guests.
This ensures everyone can enjoy your moist cake, maintaining that signature tender crumb everyone loves! -
Colorful Sprinkles: Change your sprinkle colors to match any celebration—how about red and green for Christmas or vibrant pastels for a spring occasion?
Express your creativity and make your cake the star of themed gatherings! -
Chocolate Chips: Fold in mini chocolate chips for added richness and a delightful surprise in every bite.
The combination of colorful sprinkles with chocolate takes indulgence to a whole new level—pure bliss to savor! -
Fruit Filling: Add a layer of your favorite fruit preserves or pureed fruit between cake layers for a burst of flavor.
Strawberry or raspberry would be especially delicious, enhancing the funfetti magic with sweet, fruity delight. -
Lemon Zest: Incorporate a tablespoon of fresh lemon zest for a zesty twist that balances sweetness with brightness.
This addition will refresh your palette, making the cake even more enjoyable during those warm sunny days! -
Frosting Options: Experiment with different frostings like cream cheese frosting or even a rich chocolate ganache.
These can take your cake from simple to extraordinary—imagine the smiles when your guests taste the surprise! -
Bundt Shape: Use this batter to make a funfetti bundt cake instead of traditional layers for a fun presentation.
Decorate with a drizzle of icing and sprinkles for a delightful twist that makes serving a breeze!
Whichever variation you choose, your homemade Funfetti Cake will surely spread joy and happiness, just like the memories it evokes. For some more cake inspiration, check out my Neapolitan Cake Triple or my Birthday Cake Overnight recipes!
How to Store and Freeze Homemade Funfetti Cake
Room Temperature: Keep the cake covered at room temperature for up to 1 day. This is best for short-term enjoyment and helps maintain its delightful freshness.
Fridge: For longer storage, wrap the cake tightly in plastic wrap or aluminum foil and refrigerate. It will stay fresh for up to 3 days. Bring to room temperature before serving for optimal flavor and texture.
Freezer: To freeze your homemade funfetti cake, wrap each layer securely in plastic wrap and place in an airtight container—good for up to 3 months. Thaw overnight in the fridge before enjoying.
Reheating: If you have leftover slices, gently warm them in the microwave for a few seconds to bring back their fluffy goodness. Enjoy your cake warm or chilled, with smiles guaranteed!
What to Serve with Homemade Funfetti Cake?
Elevate your celebration with delightful pairings that enhance the joy of this vibrant cake!
-
Creamy Vanilla Ice Cream: A scoop of rich ice cream adds a luscious creaminess that perfectly complements the cake’s sweetness.
-
Fresh Berries: Juicy strawberries or blueberries provide a fresh, tart contrast, enhancing the flavor profile while adding a pop of color.
-
Whipped Cream: Light and airy, freshly whipped cream balances the cake’s sweetness and brings a dose of elegance to each slice.
-
Chocolate Ganache: Drizzle warm ganache over the cake for an indulgent experience that adds a luxurious touch to every bite.
-
Fruit Salad: A mix of seasonal fruits adds a refreshing element that lightens up the dessert table while bringing in seasonal flavors.
-
Sparkling Lemonade: This zesty, bubbly drink is perfect for celebrations, adding a fun and uplifting fizz that pairs wonderfully with the sweet cake.
Serving up these delightful pairings not only complements your homemade Funfetti Cake but turns any gathering into a festive celebration full of flavor and joy!
Make Ahead Options
These homemade Funfetti Cakes are perfect for busy home cooks looking to save time without compromising on taste. You can prepare the cake layers up to 3 days in advance by baking them, cooling completely, and then wrapping them tightly in plastic wrap before refrigerating. This way, they stay moist and fresh. Additionally, you can measure and mix your dry ingredients ahead of time, storing them in an airtight container for up to 1 week. When you’re ready to serve, just let the layers come to room temperature and layer with frosting. With these make-ahead options, you’ll create a delightful Funfetti Cake that’s just as delicious, ensuring stress-free celebration moments!
Expert Tips for Homemade Funfetti Cake
Room Temperature Ingredients: Ensure all your ingredients, especially butter and eggs, are at room temperature for optimal mixing and a light, fluffy texture in your homemade funfetti cake.
Don’t Overmix: When incorporating the dry ingredients and folding in the sprinkles, be careful not to overmix the batter. This can lead to a dense cake rather than the desired fluffy texture.
Check for Doneness: Use a toothpick to check if the cake is fully baked. It should come out clean but be aware overbaking can dry out your cake.
Chill the Cakes: Let your cakes cool completely on wire racks before frosting. This helps maintain moisture and prevents buttercream from melting.
Customize the Sprinkles: For different celebrations, use themed sprinkle colors. Just remember that larger sprinkles may bleed, so opt for thin ones.
Each of these tips will help you create the perfect homemade funfetti cake, filled with flavor and joyful memories!
Homemade Funfetti Cake Recipe FAQs
What kind of flour should I use for the Funfetti Cake?
I recommend using all-purpose flour for the best structure and texture. If you’re aiming for a lighter, fluffier cake, you can substitute it with cake flour. Just keep in mind that the measurements may vary slightly.
How can I tell when my Funfetti Cake is done baking?
To determine if your cake is fully baked, insert a toothpick into the center. If it comes out clean or with a few crumbs attached, your cake is ready! Be cautious not to overbake, as this can lead to a dry texture.
How should I store my Homemade Funfetti Cake?
For short-term storage, cover the cake at room temperature for up to 1 day. If you want to keep it fresh longer, wrap it tightly in plastic wrap or foil and refrigerate it for up to 3 days. Just remember to bring it back to room temperature before serving!
Can I freeze my Funfetti Cake?
Absolutely! To freeze your cake, wrap each cooled layer in plastic wrap and place them in an airtight container. They can last up to 3 months in the freezer. Thaw them overnight in the refrigerator before serving, and they’ll taste as good as fresh!
Are there any dietary considerations for this recipe?
Yes! If you have egg allergies, you can try using a suitable egg substitute like flax eggs or applesauce. Also, for a gluten-free version, replace all-purpose flour with gluten-free all-purpose flour. Always check with your guests for any dietary restrictions before serving!
What should I do if my batter is too thick?
If you find your batter is thicker than expected, you can add a tablespoon of milk at a time until you reach your desired consistency. Just be careful not to overmix, as this can affect the final texture of your Homemade Funfetti Cake. Happy baking!
Homemade Funfetti Cake: Celebrate with Joyful Flavor!
Ingredients
Equipment
Method
- Preheat your oven to 180°C (350°F) and grease and line two 8-inch round cake pans with parchment paper.
- Sift together all-purpose flour, cornstarch, baking powder, and a pinch of salt in a medium bowl.
- Combine milk and vinegar in a separate bowl and let sit for 5 minutes to make buttermilk.
- Cream together unsalted butter, vegetable oil, and granulated sugar on medium speed for 3 minutes.
- Gradually add egg whites one at a time, mixing well after each addition.
- Add vanilla extract and half of the milk-vinegar mixture, mixing on low speed.
- Fold in half of the dry ingredient mixture, then the remaining milk mixture, and finally the rest of the dry mix.
- Gently fold in rainbow sprinkles until well dispersed.
- Divide batter evenly between prepared cake pans and bake for about 30 minutes, or until a toothpick comes out clean.
- Let the cakes cool in the pans for 15-20 minutes, then invert onto wire racks to cool completely.
Leave a Reply