
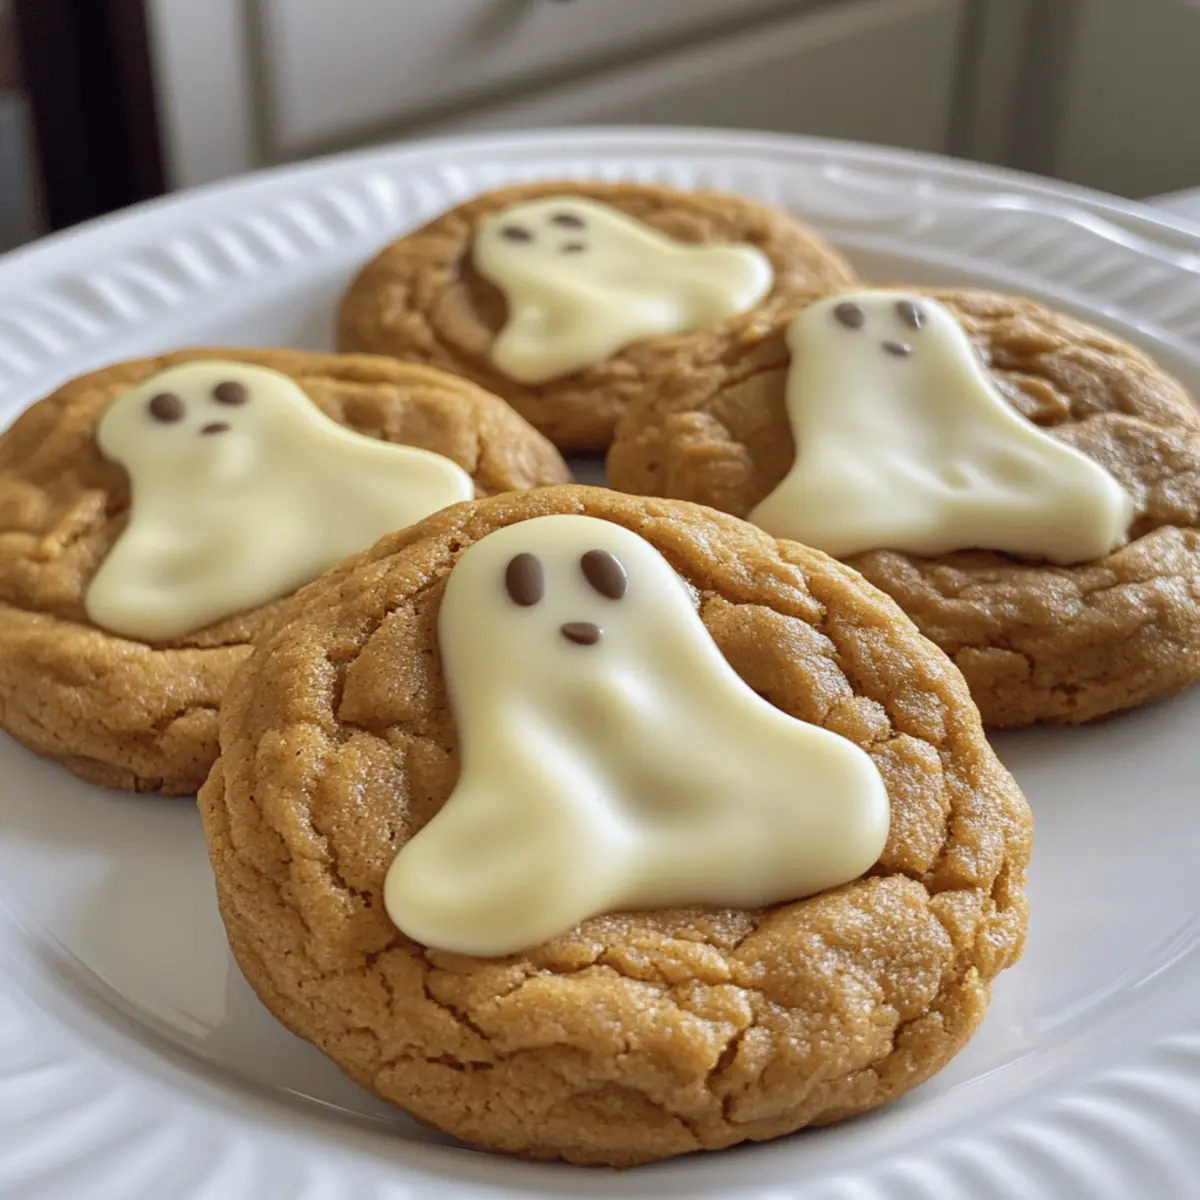
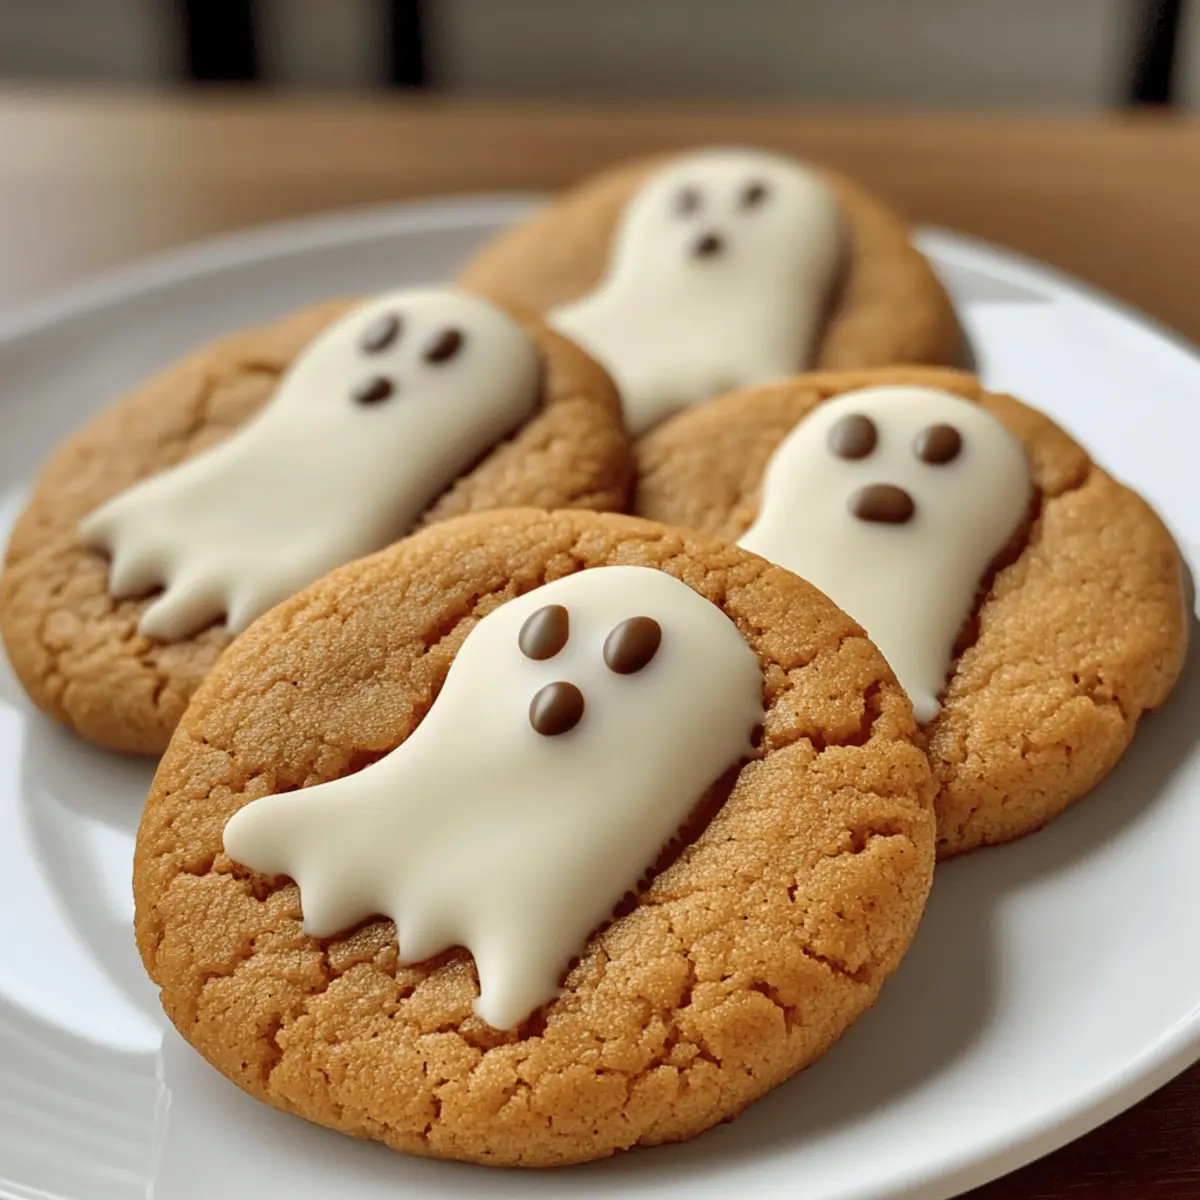
As I took my first bite of these Spooky Ghost Brown Butter Pumpkin Cookies, a wave of warmth swept over me, reminiscent of cozy autumn days. The pairing of rich brown butter and sweet pumpkin creates a delightful chewy texture that sets them apart from typical pumpkin cookies. Not only are they a festive treat that’s perfect for Halloween gatherings, but they also come together quickly, making them a go-to recipe when time is tight. Adorned with adorable white chocolate ghosts, these cookies are sure to charm guests of all ages and satisfy even the most discerning pumpkin enthusiasts. Are you ready to embrace the spirit of the season and whip up a batch of these deliciously spooky delights?
Why are these cookies a Halloween hit?
Festive Touch: The adorable ghost decorations make these cookies not just tasty, but also a delightful visual treat for Halloween gatherings.
Simple Prep: With just a few easy steps, you can swiftly whip up a batch that will impress friends and family.
Chewy Perfection: These cookies feature a soft, chewy texture that elevates them above conventional pumpkin treats, ensuring every bite is satisfying.
Versatile Options: Feel free to play with flavors! Swap in different spices or chocolate varieties for a fun twist on the classic recipe, such as our Pumpkin French Toast.
Crowd Pleaser: Whether you’re serving them at parties or sharing with loved ones, these cookies guarantee smiles all around.
Spooky Ghost Brown Butter Pumpkin Cookies Ingredients
For the Cookies
• Brown Butter – Adds a rich, nutty flavor; be sure to brown it until golden for depth.
• Pumpkin Puree – Provides moisture and flavor; use canned or homemade, but avoid pumpkin pie filling.
• Maple Syrup – Sweetens with a unique taste; can swap with honey or agave syrup when needed.
• All-Purpose Flour – Gives structure to the cookies; gluten-free blends work too if preferred.
• Baking Soda & Baking Powder – Essential leavening agents; always ensure they’re fresh for the best rise.
• Spices (Cinnamon, Nutmeg) – Add warmth and depth of flavor; adjust to your liking or use allspice as a substitute.
• Sugar – Sweetens the cookies; brown sugar can be used for a moister texture.
For Decoration
• White Chocolate & Black Candy Melts – Perfect for creating ghost designs; feel free to get creative with colored chocolate!
Step‑by‑Step Instructions for Spooky Ghost Brown Butter Pumpkin Cookies
Step 1: Brown the Butter
In a saucepan, melt one stick of unsalted butter over medium heat. Stir continually for about 5–7 minutes, watching closely until it turns a beautiful golden brown and develops a nutty aroma. This rich brown butter will be key to the flavor of your Spooky Ghost Brown Butter Pumpkin Cookies.
Step 2: Mix Wet Ingredients
In a large mixing bowl, combine the browned butter, 1 cup of pumpkin puree, ½ cup of maple syrup, and both sugars. Mix smoothly with a whisk or electric mixer until fully incorporated, about 2 minutes. This luscious wet mixture sets the stage for the flavors to shine in your cookies.
Step 3: Incorporate Dry Ingredients
In a separate bowl, whisk together 2 cups of all-purpose flour, 1 tsp of baking powder, ½ tsp of baking soda, and spices like cinnamon and nutmeg. Gradually add this dry mixture into the wet ingredients, stirring gently until just combined. Avoid overmixing to keep your Spooky Ghost Brown Butter Pumpkin Cookies chewy and tender.
Step 4: Scoop and Shape
Using a medium cookie scoop, portion out the dough onto ungreased baking sheets, leaving about 2 inches of space between each cookie. You should have around 12 cookies per tray. Before baking, consider chilling the dough for 30 minutes to ensure a thicker cookie.
Step 5: Bake
Preheat your oven to 350°F (175°C) and bake the cookies for 10–12 minutes, or until the edges are set and just starting to turn golden. The centers may look slightly underbaked—that’s perfect! Let them cool on the baking sheet for a few minutes before transferring to wire racks to cool completely.
Step 6: Decorate
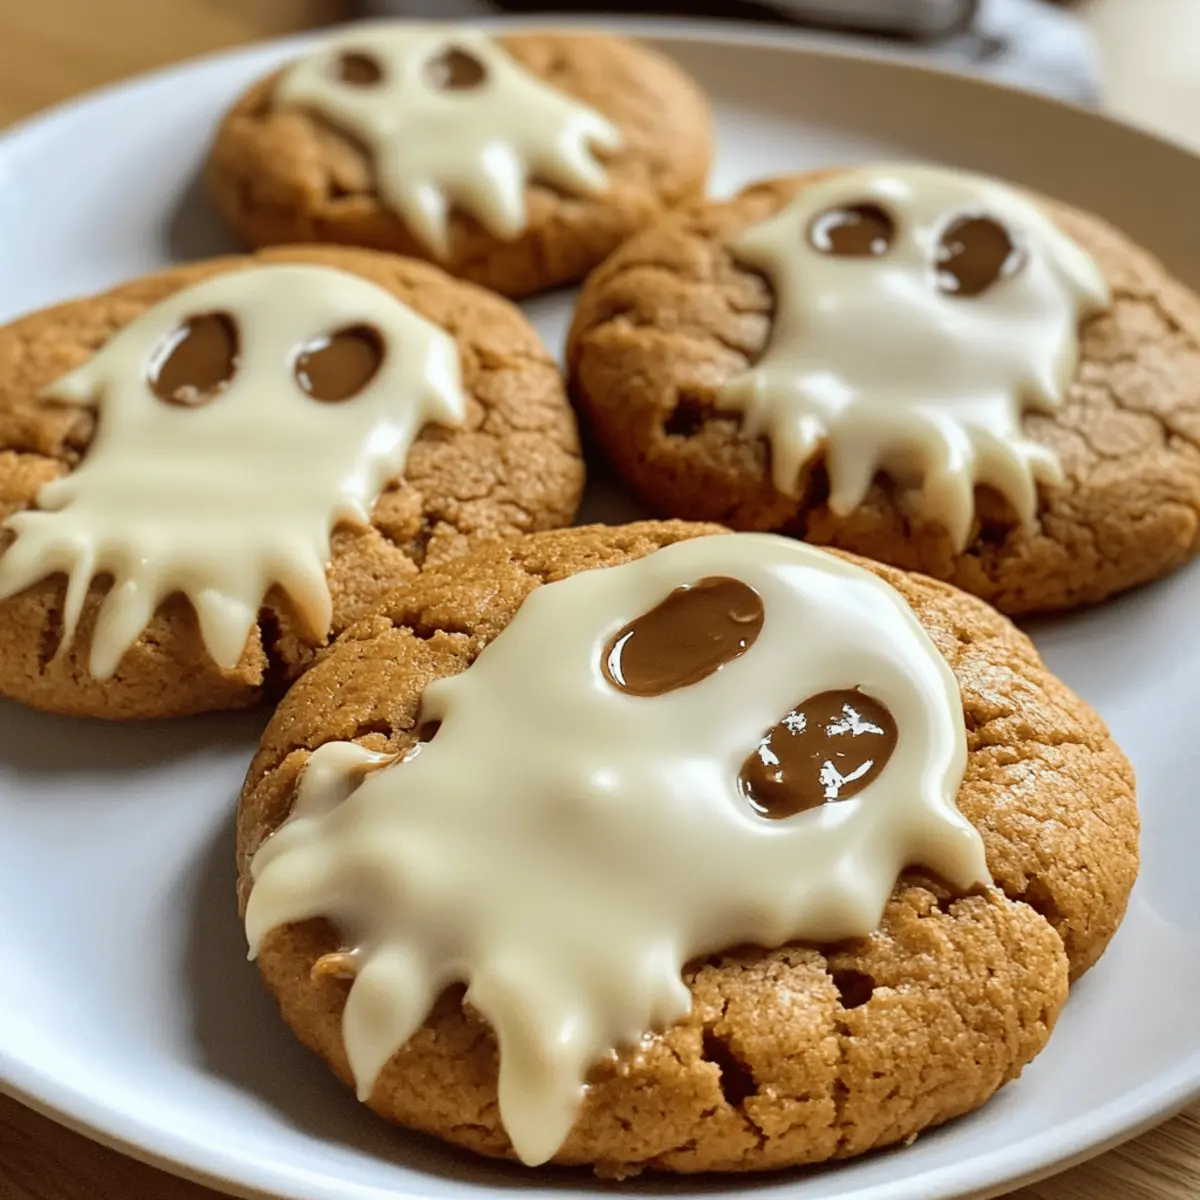
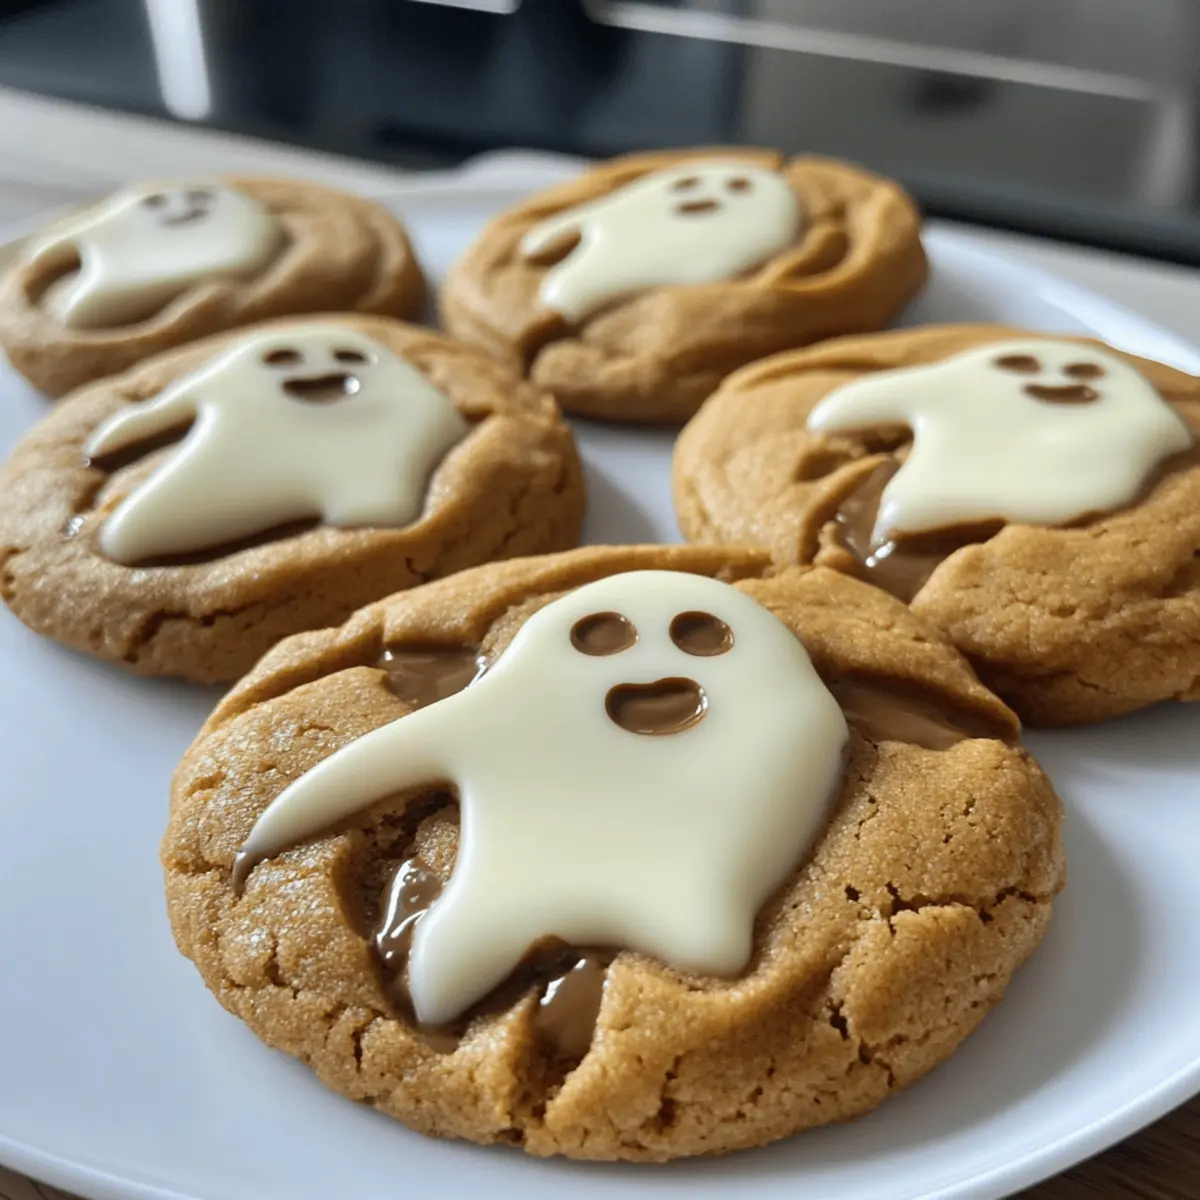
Once your Spooky Ghost Brown Butter Pumpkin Cookies have cooled, melt white chocolate and black candy melts in separate bowls. Use a piping bag to create adorable ghost designs by piping ghost shapes over the surface of each cookie. Get creative and have fun with the decorating process!
Step 7: Serve and Share
These festive cookies are perfect for sharing at Halloween gatherings or cozy family nights! Present them on a spooky platter or in a decorative box for a charming, homemade gift. Your friends and family will be thrilled to enjoy these chewy, delicious treats.
Expert Tips for Spooky Ghost Brown Butter Pumpkin Cookies
- Brown the Butter Right: Carefully watch the butter as it melts; it should have a nutty aroma and golden color to achieve the best flavor for your cookies.
- Avoid Overmixing: Mix the dough just until combined; excessive mixing can lead to dense cookies rather than the chewy texture you’re aiming for in your Spooky Ghost Brown Butter Pumpkin Cookies.
- Chill Your Dough: For thicker cookies, consider chilling your dough for 30 minutes before baking; this helps maintain their shape and results in a chewy texture.
- Use Light Baking Sheets: Opt for light-colored sheets to prevent cookies from browning too quickly; this keeps them tender and perfectly baked.
- Decorate Creatively: Feel free to experiment with the ghost designs using different colored chocolate melts for a fun twist!
Storage Tips for Spooky Ghost Brown Butter Pumpkin Cookies
Room Temperature: Store your cookies in an airtight container at room temperature for up to 1 week. This keeps them fresh and maintains their chewy texture.
Fridge: If you want to extend freshness, cookies can be stored in the fridge for up to 2 weeks. Make sure they’re tightly wrapped to avoid moisture loss.
Freezer: These Spooky Ghost Brown Butter Pumpkin Cookies freeze well for up to 3 months. Layer them carefully in an airtight container or freezer bag, separating each with parchment paper to prevent sticking.
Reheating: When ready to enjoy, simply let them thaw at room temperature or pop them in the microwave for a few seconds to warm them up and enhance that delicious flavor.
Make Ahead Options
These Spooky Ghost Brown Butter Pumpkin Cookies are perfect for busy home cooks looking to save time! You can prepare the cookie dough up to 24 hours in advance by mixing all the ingredients and storing the dough in an airtight container in the refrigerator. This will not only enhance the flavors as they meld together but also allows you to bake fresh cookies whenever you’re ready. Alternatively, you can bake the cookies, let them cool completely, and freeze them for up to 3 months. When it’s time to serve, simply thaw the cookies at room temperature and decorate with melted white chocolate and black candy melts before enjoying. This strategy ensures your treats remain just as delicious and chewy, ready to surprise your friends and family whenever you need them!
What to Serve with Spooky Ghost Brown Butter Pumpkin Cookies
Create a delightful spread around these charming cookies for a perfect Halloween gathering.
- Festive Hot Cocoa: The rich, chocolatey flavor nicely complements the pumpkin spices, warming guests on a chilly night. Top with whipped cream for extra indulgence!
- Apple Cider: A refreshing beverage that enhances the autumnal vibe, its sweet and tangy flavor balances the sweetness of the cookies beautifully.
- Cream Cheese Frosting Dip: This tangy, creamy dip pairs wonderfully with the chewy texture of the cookies, inviting guests to dip and savor each bite.
- Caramel Popcorn: The sweet crunch of caramel popcorn adds delightful texture and a bit of fun to the table, making it a perfect snack alongside your cookies.
- Spiced Pumpkin Pie: Embrace the flavors of fall! A slice of spiced pumpkin pie builds on the pumpkin theme and adds a traditional touch to your dessert spread.
- Chewy Ginger Snap Cookies: Their spicy crunch complements the sweet softness of the Spooky Ghost Brown Butter Pumpkin Cookies, creating a delightful contrast of flavors and textures.
- Miniature Cheesecakes: A rich and decadent option to elevate your dessert table; the smooth creaminess beautifully contrasts the chewy cookie texture.
Spooky Ghost Brown Butter Pumpkin Cookies Variations
Feel free to let your creativity shine by customizing these delightful treats with these fun suggestions!
- Oats Boost: Replace half the flour with rolled oats to create a heartier, chewier cookie that adds a delightful texture.
- Chocolate Swap: Use dark chocolate or colored melts instead of white chocolate for a contrasting design that’s just as festive!
- Spice Mix-Up: Try adding ginger or cardamom to the spice blend for a unique, warm flavor, giving your cookie a personal twist.
- Nutty Addition: Fold in chopped pecans or walnuts for crunch; it adds a lovely nutty flavor that complements the pumpkin.
- Softened Sweetness: Swap maple syrup for honey to impart a different sweet note, or try agave syrup for a lighter flavor.
- Gluten-Free Option: Use a gluten-free flour blend instead of all-purpose flour to make these cookies accessible to everyone.
- Pumpkin Pie Inspiration: Add mini chocolate chips for a sweet surprise inside each cookie, reminiscent of beloved fall treats.
- Ghostly Color: Use pastel colored candy melts for a playful touch, creating a rainbow of ghostly treats that can delight all ages!
These variations offer endless possibilities! Consider serving them alongside my delicious Brown Butter Brookies for an exceptional treat platter or mixing in some flavors from my Garlic Butter Meatballs for an unexpected savory surprise. Whatever you choose, these spooky delights are bound to make Halloween gatherings even more memorable!
Spooky Ghost Brown Butter Pumpkin Cookies Recipe FAQs
How do I select the right pumpkin puree for my cookies?
Absolutely! When choosing pumpkin puree, opt for pure pumpkin in a can or make your own by roasting and blending fresh pumpkin. Avoid pumpkin pie filling, as it contains added sugars and spices that can alter your cookie’s flavor.
What is the best way to store these cookies?
To keep your Spooky Ghost Brown Butter Pumpkin Cookies fresh, store them in an airtight container at room temperature for up to 1 week. If you’d like them to last longer, refrigerate for up to 2 weeks or freeze for up to 3 months, layering them with parchment paper to prevent sticking.
Can I freeze these cookies? If so, how?
Yes, you can definitely freeze these cookies! First, let them cool completely. Place them in an airtight container or freezer bag, separating each cookie with parchment paper. Be sure to label the container with the date. They can be frozen for up to 3 months! When you’re ready to enjoy, thaw them at room temperature or microwave for a few seconds to warm.
Why are my cookies not chewy?
If your Spooky Ghost Brown Butter Pumpkin Cookies aren’t turning out chewy, it could be due to overmixing the dough or using too much flour. Make sure you mix just until combined and spoon your flour into the measuring cup rather than scooping it directly, as this can lead to excess flour.
What are some dietary considerations for these cookies?
When making these cookies, consider any allergies or dietary preferences. You can easily make them gluten-free by substituting all-purpose flour with a gluten-free blend. Additionally, ensure that your chocolate melts are dairy-free if you’re catering to vegan diets.
Can pets eat pumpkin cookies?
While pure pumpkin is safe for dogs in moderation, the ingredients in these cookies—like sugar and chocolate—are not suitable for pets. It’s best to stick to plain, unseasoned pumpkin if you want to share a treat with your furry friends.
Spooky Ghost Brown Butter Pumpkin Cookies for Halloween Bliss
Ingredients
Equipment
Method
- In a saucepan, melt one stick of unsalted butter over medium heat for 5–7 minutes until golden brown.
- In a large mixing bowl, combine the browned butter, pumpkin puree, maple syrup, and sugars. Mix until smooth for 2 minutes.
- In a separate bowl, whisk together flour, baking powder, baking soda, and spices. Gradually add to the wet mixture until just combined.
- Using a cookie scoop, portion out the dough onto ungreased baking sheets, leaving space. Chill for 30 minutes if desired.
- Preheat the oven to 350°F and bake for 10–12 minutes until edges set. Cool before transferring to wire racks.
- Melt white chocolate and black candy melts. Decorate each cookie with ghost designs using a piping bag.
- Serve these festive cookies at gatherings or as gifts. Enjoy the chewy treats!
Leave a Reply