
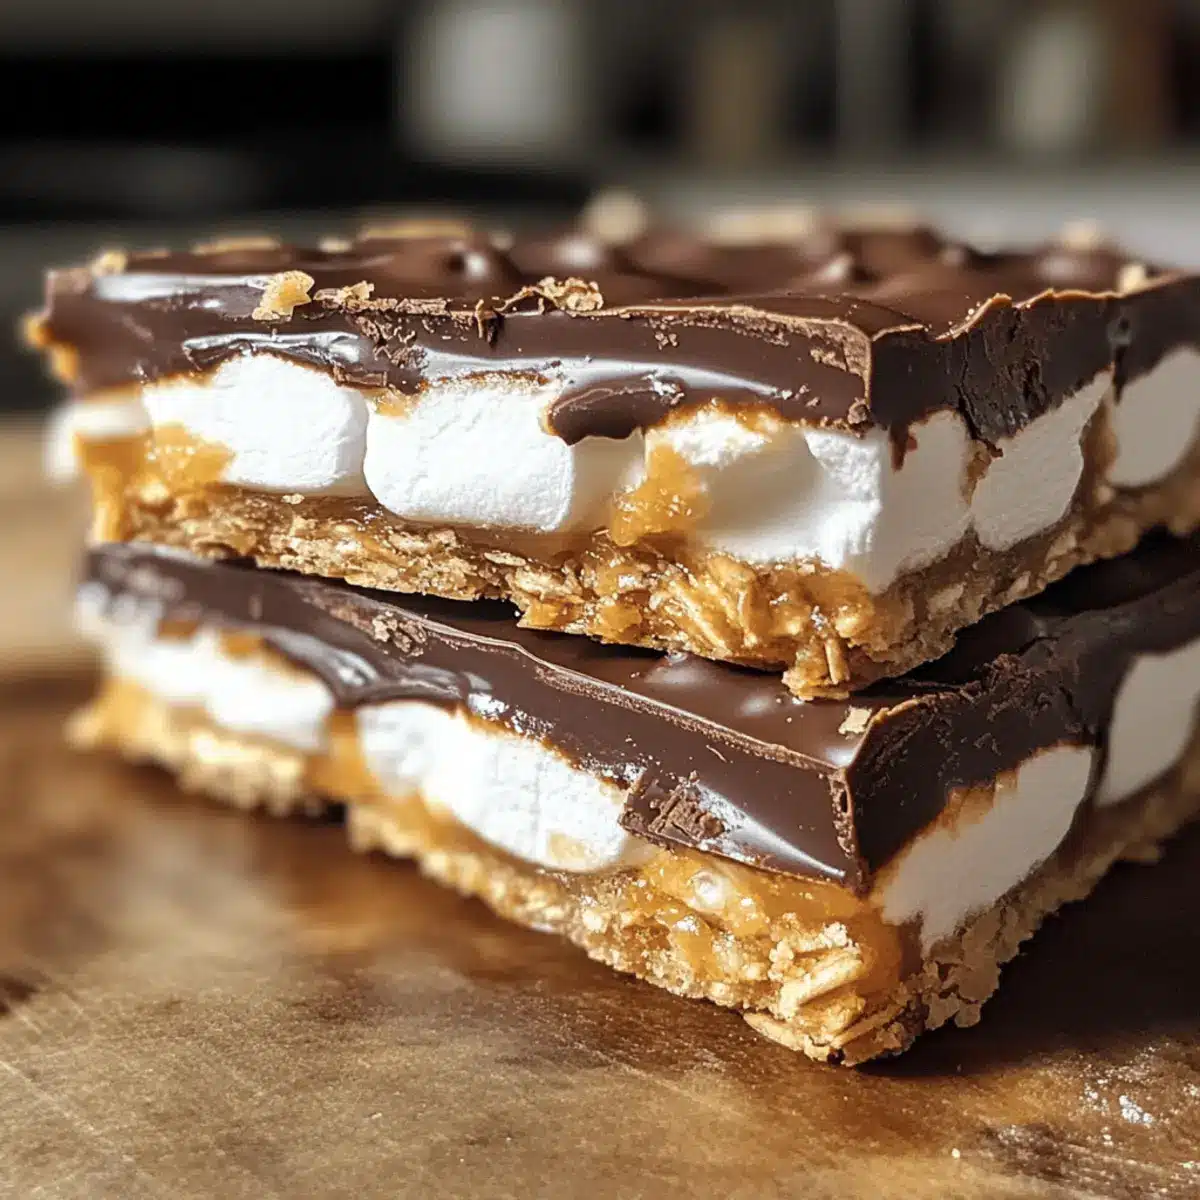
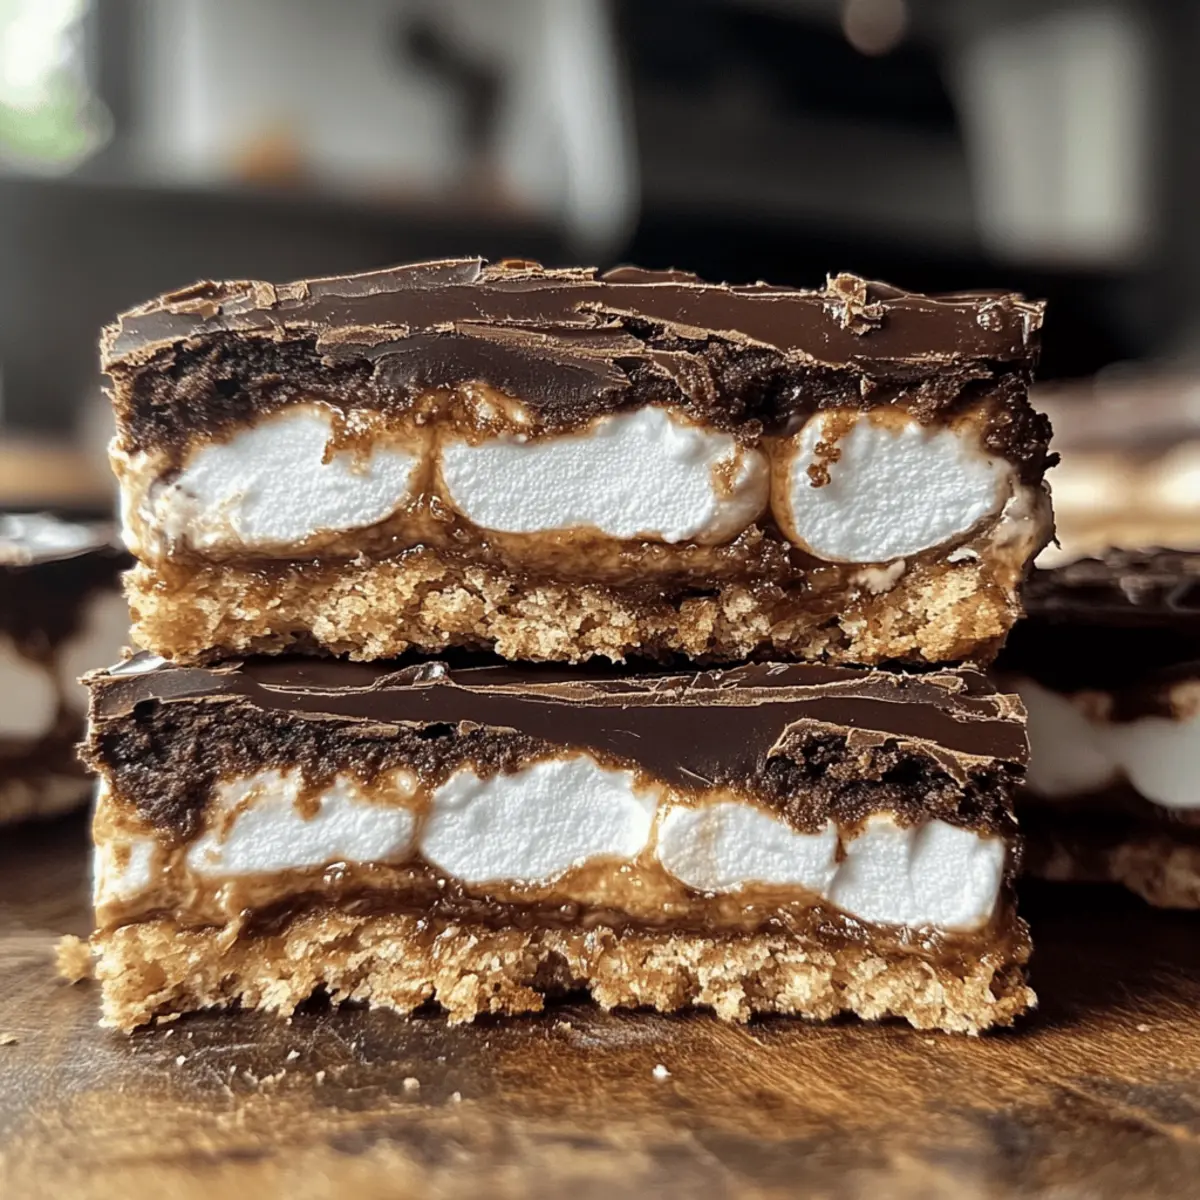
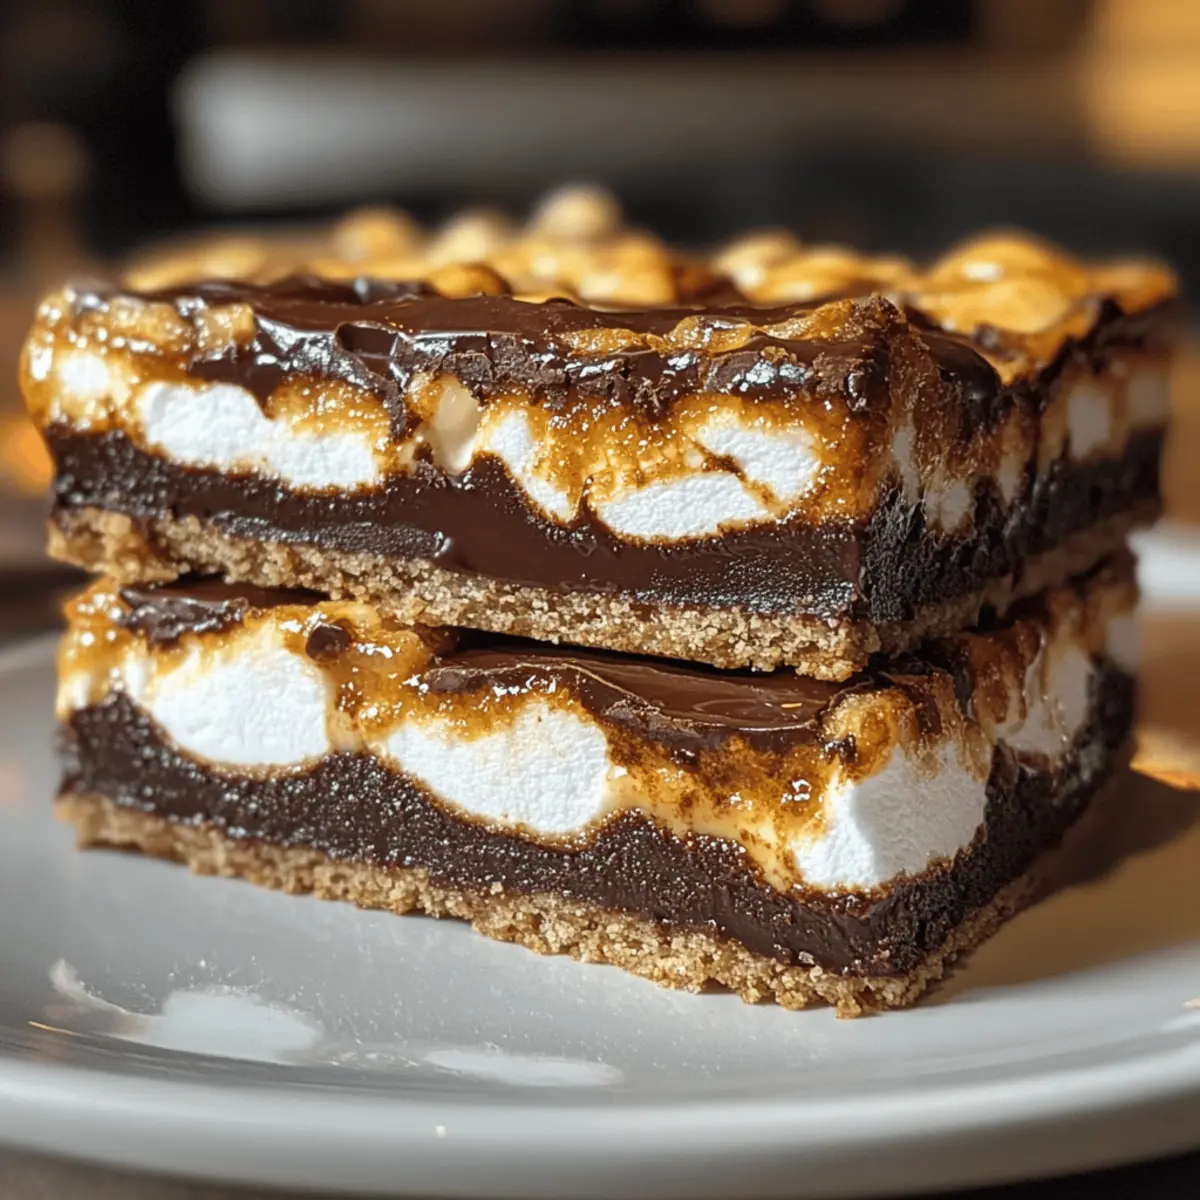
As I stood in my kitchen, the sweet aroma of melting chocolate and toasted marshmallows wafted through the air, I couldn’t help but feel a wave of nostalgia wash over me. These Easy S’Mores Bars are a delightful twist on the classic campfire treat, combining all the beloved flavors of graham crackers, ooey-gooey marshmallows, and rich chocolate into one easy-to-make dessert. Perfect for gatherings or a simple treat after dinner, they promise an irresistible gooey texture that will melt in your mouth. Whether you’re hosting friends or just satisfying a sweet tooth, these bars are a crowd-pleaser that’re bound to create unforgettable memories. I can’t wait to share how you can whip up these delicious S’Mores Bars—are you ready to ignite your taste buds?
Why are these S’Mores Bars amazing?
Irresistible flavor: The combination of chocolate, marshmallow, and graham crackers brings the classic campfire treat right to your kitchen.
Easy to make: With minimal ingredients and simple steps, even beginner bakers can create this delicious dessert effortlessly.
Gooey delight: Each bite offers a perfect blend of soft and chewy textures, delighting your taste buds.
Perfect for gatherings: These S’Mores Bars are bound to impress friends and family at any occasion—just like my easy Salted Caramel Bars!
Endless variations: Whether you swap chocolate types or try different toppings, the options are limitless, allowing you to create a unique twist each time.
Get ready to indulge in this sweet treat that’s sure to elevate your dessert game!
S’Mores Bars Ingredients
• A delightful fusion of chocolate, marshmallows, and graham crackers awaits!
For the Crust
- All-purpose flour – Provides structure and binds ingredients together; for a gluten-free option, use a gluten-free flour blend.
- Graham cracker crumbs – Adds sweetness and a classic s’mores flavor; substitute with gluten-free graham crackers if needed.
- Baking powder – Acts as a leavening agent to help the bars rise slightly; make sure it’s fresh for the best results.
- Salt – Enhances the sweetness and balances overall taste; kosher or table salt works well.
For the Filling
- Unsalted butter – Contributes richness and moisture; ensure it’s at room temperature for easy mixing.
- Light brown sugar – Adds moisture and a subtle caramel-like flavor; dark brown sugar can be used for a deeper taste.
- Eggs – Binds the ingredients and adds richness; opt for large eggs for consistency.
- Marshmallow topping (Marshmallow Creme) – Provides that signature gooey goodness; you could use mini marshmallows if desired.
- Milk chocolate chips – Adds sweetness and creaminess; swap for dark chocolate chips for a bolder flavor.
Prepare your kitchen for these must-try S’Mores Bars that promise to be a sweet crowd-pleaser!
Step‑by‑Step Instructions for S’Mores Bars
Step 1: Preheat the Oven
Begin by preheating your oven to 350°F (175°C). While that’s warming up, line a 9×13-inch baking pan with aluminum foil, allowing some overhang on the sides for easy removal later. Spraying the foil with nonstick spray ensures your S’Mores Bars won’t stick, making cleanup a breeze.
Step 2: Make the Crust
In a mixing bowl, whisk together the all-purpose flour, graham cracker crumbs, baking powder, and salt until well combined. In a separate larger bowl, beat the softened unsalted butter and light brown sugar using an electric mixer on medium speed for about 2 minutes, until the mixture is light and fluffy. Add in the eggs and continue mixing until fully incorporated.
Step 3: Combine the Mixtures
Gradually add the dry flour mixture into the butter and sugar mixture, stirring until just combined. Be careful not to overmix, as you want your S’Mores Bars to remain soft and chewy. The dough should hold together nicely, ready for layering in the prepared baking pan.
Step 4: Layer the Base
Divide your dough in half, setting aside one portion for the topping. Press the first half evenly into the bottom of your prepared pan, using your fingers or the back of a spatula to ensure a smooth, even layer. This will form the delightful base of your gooey S’Mores Bars.
Step 5: Add the Marshmallow Topping
Spread the marshmallow topping, or marshmallow cream, generously over the layer of dough, making sure to cover it evenly. Then, sprinkle the milk chocolate chips on top of the marshmallow layer, allowing some of the chocolate to peek through for that irresistibly gooey finish.
Step 6: Top with Remaining Dough
Crumble the reserved dough over the top of your S’Mores Bars, letting it fall into chunks so the marshmallow and chocolate are still visible. This creates a beautiful layered effect while allowing those signature gooey bites.
Step 7: Bake
Carefully place your pan in the preheated oven and bake for 30–35 minutes, or until the top is golden brown. The bars are done when the edges are slightly firm, but the center remains soft and gooey, just like the beloved s’mores.
Step 8: Cool and Serve
Once baked, remove your S’Mores Bars from the oven and let them cool in the pan on a wire rack for at least 1 hour. This cooling time allows them to set properly. After they have cooled completely, use the foil overhang to lift the bars out, cutting them into squares to serve.
Make Ahead Options
These Easy S’Mores Bars are perfect for meal prep! You can make the base dough up to 24 hours in advance; simply prepare it according to the recipe and refrigerate it tightly wrapped in plastic wrap. The marshmallow topping can also be spread over the crust before refrigerating, ensuring everything stays fresh and delicious. For best results, layer the chocolate chips just before baking to maintain their texture. When you’re ready to enjoy these delightful bars, bake them as directed, and you’ll have a homemade treat that’s just as gooey and satisfying as if made fresh! This make-ahead approach is a remarkable time-saver for those busy nights!
S’Mores Bars Variations & Substitutions
Feel free to let your creativity run wild as you customize these delightful S’Mores Bars to suit your taste buds!
- Gluten-Free: Swap graham cracker crumbs with gluten-free versions for a tasty treat everyone can enjoy.
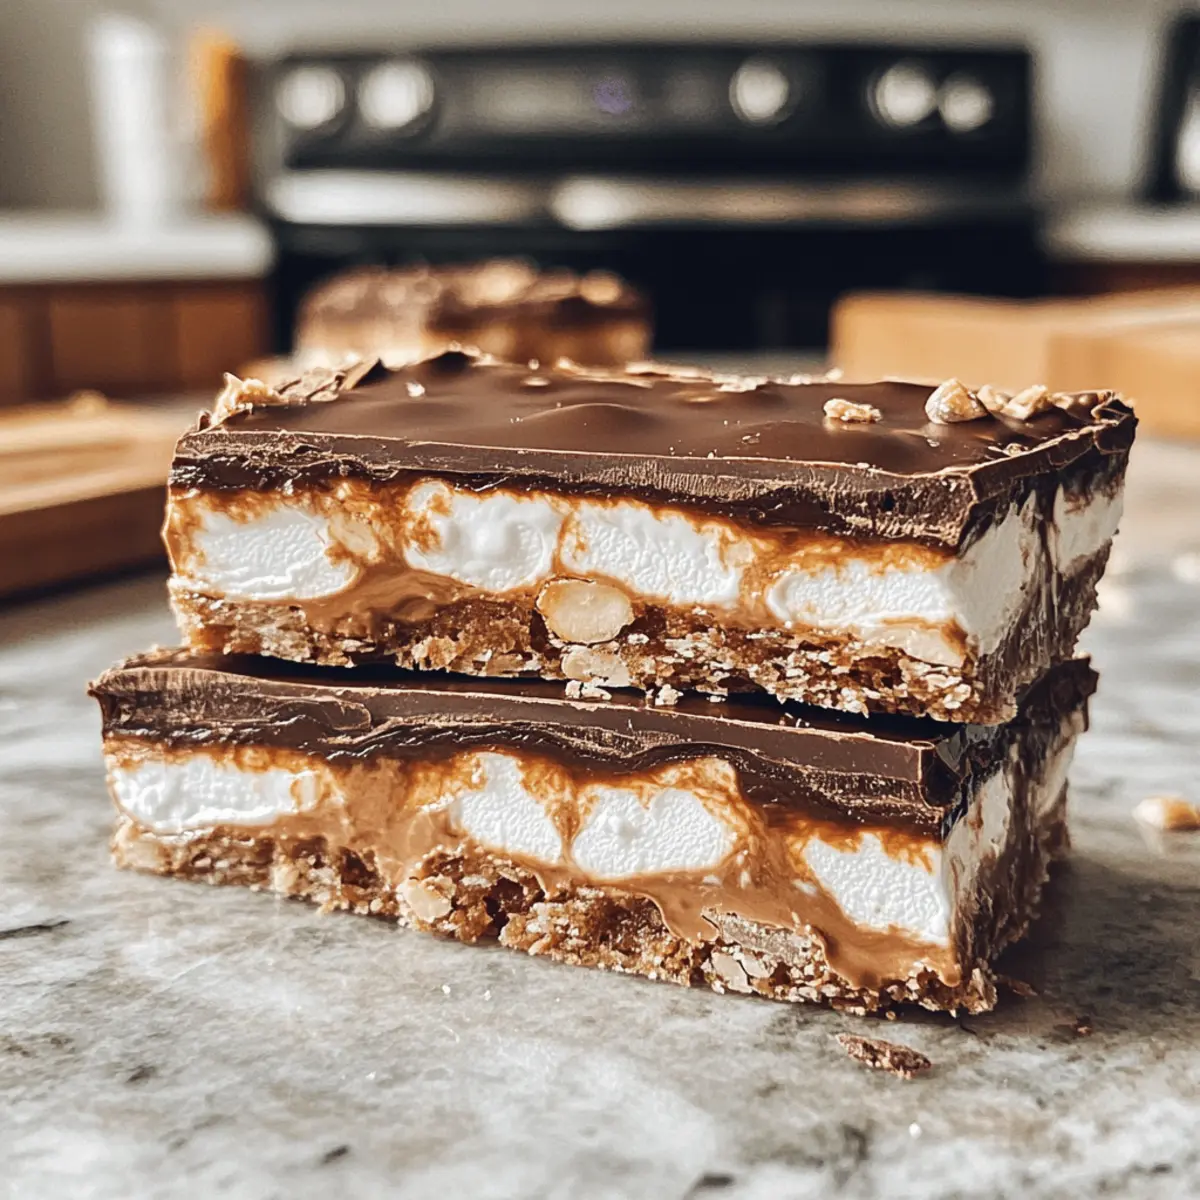
- Nutty Goodness: Add crushed walnuts or pecans to the crust for a delightful crunch and flavor contrast.
- Caramel Surprise: Drizzle caramel sauce over the marshmallow layer for a decadent touch that elevates the classic recipe.
- Peanut Butter Bliss: Mix creamy peanut butter into the dough for a rich and nutty flavor that balances sweetness beautifully.
- Spicy Kick: Sprinkle a pinch of cayenne pepper or cinnamon into the dough for a hot twist that perfectly complements the sweetness.
- Fruit Fusion: Add diced strawberries or bananas atop the chocolate layer before crumbling the dough for a refreshing fruity twist.
- Flavored Chocolate: Experiment with dark or mint chocolate chips for a unique flavor experience that will leave you craving more!
And for even more creative inspiration, you can pair these bars with a scoop of creamy ice cream alongside my easy Salted Caramel Bars for a delicious dessert duo. Happy baking!
How to Store and Freeze S’Mores Bars
Room Temperature: Store S’Mores Bars in an airtight container at room temperature for up to 5 days. They’ll maintain their flavor and gooey texture, perfect for snacking!
Fridge: If you prefer a chilled treat, keep the bars in the fridge for up to a week. Just be sure to seal them well to prevent them from drying out.
Freezer: For long-term storage, wrap individual bars in plastic wrap and then in aluminum foil. Freeze for up to 3 months. Thaw overnight in the fridge before enjoying.
Reheating: To revive that gooey texture, pop a bar in the microwave for 10-15 seconds, allowing the chocolate and marshmallow to soften beautifully!
What to Serve with Easy S’Mores Bars
As you dive into the delightful world of S’Mores Bars, consider complementing them with these delicious pairings that enhance the overall experience.
-
Vanilla Ice Cream: The creamy sweetness of vanilla ice cream is a perfect contrast to the chewy texture of the S’Mores Bars, creating a blissful balance of flavors.
-
Fresh Strawberries: Juicy, ripe strawberries add a refreshing element, cutting through the richness and bringing a touch of brightness to your dessert spread.
-
Chocolate Drizzle: Elevate your S’Mores Bars with a drizzle of melted chocolate on top, adding an extra layer of indulgence that chocolate lovers will adore.
-
Caramel Sauce: A warm drizzle of caramel sauce can enhance the flavor profile with its buttery sweetness, creating an irresistible combination with the bars’ gooey marshmallow.
-
Coffee or Espresso: Pairing with a nice cup of coffee or espresso elevates the dessert experience, as the deep flavors complement the sweetness of the S’Mores Bars perfectly.
-
Marshmallow Hot Chocolate: Sip on this decadent drink for extra marshmallowy goodness that echoes the flavors in your bars, making for a cozy, comforting dessert setting.
With these delightful additions, your S’Mores Bars will shine even brighter at the dessert table, captivating everyone around!
Expert Tips for S’Mores Bars
• Keep it Cool: Always let the S’Mores Bars cool completely before cutting, as this helps the marshmallow firm up for cleaner slices.
• Avoid Stickiness: If using marshmallow topping, wet your hands before spreading to avoid the sticky mess that can occur.
• Add Flavor: Experiment with chocolate types! Dark chocolate chips can add a richer flavor that complements the sweetness of marshmallows perfectly.
• Don’t Overmix: When combining the dough, mix just until combined to maintain a soft texture in your S’Mores Bars.
• Layering Fun: For extra crunch and flavor, consider adding crushed nuts or toffee bits between layers for a delightful twist!
S’Mores Bars Recipe FAQs
What type of graham crackers should I use for S’Mores Bars?
Absolutely! For authentic flavor, I recommend using traditional graham crackers, but if you need a gluten-free option, look for gluten-free graham crackers that are widely available in stores.
How should I store my S’Mores Bars?
You can keep your S’Mores Bars in an airtight container at room temperature for up to 5 days. If you prefer a chilled treat, refrigerate them for up to a week while making sure they are sealed properly to retain moisture.
Can S’Mores Bars be frozen?
Yes, for long-term storage, wrap individual bars tightly in plastic wrap and then in aluminum foil. Place them in a freezer-safe container and they will last for up to 3 months. When you’re ready to enjoy, simply thaw them overnight in the fridge.
What can I do if my marshmallow topping is too sticky?
Very! If you find your marshmallow topping is sticky, keep a bowl of water nearby, and wet your hands before handling it. This will prevent the marshmallow from sticking to your fingers, making it easier to spread evenly across the dough layer.
Is this recipe suitable for people with allergies?
Yes, this recipe can accommodate various dietary needs! If you have gluten allergies, use a gluten-free flour blend and graham crackers. Additionally, you may replace the eggs with a flaxseed or chia seed mixture for a vegan option. Just be sure to double-check all ingredients for allergen warnings!
Can I add extras to my S’Mores Bars?
Certainly! I often add crushed nuts or a sprinkle of toffee bits for extra crunch. Feel free to experiment with different flavored chocolate chips, like dark or white chocolate, to create your unique twist on these classic S’Mores Bars.
Irresistible S'more Bars - Gooey Chocolate Bliss Awaits!
Ingredients
Equipment
Method
- Preheat your oven to 350°F (175°C) and line a 9x13-inch baking pan with aluminum foil, spraying it with nonstick spray.
- Whisk together flour, graham cracker crumbs, baking powder, and salt in a bowl. In another bowl, beat together butter and brown sugar until light and fluffy, then add eggs and mix.
- Gradually add dry ingredients to the wet mixture, stirring until just combined to keep the bars soft and chewy.
- Press half of the dough into the bottom of the prepared pan to form a base layer.
- Spread marshmallow topping evenly over the dough, then sprinkle milk chocolate chips on top.
- Crumble the reserved dough over the top, allowing some marshmallow and chocolate to be visible.
- Bake for 30–35 minutes, until the top is golden brown and edges are slightly firm but center is gooey.
- Let the bars cool in the pan on a wire rack for 1 hour, then lift out using the foil and cut into squares.
Leave a Reply