
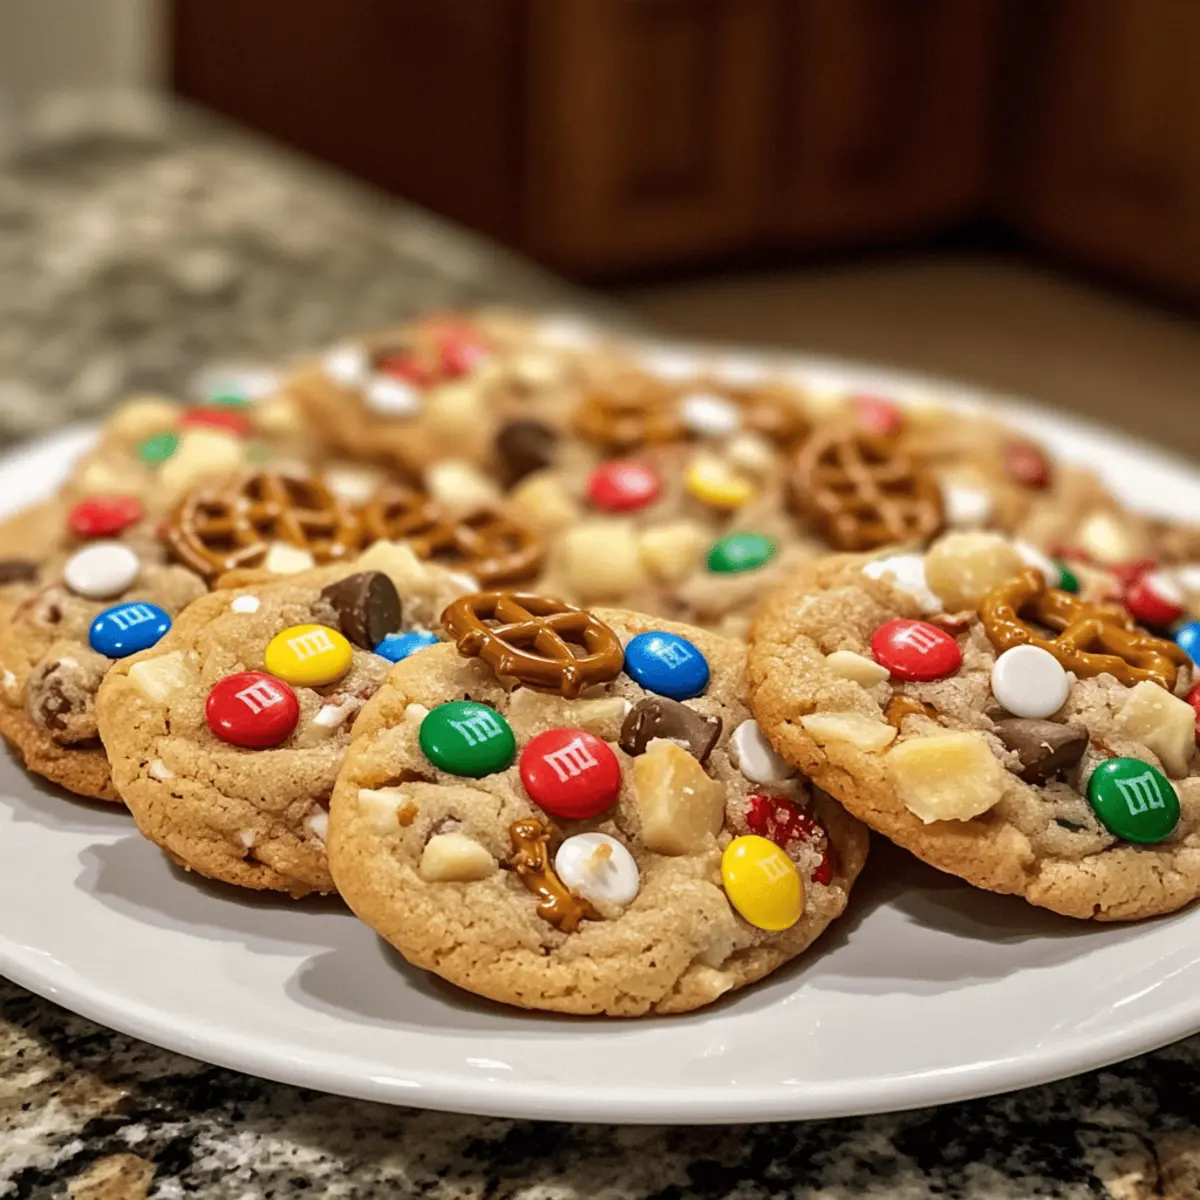
As I stood in my kitchen surrounded by an array of colors and textures, the aroma of melted butter danced through the air, instantly transporting me to festive childhood memories. My latest creation, Kitchen Sink Christmas Cookies, brings back that holiday magic with a delightful twist. These chewy cookies are more than just a sweet treat; they’re completely customizable, allowing you to incorporate your favorite pantry treasures. The blend of crunchy pretzels, salty potato chips, and colorful M&Ms creates a perfect balance of sweet and salty that will have your friends and family asking for more. Plus, with a simple prep time, you’ll find these cookies are not only a crowd-pleaser but also an easy way to add some homemade charm to your holiday celebrations. What exciting mix-ins are you going to choose for your batch?
Why Are Kitchen Sink Christmas Cookies Unique?
Customization at Its Finest: These cookies let you tailor the mix-ins to suit your taste, sparking creativity and fun in the kitchen!
Perfect for Sharing: Bring them to holiday gatherings, and watch your friends smile as they discover the delicious surprises in every bite.
Chewy Texture: Thanks to melted butter and brown sugar, you’ll enjoy a delightfully chewiness that makes these cookies truly unforgettable.
Quick to Prepare: With minimal prep time and a straightforward process, you’ll be baking holiday magic in no time! If you love festive cookies, try variations like Cinnamon Roll Cookies or our classic Chocolate Chip Cookies for added inspiration.
Fun and Festive: Adorned with colorful M&Ms and sprinkles, they add a cheerful vibe to your cookie platters!
Kitchen Sink Christmas Cookie Ingredients
• A delightful mix of flavors awaits!
For the Cookie Base
- All-Purpose Flour – Key for structure; make sure to spoon and level to prevent dense cookies.
- Baking Powder – Ensures a light texture by adding leavening.
- Baking Soda – Helps with spreading and achieving the perfect golden-brown color.
- Salt – Balances sweetness and enhances the overall flavor.
- Unsalted Butter – Melting this adds richness and leads to that perfect chewy texture.
- Dark Brown Sugar – Brings moisture and caramel richness; more than white sugar makes for chewier cookies.
- Granulated Sugar – Provides sweetness and aids in browning.
- Large Eggs – Binds everything together while adding necessary moisture; opt for room temperature for the best results.
- Vanilla Extract – Enhances the flavor and adds aromatic depth.
For the Mix-Ins
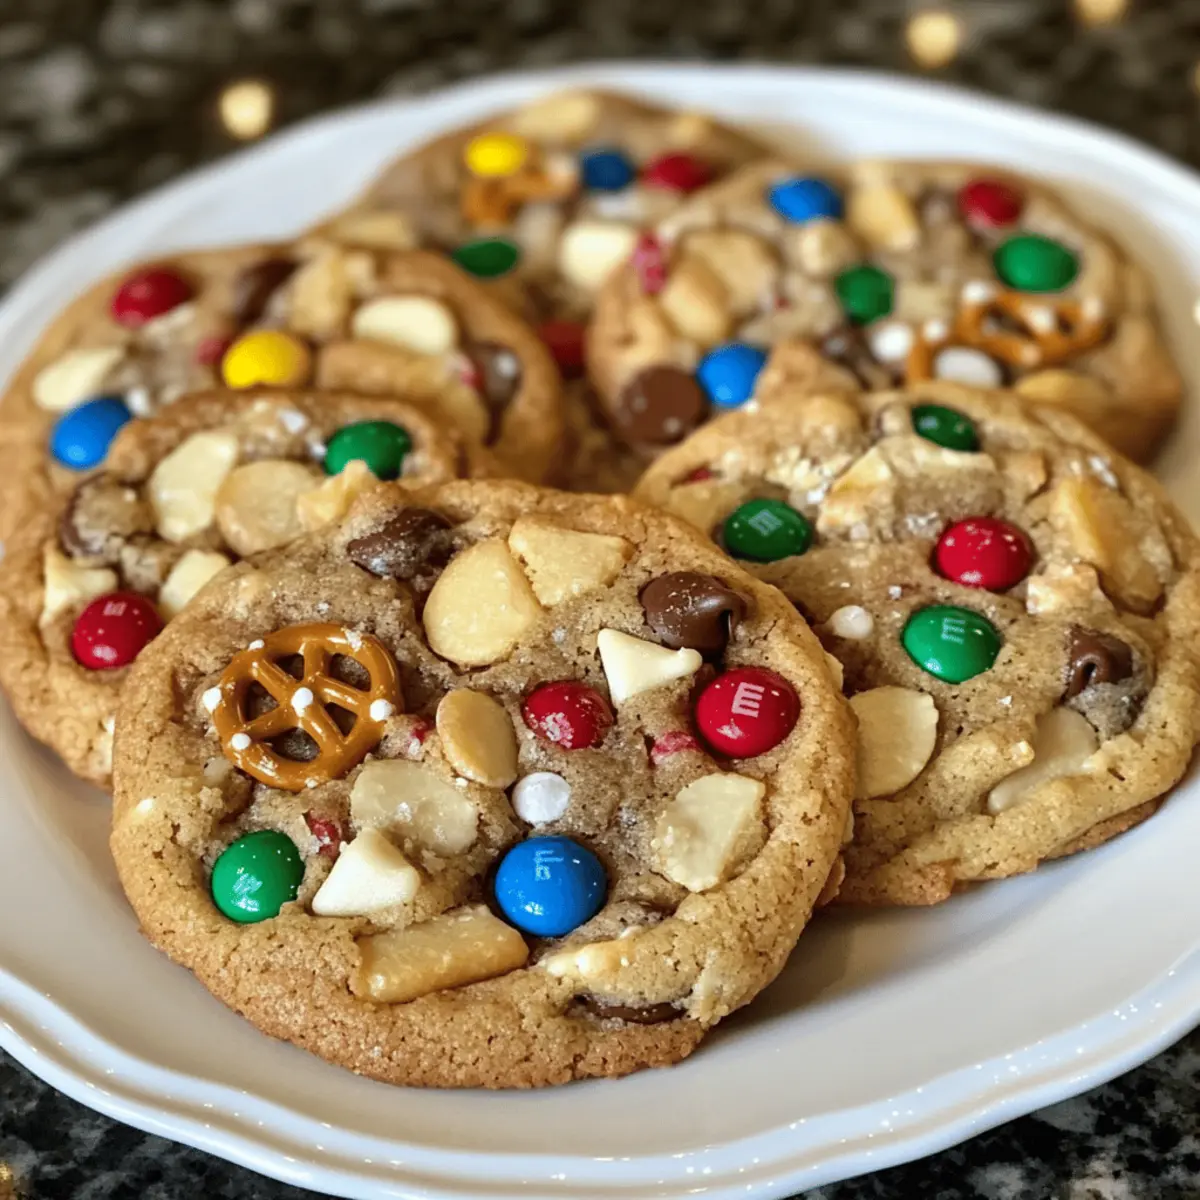
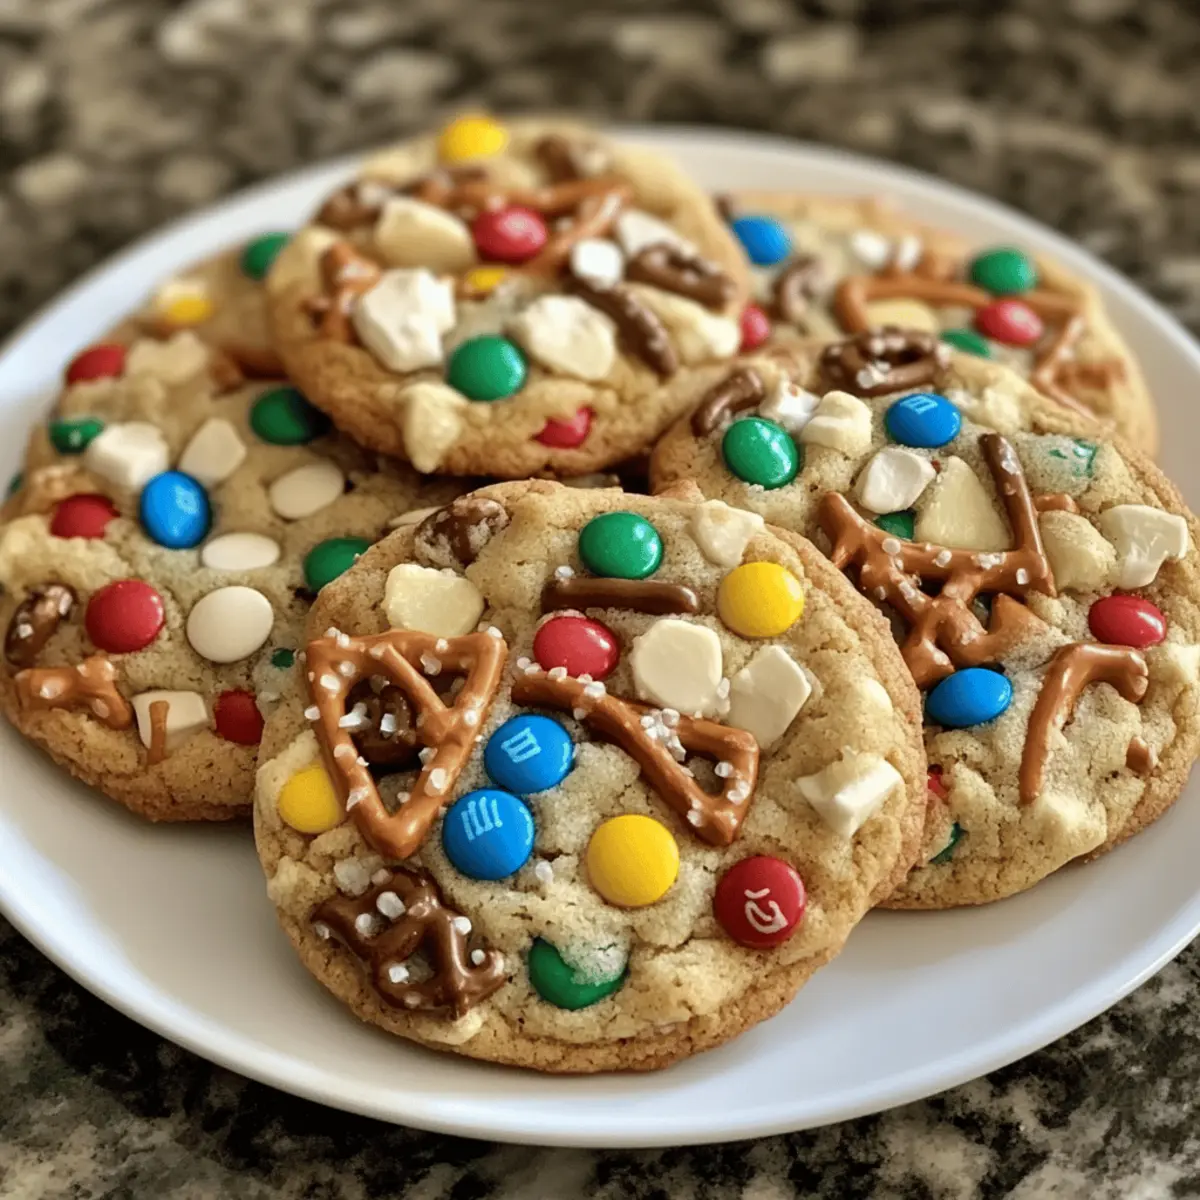
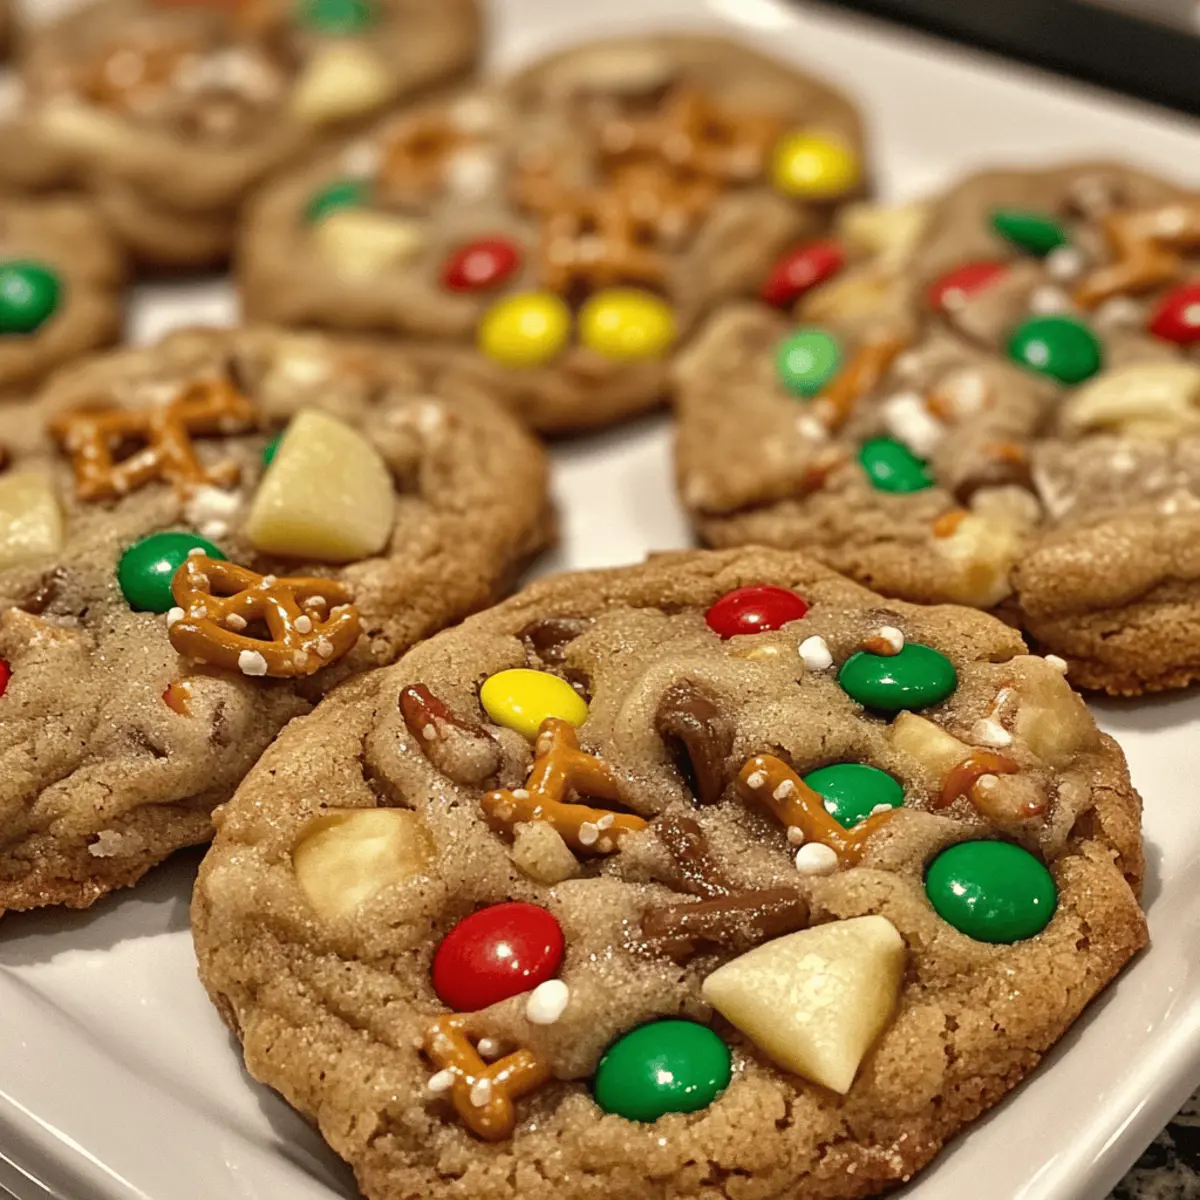
- M&Ms – Adds bursts of sweetness and color; use festive red and green varieties for a holiday touch.
- White Chocolate Chips – Offers creamy decadence and complements other ingredients.
- Pretzels – A crunchy, salty addition; break them into small pieces for even distribution throughout the cookie.
- Salted Potato Chips – Surprising but delicious; they contribute an extra crunch and saltiness.
- Holiday Sprinkles – Elevate the festive look and add a hint of sweetness.
These Kitchen Sink Christmas Cookies let you mix and match your favorites, ensuring everyone gets a unique treat!
Step‑by‑Step Instructions for Kitchen Sink Christmas Cookies
Step 1: Melt the Butter
Start by melting 1 cup of unsalted butter in a microwave-safe bowl. Heat it in the microwave for about 30 seconds or until almost fully melted, then let it cool to room temperature for 20 minutes. This step is crucial for achieving the soft, chewy texture we love in Kitchen Sink Christmas Cookies.
Step 2: Whisk Dry Ingredients
In a large mixing bowl, combine 2 ½ cups of all-purpose flour, 1 teaspoon of baking powder, ½ teaspoon of baking soda, and ½ teaspoon of salt. Use a whisk to blend the dry ingredients thoroughly until no lumps remain. This blend ensures the right lift and flavor balance in your Kitchen Sink Christmas Cookies.
Step 3: Mix Wet Ingredients
In another bowl, whisk together the cooled melted butter, 1 cup of dark brown sugar, and ½ cup of granulated sugar. Add in 2 large eggs (room temperature) and 1 teaspoon of vanilla extract. Beat together until the mixture is smooth and creamy, incorporating all those sweet flavors to make your cookies delightful.
Step 4: Combine Wet and Dry Mixtures
Gently fold the wet ingredient mixture into the dry ingredients using a rubber spatula. Mix until just combined; be careful not to overmix, as this can lead to tough cookies. The dough should be thick and slightly sticky, ready to welcome in the festive mix-ins.
Step 5: Add Festive Mix-Ins
Now, it’s time to fold in the fun! Add 1 cup of M&Ms, 1 cup of white chocolate chips, 1 cup of broken pretzels, and 1 cup of lightly crushed salted potato chips into the dough. Gently distribute these ingredients evenly throughout the mixture, ensuring every bite of your Kitchen Sink Christmas Cookies is packed with delightful surprises.
Step 6: Scoop Your Dough
Using a cookie scoop or a tablespoon, portion out the cookie dough onto a parchment-lined baking sheet, spacing them about 2 inches apart. Aim for about 1.5 ounces of dough per cookie to ensure they bake uniformly. This size will yield beautifully chewy Kitchen Sink Christmas Cookies.
Step 7: Chill the Dough
Cover the baking sheet with plastic wrap and place it in the refrigerator to chill the cookie dough for at least 1 hour. If you’re in a rush, you can also freeze the dough for 30 minutes. Chilling is essential to prevent too much spreading during baking for those perfect chewy edges.
Step 8: Preheat and Bake
Preheat your oven to 350°F (180°C). Once ready, bake the cookies for 13 to 15 minutes until they are golden around the edges but still soft in the center. For even baking, rotate the baking sheet halfway through the baking time for your Kitchen Sink Christmas Cookies.
Step 9: Shape and Cool
When the cookies are done, remove them from the oven and let them cool on the sheet for a few minutes. While they are still warm, use a large cookie cutter to shape them to your desired form and sprinkle some extra mix-ins on top if desired. This will give them a lovely finish before transferring them to a wire rack to cool completely.
How to Store and Freeze Kitchen Sink Christmas Cookies
Room Temperature: Keep your cookies in an airtight container at room temperature for up to 5 days to maintain their freshness and chewy texture.
Fridge: If you want to extend their shelf life, you can refrigerate them for up to 7 days. Again, place them in an airtight container to prevent them from drying out.
Freezer: For longer storage, freeze cookies in a zip-top bag with as much air removed as possible for up to 3 months. Allow to thaw at room temperature before enjoying.
Reheating: To revive their chewy goodness, reheat cookies in a microwave for about 10 seconds or warm them in an oven at 300°F for a few minutes. Enjoy your delightful Kitchen Sink Christmas Cookies!
What to Serve with Kitchen Sink Christmas Cookies
These delightful treats are perfect for enhancing your holiday gatherings and spreading festive joy!
-
Hot Cocoa: This classic beverage pairs beautifully, with rich chocolate complementing the cookies’ sweet and salty elements for a cozy treat.
-
Eggnog: Creamy and spiced, eggnog adds a festive flair that balances the chewiness of the cookies, creating a memorable holiday experience.
-
Fruit Salad: A refreshing burst of seasonal fruits provides a bright contrast to the indulgent cookies; it’s a light option to balance out the sweetness.
-
Milk: A timeless pairing, a glass of cold milk enhances the cookies’ flavors and textures, ensuring every bite is a delightful experience.
-
Coffee or Tea: The warmth of these beverages brings out the flavors in the cookies, making them perfect for a holiday morning or afternoon snack.
-
Cheese Platter: An assortment of soft cheeses can create an exciting sweet and savory combo, elevating your cookie experience to an elegant level.
-
Ice Cream Sundae: Top your cookies with a scoop of vanilla ice cream, drizzled with hot fudge; it transforms each cookie into a decadent dessert treasure!
-
Chocolate-Covered Pretzels: For an added crunch, serve these alongside your cookies—layering on that sweet-and-salty delight while tying in their mix-ins beautifully.
Make Ahead Options
These Kitchen Sink Christmas Cookies are perfect for busy home cooks looking to save time during the holidays! You can prepare the cookie dough up to 24 hours in advance by mixing all the ingredients and chilling the dough in the refrigerator. To maintain the cookies’ texture and flavor, be sure to cover the dough tightly with plastic wrap. When you’re ready to bake, simply scoop the chilled dough onto lined baking sheets and bake as directed. Enjoy the delightful aroma and the joy of serving freshly baked cookies with minimal effort on the day of your gathering!
Kitchen Sink Christmas Cookies Variations
Feel free to let your creativity shine with these delightful tweaks to your cookie recipe!
-
Nutty Bliss: Swap out pretzels for chopped nuts like pecans or walnuts for a rich, nutty flavor. This addition not only enhances taste but also adds a delightful crunch.
-
Chocoholics’ Delight: Use different types of chocolate, such as dark or milk chocolate chips, to customize the sweetness. Each chocolate brings out its unique flavor, making every bite a new adventure!
-
Fruity Twist: Incorporate dried fruits like cranberries or apricots for a chewy texture and a burst of natural sweetness. This variation adds a lovely color contrast to your cookies, making them even more festive.
-
Spicy Kick: Mix in a pinch of cayenne pepper or sprinkle some cinnamon for a surprising heat twist. Spices not only boost flavor but also warm the heart, making your cookies even more memorable.
-
Flavorful Granola: For a wholesome spin, add some granola to the mix for added texture and fiber. Your cookies will have an extra crunch reminiscent of a granola bar with a fun cookie twist.
-
S’mores Style: Replace the M&Ms with mini marshmallows and graham cracker crumbs for a gooey, s’mores-inspired treat. These cookies will evoke cozy campfire memories with each bite!
-
Delicious Dipping: Serve these cookies alongside a scoop of vanilla ice cream or a drizzle of melted chocolate for an indulgent dessert experience. Sharing with loved ones makes it all the more special!
Whether you stick to the classics or let your creativity soar, these Kitchen Sink Christmas Cookies will surely brighten your festive gatherings. If you’re in need of more sweet ideas, check out our delicious Cinnamon Roll Cookies or the popular Chocolate Chip Cookies!
Expert Tips for Kitchen Sink Christmas Cookies
-
Measuring Flour Properly: Always spoon and level your flour to avoid using too much, which can lead to dry cookies.
-
Chill Your Dough: Chilling the dough for at least an hour helps prevent spreading, ensuring your Kitchen Sink Christmas Cookies maintain that perfect chewy texture.
-
Use Room Temperature Eggs: This helps incorporate ingredients more evenly and creates a smoother batter for better results.
-
Watch the Baking Time: Every oven is different. Keep an eye on your cookies; they should be golden around the edges but soft in the center for the best chewy outcome.
-
Add Extra Mix-Ins: Don’t hesitate to sprinkle more festive mix-ins on top right after baking for added texture and visual appeal!
Kitchen Sink Christmas Cookies Recipe FAQs
How do I choose the right mix-ins for my Kitchen Sink Christmas Cookies?
Absolutely! The beauty of Kitchen Sink Christmas Cookies lies in their customization. You can mix in anything your heart desires, but I usually recommend balancing textures and flavors. For crunch, consider pretzels or nuts, while sweet toppings like M&Ms and white chocolate chips add delightful bursts of flavor. Keep in mind the ratios; around 2 to 2.5 cups of mix-ins should do the trick, so don’t hesitate to experiment!
What’s the best way to store Kitchen Sink Christmas Cookies?
Very important! To keep your cookies fresh, store them in an airtight container at room temperature for up to 5 days. If you want to enjoy them longer, consider refrigerating them for up to 7 days, again ensuring they are stored airtight. This helps maintain their savory chewiness while preventing drying out.
Can I freeze Kitchen Sink Christmas Cookies?
Absolutely! You can freeze these beauties for up to 3 months. Just place cooled cookies in a zip-top bag, squeezing out as much air as possible, and then seal it tightly. For the best texture, allow them to thaw at room temperature for a couple of hours before enjoying. If you want a warm treat, you can reheat them in a microwave for about 10 seconds or pop them in a 300°F oven for a few minutes.
My cookies flatten out too much while baking. What did I do wrong?
Oh no, don’t worry! There are a couple of common culprits for cookie spreading. First, ensure you’re chilling the dough for at least an hour; this helps firm up the butter and prevent excess spreading during baking. Also, double-check that you measured your flour correctly—spooned and leveled, not scooped directly from the bag. Lastly, ensure your baking soda and powder are fresh, as they’re crucial for proper lift!
Are there any allergy considerations when making these cookies?
Definitely! If you’re making these Kitchen Sink Christmas Cookies for friends or family, keep in mind common allergens like gluten, dairy, and nuts. You can substitute gluten-free flour for a gluten-free version. Some chocolate brands offer dairy-free options as well. Always inform guests of mixed-ins like nuts or pretzels, which can contain allergens, ensuring everyone can enjoy them without worry.
Chewy Kitchen Sink Christmas Cookies for Your Sweetest Holiday
Ingredients
Equipment
Method
- Melt the Butter: Start by melting unsalted butter in a microwave-safe bowl for about 30 seconds until almost melted. Cool for 20 minutes.
- Whisk Dry Ingredients: In a large bowl, combine all-purpose flour, baking powder, baking soda, and salt. Whisk until no lumps remain.
- Mix Wet Ingredients: In another bowl, whisk together melted butter, dark brown sugar, and granulated sugar. Add eggs and vanilla extract, mixing until smooth.
- Combine Wet and Dry Mixtures: Gently fold wet ingredients into dry ingredients until just combined; dough should be thick and slightly sticky.
- Add Festive Mix-Ins: Fold in M&Ms, white chocolate chips, broken pretzels, and crushed potato chips evenly throughout the dough.
- Scoop Your Dough: Portion out the dough onto a parchment-lined baking sheet, spacing them 2 inches apart, aiming for 1.5 ounces per cookie.
- Chill the Dough: Cover the baking sheet and chill the dough in the refrigerator for at least 1 hour.
- Preheat and Bake: Preheat oven to 350°F (180°C) and bake cookies for 13-15 minutes until golden around the edges and soft in the center.
- Shape and Cool: Let cookies cool briefly, shape with a cookie cutter if desired, and sprinkle extra mix-ins on top before cooling completely on a wire rack.
Leave a Reply