
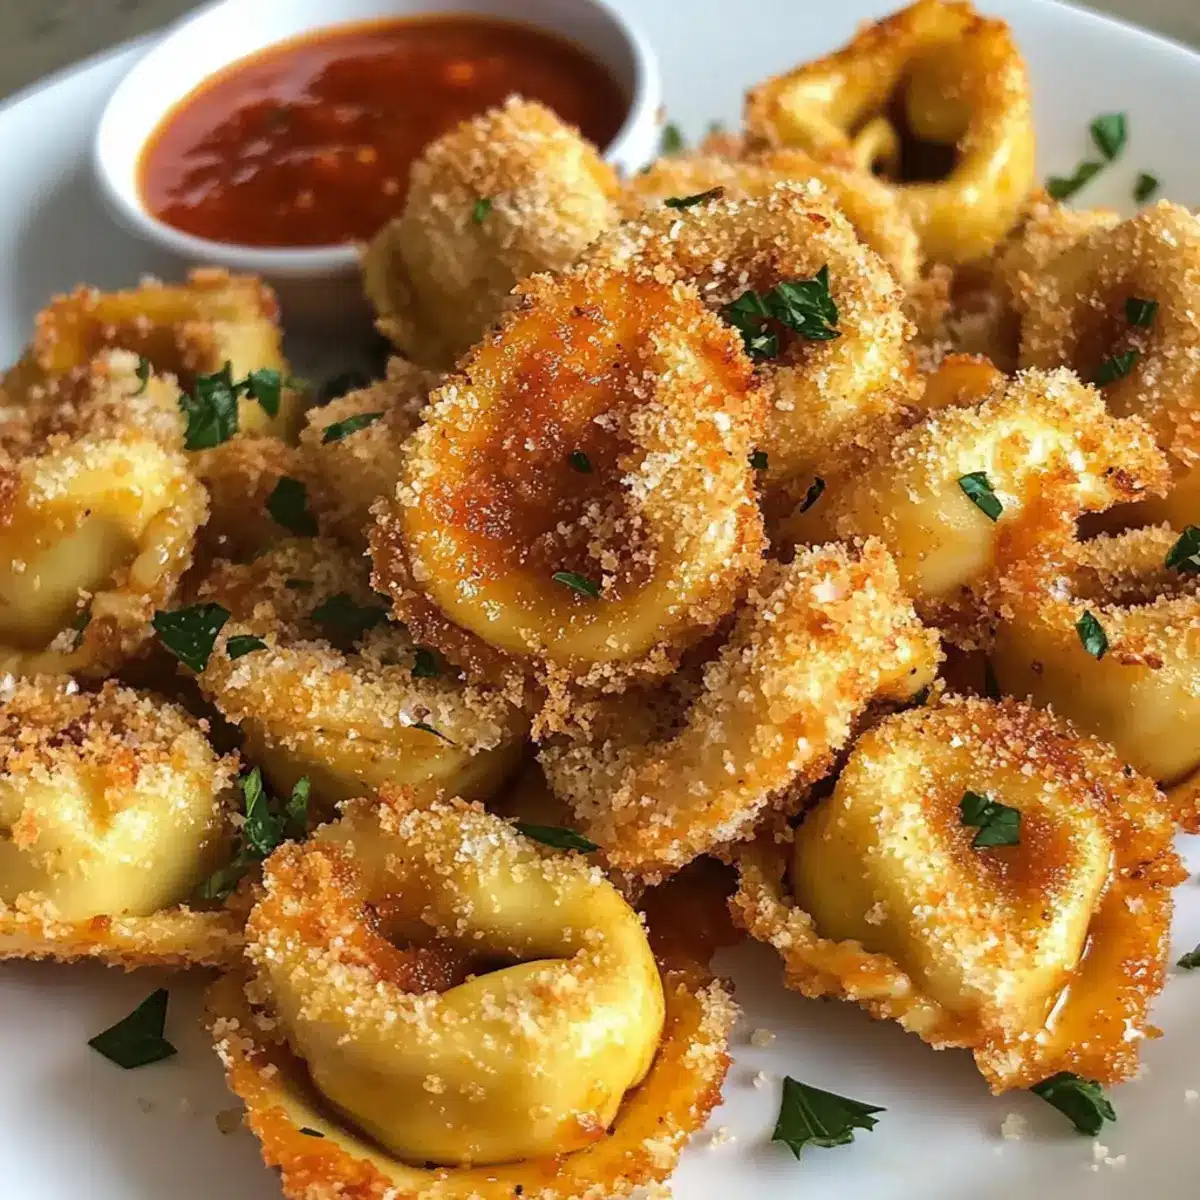
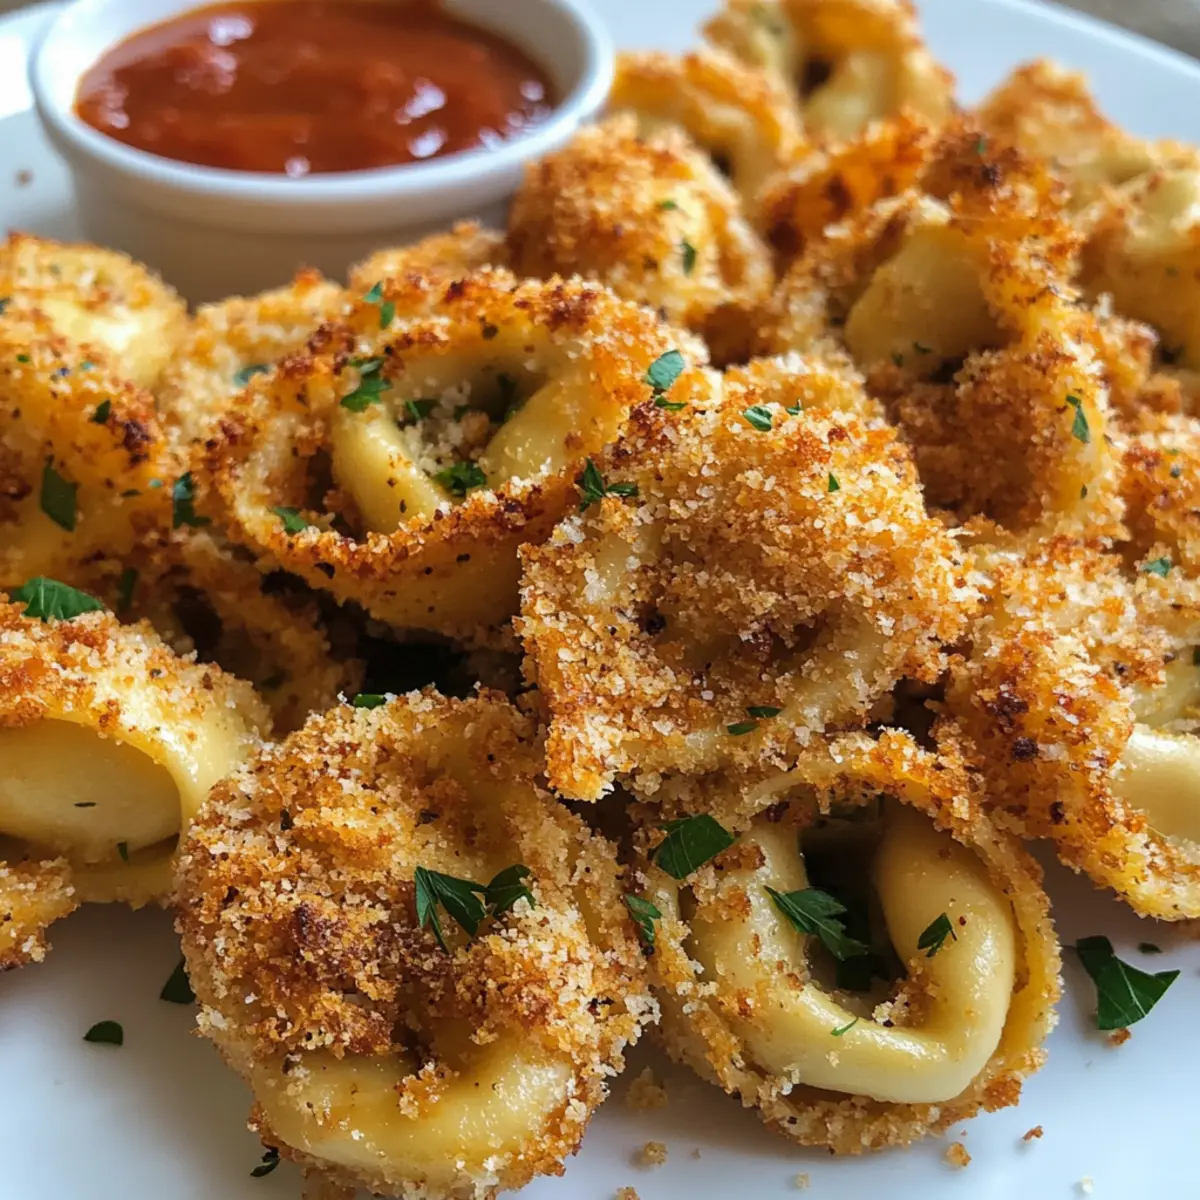
The first crunch you hear as you bite into these Easy Baked Tortellini Party Snacks brings a joyful surprise that instantly elevates any gathering. When friends gather for game day or a cozy movie night, nothing complements the fun quite like these irresistible appetizers. Not only are they super quick to whip up—ready in just 30 minutes—but they also boast a delightful contrast of soft, cheesy interior and golden, crispy exterior. This fabulous finger food not only pleases the crowd but allows for endless creativity; you can easily adapt the tortellini filling and serve them with a variety of dipping sauces. Curious about how to make these scrumptious bites? Let’s dive into this delicious world of baked tortellini goodness!

Why Are These Tortellini Snacks So Irresistible?
Crowd-Pleasing Appeal: These Crispy Tortellini Party Snacks are perfect for any gathering, making them a hit at game nights and casual get-togethers.
Quick and Easy: With only 30 minutes needed to prepare and bake, they’re a hassle-free appetizer choice.
Flavorful Diversity: Each bite offers a savory explosion from the cheesy tortellini and crunchy coating, making them utterly addictive.
Adaptable Recipe: Feel free to personalize your tortellini with various fillings such as cheese or spinach for a unique twist, tailoring them to your audience’s tastes.
For other effortless finger foods, check out the delightful Crockpot Chicken Tortellini.
Perfect for Dipping: Whether paired with marinara, ranch, or pesto, these snacks ensure everyone leaves satisfied!
Tortellini Party Snacks Ingredients
For the Tortellini
• Tortellini – Choose your favorite filling; both cheese and meat varieties work well for these tortellini party snacks.
For the Coating
• Bread Crumbs – Use traditional bread crumbs for a classic crunch; panko can elevate the texture for extra crispiness.
• Parmesan Cheese – Adds a rich, cheesy flavor; for a different twist, consider mozzarella or a dairy-free substitute if needed.
• Chili Flakes – Sprinkle in for a touch of heat; adjust to your preference or omit for a milder version.
• Butter – This adds richness and browns the coating; swap it out for olive oil for a lighter, vegan alternative.
For Serving
• Marinara Sauce – A tangy dip that complements the cheesy tortellini; you can use store-bought or homemade based on your time and preference.
• Optional Garnish – Fresh parsley or extra Parmesan cheese can enhance presentation and flavor; feel free to add before serving!
These Tortellini Party Snacks are not only easy to make but also a fantastic way to add some flavorful fun to your next gathering!
Step‑by‑Step Instructions for Tortellini Party Snacks
Step 1: Preheat the Oven
Begin by preheating your oven to 400°F (200°C). This will ensure that your Tortellini Party Snacks bake evenly and achieve that perfect golden-brown color. While the oven is warming, gather your ingredients and set up a baking sheet lined with parchment paper for easy cleanup.
Step 2: Cook the Tortellini
In a large pot, boil salted water according to package instructions and cook the tortellini until al dente, usually about 4-5 minutes. Once cooked, drain the tortellini and let them cool slightly. This step is crucial for achieving the ideal texture since they will continue baking in the oven.
Step 3: Prepare the Coating
In a mixing bowl, melt a few tablespoons of butter and combine it with breadcrumbs, grated Parmesan cheese, and chili flakes. Stir the mixture until all the breadcrumbs are coated evenly. This flavorful coating will create a crispy exterior for your tortellini snacks, enhancing each bite.
Step 4: Coat the Tortellini
Using your hands or a fork, take each tortellini and dip it into the breadcrumb mixture, ensuring each piece is fully coated. Place the coated tortellini on the prepared baking sheet in a single layer, ensuring they have enough space to crisp up without sticking together.
Step 5: Bake to Perfection
Transfer the baking sheet to the preheated oven and bake the tortellini for about 15 minutes, or until they are golden brown and crispy. Keep an eye on them during the last few minutes to prevent over-browning. The enticing aroma will fill your kitchen as they cook!
Step 6: Garnish and Serve
Once baked, remove the tortellini snacks from the oven and let them cool for a couple of minutes. For an extra touch, sprinkle additional Parmesan cheese and freshly chopped parsley on top. Serve them warm with a side of marinara sauce for dipping, making your Tortellini Party Snacks an irresistible treat!
Expert Tips for Tortellini Party Snacks
-
Perfect Cooking: Ensure tortellini is al dente: Overcooking will leave them mushy after baking. Aim for slightly undercooked while boiling.
-
Crunch Factor: Use panko breadcrumbs: They create a lighter, airier texture than regular breadcrumbs, enhancing that desirable crispy bite.
-
Make-Ahead Magic: Prep in advance: Assemble the snacks, then refrigerate. Bake them just before serving for optimal freshness and crunch.
-
Watch the Time: Keep an eye on baking: Start checking at 12 minutes to prevent burning. Every oven is different, so adjust accordingly.
-
Flavor Customization: Experiment with fillings: Use different tortellini fillings like spinach or butternut squash to elevate these Tortellini Party Snacks and cater them to your guests’ tastes.
Make Ahead Options
These Tortellini Party Snacks are perfect for meal prep, making your gathering planning a breeze! You can assemble the tortellini, coat them in breadcrumbs, and refrigerate them for up to 24 hours before baking. Simply line a baking sheet with parchment, place the coated tortellini in a single layer, and cover tightly with plastic wrap or foil to maintain their quality. When you’re ready to serve, preheat your oven and bake the tortellini directly from the fridge, adding a couple of extra minutes to the cooking time if needed. This way, you can enjoy delightful, crispy tortellini snacks without the last-minute rush!
How to Store and Freeze Tortellini Party Snacks
Fridge: Store any leftover tortellini snacks in an airtight container for up to 3 days. Reheat in the oven for a few minutes to regain their crispy texture.
Freezer: To freeze, place uncooked, coated tortellini snacks on a baking sheet until firm, then transfer to a freezer-safe bag. They can be frozen for up to 3 months.
Reheating: When ready to enjoy, bake from frozen at 400°F (200°C) for an additional 5-10 minutes until heated through and crispy again.
Make-Ahead Tip: Preparing these tortellini party snacks ahead of time allows for seamless party planning and delightful snacking at your gatherings.
Tortellini Party Snacks Variations
Feel free to give these delightful bites your own twist for an even more personalized experience!
- Gluten-Free: Use gluten-free tortellini to make these snacks accessible for everyone at your gathering.
- Vegan Delight: Swap Parmesan for nutritional yeast or a dairy-free cheese alternative to keep this recipe friendly for vegan diets. It still delivers on flavor!
- Stuffed Goodness: Try different tortellini fillings like roasted red pepper and feta for a Mediterranean flair or a classic cheese blend for comfort vibes.
- Herb-Infused: Add dried herbs like oregano or basil to the breadcrumb mixture for a burst of Mediterranean flavor that elevates the whole dish.
- More Crunch: Consider mixing in crushed nuts or seeds with the breadcrumbs for an extra crunchy texture that adds a fun twist to every bite.
- Spicy Kick: For those who love a bit of heat, add jalapeños or pepper jack cheese into the tortellini filling to spice things up.
- Savory Sauces: Serve alongside various sauces beyond marinara, like a tangy yogurt dip or a spicy sriracha mayo, perfect for catering to diverse palettes.
- Cheesy Layers: Stuff each tortellini with a blend of ricotta and herbs before coating, creating an even more indulgent and flavorful snack option.
Looking for a comforting meal option to pair with these tasty treats? Check out the smooth and satisfying Crockpot Chicken Tortellini for a delightful dinner idea!
What to Serve with Easy Baked Tortellini Party Snacks
Elevate your cozy gatherings with delightful side dishes and beverages that perfectly accompany these charming bites.
-
Creamy Spinach Dip: This rich dip adds a burst of flavor, balancing the crispy tortellini with its creamy texture. It’s an all-time favorite that invites guests to indulge.
-
Garlic Breadsticks: With their soft, doughy interior and crispy exterior, these breadsticks are perfect for dipping and complement the savory tortellini beautifully.
-
Caprese Salad: Fresh tomatoes, basil, and mozzarella provide a refreshing contrast. The vibrant colors and zesty flavors lift the meal, making it feel festive.
-
Roasted Vegetables: A medley of seasonal veggies roasted until caramelized adds a nutritious, earthy note and beautiful color to the table, balancing out the rich tortellini.
-
Bruschetta: This crisp, topped bread pairs well with the tortellini. The bright, garlicky toppings enhance the overall flavor, creating a delightful culinary mix.
-
Crispy Potato Wedges: These golden wedges add a satisfying crunch and offer a hearty contrast, creating a comforting snack alongside the soft tortellini bites.
-
Chilled White Wine: A refreshing glass of Sauvignon Blanc complements the savory notes of the appetizers, making it an ideal drink choice that pairs excellently with Italian flavors.
-
Tiramisu: Finish the meal with this classic Italian dessert for a sweet surprise, enhancing the overall dining experience with its rich, coffee-infused layers.

Tortellini Party Snacks Recipe FAQs
What type of tortellini should I use for the best flavor?
Absolutely! For the best flavor, choose tortellini with a robust filling like cheese, spinach, or meat. Each filling brings a unique taste and complements the crispy coating beautifully. You can also opt for gluten-free tortellini if dietary needs require it.
How should I store leftover tortellini snacks?
Store any leftover tortellini snacks in an airtight container in the refrigerator for up to 3 days. To ensure they regain their crispiness, reheat them in the oven at 350°F (175°C) for approximately 5-10 minutes.
Can I freeze the tortellini snacks after coating them?
Yes, you can! To freeze, place the uncooked, coated tortellini snacks on a baking sheet lined with parchment paper and freeze until firm. Once firm, transfer them to a freezer-safe bag or container. They can be stored for up to 3 months. When ready to bake, cook from frozen at 400°F (200°C), adding 5-10 minutes to the original baking time.
What’s a common troubleshooting tip if my tortellini snacks aren’t crispy?
If your tortellini snacks are not as crispy as desired, consider using panko breadcrumbs for a lighter texture. Additionally, ensure that the oil or melted butter is evenly distributed in your coating mixture. Finally, don’t overcrowd the baking sheet, as this can trap steam and prevent crispness.
Are these tortellini snacks suitable for vegetarians or those with allergies?
Definitely! You can easily adapt these tortellini party snacks for vegetarian diets by choosing vegetarian tortellini and swapping out the cheese for vegan options if dairy is a concern. Always check the ingredient labels for allergens, especially if serving guests with dietary restrictions.
Crispy Tortellini Party Snacks for Fun Gatherings
Ingredients
Equipment
Method
- Preheat your oven to 400°F (200°C). Gather your ingredients and line a baking sheet with parchment paper.
- Boil salted water and cook the tortellini until al dente (about 4-5 minutes), then drain.
- Melt butter in a bowl and mix it with breadcrumbs, Parmesan cheese, and chili flakes until evenly coated.
- Dip each tortellini into the breadcrumb mixture, ensuring they are fully coated. Place them on the baking sheet.
- Bake for 15 minutes or until golden brown and crispy. Watch closely to avoid over-browning.
- Let them cool slightly, then garnish with additional Parmesan and parsley before serving with marinara sauce.
Leave a Reply