
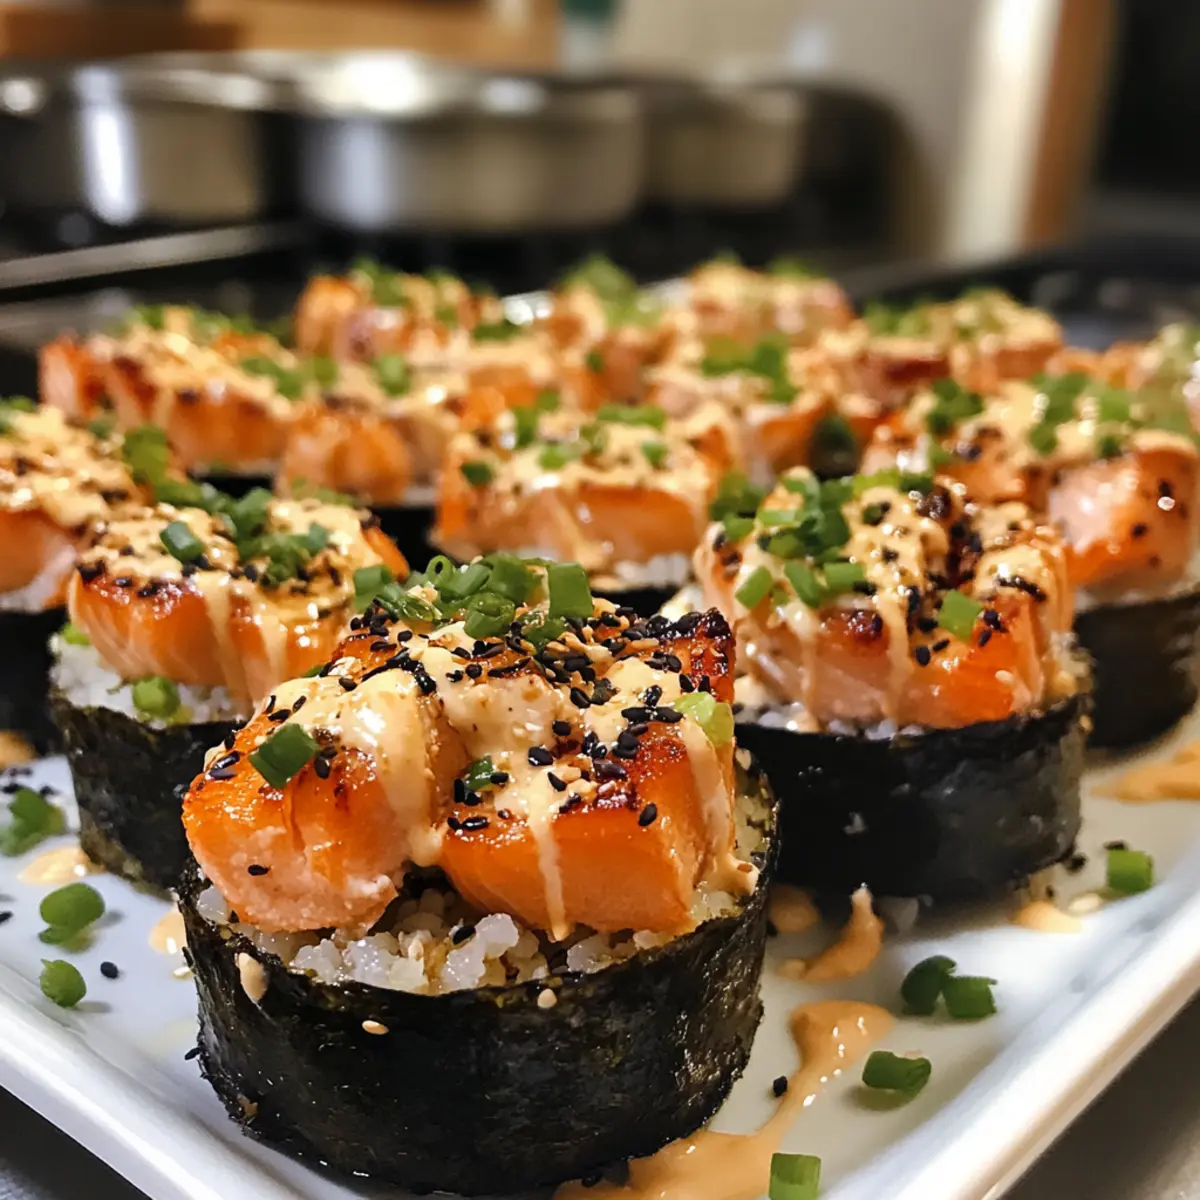
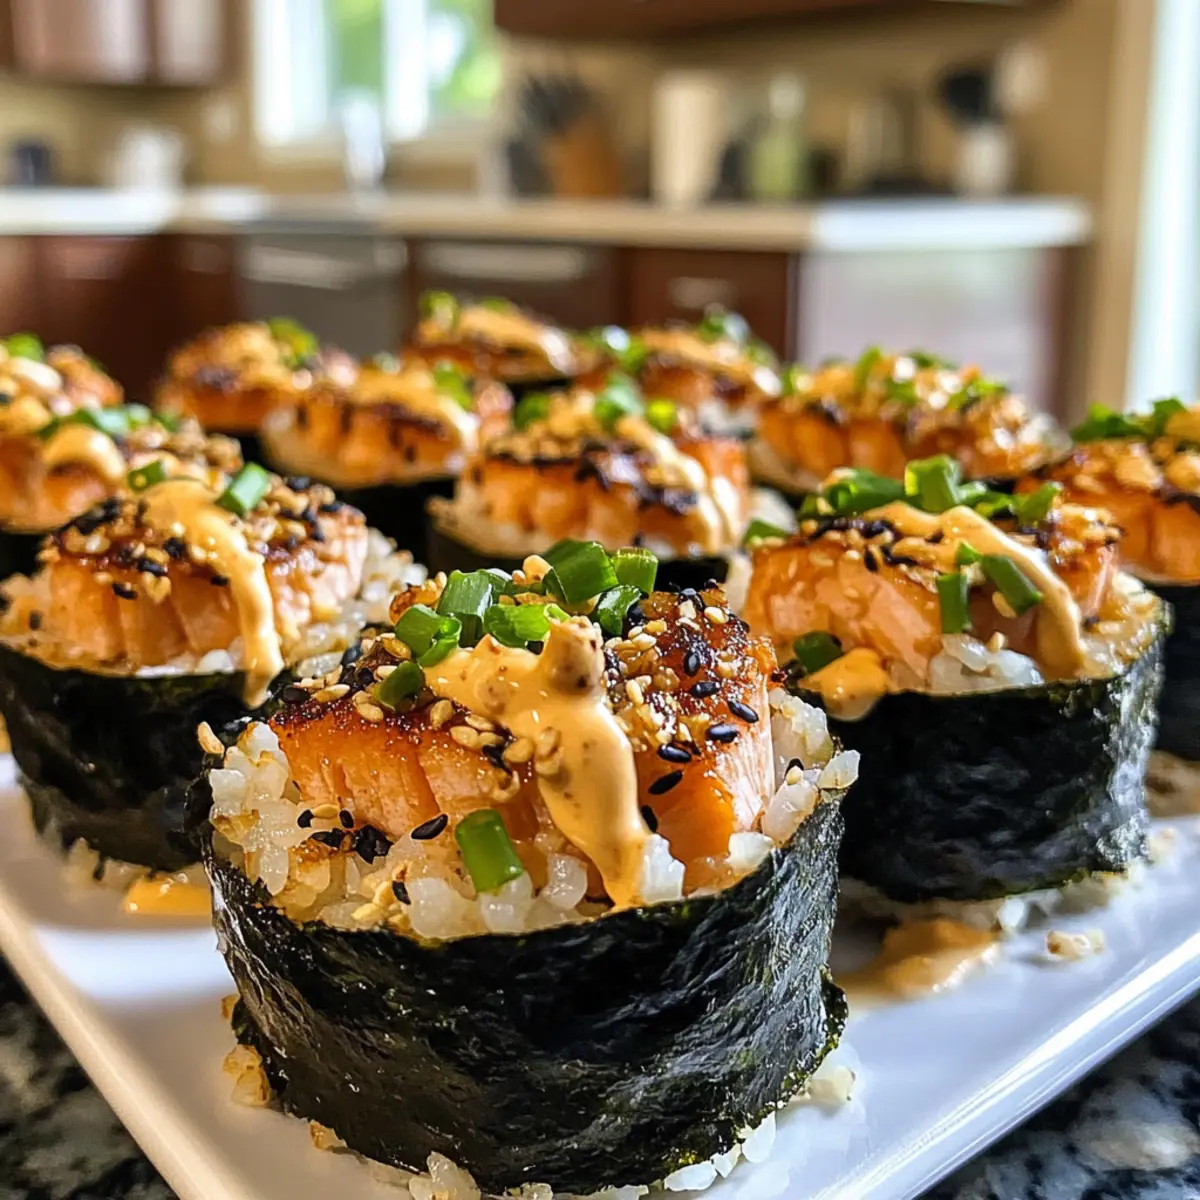
The aroma of freshly baked sushi cups wafts through my kitchen, and I can’t help but smile at how easy it is to create something so vibrant and delicious. Introducing my Easy Baked Salmon Sushi Cups—a warm, fun twist on the classic sushi roll. These delightful morsels pair beautifully tender salmon with slightly sticky sushi rice, all snugly wrapped in a crispy nori cup. Whether you’re hosting a gathering or craving a unique snack, these baked sushi cups bring smiles and satisfied appetites to the table. Plus, they come together in a snap, making them perfect for busy weeknights or impromptu get-togethers. Want to impress your friends with a crowd-pleaser that’s as simple as it is flavorful? Let’s dive into this tasty recipe!

Why Are These Sushi Cups the Best?
Unique Twist: Experience sushi like never before with these baked delights that combine traditional flavors in an easy, deconstructed format.
Crowd Pleaser: Perfect for gatherings, these cups look stunning and taste exceptional, ensuring everyone will come back for seconds.
Quick to Prepare: With minimal prep and cook time, you can whip these up in a flash—ideal for busy evenings or last-minute invitations.
Versatile Ingredients: Feel free to experiment! Swap salmon for shrimp or add veggies like avocado for a refreshing twist.
Flavor Explosion: Each bite encapsulates a savory blend of tender salmon, sticky rice, and zesty toppings, leaving your taste buds wanting more.
Elevate your appetizers with these delicious Baked Salmon Sushi Cups, and for another easy dish, check out the delightful Cheesecake Cookie Cups.
Baked Salmon Sushi Cups Ingredients
Get ready to create a delightful dish with these essential ingredients!
For the Sushi Cups
• Salmon – Fresh or frozen, cubed salmon adds rich flavor and protein. Substitute with cooked crab or shrimp if preferred.
• Sushi Rice – The base for the cups; regular short-grain rice can be used, but texture may vary.
• Nori Sheets – Used to hold the sushi cups; ensure they are cut well to fit the muffin tin.
• Light Soy Sauce – Provides umami flavor and seasoning. Can be replaced with tamari for a gluten-free version.
• Rice Vinegar – Adds acidity to the rice; no suitable substitute would maintain the original taste integrity.
• White Sugar – Balances acidity; can use honey or mirin in smaller quantities.
For the Salmon Mixture
• Kewpie Mayo – Adds creaminess and tang. Use regular mayo as a substitute, but flavor will differ.
• Sriracha – For heat and flavor; adjust the amount based on spice preference.
• Sesame Oil – Offers a nutty aroma and taste. Can replace with olive oil for a milder flavor.
• Green Onion – Freshness and crunch; parsley can be an alternative.
For Garnish
• Furikake – A blend of seaweed and sesame for added flavor; omit if unavailable.
Get excited about whipping up these irresistible Baked Salmon Sushi Cups that everyone will love!
Step‑by‑Step Instructions for Easy Baked Salmon Sushi Cups
Step 1: Prepare Sushi Rice
Begin by cooking sushi rice according to the package instructions, usually about 20 minutes, until fluffy and sticky. In a microwave-safe bowl, mix rice vinegar and sugar until dissolved, then fold this mixture into the warm rice gently to avoid mashing. Allow the seasoned rice to cool, as it will be the base of your Baked Salmon Sushi Cups.
Step 2: Mix Salmon
In a medium bowl, combine cubed salmon with light soy sauce, Kewpie mayo, sriracha, and sesame oil. Use a spatula to gently mix until all ingredients are evenly coated, creating a flavorful fusion. Set this salmon mixture aside while you prepare the muffin tin, as the flavors will meld beautifully during this time.
Step 3: Preheat Oven
Preheat your oven to 400°F (200°C) to ensure it reaches the optimal temperature for baking the cups. As the oven heats, prepare your muffin tin by lightly greasing each cup to prevent sticking. This step is crucial for achieving those golden, crunchy edges of the Baked Salmon Sushi Cups.
Step 4: Assemble Cups
Cut nori sheets into squares that will comfortably fit into the muffin tin cups. Place a square of nori in each greased cup, gently pressing it into the bottom. Spoon a generous amount of sushi rice into each nori cup, pressing it down firmly before adding a layer of the salmon mixture on top. This layering creates a delightful contrast in textures.
Step 5: Bake
Carefully place the muffin tin in the preheated oven and bake for about 15 minutes. Keep an eye out for the salmon to turn opaque and cooked through, while the nori edges become crispy and lightly golden. The enticing aroma will fill your kitchen, signaling that your Baked Salmon Sushi Cups are close to perfection.
Step 6: Garnish & Serve
Once baked, remove the sushi cups from the oven and allow them to cool for a minute. Drizzle with additional sriracha or spicy mayo, then sprinkle with furikake and chopped green onions for a burst of color and flavor. Serve these delightful Baked Salmon Sushi Cups warm, perfect for entertaining or a casual snack!
Make Ahead Options
These Easy Baked Salmon Sushi Cups are perfect for meal prep enthusiasts looking to save time during busy weeknights! You can prepare the sushi rice and the salmon mixture up to 24 hours in advance, storing them separately in airtight containers in the refrigerator. To maintain the quality, keep the sushi rice wrapped to prevent it from drying out and refrigerate the salmon mixture in a tightly sealed container. When you’re ready to enjoy your sushi cups, simply assemble them in the muffin tin and bake as instructed for about 15 minutes until golden and cooked through. This way, you’ll have a delicious meal with minimal last-minute effort!
Variations & Substitutions for Baked Salmon Sushi Cups
Feel free to let your creativity shine while making these delightful sushi cups!
- Tuna Twist: Swap salmon for fresh tuna for a different yet delightful flavor experience. Each bite will feel like a new adventure!
- Plant-Based: Use cubed tofu or tempeh instead of salmon for a vegan-friendly option that still holds onto the delicious essence of sushi. The texture will be pleasantly chewy!
- Add Veggies: Mix in diced cucumber or avocado with the salmon for a fresh, crunchy texture that complements the rich flavors beautifully. Don’t forget, more colors mean more fun!
- Spicy Kick: Increase the amount of sriracha or add chopped jalapeños for a fiery twist. Your taste buds will be dancing with joy!
- Cheesy Delight: Incorporate cream cheese into the salmon mixture for a creamy, indulgent treat that adds a whole new layer of lusciousness. Just imagine that smooth, velvety bite!
- Herb Infusion: Try adding fresh herbs like cilantro or basil to the mix; these will elevate the flavors and provide a refreshing taste in every mouthful. It’s a herbaceous hug!
- Gluten-Free Option: Substitute regular soy sauce with tamari to cater to gluten-intolerant friends without compromising on flavor. Everyone deserves to indulge!
These flexible ideas can take your Baked Salmon Sushi Cups from delightful to extraordinary, just like the comforting Crispy Salmon and Rice Bowl!
Storage Tips for Baked Salmon Sushi Cups
- Fridge: Store leftover Baked Salmon Sushi Cups in an airtight container for up to 2-3 days to maintain their flavor and texture.
- Freezer: For longer storage, freeze the sushi cups (unbaked) in a single layer on a baking sheet, then transfer to an airtight container, and they’ll last for up to 1 month.
- Reheating: When ready to enjoy, reheat baked cups in the oven at 350°F (175°C) for about 10 minutes, or microwave until warmed through. This will help regain some crispiness.
- Freshness Tip: Consider adding a drizzle of fresh sriracha or spicy mayo just before serving to amp up the flavor each time you enjoy these delightful bites!
Expert Tips for Baked Salmon Sushi Cups
- Perfect Salmon: Ensure the salmon is cubed evenly for consistent cooking. Overly large pieces may not cook through and will affect the overall taste.
- Gentle Mixing: Avoid overmixing the sushi rice after incorporating the vinegar mixture. This keeps the rice fluffy and avoids a mushy texture in your Baked Salmon Sushi Cups.
- Nori Preparation: Cut nori sheets into sizes that fit your muffin tin snugly, ensuring they will hold their shape. Check for any tears that might lead to spillage.
- Watch the Baking Time: Keep an eye on the baking process, as different ovens may vary. You want a golden and crispy finish without burning the nori.
- Cooling Time: Let the sushi cups rest for a moment before serving, allowing the flavors to settle and preventing burns from hot toppings.
What to Serve with Easy Baked Salmon Sushi Cups
Elevate your dining experience with delicious accompaniments that perfectly complement these scrumptious bites of flavor.
-
Crispy Edamame: These lightly salted, steamed soybeans add a playful crunch and pack a protein punch, perfectly balancing the sushi cups.
-
Cucumber Salad: A refreshing side of sliced cucumbers tossed in rice vinegar and sesame oil provides a cool contrast, brightening the meal.
-
Pickled Ginger: This traditional sushi accompaniment offers a zesty, tangy kick that cleanses the palate, enhancing the savory richness of the sushi cups.
-
Spicy Crab Salad: Add a creamy and spicy flair with a quick crab salad made with mayo and sriracha to echo the flavors of the salmon, creating a delightful harmony on your plate.
-
Miso Soup: A warm bowl of miso soup serves as a cozy addition, the umami-rich broth wrapping you in comfort while balancing the sushi’s richness.
-
Sauvignon Blanc: Pair with a chilled glass to elevate the meal; its crisp acidity complements the flavors while refreshing the palate between bites.
These pairing ideas will not only enhance your tasting experience but also create a lovely spread that’s perfect for your gathering or a cozy night in!

Easy Baked Salmon Sushi Cups Recipe FAQs
What type of salmon should I use for this recipe?
Absolutely! Fresh or frozen cubed salmon works wonderfully in this recipe. If you’re not a salmon fan, you can easily substitute it with cooked crab or shrimp for a delightful twist.
How should I store leftover sushi cups?
Very! Store leftover Baked Salmon Sushi Cups in an airtight container in the refrigerator for up to 2-3 days. This helps maintain their flavor and texture, ensuring you can enjoy them again!
Can I freeze the sushi cups?
Definitely! For long-term storage, freeze the sushi cups before baking. Place them in a single layer on a baking sheet until solid, then transfer to an airtight container. They can be frozen for up to 1 month. When ready to bake, simply pop them in the oven from frozen, adding a few extra minutes to the baking time.
What should I do if the sushi cups don’t hold their shape?
If your cups are falling apart, it might be due to the nori sheets being too large or not pressed firmly enough into the muffin tin. Ensure that your nori sheets fit snugly and that you press the sushi rice down firmly before adding the salmon mixture. If you notice edges curling up, you may need to bake for a longer time to ensure they’re cooked through.
Are these sushi cups gluten-free?
Absolutely! To make your Baked Salmon Sushi Cups gluten-free, simply replace the light soy sauce with tamari. This substitution maintains the delicious umami flavor without the gluten, making it a safe option for those with dietary restrictions.
Irresistible Baked Salmon Sushi Cups for Easy Entertaining
Ingredients
Equipment
Method
- Prepare sushi rice by cooking according to package instructions (around 20 minutes) until fluffy and sticky.
- Mix rice vinegar and sugar in a microwave-safe bowl until dissolved and fold into warm rice.
- Preheat oven to 400°F (200°C) and grease muffin tin.
- Cut nori sheets into squares to fit each muffin cup and press into the cups.
- Fill nori cups with a layer of sushi rice, then top with the salmon mixture.
- Bake for about 15 minutes until salmon is cooked through and nori is crispy.
- Allow to cool briefly, then garnish with sriracha, furikake, and green onions.
Leave a Reply