
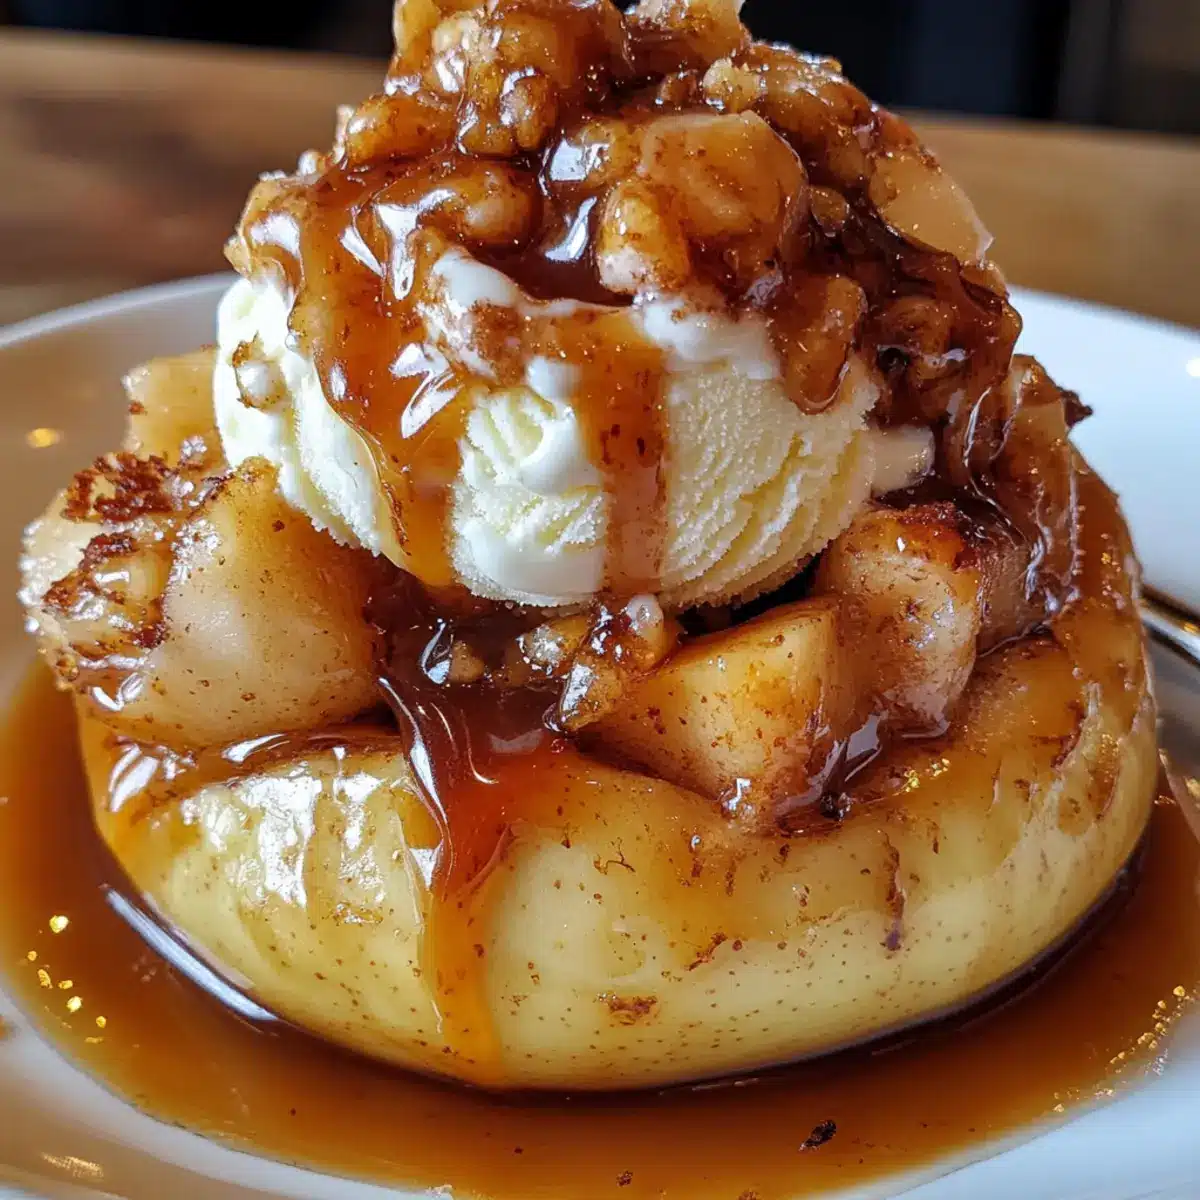
As the leaves turn and the air gets a little crisp, I can’t help but crave a taste of autumn. That’s when I turn to my favorite fall dessert: Bloomin’ Apples. These breathtaking beauties not only look like they’ve stepped straight out of a fairy tale, but they’re also incredibly easy to make, making them perfect for any occasion. Each tender, baked apple opens up to reveal a gooey caramel center, creating an interactive dessert experience that ignites pure joy. Plus, they pair perfectly with a scoop of creamy vanilla ice cream and a drizzle of caramel sauce, transforming any gathering into a cozy celebration. Are you ready to bring a little magic into your kitchen? Let’s dive into this delightful recipe!
Why are Bloomin’ Apples a must-try?
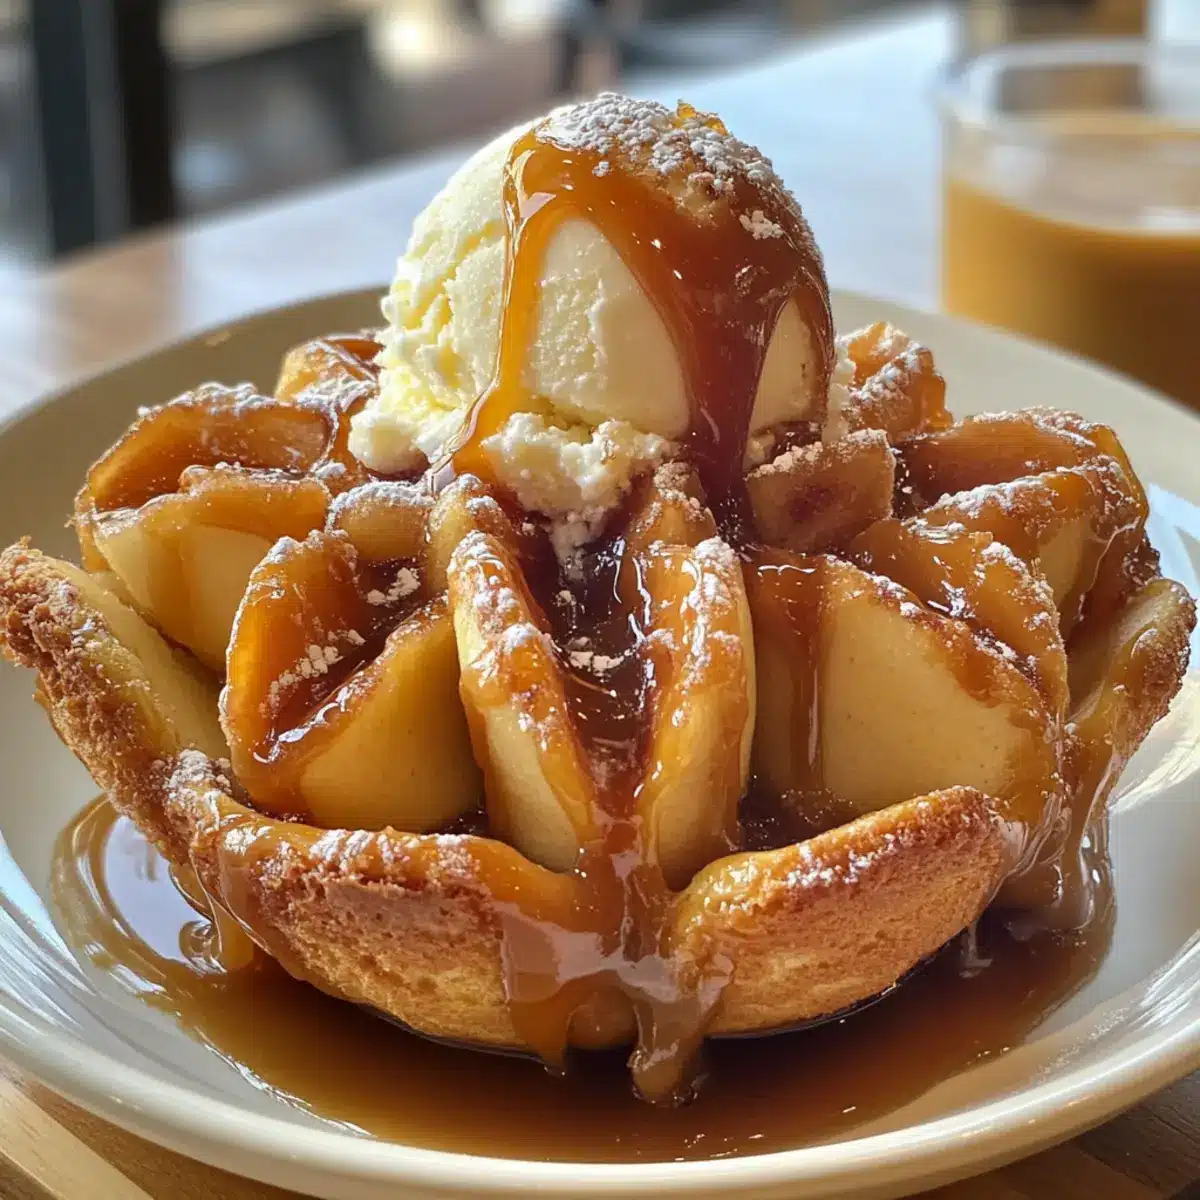
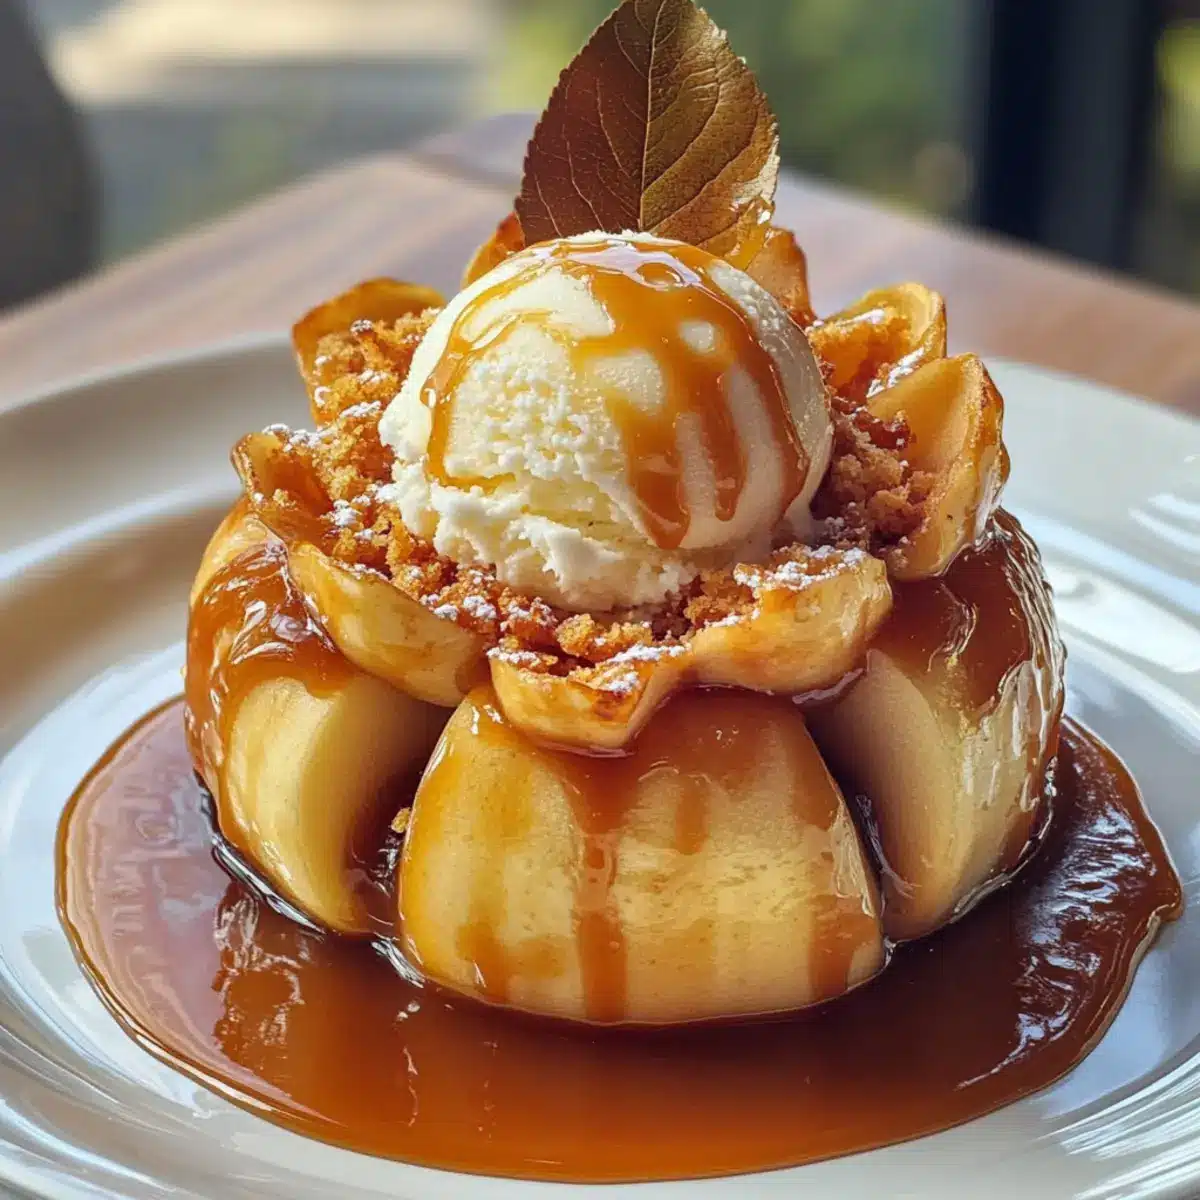
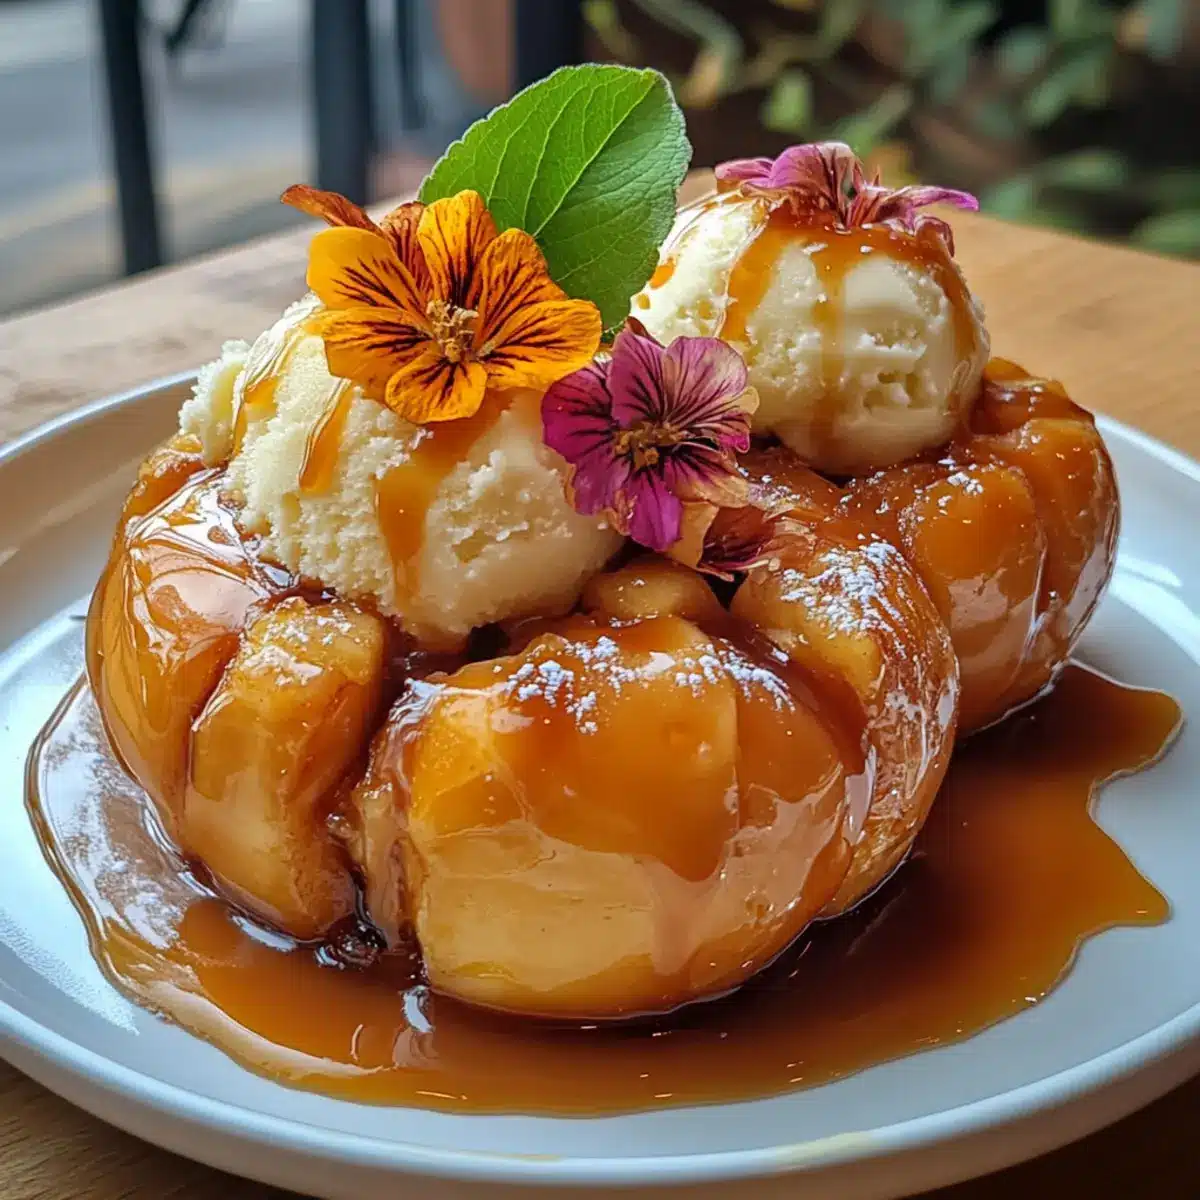
Impressive Presentation: These stunning Bloomin’ Apples bloom beautifully in the oven, providing a wow factor that will impress your guests.
Interactive Delight: Digging into the gooey caramel center creates an engaging experience, perfect for sharing at gatherings.
Autumn Flavors: With warm cinnamon and rich caramel, each bite delivers a delicious taste of fall, making it the ultimate seasonal treat.
Easy to Make: Simple steps mean even novice bakers can enjoy crafting this enchanting dessert without stress.
Versatile Variations: Feel free to customize with different fillings or topping options, like chocolate chips or nuts—your creativity can shine!
Serve warm alongside a scoop of vanilla ice cream for a comforting dessert. Looking to further enhance your dessert repertoire? Check out our guide to easy fall desserts.
Bloomin’ Apples Ingredients
• Get ready to create a fall favorite!
For the Apples
- Honeycrisp/Gala/Granny Smith Apples – These firm varieties provide ideal structure and sweetness when baked; any similar firm apple will work.
For the Filling
- Chewy Caramel Squares – These create a luscious, gooey center; feel free to swap with chocolate or toffee for a twist.
For the Butter Mixture
- Melted Butter – Adds richness and promotes caramelization; margarine is a great dairy-free substitute.
- Brown Sugar – Provides a deeper sweetness that enhances flavor; you can use white sugar, but it won’t be as rich.
- Granulated Sugar – Boosts the overall sweetness; substituting with more brown sugar is an option.
- Ground Cinnamon – A classic ingredient that adds warm fall flavors; nutmeg or allspice can serve as alternatives.
For Serving
- Vanilla Ice Cream – Complements the warm apples beautifully; non-dairy ice cream is a suitable alternative.
- Caramel Sauce – A drizzle adds extra sweetness and indulgence; chocolate sauce can be a fun twist!
Step‑by‑Step Instructions for Bloomin’ Apples
Step 1: Preheat the Oven
Begin by preheating your oven to 375°F. If you prefer using an air fryer, set it to 350°F for a quick and delightful cook. This initial heating ensures that your Bloomin’ Apples will bake evenly and develop a tender, fragrant goodness.
Step 2: Prepare the Butter Mixture
In a small mixing bowl, whisk together melted butter, brown sugar, granulated sugar, and ground cinnamon. This mixture will provide a rich, sweet glaze for your apples. Aim for a smooth consistency, as this will help enhance the flavor of your delicious Bloomin’ Apples during baking.
Step 3: Core and Slice the Apples
Take each apple and slice off the top to create a lid, then carefully core them without cutting through the bottom. Using a paring knife, gently slice thin crosswise cuts down the sides of each apple, spacing them about 1/4 inch apart. The goal is to create a beautiful blooming effect, so be careful not to cut all the way through the base.
Step 4: Fill the Apples
Place two chewy caramel squares inside the center of each apple. It’s the gooey caramel that will melt and create a delightful surprise in the center of your Bloomin’ Apples. Gently press them into the core of the apple to ensure they’re secure and will melt beautifully.
Step 5: Brush with Butter Mixture
Generously brush the butter and sugar mixture over each apple, ensuring all the surfaces are coated. This will not only enhance the flavor but also promote a lovely caramelization while baking. Make sure to get into the sliced areas to maximize the gooey sweetness of the finished dish.
Step 6: Bake the Apples
For oven baking, arrange the apples in a greased baking dish, then place them in the preheated oven. Bake for about 30 minutes, or until they are tender and the caramel inside begins to bubble. If using an air fryer, cook for approximately 20 minutes, keeping an eye on them as they cook.
Step 7: Serve Warm
Once the Bloomin’ Apples are cooked to perfection, remove them from the oven and let them cool slightly. Serve them warm, topped with a generous scoop of vanilla ice cream and a drizzle of caramel sauce for an extra indulgent treat. Enjoy this cozy fall dessert with friends and family!
Expert Tips for Bloomin’ Apples
-
Apple Selection: Choose firm varieties like Honeycrisp, Gala, or Granny Smith to prevent collapsing. A good apple holds its shape during baking.
-
Slicing Technique: Use chopsticks or a wooden spatula as guides when slicing. This helps keep your apple intact while achieving that beautiful bloom effect.
-
Butter Coating: Don’t skimp on brushing the apples with the melted butter mixture. Generous coverage enhances caramelization and flavor.
-
Serving Hot: Serve your Bloomin’ Apples warm for the best texture and gooeyness. The melted caramel center is a delightful surprise that should be enjoyed immediately!
-
Experiment with Fillings: Don’t hesitate to customize your caramel-stuffed apples! Try adding nuts or chocolate chips inside for a flavor twist.
Storage Tips for Bloomin’ Apples
Fridge: Store any leftover Bloomin’ Apples in an airtight container in the refrigerator for up to 2 days. This helps maintain their flavor and texture.
Reheating: To enjoy them warm again, gently reheat in the microwave for about 15-30 seconds or in the oven at 350°F until warmed through.
Freezer: While not ideal, you can freeze Bloomin’ Apples for up to 1 month. Wrap them individually in plastic wrap then place in a freezer bag, but expect changes in texture upon thawing.
Serving Suggestions: Best served fresh! For an extra indulgent treat, reheat and drizzle with caramel sauce or serve alongside vanilla ice cream again for that cozy fall dessert experience.
What to Serve with Caramel-Stuffed Bloomin’ Apples
As you prepare to enjoy these tender baked beauties, consider adding delicious companions to elevate your fall dessert experience.
-
Creamy Vanilla Ice Cream: This classic pairing brings a cool contrast to the warm caramel apples, creating a delightful harmony of textures. The creaminess of the ice cream balances the sweet, gooey center perfectly.
-
Toasty Cinnamon Bread: A slice of warm, cinnamon-laden bread provides a comforting element, inviting you to savor every bite. Its spiced flavor echoes the warm notes of the Bloomin’ Apples and enhances the overall cozy vibe of your dessert.
-
Nutty Granola Topping: Sprinkle crunchy granola over the apples for added texture and nutty flavor. It adds a satisfying crunch that contrasts with the soft fruit and gooey caramel center, making each bite exciting.
-
Caramel Drizzle Variation: Elevate your dessert experience by drizzling a rich chocolate sauce or spiced maple syrup over the apples. These alternative toppings introduce new flavors that excite the palate and add a touch of indulgence.
-
Warm Spiced Cider: Serve with a warm mug of spiced apple cider to sip alongside your Bloomin’ Apples. The aromatic spices enhance the fall theme, making it a perfect drink to cozily complement your dessert.
-
Chai Tea: A cup of aromatic chai tea brings warmth and complex flavors, enhancing the comforting nature of these apples. The spices in the tea create a wonderful pairing that wraps you in cozy nostalgia.
-
Pecan Pie Bites: For a sweet finishing touch, serve a few pecan pie bites alongside your apples. The rich, nutty flavor of the pie deepens the dessert menu and leaves everyone wanting more.
These delightful pairings will not only complement your Caramel-Stuffed Bloomin’ Apples, but also create memorable moments filled with warmth and comfort during your fall gatherings. Enjoy!
Bloomin’ Apples: Fun Variations
Feel free to get creative and personalize your Bloomin’ Apples with these delightful twists!
-
Nutty Crunch: Add a mix of oats, brown sugar, and chopped nuts in the center for a satisfying crunch. The contrast between the gooey caramel and the crunchy topping makes each bite unforgettable.
-
Chocolate Lovers: Swap out caramel for chocolate chips or a mix of both. This variation satisfies all chocolate cravings while still showcasing the warm apple flavors.
-
Spicy Kick: Incorporate a pinch of cayenne pepper into the butter mixture for a surprising heat that beautifully contrasts the sweetness of the apples. It’s a delightful way to turn up the flavor profile!
-
Maple Infusion: Use maple syrup instead of granulated sugar in your butter mixture for a unique, deep sweetness. The maple tones complement the apples perfectly, adding an autumnal twist.
-
Fruit Twists: Mix dried cranberries or raisins with the caramel for an unexpected fruity explosion. Each bite will be an adventure in texture and taste. Add some walnuts for an even bolder flavor sensation!
-
Herb Infusion: A sprig of fresh rosemary or thyme inside the apple can elevate the flavor harmony and add a fragrant aroma that will delight your guests. It’s all about surprising the palate!
-
Dairy-Free Delight: For a dairy-free twist, substitute the butter with coconut oil and the ice cream with coconut milk-based versions. Your Bloomin’ Apples will still be rich and satisfying while being more accommodating to dietary needs.
-
Syrupy Drizzle: Instead of a caramel drizzle, experiment with a warm raspberry or blueberry syrup for a fresh, tangy contrast. This vibrant drizzle adds not only flavor but gorgeous color to your presentation.
Feeling inspired? These variations can take your Bloomin’ Apples from simple to extraordinary, perfect for sharing with family or impressing friends. And for more inspiration, be sure to check out our collection of easy fall desserts!
Make Ahead Options
These Bloomin’ Apples are perfect for meal prep enthusiasts! You can core and slice the apples up to 24 hours in advance, then store them in a bowl of water with a splash of lemon juice to prevent browning. Additionally, you can prepare the buttery sugar mixture and refrigerate it for up to 3 days. Simply assemble the apples with the caramel filling and brush them with the mixture before baking. When you’re ready to serve, just pop them in the oven or air fryer as instructed, and you’ll have a delectable fall dessert with minimal effort—just as delicious and warm as if made fresh!
Bloomin’ Apples Recipe FAQs
What type of apples are best for Bloomin’ Apples?
Absolutely! For Bloomin’ Apples, I recommend firm and crisp varieties like Honeycrisp, Gala, or Granny Smith. These apples not only hold their shape when baked but also provide a delightful sweetness. If you’re in a pinch, any similar firm apple that won’t turn mushy will do the trick.
How should I store leftovers from Bloomin’ Apples?
After enjoying your Bloomin’ Apples, store any leftovers in an airtight container in the refrigerator for up to 2 days. This helps keep the flavor and texture intact. When you’re ready to enjoy them again, gently reheat in the microwave for about 15–30 seconds or in the oven at 350°F until warmed through.
Can I freeze Bloomin’ Apples?
Certainly! While freezing isn’t preferred because it may change the texture, you can freeze your Bloomin’ Apples for up to 1 month. Wrap each apple individually in plastic wrap, then place them in a freezer-safe bag. When you’re ready to enjoy, simply thaw them in the fridge overnight, and reheat in the oven at a low temperature until warmed through.
What should I do if my apples don’t bloom properly?
Very! If your apples aren’t blooming as desired, make sure you’re slicing them correctly. The key is making thin, even cuts, approximately 1/4 inch apart, without cutting all the way through the base. Using chopsticks as guides can help prevent cutting too deep. Additionally, ensure you’re using a firm variety of apple, as this makes a significant difference in their ability to hold shape while baking.
Are there any dietary considerations for this recipe?
Yes! If you’re cooking for someone with dietary restrictions, feel free to substitute as needed. For a dairy-free option, use margarine instead of butter, and opt for non-dairy ice cream. If someone has a chocolate allergy, replace the caramel with a mix of nuts or dried fruits for a flavorful center without compromising on taste. Always check ingredient labels to ensure they meet the dietary needs of your guests.
How can I enhance the flavors in my Bloomin’ Apples?
The more the merrier! For an extra flavor boost, consider mixing in oats, brown sugar, and chopped nuts as a crunchy topping in the core of each apple. You can also experiment by swapping out the caramel for chocolate chips or a combination of caramel and chocolate. This allows you to customize the Bloomin’ Apples to fit your taste and creativity perfectly!
Bloomin' Apples: Cozy Fall Dessert with Gooey Caramel Bliss
Ingredients
Equipment
Method
- Preheat your oven to 375°F (350°F for air fryer).
- Whisk together melted butter, brown sugar, granulated sugar, and ground cinnamon for the butter mixture.
- Slice off the top of each apple and core them, creating thin crosswise cuts down the sides.
- Place two chewy caramel squares inside the center of each apple.
- Brush the butter mixture generously over each apple.
- Bake for about 30 minutes until tender, or 20 minutes in an air fryer.
- Serve warm with vanilla ice cream and caramel sauce.
Leave a Reply