
“Did you know that dessert can be both indulgent and quick? Enter these Cannoli Cheesecake Bars: a delightful fusion of creamy ricotta and rich cheesecake that satisfies your sweet cravings in just 15 minutes of hands-on time. With a golden graham cracker crust and pockets of mini chocolate chips, this recipe not only tastes heavenly but also offers a no-bake option that anyone can master—no advanced baking skills required! Plus, for those looking for gluten-free alternatives, simply swap in almond flour. Whether you’re hosting a gathering or treating yourself, these bars promise to impress. Ready to learn how to whip up this delicious dessert?”
Why are Cannoli Cheesecake Bars irresistible?
Quick and Easy: In just 15 minutes of hands-on time, you can create a dessert that’s bound to impress.
Decadent Creaminess: Combining the smoothness of ricotta with rich cream cheese, the filling is nothing short of indulgent.
Versatile Delight: Not only can you swap out for gluten-free almond flour, but you can also play with flavors by adding orange zest or extra chocolate chips.
No Baking Required: Say goodbye to complicated recipes; this one is virtually foolproof, making it ideal for beginners and experienced bakers alike.
Crowd-Pleasing Treat: With its lovely presentation and delicious flavor, these bars are perfect for entertaining or spontaneous sweet cravings. Don’t miss trying the Fried Strawberry Cheesecake for another delicious twist on a classic!
Cannoli Cheesecake Bars Ingredients
For the Crust
• Graham Cracker Crumbs – This forms the crunchy base; you can substitute with almond flour for a gluten-free option.
• Granulated Sugar – Adds sweetness to the crust, balancing the flavors beautifully.
• Unsalted Butter – Melting this will help bind the crust together and enhance its richness.
For the Filling
• Room Temperature Cream Cheese – Ensures a smooth, creamy filling; cold cream cheese could result in lumps.
• Granulated Sugar – Enhances the sweetness and balances the tartness of the ricotta cheese.
• Eggs – Provide essential structure; make sure to beat them in one at a time for optimal texture.
• Vanilla Extract – Adds depth to the overall flavor profile of the filling.
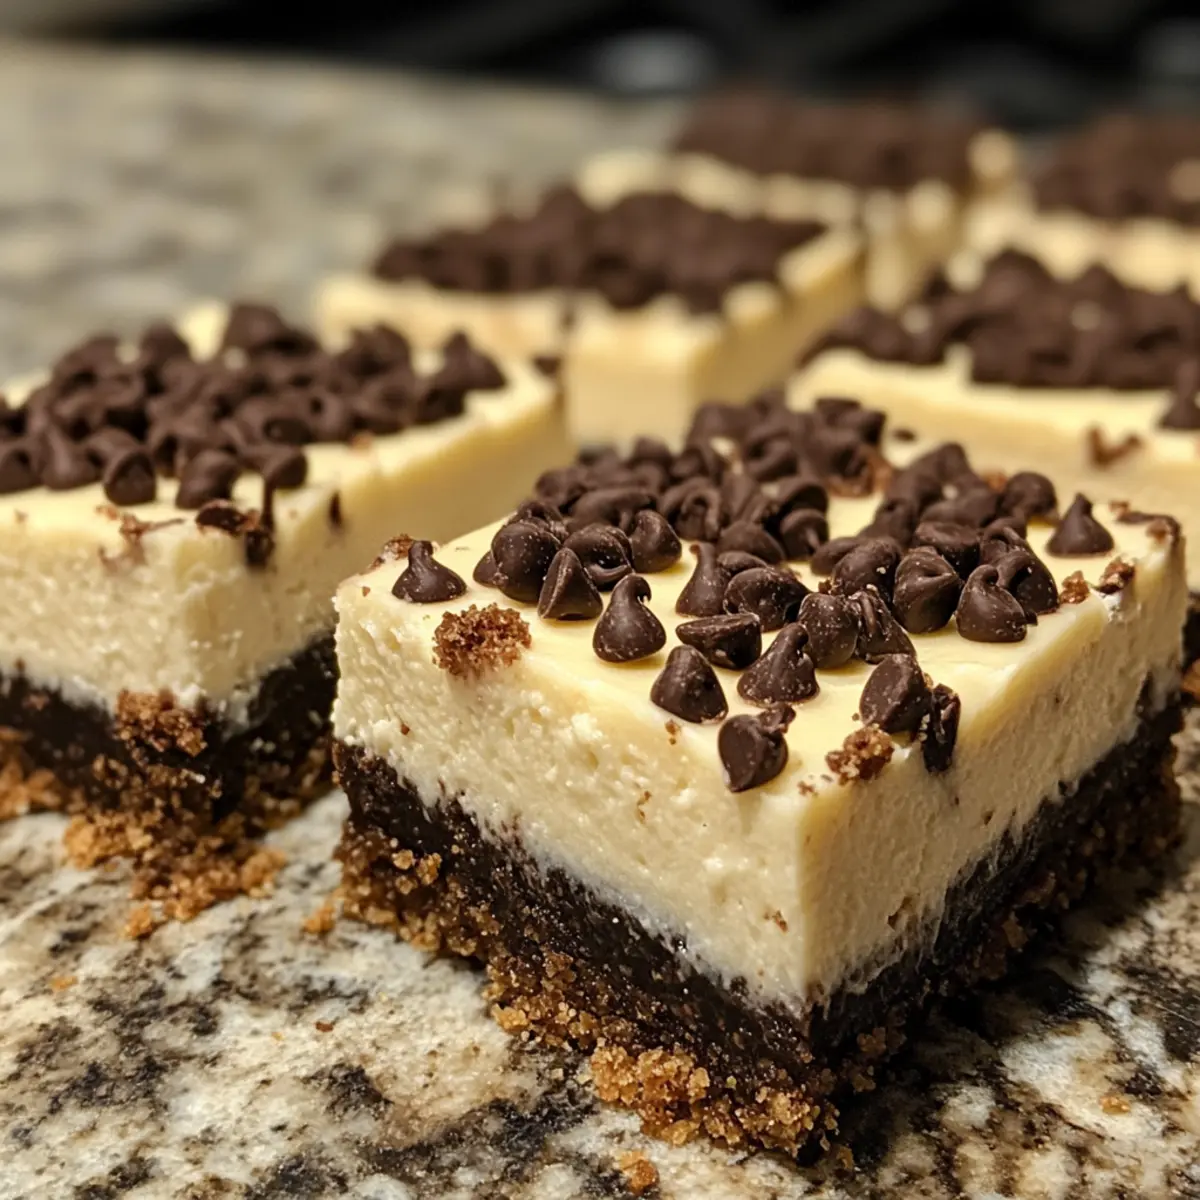
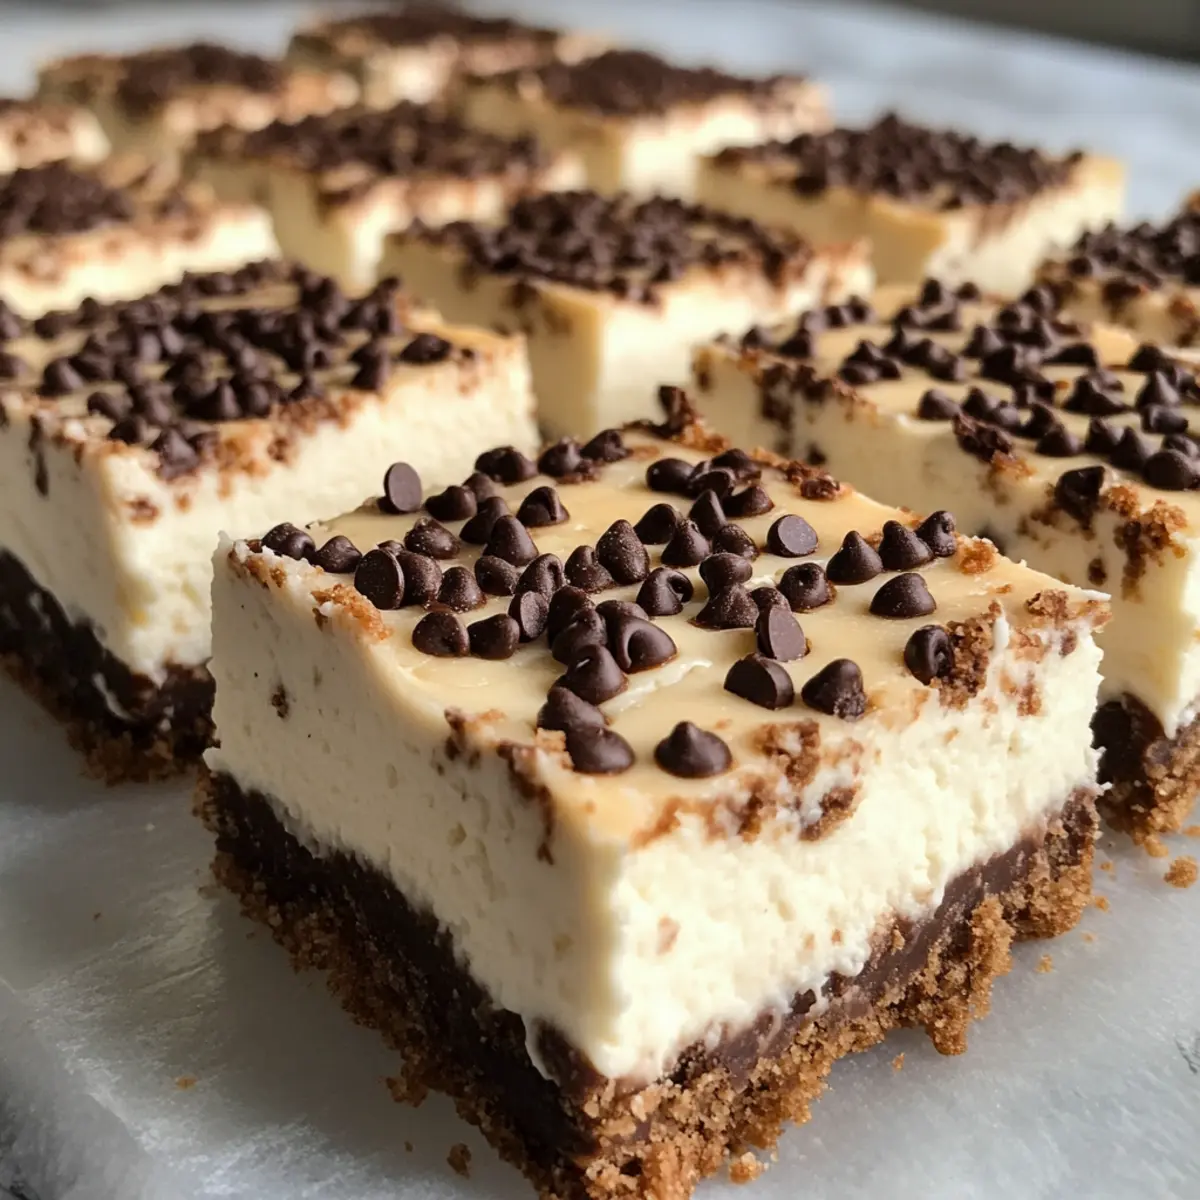
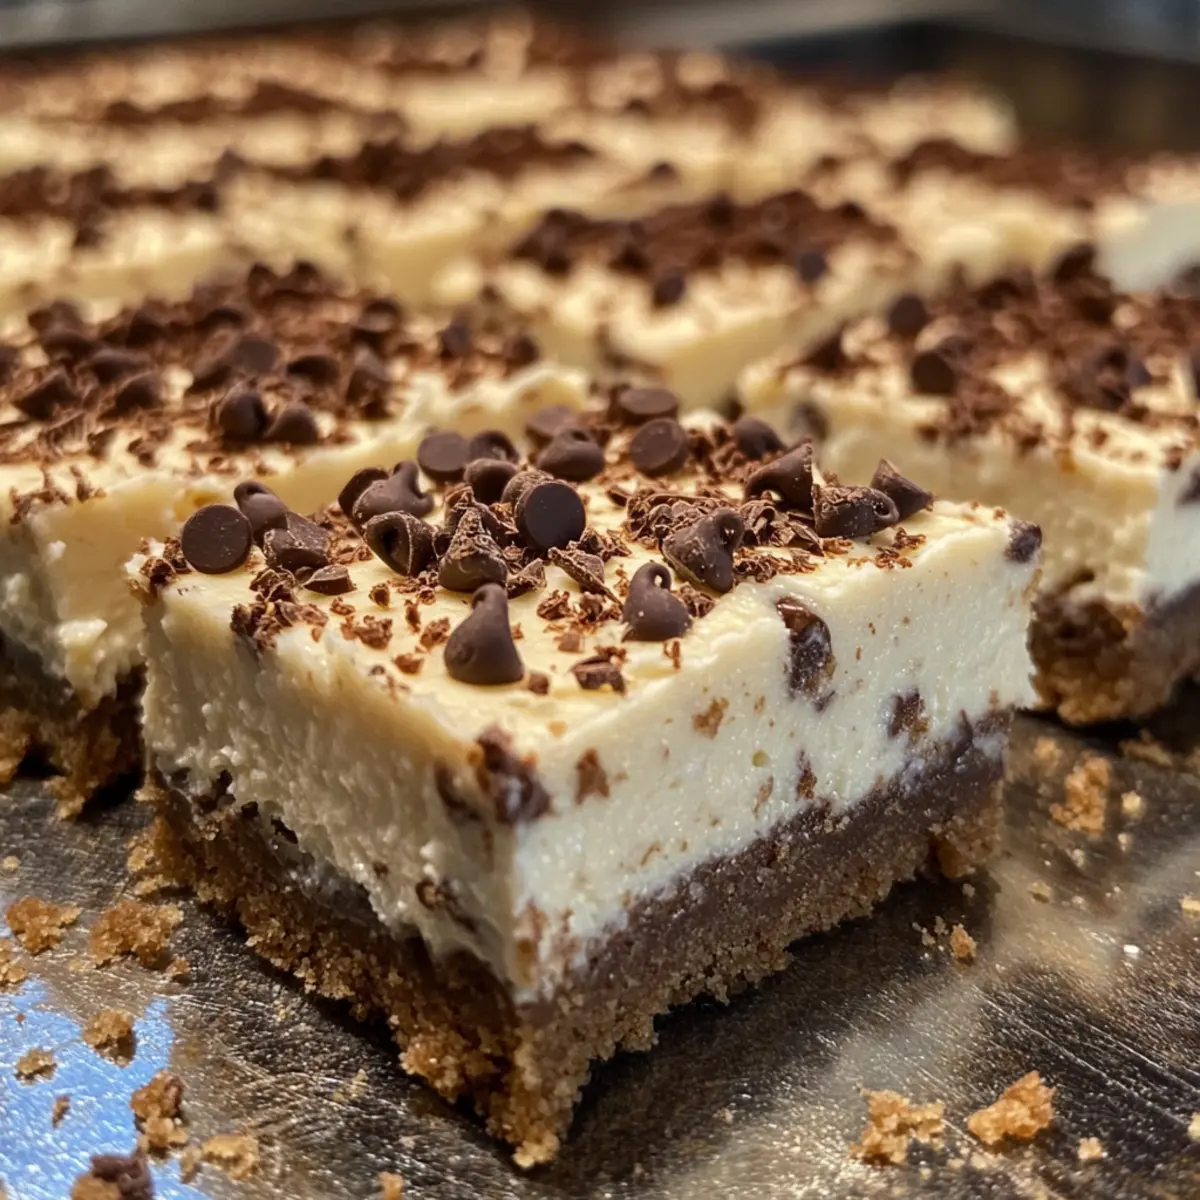
• Ricotta Cheese – The star ingredient for a creamy texture; ensure it’s smooth for the best results.
• Mini Chocolate Chips – These little treats bring bursts of sweetness; opt for mini to avoid sinking in the filling.
Enjoy creating your very own Cannoli Cheesecake Bars!
Step‑by‑Step Instructions for Cannoli Cheesecake Bars
Step 1: Prepare the Crust
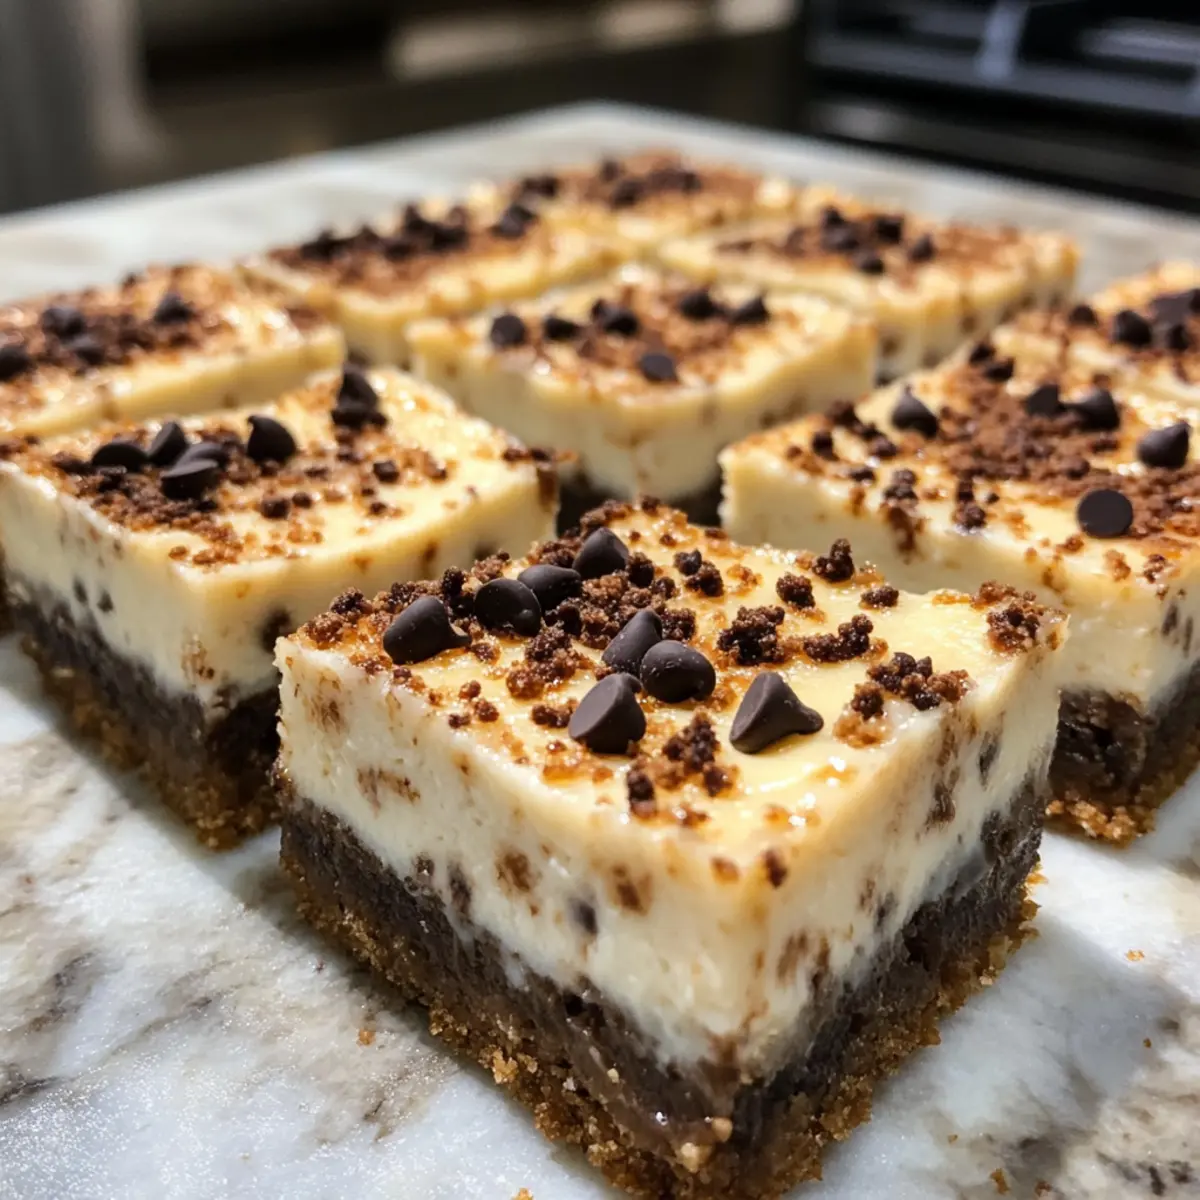
In a medium bowl, mix together the graham cracker crumbs and 2 tablespoons of sugar. Pour in the melted unsalted butter and stir until the mixture resembles wet sand. Line an 8×8-inch baking pan with parchment paper and firmly press the crumb mixture into the bottom, creating a slight lip along the sides. Set it aside while you prepare the filling.
Step 2: Make the Filling
In a large mixing bowl, beat together the room-temperature cream cheese and granulated sugar using an electric mixer until the mixture is smooth and creamy. Gradually add the eggs, mixing well after each addition, then pour in the vanilla extract. Gently fold in the ricotta cheese and mini chocolate chips until fully incorporated, ensuring a luscious Cannoli Cheesecake Bars filling.
Step 3: Bake the Bars
Pour the filling over the prepared crust, spreading it evenly using a spatula. Preheat your oven to 325°F (160°C) and bake the Cannoli Cheesecake Bars for 40-45 minutes. Look for set edges and a slightly jiggly center; this indicates the dessert is cooked but still creamy.
Step 4: Cool and Chill
Once baked, remove the bars from the oven and allow them to cool at room temperature for about 30 minutes. To ensure a perfectly set texture, transfer the pan to the refrigerator and chill for at least 4 hours or overnight. This final step will firm up the filling, making them easier to slice and serve.
Make Ahead Options
These Cannoli Cheesecake Bars are a fantastic choice for meal prep enthusiasts looking to save time on busy weeknights! You can easily prepare the crust up to 24 hours in advance; simply mix the graham cracker crumbs, sugar, and melted butter, then press it into the pan. Additionally, the cheesecake filling can be made and stored separately in the fridge for up to 3 days (just keep it in an airtight container to maintain its creamy texture). When you’re ready to bake, pour the filling over the crust and bake as directed. This way, you’ll enjoy these decadent Cannoli Cheesecake Bars with minimal effort, ready to impress whenever a sweet craving strikes!
Storage Tips for Cannoli Cheesecake Bars
Fridge: Store leftovers in an airtight container for up to 5 days. This keeps your Cannoli Cheesecake Bars fresh and ready for indulgence anytime.
Freezer: For longer storage, individually wrap bars in plastic wrap and aluminum foil. Freeze for up to 2 months, allowing you to enjoy this treat later.
Thawing: When you’re ready to enjoy, thaw your frozen bars overnight in the fridge. This ensures a smooth texture and preserves the delightful flavors.
Serving: It’s best to serve these chilled, and you can add a dusting of powdered sugar for a beautiful presentation right before indulging.
Cannoli Cheesecake Bars Variations
Feel free to get creative with these Cannoli Cheesecake Bars—there are so many delightful twists to enhance your experience!
- Gluten-Free: Substitute graham cracker crumbs with 1 1/4 cups of almond flour mixed with 2 tbsp sugar for a gluten-free version.
- Citrus Twist: Add 1-2 teaspoons of orange zest to the filling for a refreshing burst of flavor.
- Cottage Cheese: Blend cottage cheese until smooth as a ricotta alternative if it’s unavailable. It offers a similar creamy texture!
- Nutty Crunch: Incorporate finely chopped nuts, like pistachios or walnuts, into the crust for an interesting texture and added flavor.
- Cheesecake Swirl: Create a swirl effect by reserving some of the filling, coloring it with cocoa powder, and marbleizing it before baking.
- Extra Chocolate: For those who can’t get enough, sprinkle some extra mini chocolate chips on top just before baking.
- Spice It Up: Add a pinch of cinnamon or nutmeg to the filling for a subtle warmth that complements the creamy goodness.
- Fruity Surprise: Fold in some diced strawberries or cherries into the filling for a sweet and fruity spin—perfect for summer!
You might also enjoy elevating your dessert repertoire with the irresistible Fried Strawberry Cheesecake or indulging in dreamy Cannoli Squares Deliciously. With so many variations to explore, you can customize each batch to suit your cravings!
Expert Tips for Cannoli Cheesecake Bars
-
Room Temperature Ingredients: Ensure all dairy items are at room temperature before starting. This helps the filling become creamy without lumps, giving you perfect Cannoli Cheesecake Bars.
-
Watch Your Eggs: Add the eggs one at a time to the mixture, making sure each is fully incorporated before adding the next. This step is crucial for achieving a smooth texture.
-
Cooling Technique: To prevent cracks on the surface of your bars, crack the oven door open for 30 minutes after baking. This allows for a gentle cooling process.
-
Chill Before Baking: If your filling appears runny, chill it in the fridge for about 30 minutes prior to pouring it onto the crust. This small step ensures a thicker consistency.
-
Larger Batches: If making a double batch, use a larger baking pan and remember to increase the baking time by 5-7 minutes, so every bar bakes evenly.
What to Serve with Cannoli Cheesecake Bars
Indulging in these creamy delights is just the beginning; let’s create a full meal experience.
-
Italian Coffee: The rich flavor and caffeine kick will beautifully complement the sweet, creamy notes of the cheesecake bars. A warm espresso or cappuccino is particularly delightful.
-
Fresh Berries: Serve a side of mixed seasonal berries for a burst of freshness and tangy contrast. Their natural sweetness pairs well with the richness of the dessert.
-
Whipped Cream: A dollop of freshly whipped cream adds a light, airy texture that enhances the bars’ creamy filling, making each bite even more delightful.
-
Chocolate Sauce: Drizzle semi-sweet chocolate sauce over the bars for an extra layer of indulgence. The luscious chocolate pairs wonderfully with the mini chocolate chips in the cheesecake.
-
Vanilla Ice Cream: A scoop of vanilla ice cream brings a lovely creamy balance, cooling down the warmth of the bars while enhancing their flavor.
-
Mint Leaves: Garnish with fresh mint leaves for a pop of color and a refreshing herbal note that cuts through the dessert’s richness.
-
Amaretto Liqueur: As a sophisticated drink pairing, a glass of amaretto enhances the almond notes in the dish, giving it a delightful extra dimension.
-
Almond Biscotti: Crunchy and flavor-rich, these crunchy cookies provide a satisfying texture contrast while echoing the flavors in the cannoli.
Cannoli Cheesecake Bars Recipe FAQs
How do I choose ripe ingredients for my Cannoli Cheesecake Bars?
When selecting your ingredients, especially ricotta cheese, look for a smooth and creamy texture without any lumps. Avoid any outdated dairy products, and check for freshness signs like dark spots or unusual smells. For the best flavor, ensure your eggs are large and fresh.
What’s the best way to store leftover Cannoli Cheesecake Bars?
Store any leftovers in an airtight container in the refrigerator for up to 5 days. This keeps them fresh and ready for a quick indulgence at any time. I often make sure to wrap them securely to prevent them from absorbing other odors in the fridge.
Can I freeze Cannoli Cheesecake Bars, and if so, how?
Absolutely! To freeze, first cut the bars into individual servings and wrap each tightly in plastic wrap followed by aluminum foil. They can be frozen for up to 2 months. When you’re ready to enjoy, simply thaw them overnight in the fridge for the best texture and flavor.
What if my Cannoli Cheesecake Bars have cracks on top?
Cracks can happen, but there’s an easy fix! To prevent them in the first place, make sure to cool your bars slowly. After baking, leave the oven door ajar for about 30 minutes. If they do crack, you can dust them with powdered sugar or add a drizzle of chocolate to mask the imperfections.
Are Cannoli Cheesecake Bars safe for people with allergies?
If you have guests with dietary restrictions, it’s crucial to know the ingredients. These bars contain dairy and eggs; for those who are lactose intolerant, consider using lactose-free cream cheese and ricotta. For a gluten-free option, simply swap graham cracker crumbs with almond flour. Always check labels to ensure there are no hidden allergens.
How long do Cannoli Cheesecake Bars need to set in the fridge?
I recommend chilling your Cannoli Cheesecake Bars for at least 4 hours, but overnight is even better! This allows the flavors to meld beautifully and ensures a firmer texture, making slicing easier when you’re ready to serve.
Creamy Cannoli Cheesecake Bars You'll Love to Indulge In
Ingredients
Equipment
Method
- In a medium bowl, mix together the graham cracker crumbs and 2 tablespoons of sugar. Pour in the melted unsalted butter and stir until the mixture resembles wet sand. Line an 8x8-inch baking pan with parchment paper and firmly press the crumb mixture into the bottom, creating a slight lip along the sides. Set it aside while you prepare the filling.
- In a large mixing bowl, beat together the room-temperature cream cheese and granulated sugar using an electric mixer until the mixture is smooth and creamy. Gradually add the eggs, mixing well after each addition, then pour in the vanilla extract. Gently fold in the ricotta cheese and mini chocolate chips until fully incorporated.
- Pour the filling over the prepared crust, spreading it evenly using a spatula. Preheat your oven to 325°F (160°C) and bake the Cannoli Cheesecake Bars for 40-45 minutes. Look for set edges and a slightly jiggly center to indicate it's cooked but still creamy.
- Once baked, remove the bars from the oven and allow them to cool at room temperature for about 30 minutes. Transfer the pan to the refrigerator and chill for at least 4 hours or overnight for a perfectly set texture.
Leave a Reply