
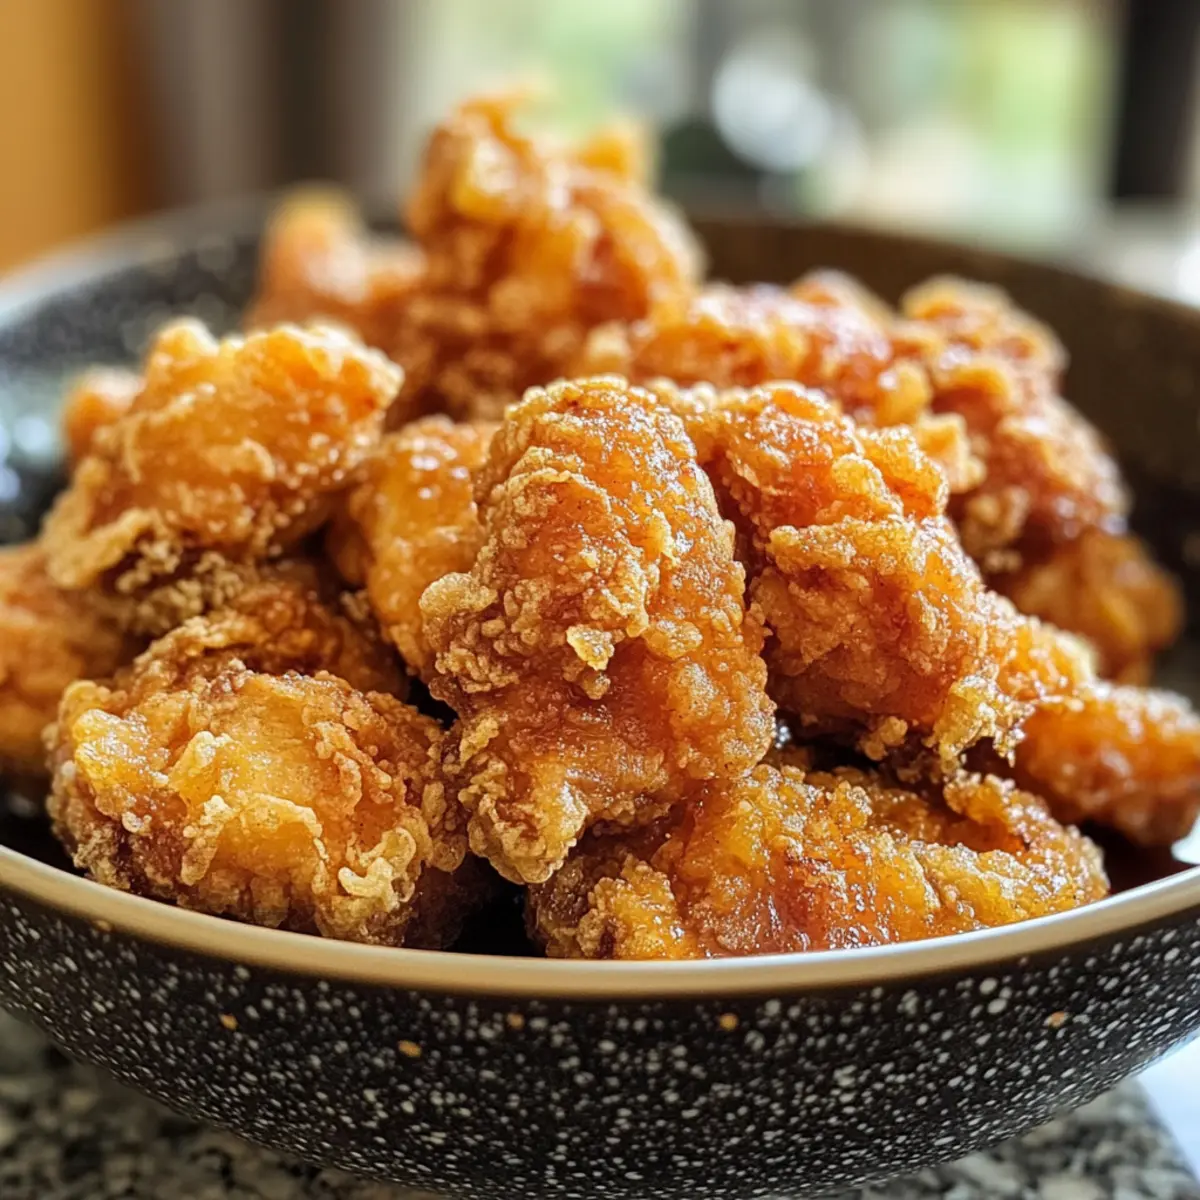
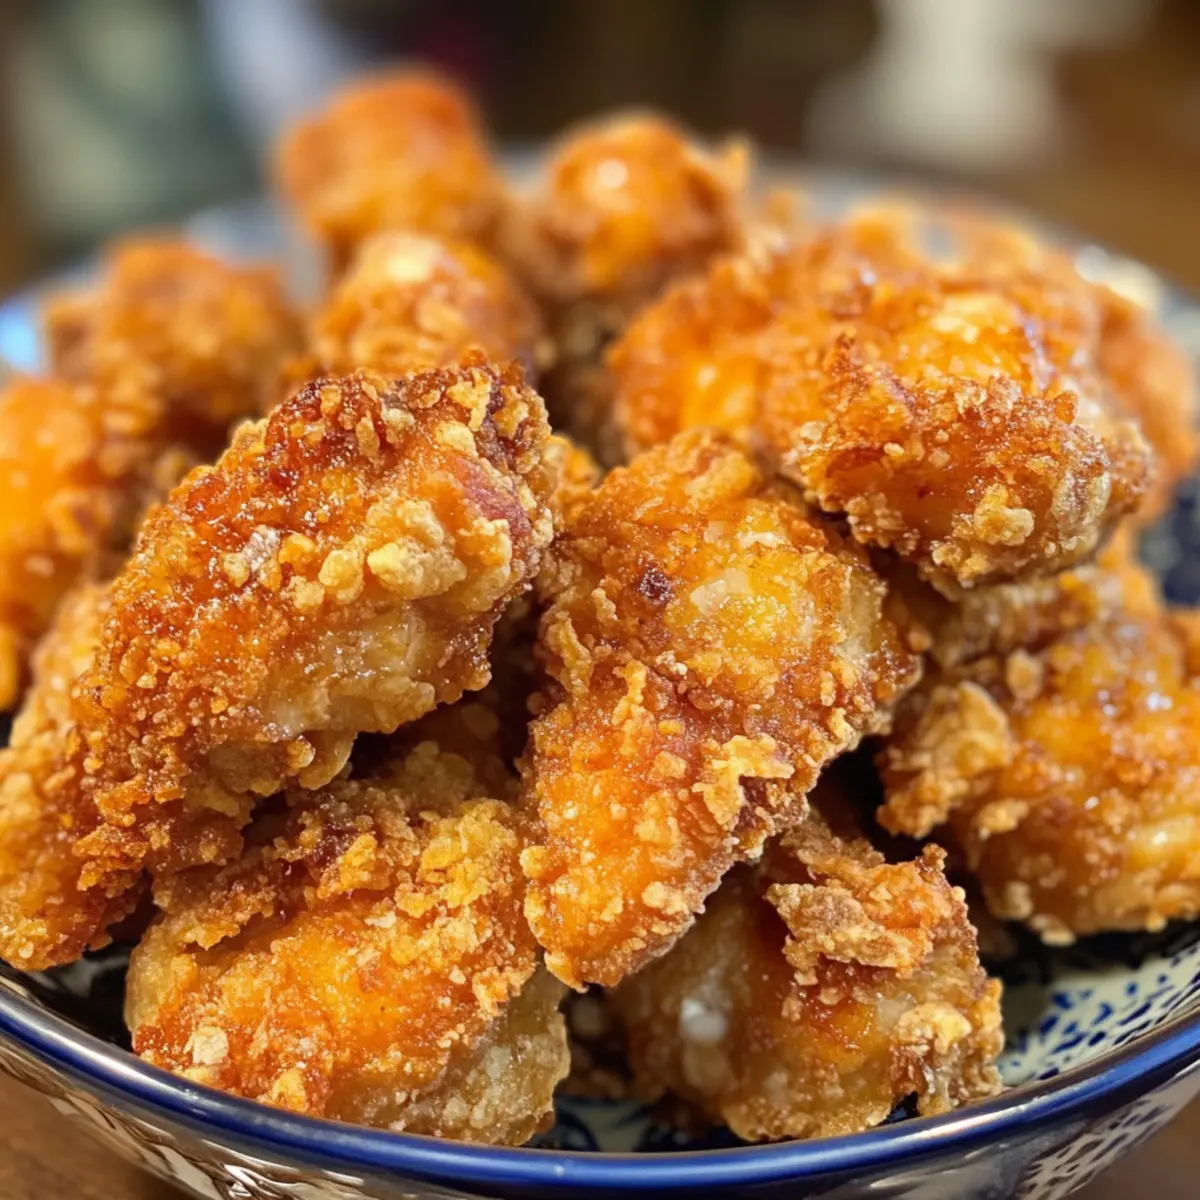
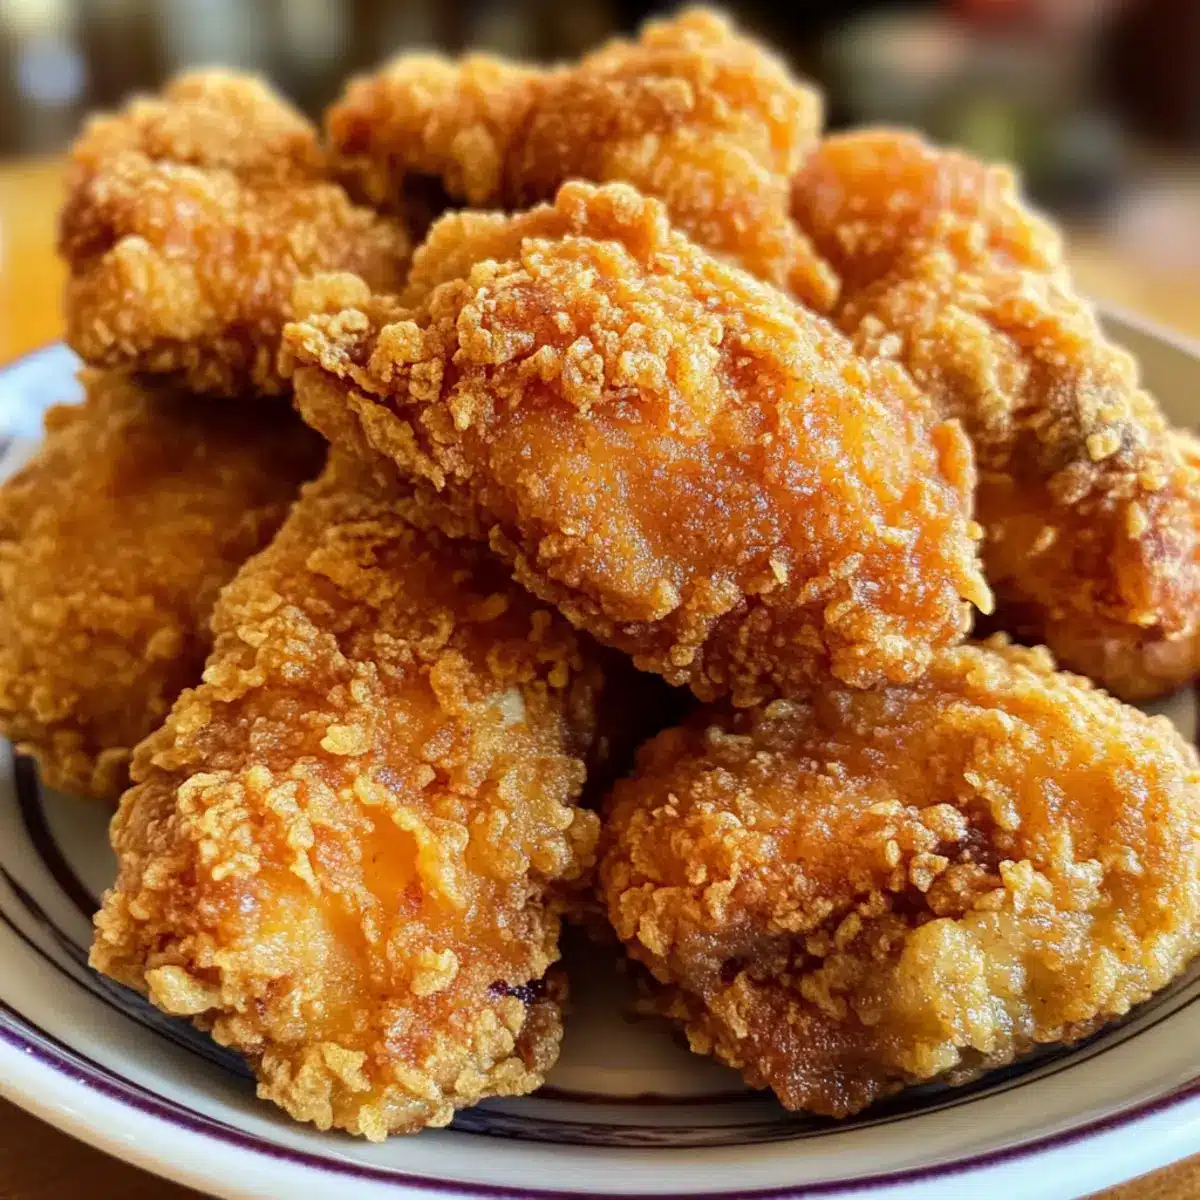
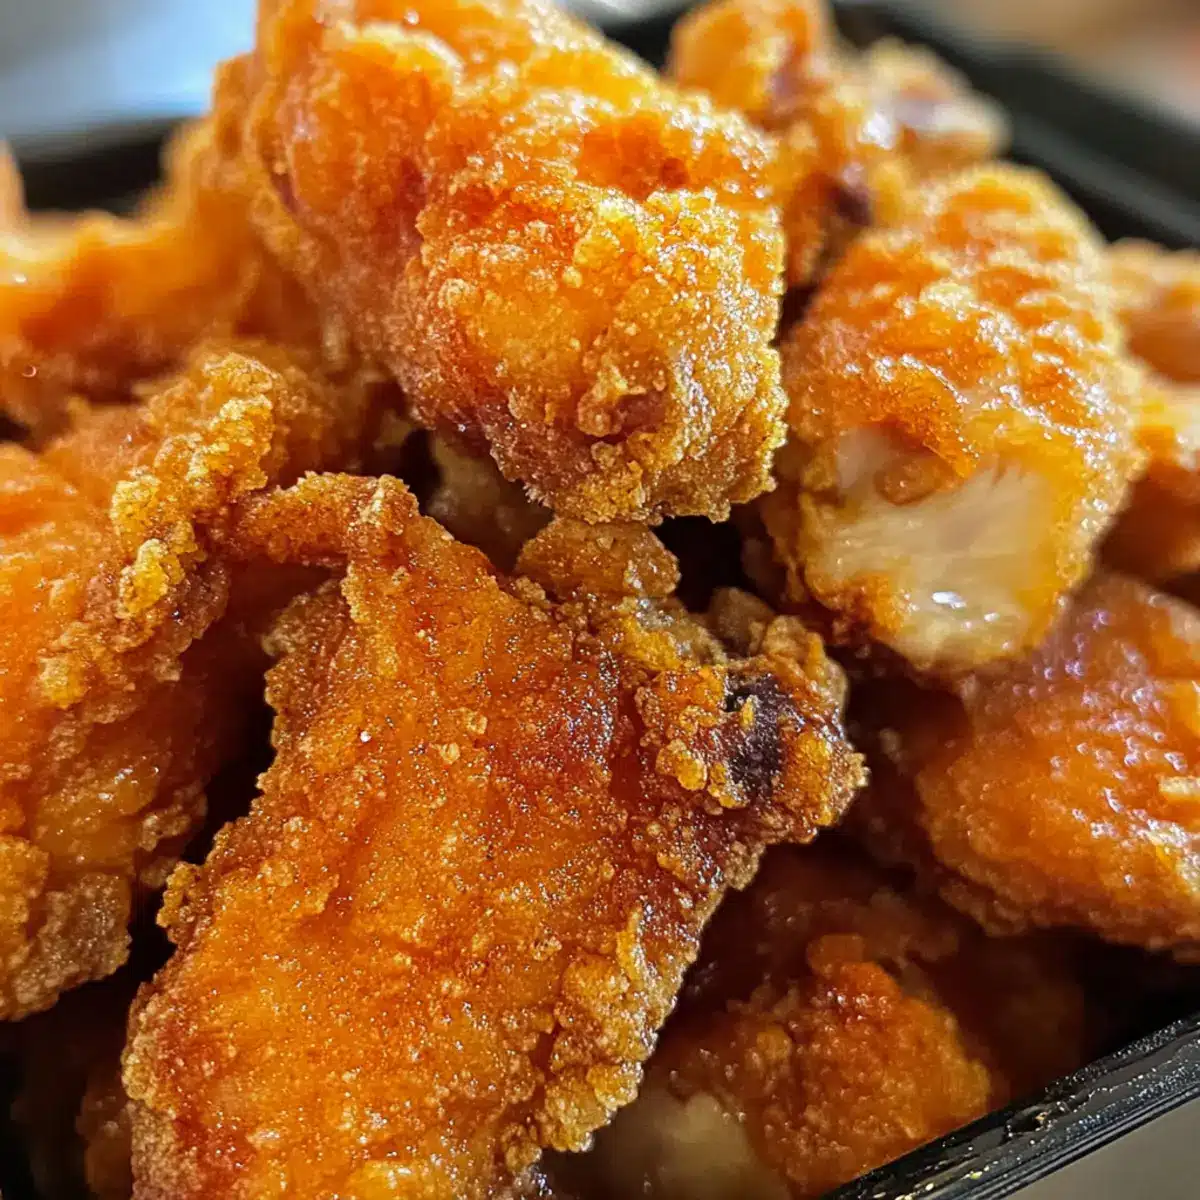
The moment the sizzling sound meets my ears, I know something magical is happening in my kitchen. Today, I’m making Japanese Fried Chicken (Karaage), and if you haven’t tried this delightful dish yet, you’re in for a treat. Each tender piece is marinated in a savory blend that promises to awaken your taste buds, followed by a double-fry technique that seals in all that juicy goodness while offering an irresistible crunch on the outside. The beauty of this Karaage recipe lies in its simplicity—it’s easy to whip up but utterly impressive, making it perfect whether you’re cooking for family or planning a casual get-together with friends. Are you ready to turn your kitchen into a Japanese bistro? Let’s dive in!
Why is Karaage Chicken a must-try?
Crispy Texture: The double-frying technique delivers an unparalleled crunch that contrasts beautifully with the juicy chicken inside.
Savory Marinade: Marinated in a delightful mix of soy sauce and ginger, each bite bursts with umami flavor that’ll make your taste buds sing!
Quick & Simple: With just a few ingredients and straightforward steps, even novice cooks can master this dish in no time.
Crowd-Pleasing Appeal: Whether it’s a busy weeknight or a fun gathering, this Japanese Fried Chicken is a surefire hit that everyone will love.
Culinary Adventure: Prepare to impress your family or friends with this authentic recipe that brings a taste of Japan right to your table—similar to how I showcased in my Honey Drenched Fried Chicken recipe as a fun spin on traditional fried favorites!
Japanese Fried Chicken Ingredients
Get ready to impress with these authentic ingredients!
For the Chicken
- Chicken Thigh Fillets – Using thighs ensures succulent, juicy meat; breast can be used but may dry out.
- Soy Sauce – Provides deep umami flavor and essential saltiness for the marinade.
- Cooking Sake – Adds depth to the marinade; can substitute with unsalted sake if needed.
- Mirin – Contributes a touch of sweetness; for a quick fix, use sugar (1/4 tsp for every 1/2 tsp mirin).
- Freshly Grated Ginger – Adds an aromatic zing that elevates the overall flavor profile.
For the Coating
- Cornstarch/Corn Flour – Essential for achieving that crispy texture when frying; can swap with potato starch for a unique crunch.
For Frying
- Vegetable Oil – Required for deep frying, ensuring a beautiful golden exterior on your Karaage Chicken.
With these key ingredients, you’ll be on your way to whipping up a mouthwatering plate of Japanese Fried Chicken (Karaage) that is bound to delight your guests!
Step‑by‑Step Instructions for Japanese Fried Chicken (Karaage)
Step 1: Marinate Chicken
In a large zip-top bag, combine chicken thigh fillets with soy sauce, cooking sake, mirin, and freshly grated ginger. Make sure all pieces are well coated, then seal the bag, pressing out excess air. Allow the chicken to marinate for 30 minutes to 1 hour in the refrigerator, enhancing the flavors of your Japanese Fried Chicken (Karaage).
Step 2: Prepare Oil
While the chicken is marinating, pour vegetable oil into a deep pot or fryer, filling it up to about 5 cm. Heat the oil over medium heat until it reaches a temperature of approximately 160°C (320°F). To test, drop a small piece of batter into the oil; it should sizzle and rise to the surface, indicating it’s ready for frying.
Step 3: Coat Chicken
After marinating, carefully drain the excess marinade from the chicken and pat each piece dry with paper towels to ensure a crispy finish. Dredge the chicken pieces in cornstarch, making sure they are fully coated. This coating will give your Japanese Fried Chicken (Karaage) that signature crunch.
Step 4: First Fry
Gently lower the coated chicken pieces into the hot oil in small batches, ensuring not to crowd the pot. Fry them for about 2.5 to 3 minutes until they turn pale golden. Once done, carefully remove the chicken and place it on paper towels to drain the excess oil, allowing it to rest for 3 to 4 minutes, which helps lock in the juiciness.
Step 5: Increase Oil Temperature
Once your chicken has rested, increase the oil temperature to 190-200°C (374-392°F). You can use a thermometer for accuracy or the bamboo stick method, where bubbles form around the stick when dipped into the oil, signifying it’s hot enough.
Step 6: Second Fry
Return the rested chicken pieces back into the hot oil, frying them for an additional 30 seconds to 1 minute. Watch for that glorious golden-brown color to form, signaling that they are perfectly crispy. Once done, remove them and drain on paper towels again to get rid of any excess oil, completing your Japanese Fried Chicken (Karaage).
Japanese Fried Chicken (Karaage) Customization Ideas
Feel free to explore these delightful variations that elevate your Karaage experience and cater to your taste preferences!
-
Dairy-Free: All ingredients are naturally dairy-free, making this dish a great option for those avoiding dairy.
-
Spicy Kick: Add a teaspoon of chili flakes or a splash of sriracha to the marinade for a bold, spicy twist that will awaken your taste buds.
-
Garlic Infusion: Mix in minced garlic with the marinade to deepen the flavor profile. This adds a savory aroma that enhances the dish while still respecting tradition.
-
Herb-Infused: Add fresh herbs such as basil or cilantro to the marinade for a burst of freshness. It’s a lovely way to reinvent this classic without losing its essence.
-
Potato Starch Variation: Swap cornstarch for potato starch in the coating for a unique texture. The potato starch offers an ultra-crisp finish, perfect for those who love crunch in every bite.
-
Citrus Zest: Incorporate lemon or yuzu zest into the marinade for a bright, zesty flavor that balances the savory elements beautifully. It’s a refreshing twist that takes your Karaage to the next level.
-
Honey Drizzled: For a delightful touch of sweetness, drizzle your Karaage with honey or a mix of honey and soy sauce before serving. This creates an irresistible glaze!
-
Asian Slaw: Serve your Karaage alongside a crunchy Asian slaw or a fresh side of hijiki seaweed salad, similar to the ideas in my Dollys Chicken and Stuffing Casserole recipe. It adds a wonderful crunch and a pop of color to your meal.
Embrace your culinary creativity while preparing this classic Japanese dish, and enjoy the journey as you make it your own!
Expert Tips for Japanese Fried Chicken
-
Proper Temperatures: Use a thermometer to monitor oil temperature for frying. Achieving the right heat is crucial for perfect crispy Japanese Fried Chicken (Karaage).
-
Avoid Overcrowding: Fry chicken in small batches. Overcrowding lowers the oil temperature, leading to soggy, greasy pieces instead of that delightful crunch.
-
Resting Time Matters: Always let the chicken rest after the first fry. This step ensures the juices redistribute, resulting in tender, flavorful bites.
-
Mind the Marinade: Don’t marinate the chicken for too long. Stick to the 30-minute to 1-hour range to prevent overly salty Japanese Fried Chicken.
-
Experiment with Coatings: Try using potato starch instead of cornstarch for a different crispy texture. It can give your Karaage a delightful twist!
Make Ahead Options
Karaage Chicken is perfect for busy home cooks looking to save time without sacrificing flavor! You can marinate the chicken in the soy sauce, sake, mirin, and ginger mixture up to 24 hours in advance, allowing the meat to soak up those delicious flavors. After marinating, pat the chicken dry and coat it with cornstarch; this step can also be prepped and kept in an airtight container for up to 3 days in the refrigerator. When you’re ready to serve, simply heat the oil and fry the chicken using the double-fry method as detailed in the instructions. This way, you’ll get that golden, crunchy exterior with minimal effort, making your homemade Japanese Fried Chicken just as delightful as it would be when freshly made!
What to Serve with Crispy Authentic Karaage Chicken?
There’s nothing quite like the joyful crunch of Karaage Chicken, and pairing it with the right sides can elevate your meal into a delightful dining experience.
-
Shredded Lettuce:
Adds a fresh, crisp texture that balances the richness of the fried chicken, offering a refreshing bite. -
Hijiki Seaweed Salad:
This traditional salad brings a delightful oceanic flavor and soft chewiness, complementing the savory chicken marvelously. -
Steamed Rice:
A warm, fluffy bowl of rice acts as the perfect canvas to soak up the flavors, making every bite feel wholesome and comforting. -
Pickled Vegetables:
The tanginess of pickled veggies cuts through the grease beautifully, adding a zesty contrast that cleanses your palate. -
Kyoto-style Soy Sauce Dip:
A simple mixture of soy sauce and citrus zest provides an extra umami hit, perfect for dunking your crispy bites into! -
Sashimi Salad:
Light and healthy, this dish brings an assortment of flavors and textures, enhancing the meal’s complexity while remaining refreshing. -
Green Tea:
Offering a subtle, earthy flavor, this drink harmonizes with the dish and enhances the overall dining experience, grounding the savory notes. -
Mochi Ice Cream:
For dessert, indulge in the delightful chewiness of mochi ice cream—sweet, icy, and a lovely way to wrap up your meal. -
Chilled Sake:
Complement the experience with a chilled glass of sake, balancing the savory richness of Karaage Chicken with its smooth, refreshing profile.
Storage Tips for Japanese Fried Chicken (Karaage)
Room Temperature: Enjoy your Karaage fresh! If left out, it’s best consumed within 2 hours to prevent spoilage.
Fridge: Store any leftovers in an airtight container in the refrigerator, where it will stay fresh for up to 3 days.
Freezer: For longer storage, freeze the fried chicken in a single layer, wrapped well; it can be kept for up to 2 months.
Reheating: To retain crispiness, reheat the chicken in an oven at 180°C (350°F) for about 10-15 minutes, perfect for bringing back that crunchy texture of your Japanese Fried Chicken (Karaage).
Japanese Fried Chicken (Karaage) Recipe FAQs
How do I choose the right chicken for Karaage?
Absolutely! I recommend using chicken thigh fillets, as they ensure maximum juiciness and tenderness. While boneless breast can work, it’s worth noting that it may dry out more easily during frying.
How should I store leftover Karaage Chicken?
After enjoying your delicious Karaage, allow it to cool to room temperature before storing. Place leftovers in an airtight container in the refrigerator, where they will remain fresh for up to 3 days. If you want to save some for later, consider freezing them!
Can I freeze Japanese Fried Chicken (Karaage)?
Very! To freeze, lay the fried chicken pieces in a single layer on a baking sheet, ensuring they aren’t touching. Once frozen solid, transfer them to a freezer-safe bag or container, labeling it with the date. You can keep your Karaage in the freezer for up to 2 months.
What should I do if my Karaage Chicken is too greasy?
If you find your Karaage is a bit greasy, it may be due to frying at a lower temperature or overcrowding the pan. Ensure that your oil temperature is high enough, around 190-200°C (374-392°F), and fry in small batches. Let the chicken drain on paper towels after frying to help absorb excess oil!
Are there any dietary considerations for Karaage Chicken?
Great question! If you have dietary restrictions, remember to check the ingredients in your soy sauce and cooking sake, as they can contain gluten. Always opt for gluten-free alternatives if needed. Also, be mindful of fresher ingredients like ginger; it’s generally safe for pets, but it’s better to avoid giving your dog any fried food.
Can I use a different starch for the coating?
Absolutely! If you’re looking for an alternative texture, you can use potato starch instead of cornstarch. This can provide a unique crispiness while still yielding a delicious final product, giving you a delightful twist to your classic Japanese Fried Chicken (Karaage).
Crispy Japanese Fried Chicken (Karaage) That Impresses Every Time
Ingredients
Equipment
Method
- In a large zip-top bag, combine chicken thigh fillets with soy sauce, cooking sake, mirin, and freshly grated ginger. Marinate for 30 minutes to 1 hour.
- While marinating, heat vegetable oil to 160°C in a deep pot.
- Drain excess marinade, pat chicken dry, and coat in cornstarch.
- Fry chicken in small batches for 2.5 to 3 minutes until pale golden, then rest for 3 to 4 minutes.
- Increase oil temperature to 190-200°C.
- Fry the chicken again for 30 seconds to 1 minute until golden-brown; drain on paper towels.
Leave a Reply