
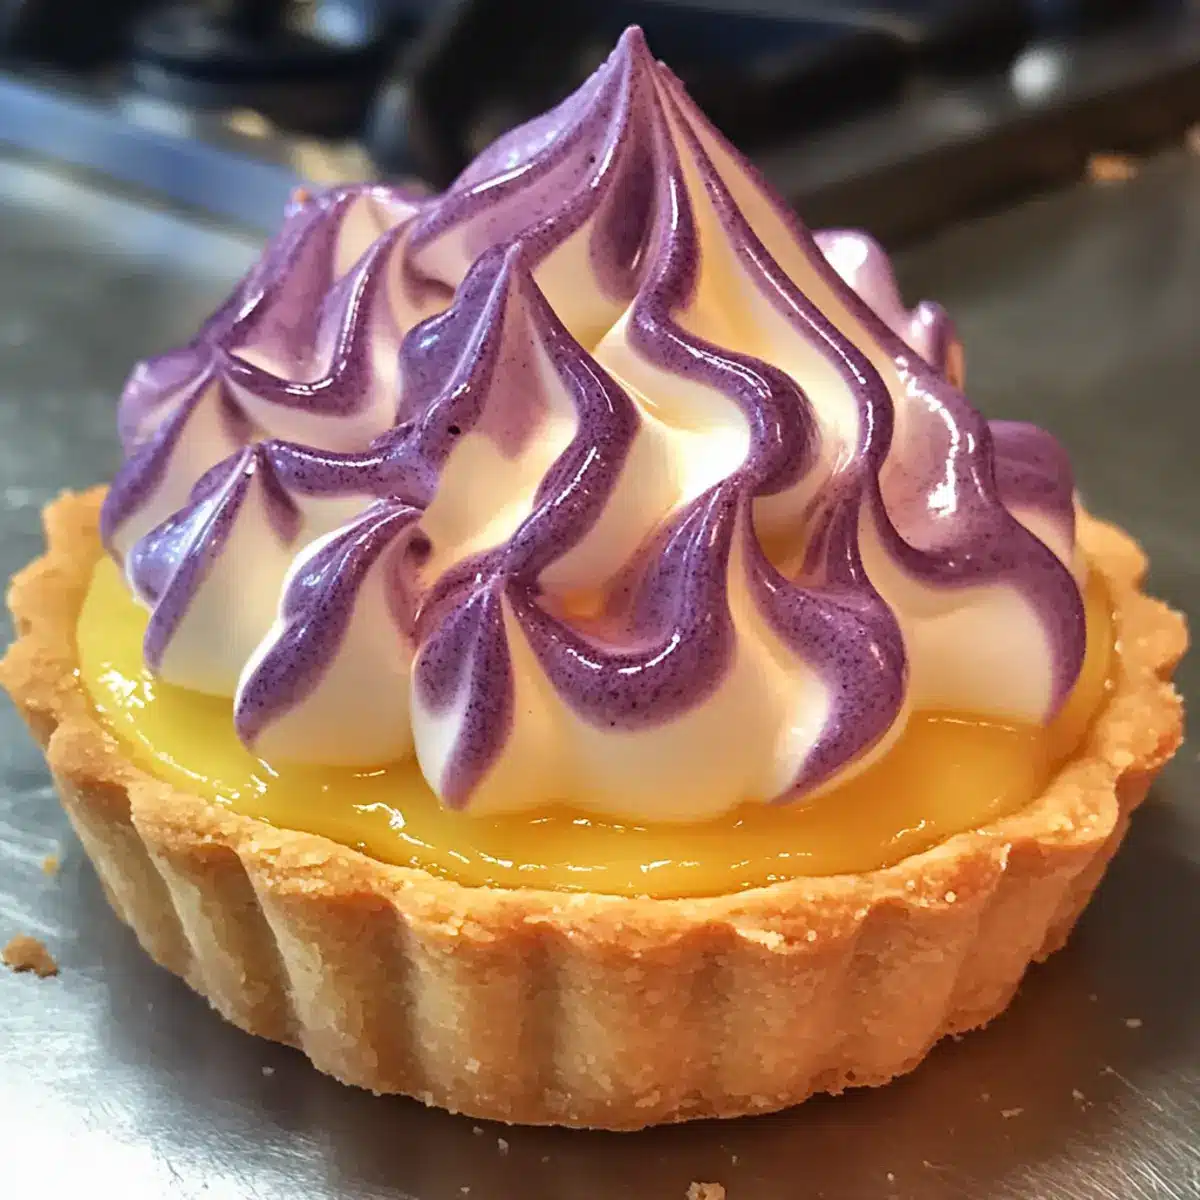
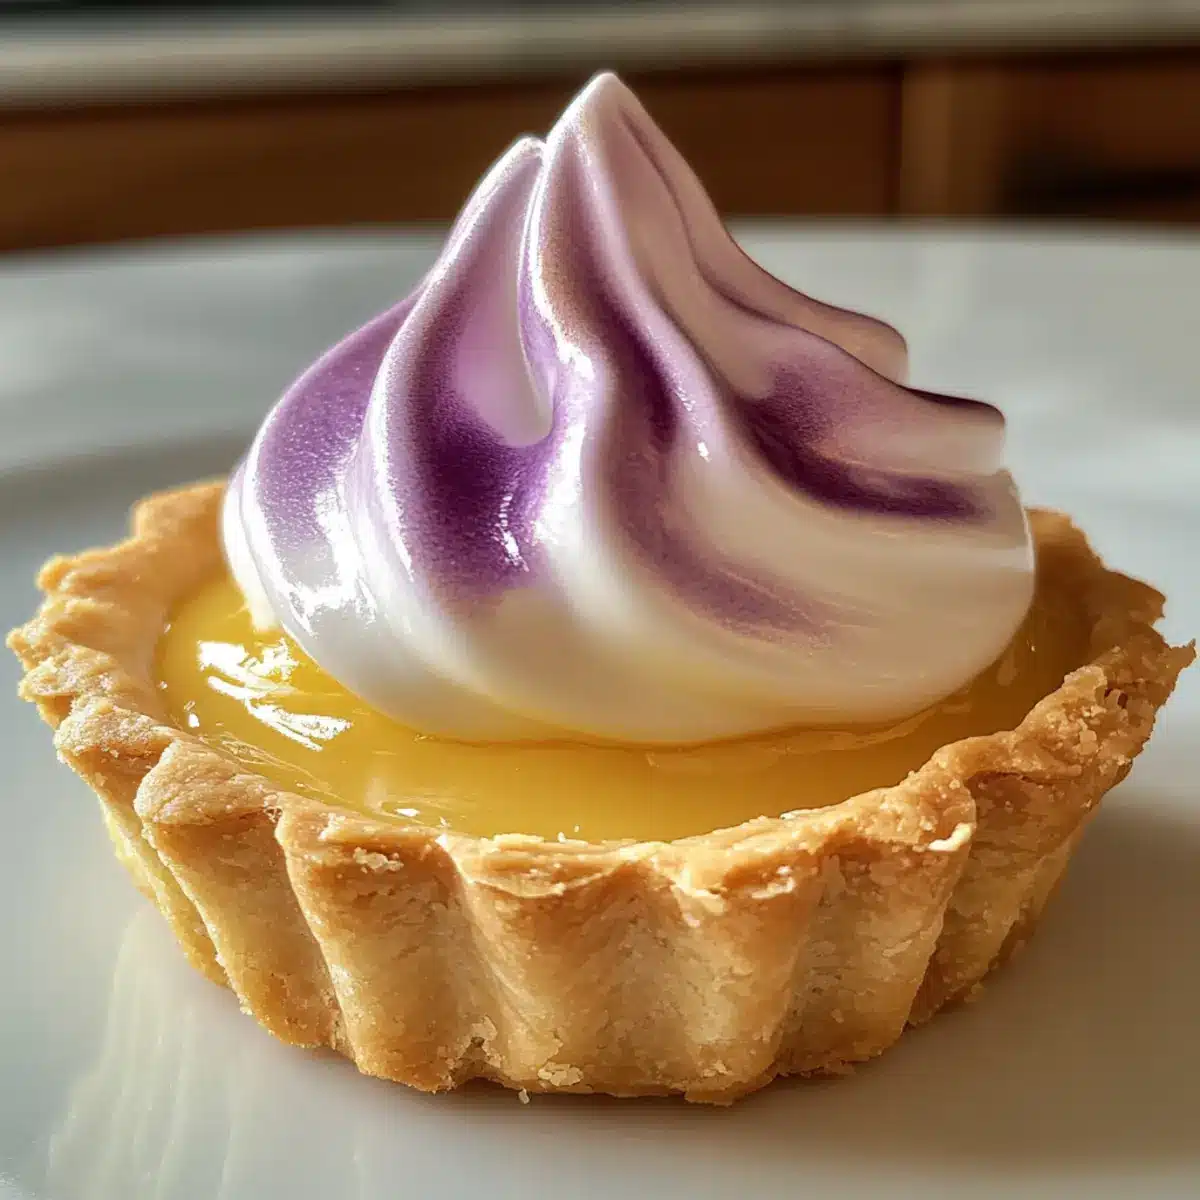
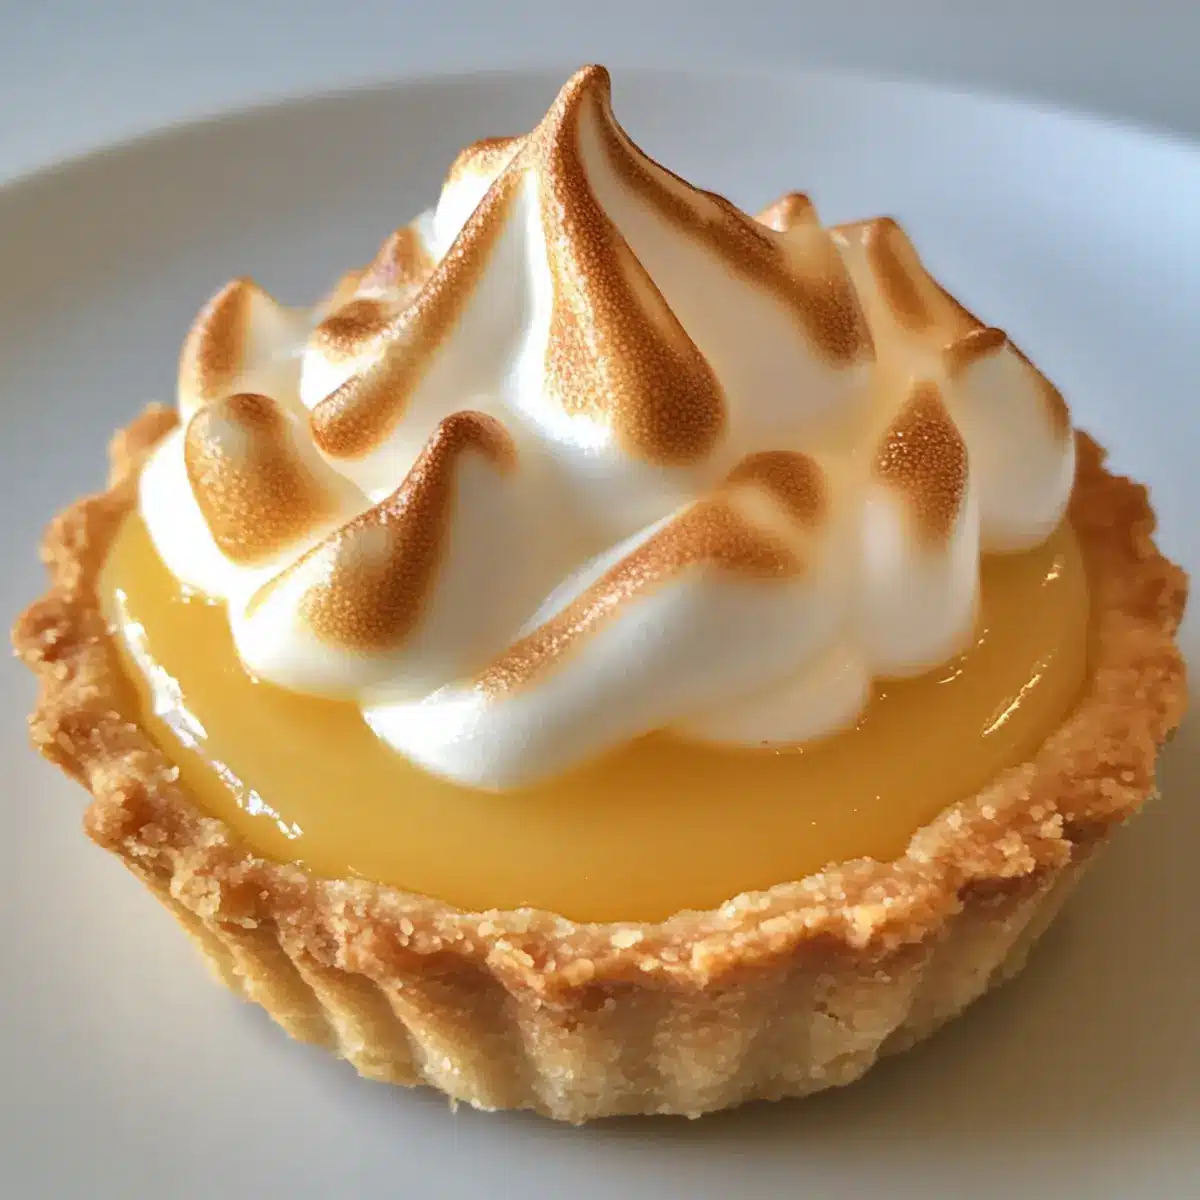
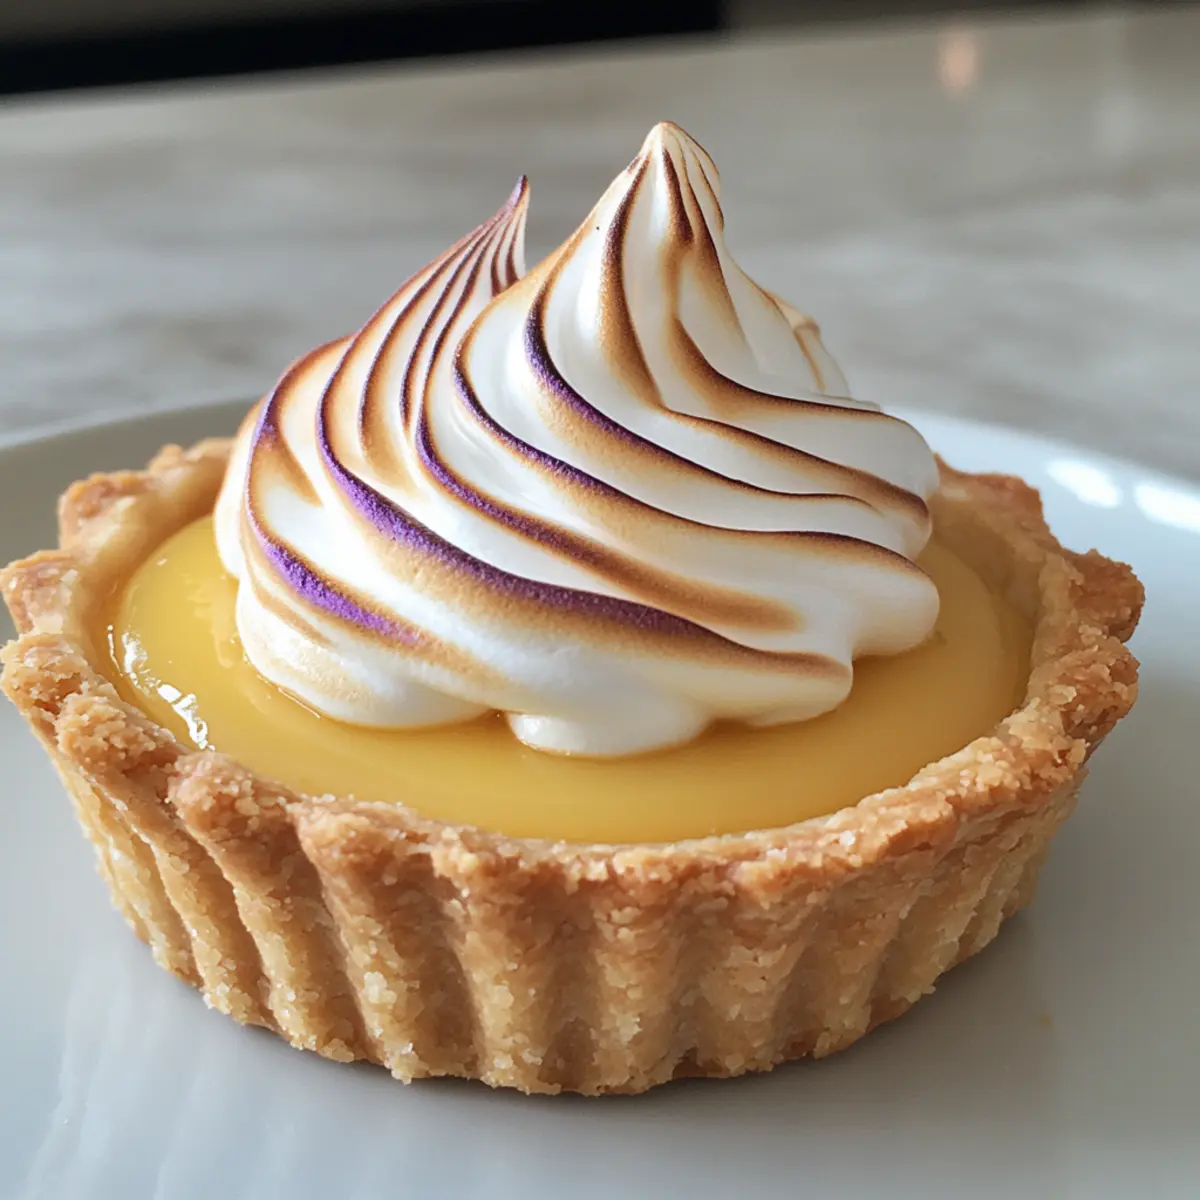
Spring is here, and with it comes the irresistible promise of fresh, vibrant flavors! Today, I’m excited to share my Mini Lemon Tart with Lilac Meringue—an enchanting dessert that perfectly captures the essence of the season. These bite-sized tarts boast a buttery crust, luscious lemon curd, and ethereal lilac meringue, making them a stunning centerpiece for any gathering. Not only are they a feast for the eyes, but they’re also quick to whip up, ensuring you spend less time in the kitchen and more time enjoying the company of friends and family. With gluten-free variations available, everyone can indulge in this delightful treat. Are you ready to bring a touch of spring into your kitchen? Let’s dive in!
Why is this Mini Tart Amazing?
Delightfully Unique: These Mini Lemon Tarts with Lilac Meringue bring a fresh, floral twist to classic desserts, making them an eye-catching centerpiece.
Quick and Easy: With straightforward steps, you’ll be impressing guests in no time. Perfect for those busy spring days!
Versatile Options: Feel free to experiment with flavors; consider a rose meringue or a gluten-free shell to cater to different dietary needs.
Perfect for Gatherings: These lovely tarts are ideal for brunches or tea parties, offering both taste and presentation that will wow your guests.
Flavorful Bliss: Enjoy the zesty lemon curd paired with the light, airy meringue that creates a delightful harmony with every bite. You might also love them alongside a refreshing lavender lemonade for a complete experience!
Mini Lemon Tart Ingredients
For the Tart Shells
- Flour – Use all-purpose flour for a classic base.
- Powdered Sugar – Confectioners’ sugar ensures a tender crust.
- Butter – Cold butter adds richness and flakiness; substitute with vegan butter for a dairy-free version.
- Egg Yolk – Binds the shell together, but a flax egg works as a vegan alternative.
- Water – Use ice-cold water for better dough consistency.
For the Lemon Curd
- Fresh Lemon Juice – The key to tartness; swap with lime juice for a zesty twist.
- Lemon Zest – Enhances aroma and flavor intensity—definitely recommended!
- Granulated Sugar – Sweetness levels can be adjusted according to your taste preference.
- Eggs – Thickening agent; use an egg replacer for a vegan version.
- Butter – Adds creaminess, but coconut oil can be a great dairy-free substitute.
For the Lilac Meringue
- Egg Whites – Provide lightness and structure; ensure they are free of yolk for proper whipping.
- Granulated Sugar – Sweetens and stabilizes the meringue; coconut sugar offers a unique flavor twist.
- Cream of Tartar – Acts as a stabilizer, but it’s okay to replace it with lemon juice.
- Vanilla Extract – Adds flavor; swap out for rose water to give a floral twist.
- Violet Food Coloring – For visual appeal; consider natural alternatives like butterfly pea flower extract.
Step‑by‑Step Instructions for Mini Lemon Tart with Lilac Meringue
Step 1: Make the Tart Shells
In a food processor, pulse together the all-purpose flour and powdered sugar until combined. Add cold, cubed butter and process until crumbly. Mix in the egg yolk and ice-cold water until the dough forms a ball. Chill the dough for 30 minutes, then preheat your oven to 350°F (175°C). Roll out the dough, press it into mini tart pans, and bake for 10–12 minutes until golden brown. Allow them to cool completely.
Step 2: Prepare the Lemon Curd
In a medium saucepan over medium heat, whisk together the fresh lemon juice, lemon zest, granulated sugar, and eggs. Stir continuously for about 8–10 minutes until the mixture thickens and coats the back of a spoon. Remove from heat and mix in the butter until melted and smooth. Pour the luscious lemon curd into the cooled tart shells and chill in the refrigerator for at least 1 hour to set.
Step 3: Make the Lilac Meringue
In a heatproof mixing bowl, combine the egg whites, granulated sugar, and cream of tartar. Place the bowl over a saucepan of simmering water, making sure the bowl doesn’t touch the water. Whisk gently until the mixture is warm and the sugar dissolves. Remove from heat, and beat with an electric mixer for 5–7 minutes until stiff peaks form. Stir in vanilla extract and a few drops of violet food coloring for that whimsical touch.
Step 4: Pipe Meringue and Toast
Using a piping bag, elegantly pipe the fluffy lilac meringue onto the top of each mini lemon tart. Create swirls or peaks to add dimension. Use a kitchen torch to carefully toast the tips of the meringue until lightly browned. Be cautious not to burn it! Lastly, garnish your stunning Mini Lemon Tarts with edible lilac petals or dried lavender for an exquisite finish.
Mini Lemon Tart with Lilac Meringue Variations
Customize your Mini Lemon Tart with Lilac Meringue for delightful variations that will surprise your taste buds!
- Rose Meringue: Swap vanilla extract for rose water, adding a beautiful floral note and a blush of color.
- Lime-Lavender Curd: Substitute lime juice and a hint of culinary lavender, creating a unique and aromatic flavor profile.
- Gluten-Free Shell: Use almond flour mixed with a gluten-free baking mix for those needing a gluten-free option without sacrificing taste.
- Matcha Meringue: Mix in a spoonful of matcha powder for a vibrant green hue and a subtly earthy taste twist.
- Chai Spice Curd: Infuse your lemon curd with chai spices like cinnamon and cardamom for a warm, comforting flavor experience.
- Coconut Meringue: Replace granulated sugar with coconut sugar and add shredded coconut for a tropical touch to your meringue.
- Spicy Citrus: Add a pinch of cayenne pepper to the lemon curd for a surprising kick that complements the tartness.
- Elderflower Meringue: Substitute a little elderflower extract in the meringue for a sweet, flowery essence—perfect for spring!
Don’t forget to enjoy these tarts with a side of lavender lemonade or a lovely cup of floral-infused tea for a complete spring experience!
How to Store and Freeze Mini Lemon Tart with Lilac Meringue
Fridge: Store your Mini Lemon Tarts in an airtight container for up to 2 days. This will keep the tart shells crisp while preserving the freshness of the lemon curd and meringue.
Freezer: For longer storage, freeze the tart shells without filling for up to 1 month. Wrap each shell tightly in plastic wrap and an extra layer of foil to prevent freezer burn.
Reheating: To enjoy the frozen tart shells, thaw them overnight in the fridge before crisping them back in a 350°F (175°C) oven for about 5-7 minutes. Refill with fresh lemon curd and lilac meringue just before serving for the best texture.
Make-Ahead Tips: Prepare the tart shells and lemon curd a day in advance. Keep the meringue separate until ready to serve for optimum fluffiness.
Make Ahead Options
These Mini Lemon Tarts with Lilac Meringue are perfect for busy home cooks looking to save time without sacrificing quality! You can prepare the tart shells and lemon curd up to 24 hours in advance. Simply bake the tart shells, allow them to cool completely, and store them in an airtight container at room temperature. Meanwhile, make the lemon curd and refrigerate it in a separate container. Just before serving, whip up the lilac meringue and pipe it onto the cooled tarts for that fresh, fluffy finish. This way, your delightful desserts are just as delicious and visually stunning while allowing you to enjoy more time with your guests!
What to Serve with Mini Lemon Tart with Lilac Meringue
Imagine a delightful spring gathering where refreshing flavors and vibrant colors mingle to create a feast for the senses.
-
Lavender Lemonade: The floral notes of lavender complement the tart’s citrusy zing, making a refreshingly exquisite drink pairing.
-
Earl Grey Tea: This aromatic tea, infused with bergamot, enhances the floral lilac meringue, creating a beautifully balanced sip. Consider serving it warm for cozy moments.
-
Fresh Berries: A medley of plump strawberries, blueberries, and raspberries adds juicy sweetness and a pop of color, enhancing the overall presentation.
-
Coconut Macaroons: Chewy coconut macaroons provide a delightful contrast in texture—sweet, chewy, and paired beautifully with the zesty tart.
-
Chilled Prosecco: This fizzy wine lightens the palate, creating a celebratory vibe, perfect for spring brunches or afternoon teas.
-
Honey-Sweetened Yogurt: A dollop of creamy yogurt drizzled with honey adds a rich creaminess that balances the tartness of the lemon curd in each delightful bite.
-
Meringue Kisses: Light and airy, these playful treats echo the lilac meringue and offer a whimsical touch, making them a fun addition to the dessert table.
Expert Tips for Mini Lemon Tart
- Grease-Free Utensils: Ensure that all bowls and utensils are completely grease-free while whipping egg whites. This will help achieve maximum volume for your lilac meringue.
- Cooling Trick: Speed up the cooling process of your lemon curd by transferring it to a shallow bowl. This allows it to cool evenly and quickly.
- Even Toasting: When using a kitchen torch to toast the meringue, hold it at an angle to avoid burning. This ensures that your Mini Lemon Tart has perfectly toasted peaks.
- Measure Carefully: Be precise with your measurements, especially for the tart shell ingredients. Too much flour can make the shell tough.
- Flavor Variations: Feel free to experiment with the meringue! A dash of rose water can create a delightful twist, enhancing your Mini Lemon Tart’s floral flavor profile.
- Chill Time: Allow the assembled tarts to chill before serving. This helps the flavors meld beautifully, resulting in a more enjoyable taste experience.
Mini Lemon Tart with Lilac Meringue Recipe FAQs
How do I choose the best lemons for the lemon curd?
Absolutely! Look for lemons that are bright yellow, firm to the touch, and slightly fragrant. Thin-skinned lemons usually have more juice. Avoid any that have green spots or are overly soft, as these may be past their prime.
What’s the best way to store Mini Lemon Tarts?
To maintain their delightful texture, store your Mini Lemon Tarts in an airtight container in the fridge for up to 2 days. This keeps the tart shells crisp while preserving the vivid flavors of the lemon curd and lilac meringue.
Can I freeze the Mini Lemon Tart with Lilac Meringue?
Yes! For longer storage, you can freeze the tart shells without any filling for up to 1 month. Wrap each shell tightly in plastic wrap followed by foil to prevent freezer burn. When ready to use, thaw the shells overnight in the fridge, then crisp them back in the oven at 350°F (175°C) for about 5-7 minutes before adding the lemon curd and meringue right before serving.
What if my meringue won’t peak?
Very good question! If your meringue isn’t forming peaks, ensure your mixing bowl and whisk are free of any grease. This can interfere with whipping. Additionally, make sure your egg whites are at room temperature, as this helps in achieving better volume. If you’re still having issues, try adding a bit more granulated sugar gradually as you’re whipping to stabilize the mixture.
Can I make this Mini Lemon Tart gluten-free?
Yes, indeed! You can easily make a gluten-free version by substituting the all-purpose flour with a blend of almond flour and a gluten-free baking mix. This way, everyone can enjoy this delightful spring dessert!
Is this recipe suitable for pets or allergies?
Always be cautious! The Mini Lemon Tart contains ingredients that may not be safe for pets, such as lemon and sugar. For those with allergies, be sure to adapt the recipe by substituting any allergens like eggs or dairy as needed. You can use flax eggs for a vegan alternative and coconut oil for those avoiding dairy.
Mini Lemon Tart with Lilac Meringue for Spring Bliss
Ingredients
Equipment
Method
- Pulse together the flour and powdered sugar until combined. Add butter and process until crumbly. Mix in egg yolk and water until dough forms. Chill for 30 minutes, preheat oven to 350°F, roll out dough, press into tart pans, and bake for 10–12 minutes.
- In a saucepan over medium heat, whisk together lemon juice, lemon zest, sugar, and eggs. Stir for 8–10 minutes until thickened. Mix in butter until melted. Pour into cooled tart shells and chill for 1 hour.
- In a heatproof bowl, combine egg whites, sugar, and cream of tartar over simmering water. Whisk until warm and sugar dissolves. Beat with an electric mixer until stiff peaks form. Stir in vanilla and food coloring.
- Pipe the meringue onto the tarts, creating swirls or peaks. Use a kitchen torch to toast the meringue tips until lightly browned. Garnish with edible lilac petals or dried lavender.
Leave a Reply