
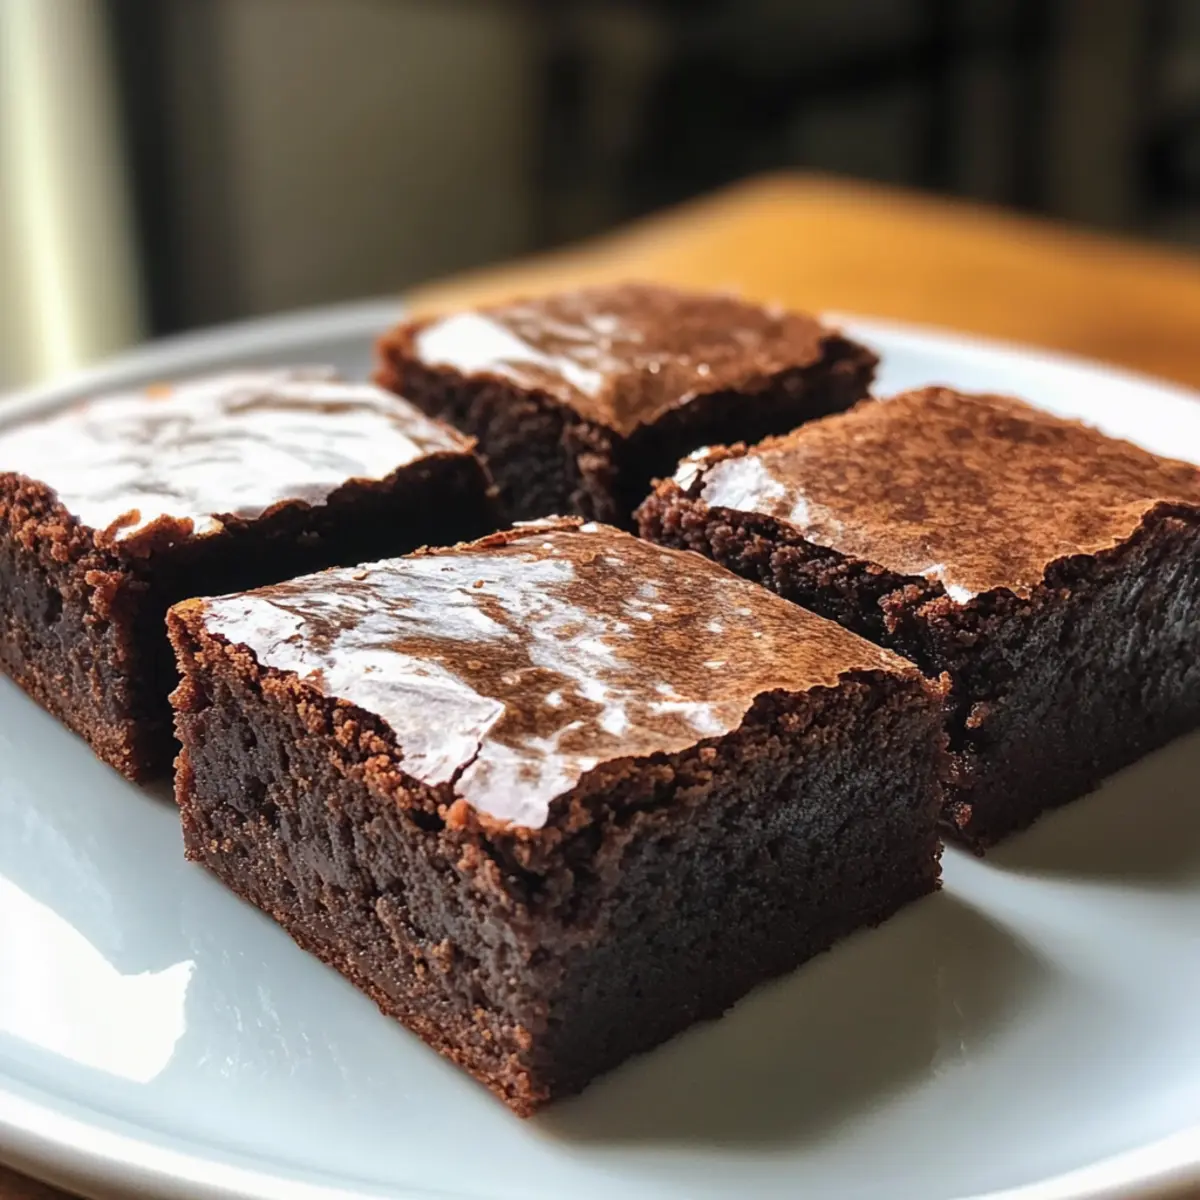
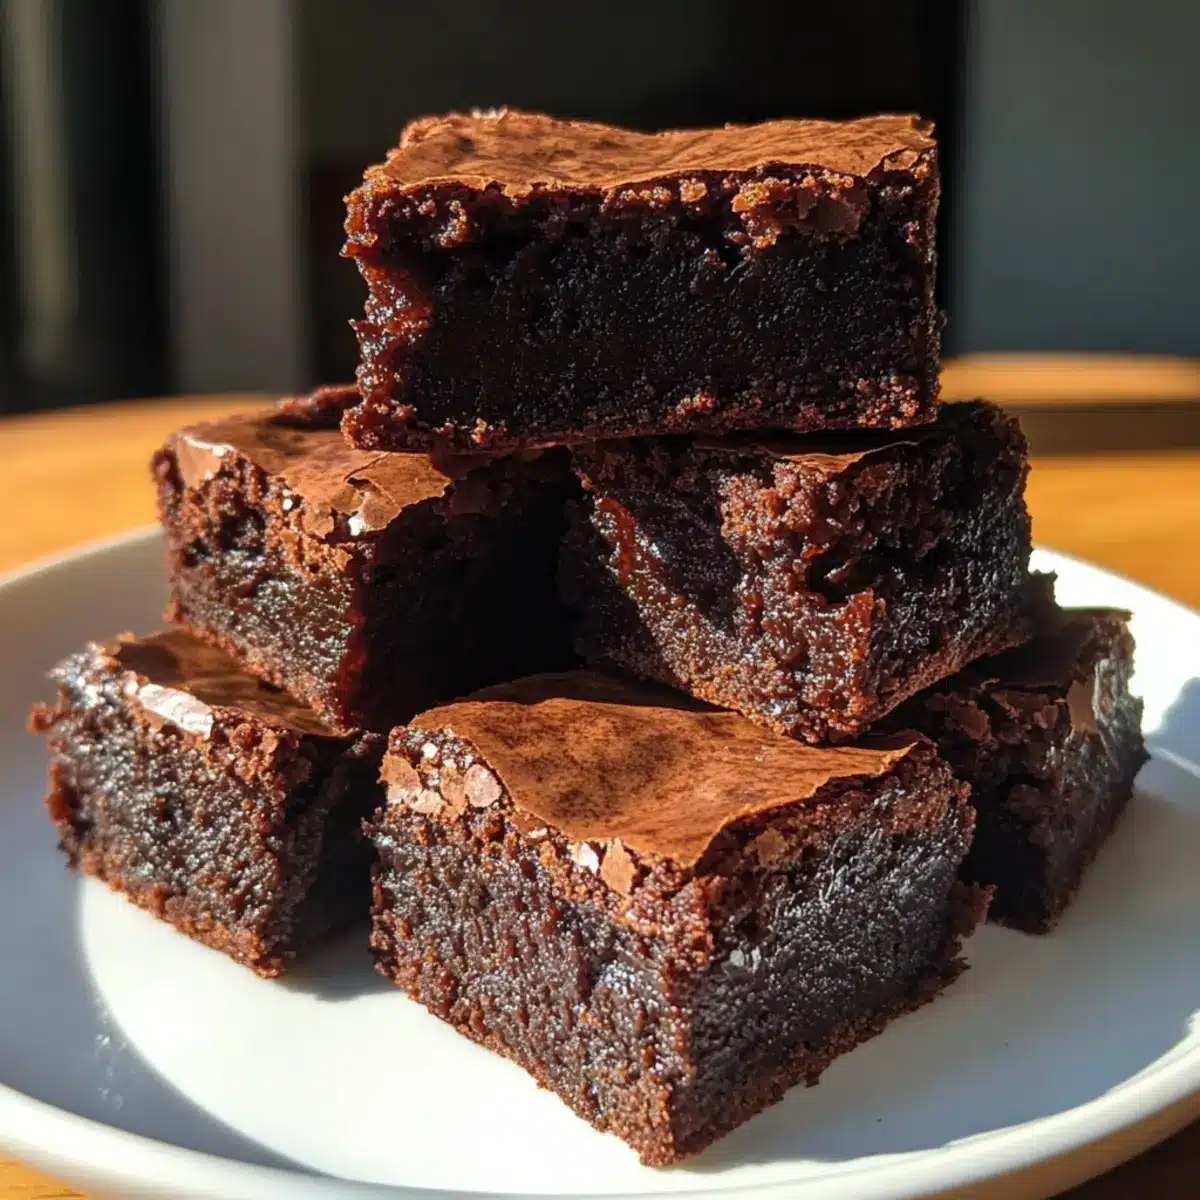
With each bite of these Chewy Chocolate Mochi Brownies, you’ll be transported to a world where gooey chocolate dances harmoniously with a delightful chewiness that could dazzle even the most discerning dessert lovers. These brownies are not just any sweet treat; they’re a gluten-free miracle that pairs the classic elements of fudgy brownies with the irresistible texture of mochi. Whether you’re craving a decadent dessert after dinner or a sweet remedy for a mid-afternoon slump, these brownies are quick to whip up and sure to impress friends and family alike. Imagine serving them warm, topped with a scoop of ice cream! Are you ready to indulge in a chocolate experience like no other? Let’s dive into the recipe!
What Makes Mochi Brownies So Special?
Gooey Goodness: Each bite is filled with rich chocolate that melts in your mouth, creating a truly decadent experience.
Unique Texture: The chewyness of mochi combined with the fudgy center makes these brownies unlike any traditional dessert you’ve ever had.
Gluten-Free Delight: Enjoy these brownies without guilt, as they’re fully gluten-free and perfect for anyone with dietary restrictions.
Quick & Easy: Whip them up in no time with simple ingredients that you probably already have in your kitchen.
Crowd-Pleasing: Serve warm with a scoop of ice cream for a dessert that will leave your friends begging for the recipe, just like our delicious Kit Kat Brownies!
Mochi Brownie Ingredients
• Discover the secret to the perfect chocolate mochi brownies!
For the Batter
- Cocoa Powder – Adds rich chocolate flavor; no known substitutions.
- Dark Chocolate – Provides deep chocolate taste and moisture; use semi-sweet chocolate for a milder flavor.
- Unsalted Butter – Contributes to moisture and richness; can use coconut oil for a dairy-free version.
- Vanilla Extract – Enhances overall flavor; pure vanilla is preferred, but imitation works well, too.
- Eggs – Binds ingredients and adds structure; no direct substitutes for vegan; consider flax eggs as an alternative.
- Milk – Adds moisture; whole milk is recommended; use almond milk for a non-dairy option.
- Glutinous Rice Flour – Key ingredient for chewy texture and ensures it’s gluten-free; no substitutes will replicate the same texture.
- Salt – Balances sweetness; kosher salt is preferred.
- Sugar – Adds sweetness and moisture; use brown sugar for a deeper flavor.
- Baking Powder – Helps with leavening; ensure using fresh for optimal results.
- Chocolate Chunks – Added to taste for extra richness and texture; use any type of chocolate as preferred.
These ingredients come together beautifully to create a delightful batch of mochi brownies that are sure to impress. Get ready to enjoy a unique dessert experience!
Step‑by‑Step Instructions for Mochi Brownies
Step 1: Preheat and Prepare
Begin by preheating your oven to 320°F (160-170°C). While the oven is warming up, line an 8×8-inch baking pan with parchment paper, creating an overhang for easy removal later. Ensure the edges are well-covered to prevent sticking. This preparation will set the stage for your delectable mochi brownies.
Step 2: Melt Chocolate and Butter
In a double boiler, melt together the dark chocolate and unsalted butter over low heat. Stir occasionally until the mixture is smooth and glossy, which takes about 5-7 minutes. Once melted, remove from heat and let it cool to room temperature, ensuring it’s still pourable, as this luscious blend will be a key flavor component for your mochi brownies.
Step 3: Mix Wet Ingredients
In a medium-sized mixing bowl, whisk together the eggs and vanilla extract until well combined and slightly frothy. Then, add in the milk, stirring gently until you achieve a smooth mixture. This wet blend creates a rich base that will beautifully complement the chocolate once it’s incorporated into the mochi brownies.
Step 4: Combine Wet and Chocolate Mixtures
Pour the cooled chocolate-butter mixture into the egg and milk blend, stirring continuously until the two mixtures meld seamlessly. This step is crucial for ensuring a uniform flavor throughout your mochi brownies, resulting in a delightful fudgy texture paired with the chewy quality you desire.
Step 5: Prepare Dry Ingredients
In a separate bowl, sift together the glutinous rice flour, cocoa powder, baking powder, salt, and sugar. Mixing these dry ingredients thoroughly ensures there are no clumps, which is essential for achieving the perfect consistency in your mochi brownies. The combination of these ingredients creates the signature chewiness and rich chocolate flavor.
Step 6: Create the Batter
Gradually pour the wet mixture into the bowl of dry ingredients, folding gently until a lump-free batter forms. Avoid overmixing, as this keeps the mochi brownies tender and chewy. You’ll notice the batter becoming thick and glossy, filled with rich chocolatey goodness—an inviting sight as you prepare for baking.
Step 7: Transfer to Baking Pan
Carefully pour the batter into the prepared baking pan, spreading it evenly. For added indulgence, sprinkle a generous amount of chocolate chunks on top, ensuring they are evenly distributed. This step not only enhances the flavor but makes your mochi brownies irresistibly decadent with gooey pockets of chocolate.
Step 8: Bake to Perfection
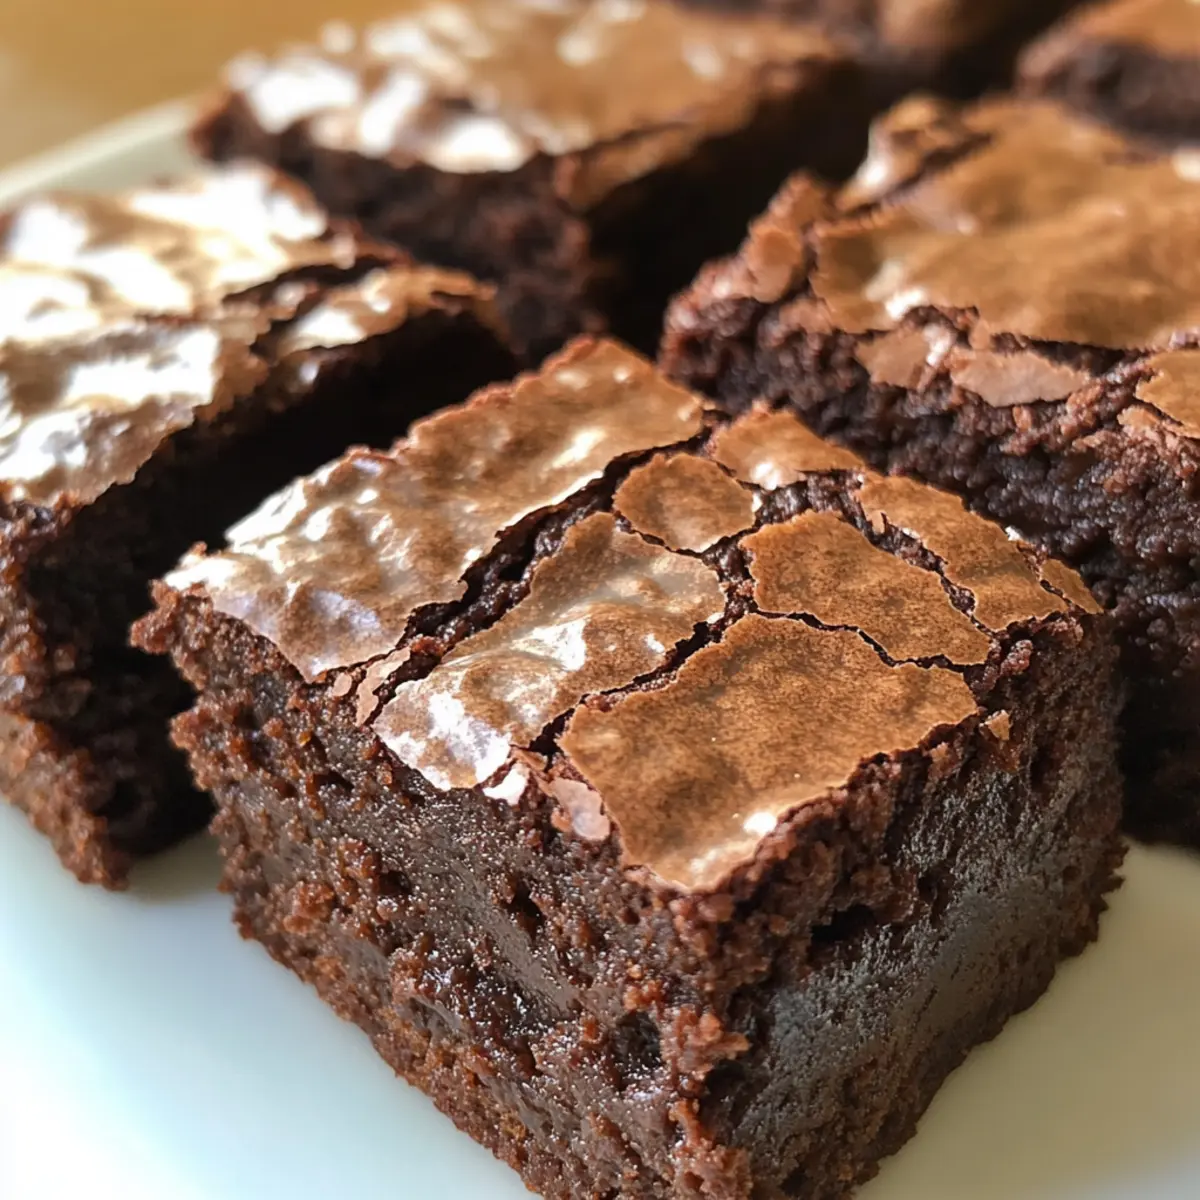
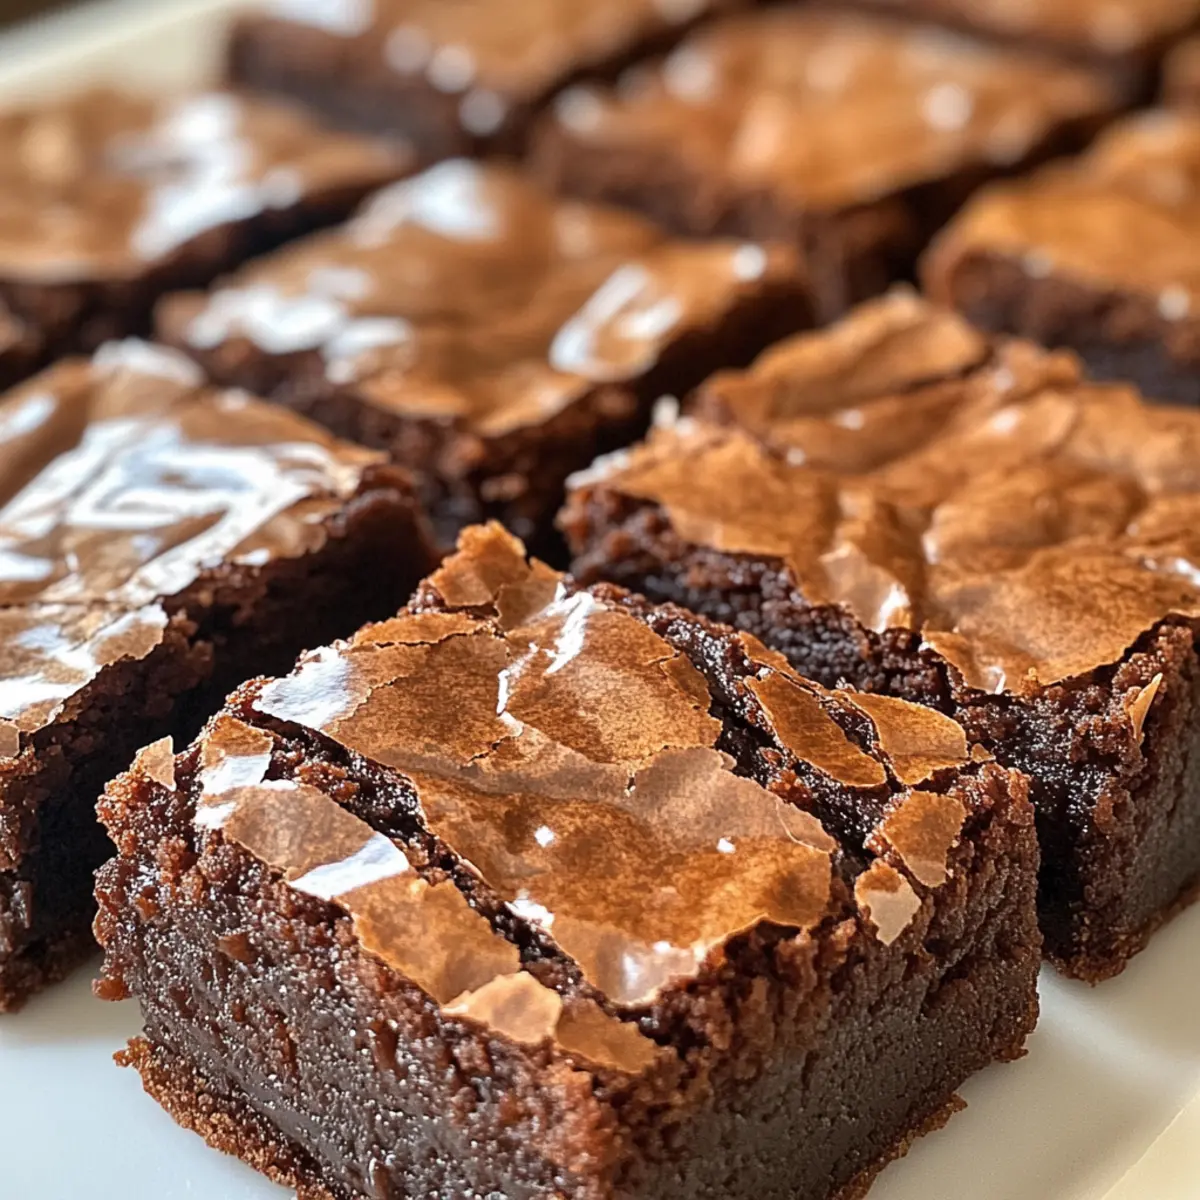
Place the pan in the preheated oven and bake for 55-60 minutes. Check the doneness by inserting a toothpick into the center; it should come out with a few moist crumbs, indicating that the center is still soft and fudgy. Your mochi brownies will have a lovely, slightly domed top when they are ready.
Step 9: Cool and Serve
Once baked, remove the pan from the oven and let the brownies cool in the pan for at least 20 minutes. After cooling, lift the brownies out using the parchment paper edges, transferring them to a wire rack. Allow them to cool completely before cutting into squares for serving. The chewy texture and rich chocolate flavor will be a delightful treat for everyone!
Expert Tips for Mochi Brownies
-
Use Parchment Paper: Line your pan with baking paper to avoid sticking; this ensures your mochi brownies come out intact and beautiful.
-
Cool Properly: Let the brownies cool completely before cutting. This allows them to set, ensuring neat squares and that perfect chewy texture.
-
Test for Doneness: For the best results, check with a toothpick; it should come out with a few moist crumbs, indicating a fudgy center without overbaking.
-
Mind the Mixing: Avoid overmixing when combining wet and dry ingredients. This keeps the batter tender for those deliciously chewy mochi brownies.
-
Customize Flavors: Feel free to experiment with different types of chocolate or add in nuts and spices to personalize your mochi brownies and elevate their flavors!
How to Store and Freeze Mochi Brownies
Room Temperature: Keep mochi brownies in an airtight container at room temperature for up to 3 days. This helps maintain their chewy texture while keeping them deliciously fresh.
Fridge: For longer shelf life, store brownies in the fridge where they’ll stay fresh for up to a week. Ensure they’re tightly wrapped to prevent them from drying out.
Freezer: Freeze mochi brownies by wrapping individual pieces in plastic wrap, then placing them in a zip-top bag. They can be frozen for up to 3 months without losing flavor.
Reheating: To enjoy a warm treat, gently reheat brownies in the microwave for 10-15 seconds, bringing back their original gooeyness without drying them out.
Mochi Brownies: Fun Variations Await!
Feel free to unleash your creativity and make these mochi brownies your own with a few delightful twists!
-
Nutty Crunch: Add chopped walnuts or almonds to the batter for a delightful crunch and flavor contrast. The nutty texture complements the gooeyness beautifully.
-
Fruity Surprise: Stir in dried cherries or cranberries for a sweet-tart burst in every bite. These fruits enhance the flavors while providing a lovely chewiness that’s simply irresistible.
-
Spicy Kick: Add a pinch of cayenne pepper or cinnamon to the batter for a warm, unexpected heat. It’s a surprising twist that will tickle your taste buds and elevate the flavor profile significantly.
-
Dairy-Free Delight: Substitute coconut oil for unsalted butter and almond milk for cow’s milk for a completely dairy-free dessert. You can enjoy all the chocolatey goodness without the dairy.
-
Flavored Chocolates: Experiment with using flavored chocolate, such as orange or sea salt dark chocolate. This small change can lead to an enchanting taste experience—much like enjoying our scrumptious Kit Kat Brownies!
-
Vegan Version: Replace the eggs with flax eggs to create a crowd-pleasing vegan treat. Combine 1 tablespoon of ground flaxseed with 2.5 tablespoons of water, let it sit for a few minutes, and mix it into your batter.
-
Chewy Layers: Add layers of sweetened cream cheese between the batter before baking for a decadent twist. The creamy layer adds a luscious finish that elevates the brownies entirely.
-
Chocolate Chips: Fold in an assortment of chocolate chips—milk, dark, or white—right into the batter. This little twist amplifies the chocolate experience joyfully!
Make Ahead Options
These Chewy Chocolate Mochi Brownies are perfect for meal prep enthusiasts, allowing you to savor a delightful dessert with minimal effort! You can prepare the brownie batter up to 24 hours in advance; simply cover it tightly and refrigerate. When ready to bake, let the batter sit at room temperature for about 30 minutes before pouring it into the pan. Additionally, if you’d like to bake a batch ahead, cool the brownies completely, then store them in an airtight container at room temperature for up to 3 days. Just reheat them slightly in the microwave or oven before serving for that fresh-out-of-the-oven taste. Enjoy the convenience of these mochi brownies while still delighting in their rich, gooey goodness!
What to Serve with Chewy Chocolate Mochi Brownies?
Indulging in these delightful morsels opens the door to a world of delicious pairings that will enhance every bite.
-
Vanilla Ice Cream: The creamy richness beautifully contrasts with the chewy texture, creating a delightful treat that melts in your mouth. A scoop of vanilla will elevate your dessert experience to new heights!
-
Fresh Berries: Juicy strawberries or raspberries add a burst of freshness and tartness that balances the sweetness of the brownies. Their vibrant color and flavor bring a pop of vitality to your dessert plate.
-
Chocolate Drizzle: Drizzling warm chocolate sauce over your mochi brownies intensifies the chocolate flavor. It creates an indulgent layer that will surely satisfy every chocolate lover’s cravings.
-
Whipped Cream: Light and airy whipped cream provides a luscious contrast, making each bite feel decadent yet light. Top them with a dollop for that extra touch of elegance.
-
Mint Tea: Fresh mint tea complements the chocolate brownies, offering a refreshing contrast. The herbal notes will cleanse your palate and leave you feeling invigorated after this delightful dessert.
-
Matcha Latte: This creamy, slightly bitter drink pairs wonderfully with the sweet, chewy brownies. The earthiness of matcha elevates the flavors and adds a unique twist.
-
Caramel Sauce: A buttery caramel sauce drizzled over each square introduces a rich sweetness that enhances the overall flavor profile. It’s a delightful match made in dessert heaven!
Mochi Brownies Recipe FAQs
What type of glutinous rice flour should I use for mochi brownies?
It’s essential to use sweet glutinous rice flour, also known as “mochi flour,” which is different from regular rice flour. This specific flour gives the brownies their iconic chewy texture. Look for it in Asian grocery stores or online, and avoid substitutes.
How should I store leftover mochi brownies?
Keep your mochi brownies in an airtight container at room temperature for up to 3 days. If you want to extend their freshness, refrigerate them for up to a week. Just ensure they are tightly wrapped to maintain that delightful chewiness.
Can I freeze mochi brownies? What’s the best way?
Absolutely! To freeze mochi brownies, start by wrapping individual pieces tightly in plastic wrap. Then, place them in a zip-top freezer bag, removing as much air as possible. These brownies can be frozen for up to 3 months. To enjoy, simply thaw them in the refrigerator or warm them slightly in the microwave for 10-15 seconds.
What if my brownies come out too dry?
If your brownies turn out dry, it’s likely due to overbaking. Always check for doneness a few minutes early; a toothpick should come out with some moist crumbs, indicating a fudgy center. Also, be sure to measure your ingredients accurately, especially baking times, as ovens can vary.
Are mochi brownies safe for people with nut allergies?
These mochi brownies can be made nut-free by using dairy alternatives like almond milk, coconut milk, or even oat milk instead of milk—with careful consideration not to add nuts or nut-based products in the mix. Always double-check ingredient labels to ensure there are no cross-contaminations, especially if you’re serving guests with allergies.
Melting Mochi Brownies That Are Gluten-Free and Irresistible
Ingredients
Equipment
Method
- Preheat your oven to 320°F (160-170°C) and line an 8x8-inch baking pan with parchment paper.
- Melt together the dark chocolate and unsalted butter over low heat until smooth, about 5-7 minutes. Let cool to room temperature.
- Whisk together the eggs and vanilla extract until frothy. Add milk and stir gently until smooth.
- Mix the cooled chocolate-butter mixture into the egg and milk blend, stirring continuously until combined.
- In a separate bowl, sift together glutinous rice flour, cocoa powder, baking powder, salt, and sugar.
- Gradually fold the wet mixture into the dry ingredients, mixing gently until a lump-free batter forms.
- Pour the batter into the prepared baking pan and sprinkle chocolate chunks on top.
- Bake for 55-60 minutes. A toothpick should come out with a few moist crumbs.
- Cool in pan for at least 20 minutes before transferring to a wire rack to cool completely. Cut into squares for serving.
Leave a Reply