
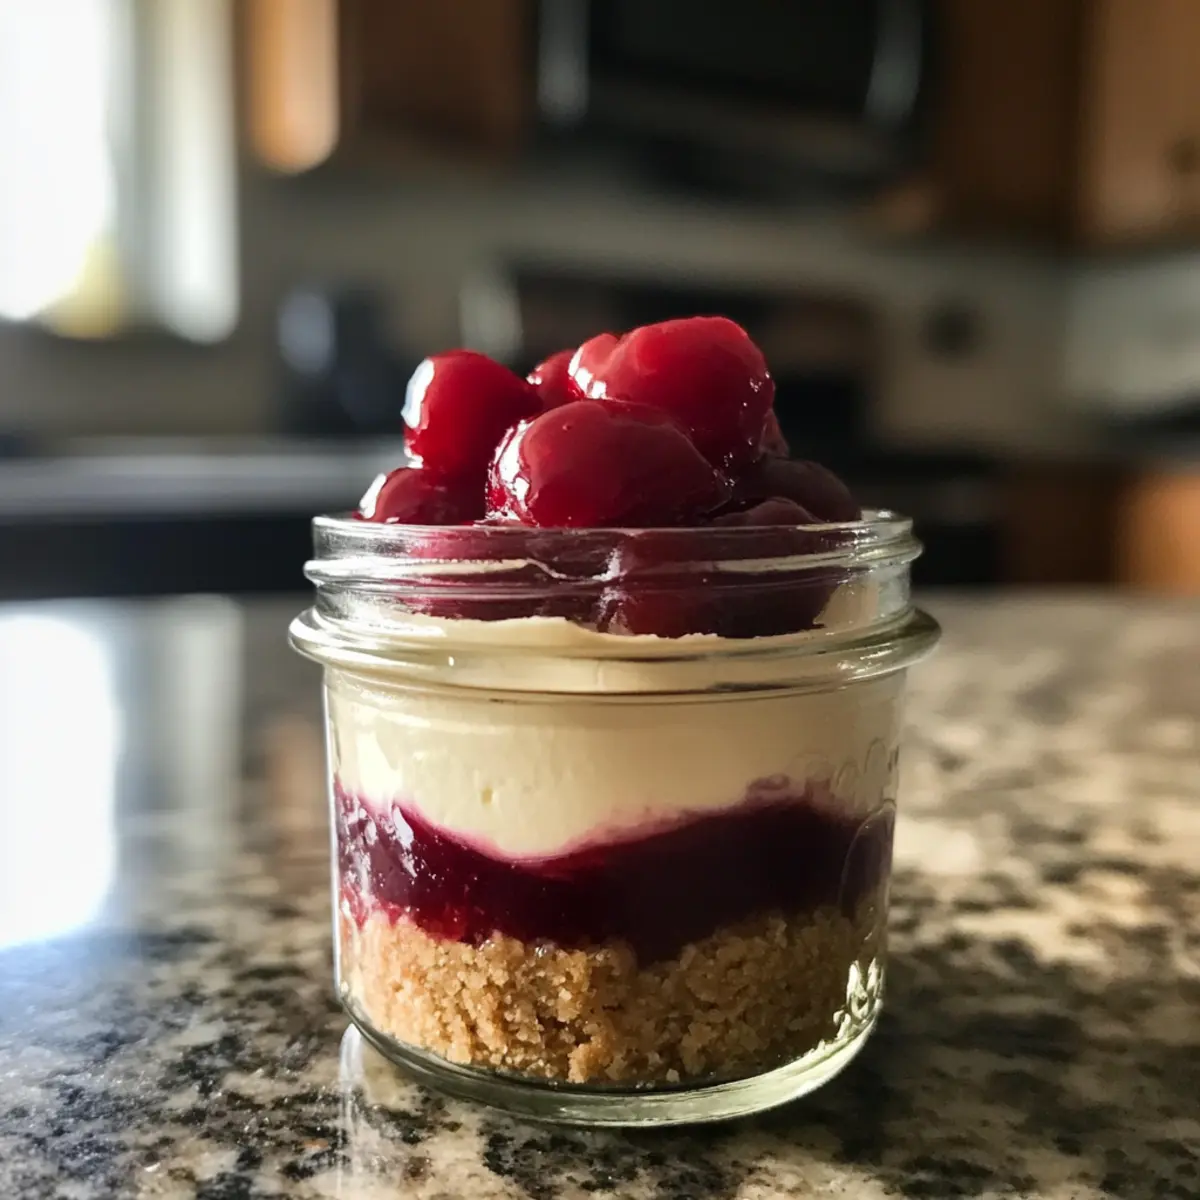
As I rummaged through my pantry, searching for a sweet escape from the ordinary, I stumbled upon jars just waiting to be filled with something delightfully unique. That’s when I decided to whip up a Healthier No-Bake Cheesecake in a Jar. This charming dessert not only satisfies my cheesecake cravings but also comes together in a flash, making it perfect for those busy weeknights. Using rich Greek yogurt and a buttery graham cracker crust, it’s a deliciously creamy treat you can enjoy guilt-free! Plus, with the option of topping it off with fresh cherries or blueberries, this no-bake wonder becomes an enticing canvas for seasonal flavors. Are you ready to transform your dessert game? Let’s get started!
Why is no-bake cheesecake so appealing?
Simplicity at Its Finest: Preparing this no-bake cheesecake in a jar is a breeze, requiring only straightforward ingredients and minimal effort.
Creamy Delight: The combination of Greek yogurt and cream cheese delivers a smooth, velvety texture that melts in your mouth, making each bite irresistible.
Customizable Fun: With topping options like fresh cherries or blueberries, you can easily adapt this recipe to suit any mood or occasion.
Guilt-Free Indulgence: Lightened up with healthier ingredients, it offers a satisfying treat without the excess calories of traditional cheesecake.
Perfect for Any Gathering: These charming jars aren’t just a dessert; they’re a show-stopping centerpiece for any gathering, making them incredibly appealing to both family and friends!
Try serving them alongside an Oreo Cheesecake Cookie or Millionaires Cheesecake for a delightful dessert spread that everyone will love!
No-Bake Cheesecake in a Jar Ingredients
For the Cherry Topping
- Pitted Cherries – Fresh or frozen cherries provide natural sweetness and can be substituted with blueberries for variation.
- Pure Maple Syrup – Acts as a natural sweetener; only 3 tablespoons are used, minimizing added sugars.
- Fresh Lemon Juice – Adds a bright tartness that beautifully balances the sweetness of the cheesecake.
- Water – Helps dissolve the corn starch in the cherry topping.
- Corn Starch – Thickens the cherry compote, ensuring a smooth topping.
For the Cheesecake Filling
- Cream Cheese – Provides creaminess and richness to the filling; can substitute with light cream cheese for a lower fat option.
- Plain Full-Fat Greek Yogurt – Replaces some cream cheese for a lighter, healthier filling while maintaining a rich flavor.
For the Crust
- Graham Cracker Crumbs – Creates the crust; substitute with gluten-free crackers for a gluten-free option.
- Butter – Offers moisture and texture to the crust; a dairy-free alternative can also be used if needed.
This no-bake cheesecake in a jar is a perfect treat to whip up, satisfying your sweet tooth without the fuss!
Step‑by‑Step Instructions for No-Bake Cheesecake in a Jar
Step 1: Prepare Cherry Topping
In a medium saucepan, combine your pitted cherries, pure maple syrup, fresh lemon juice, water, and corn starch. Bring the mixture to medium heat, stirring continuously for about 5-10 minutes until it thickens slightly and becomes bubbly. Once the cherry topping has thickened, remove it from heat and let it cool to room temperature while you prepare the cheesecake filling.
Step 2: Make Cheesecake Filling
In a large mixing bowl, beat together the softened cream cheese and plain full-fat Greek yogurt using an electric mixer until the mixture becomes completely smooth and creamy. Gradually blend in the remaining maple syrup and lemon juice until well combined. Once your filling has the desired creamy consistency, cover the bowl and chill it in the refrigerator for at least 30 minutes to thicken further.
Step 3: Prepare Crust
Melt the butter in a small microwave-safe bowl. In another bowl, combine the graham cracker crumbs with the melted butter, mixing thoroughly until all crumbs are evenly coated. Divide this crumb mixture equally among six mini mason jars, pressing down gently with a spoon to form a solid crust layer at the bottom of each jar.
Step 4: Assemble Jars
Carefully spoon the chilled cheesecake filling over the crust in each jar, tapping gently on the counter to settle the filling. Use a spatula to spread the filling evenly across the top of the crust, making sure to leave some space for the cherry topping. Once all jars are filled, beautifully layer the cooled cherry compote on top of the cheesecake filling, creating a vibrant and enticing look.
Step 5: Chill & Serve
Place the assembled jars in the refrigerator and chill them for at least one hour to allow the cheesecake to set properly. Once chilled, the no-bake cheesecake in a jar will be ready to serve! For the best texture and flavor, enjoy these delightful desserts within three days, and feel free to customize with seasonal fruit toppings if desired.
What to Serve with Healthier No-Bake Cheesecake in a Jar
Looking to elevate your dessert experience? Pair these delightful little jars with some complementary treats for a truly unforgettable meal.
-
Creamy Vanilla Ice Cream: A scoop of vanilla ice cream adds a luscious creaminess that harmonizes beautifully with the tangy cheesecake filling. It’s a wonderful contrast in temperature and texture!
-
Mixed Berry Salad: A refreshing bowl of mixed berries brings a burst of freshness that cuts through the richness, providing a vibrant and colorful side to your dessert.
-
Chocolate Drizzle: A smooth chocolate drizzle over the cheesecake adds a decadent touch, offering a rich, sweet contrast that pairs perfectly with the fruit topping.
-
Graham Cracker Crust Cookies: Serve a few of these cookies alongside the jars for an added crunch factor that brings out the buttery taste of the cheesecake crust.
-
Mint-Infused Sparkling Water: A glass of mint-infused sparkling water cleanses the palate after each rich bite, refreshing your senses and enhancing the overall dessert experience.
-
Decaf Coffee or Espresso: Sip on decaf coffee or espresso as you savor your cheesecake; the coffee’s bitterness perfectly balances the sweetness of the jars, creating a wonderful end to your meal.
Whether it’s a family dinner or a gathering with friends, these pairings will elevate your experience while making the delicious no-bake cheesecake in a jar the true star of the show!
Make Ahead Options
These No-Bake Cheesecake in a Jar desserts are perfect for meal prep enthusiasts! You can make the cherry topping and cheesecake filling up to 24 hours in advance; simply refrigerate them in airtight containers to maintain freshness. The buttery graham cracker crust can also be prepared ahead of time; just keep it stored separately to avoid sogginess. When you’re ready to serve, layer the filling and topping in the jars, then let them chill in the fridge for at least one hour to set before enjoying. This way, you’ll have a delicious and impressive dessert with minimal last-minute effort, ensuring your evenings are just a bit easier!
Expert Tips for No-Bake Cheesecake in a Jar
-
Chilling Time Matters: Allow the jars to chill in the fridge for at least one hour for optimal texture. An under-chilled cheesecake can be too soft and messy.
-
Mixing Secrets: Beat the cream cheese and Greek yogurt until completely smooth before chilling. This prevents lumps and ensures a creamy, delightful filling in your no-bake cheesecake in a jar.
-
Fruit Variations: Don’t hesitate to experiment with different toppings. Blueberries, raspberries, or strawberries can add a refreshing twist and adapt the dessert to seasonal availability.
-
Crust Consistency: Make sure to press the crust mixture firmly in the jars. This creates a sturdy base for the cheesecake filling and prevents it from crumbling when served.
-
Sugar Watch: Use maple syrup judiciously; while it’s a healthier alternative, adding too much can make the cheesecake overly sweet. Three tablespoons usually strikes the perfect balance.
No-Bake Cheesecake in a Jar Variations
Feel free to get creative with this no-bake cheesecake in a jar, as there are so many delightful options to explore!
- Berry Bliss: Blend in fresh or frozen blueberries instead of cherries for a sweet burst of flavor. Their vibrant color adds a beautiful touch too!
- Citrus Zing: Replace lemon juice with lime juice for a tangy twist that brightens the cheesecake filling, giving it a refreshing vibe. Trust me, it’s surprisingly delightful!
- Nutty Crust: Swap graham cracker crumbs for almond flour mixed with coconut oil for a gluten-free and nutty crust that’s incredibly tasty. The texture will take your dessert up a notch!
- Dairy-Free Delight: Use full-fat coconut cream instead of cream cheese for a rich, dairy-free alternative that still delivers that luscious creaminess. You won’t even miss the dairy!
- Chocolate Indulgence: Drizzle melted dark chocolate over the cheesecake layer before adding the topping for an indulgent chocolatey twist. Chocolate lovers, rejoice!
- Spiced Autumn: Incorporate pumpkin spice or cinnamon into the filling for a warm, autumn-inspired cheesecake. This version is perfect for cozy evenings and festive gatherings!
- Caramel Drizzle: Add a drizzle of caramel sauce atop the cherry compote for an extra layer of flavor that pairs beautifully with the fruity topping. It’s a small touch that makes a big impact!
- Layer it Up: For added fun, create layers of flavors by alternating between cherry and blueberry toppings. Each spoonful will reveal delicious surprises!
These variations make your no-bake cheesecake in a jar even more enticing, offering a little something for everyone to love! Pair them with a scoop of Marshmallow Whip Cheesecake for a dessert table that’s bound to impress!
Storage Tips for No-Bake Cheesecake in a Jar
Fridge: Store finished jars in the refrigerator for up to 3 days. Make sure they are tightly sealed to retain freshness and prevent absorption of other odors.
Freezer: If you want to keep your no-bake cheesecake in a jar for longer, freeze the jars without the topping for up to 3 months. Allow the filling to cool completely before freezing.
Reheating: There’s no need to reheat these desserts! Just thaw in the refrigerator overnight before adding your desired topping and enjoying.
Add Toppings Later: For best results, add the fruit topping after thawing for optimal freshness and visual appeal.
No-Bake Cheesecake in a Jar Recipe FAQs
How do I choose the best cherries for my topping?
Absolutely! For the best flavor, look for fresh cherries that are plump, firm, and bright in color without any dark spots. If you’re using frozen cherries, they should be unsweetened and free from ice crystals, ensuring a fresh taste. Both options will work beautifully in your no-bake cheesecake in a jar.
How should I store my no-bake cheesecake jars?
You can store your finished jars in the refrigerator for up to 3 days. Make sure they are tightly sealed to maintain freshness and prevent them from absorbing any odors from the fridge. This way, you can enjoy this delightful dessert just like the day you made it!
Can I freeze my no-bake cheesecake in a jar?
Yes! Freezing is a great way to prolong the life of your cheesecake jars. Simply freeze the jars without the topping for up to 3 months. Ensure that the filling has cooled completely before placing it in the freezer. When you’re ready to indulge, thaw the jars in the refrigerator overnight and add your topping before serving.
What should I do if my cheesecake filling is too soft?
If you find that your cheesecake filling didn’t set as expected, it might be due to insufficient chilling. Make sure to chill it for at least one hour for optimal firmness. Alternatively, you can incorporate an extra tablespoon of corn starch to help thicken it further; just mix it with a bit of warm water before adding it to the cheese mixture.
Are there any dietary concerns I should be aware of with this recipe?
Certainly! This no-bake cheesecake in a jar is vegetarian-friendly. However, those with dairy allergies can use dairy-free alternatives for cream cheese and yogurt. If you’re concerned about gluten, substitute graham cracker crumbs with gluten-free options to accommodate different dietary needs.
How do I adapt the flavor of my cheesecake?
The fun part about this recipe is its adaptability! You can easily switch up the topping with seasonal fruits like blueberries, strawberries, or raspberries to get a new flavor profile. If you wish to lighten it up even further, consider using low-fat cream cheese or Greek yogurt in your cheesecake filling for a guilt-free treat.
No-Bake Cheesecake in a Jar: A Healthier Sweet Treat!
Ingredients
Equipment
Method
- In a medium saucepan, combine the pitted cherries, pure maple syrup, fresh lemon juice, water, and corn starch. Bring to medium heat, stirring continuously for about 5-10 minutes until thickened. Cool to room temperature.
- In a large mixing bowl, beat together softened cream cheese and Greek yogurt using an electric mixer until smooth. Gradually blend in the remaining maple syrup and lemon juice. Chill in the refrigerator for at least 30 minutes.
- Melt the butter in a microwave-safe bowl. Combine the graham cracker crumbs with melted butter and mix thoroughly. Divide evenly among six mini mason jars, pressing down to form the crust.
- Spoon the chilled cheesecake filling over the crust in each jar, spreading evenly while leaving space for the cherry topping. Layer the cooled cherry compote on top.
- Chill the assembled jars in the refrigerator for at least one hour before serving. Enjoy within three days for best taste.
Leave a Reply