
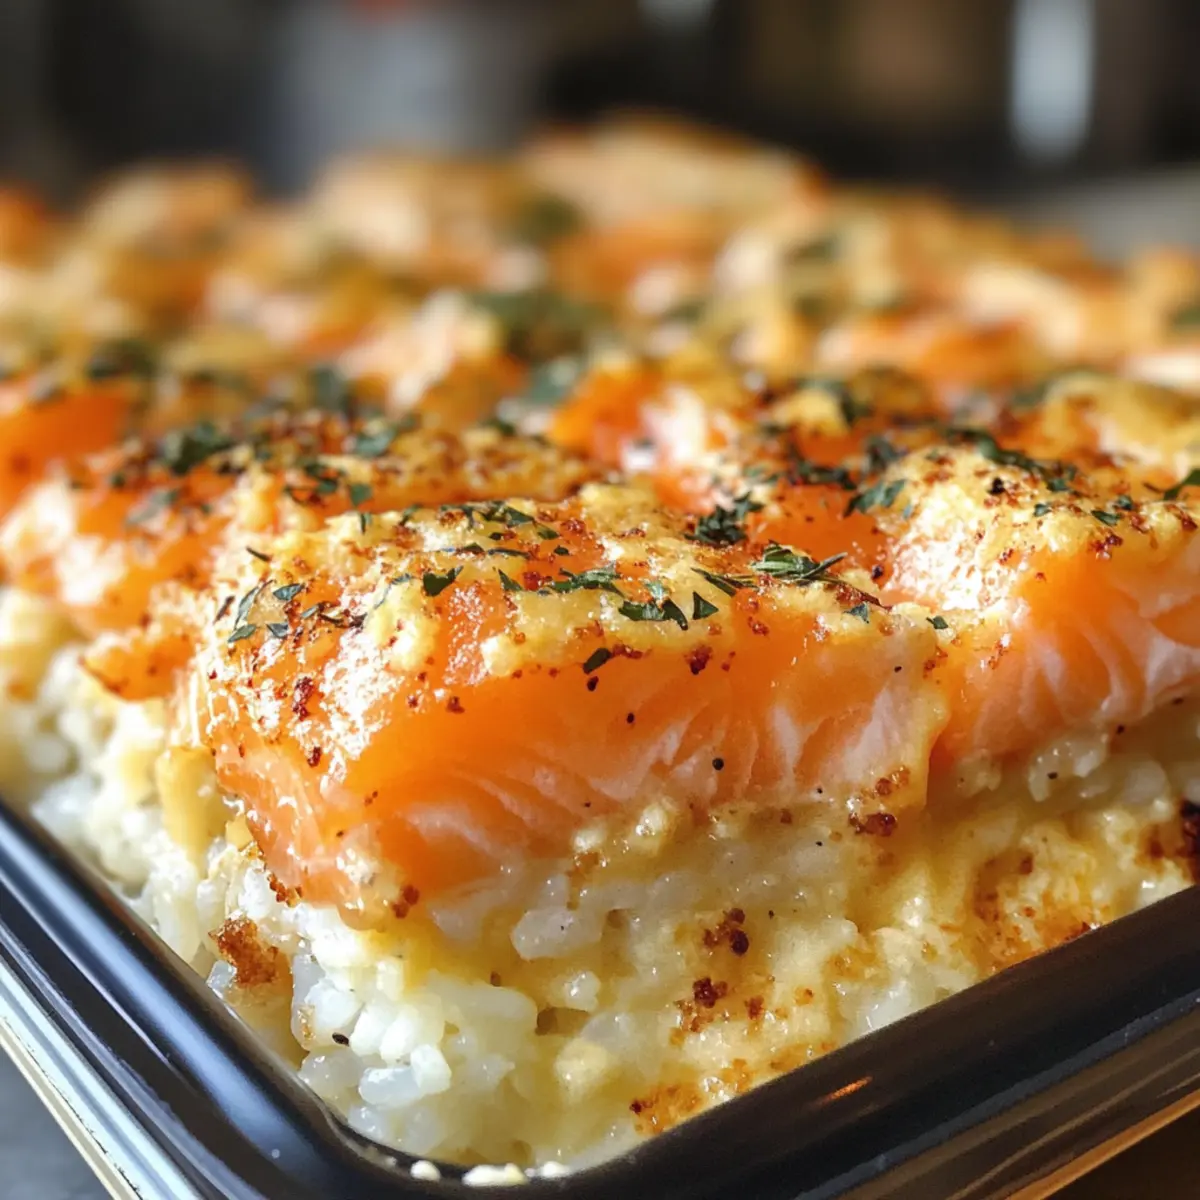
Steam wafted through the kitchen as I prepped for my latest dinner adventure, a Spicy Salmon Sushi Bake that promised to satisfy my cravings with ease and comfort. You see, sushi can feel intimidating with all that rolling and precision, but this recipe flips the script—turning sushi into a cozy, creamy casserole! Packed with layers of tender rice and luscious salmon, all topped with a zesty sriracha mayo that bubbles and caramelizes, it’s a flavor-packed twist that brings everyone together at the table. Not only does this dish save time on preparation, making it a perfect choice for busy weeknights or gatherings, but it also invites creativity; feel free to swap in tuna or shrimp for a change of pace. Are you ready to transform your sushi experience into a delightful baked dish? Let’s dive in!
Why Is This Recipe a Must-Try?
Simplicity at Its Finest: With just a few ingredients and straightforward steps, this dish makes homemade sushi accessible to everyone, whether you’re a pro in the kitchen or just starting out.
Crowd-Pleasing Comfort: Perfect for family dinners or gatherings, this Spicy Salmon Sushi Bake combines flavors that everyone loves, making it an instant hit on your dining table.
Versatile Ingredients: Feel free to swap salmon for tuna or shrimp to suit any palate and make it your own!
Bold, Creamy Flavor: The zesty sriracha mayo creates a rich topping that elevates the dish beyond standard casseroles, making every bite a flavor explosion.
Time-Saving Delight: Say goodbye to rolling sushi! This bake comes together in no time, allowing you to spend more time with loved ones and less time in the kitchen.
Perfect for Leftovers: Enjoy the goodness again! This dish stores well in the fridge and reheats beautifully, making it great for meal prep or quick lunches. Don’t forget to check out my other crowd-pleasers like Crockpot Loaded Bake or Mashed Potato Bake for more delicious ideas!
Spicy Salmon Sushi Bake Ingredients
-
For the Rice Base
-
Sushi Rice – Provides the essential foundation; substitute with other short-grain rice if needed.
-
Water – Required for cooking rice to perfection; essential for proper texture—no substitutions recommended.
-
Rice Vinegar – Adds a tangy acidity to the rice; for a milder taste, reduce quantities or use apple cider vinegar.
-
Sugar – Balances the vinegar’s acidity; can be adjusted based on your taste preference.
-
Salt – Enhances overall flavor; essential for seasoning, so don’t omit.
-
For the Topping
-
Fresh Salmon Fillet – Acts as the main protein source and adds richness; can be swapped with cooked crab or shrimp.
-
Mayonnaise – Creates a creamy and luxurious topping; use a vegan mayo for a dairy-free version.
-
Sriracha Sauce – Provides the desired spiciness; adjust quantity to control heat level for your family’s liking.
-
Sesame Oil – Adds a nutty depth of flavor; optional to use, but can be replaced with olive oil if needed.
-
Green Onions – Brings a fresh crunch; can substitute with chives or shallots if preferred.
-
For Garnishing
-
Nori – Provides an essential sea flavor for garnishing; optional, omit if not available.
-
Tobiko – Adds a pop of flavor as an optional garnish; not necessary, can be left out entirely.
This ingredient list for the Spicy Salmon Sushi Bake will set you on the right path to creating a delicious and memorable meal!
Step‑by‑Step Instructions for Spicy Salmon Sushi Bake
Step 1: Preheat the Oven
Begin your delicious journey by preheating your oven to 375°F (190°C). This temperature is crucial for achieving the perfect golden brown crust on your Spicy Salmon Sushi Bake. While the oven warms up, gather your baking dish and make sure it’s ready to hold all the flavorful layers you’ll create.
Step 2: Cook the Sushi Rice
Rinse 1 cup of sushi rice under cold water until the water runs clear, removing excess starch for the ideal texture. In a medium pot, combine the rinsed rice with 1.25 cups of water and bring it to a boil over medium-high heat. Once boiling, reduce the heat, cover with a lid, and let it simmer for 18-20 minutes until the rice is tender and all the water is absorbed.
Step 3: Season the Rice
Once your rice has cooked, let it rest for about 10 minutes off the heat to enhance its stickiness. In a small bowl, combine 3 tablespoons of rice vinegar, 1 tablespoon of sugar, and 1 teaspoon of salt, stirring until dissolved. Gently fold this mixture into the warm rice, ensuring it’s evenly coated while keeping the rice fluffy, creating a flavorful base for the Spicy Salmon Sushi Bake.
Step 4: Prepare the Baking Dish
Spread the seasoned sushi rice evenly across the bottom of a greased baking dish, pressing it down gently to form a solid base. This layering technique is essential for the structure of your Spicy Salmon Sushi Bake. Allow the rice to cool slightly while you prepare the salmon mixture, which will provide that creamy, spicy top layer.
Step 5: Mix the Salmon Topping
In a medium bowl, combine 8 ounces of diced fresh salmon fillet, ½ cup of mayonnaise, 3 tablespoons of sriracha sauce, and 1 teaspoon of sesame oil. Add sliced green onions (approximately 2) for a refreshing crunch. Mix all the ingredients until well combined, creating a luscious filling that elevates the sushi bake’s flavor profile and offers creamy goodness.
Step 6: Assemble the Bake
Carefully spread the salmon mixture evenly over the layer of sushi rice in your baking dish. Make sure to cover the rice completely to ensure every bite of your Spicy Salmon Sushi Bake is packed with flavor. This rich topping will bubble and caramelize beautifully as it bakes, creating a delightful crust on top.
Step 7: Bake the Sushi Bake
Place the assembled dish in your preheated oven, baking for 25-30 minutes. Keep an eye on it; the top should become golden brown and the salmon should be cooked through. The bubbling edges will signal that your Spicy Salmon Sushi Bake is nearing the finish line, creating mouthwatering aromas that fill your kitchen.
Step 8: Garnish and Serve
Once baked, allow the Spicy Salmon Sushi Bake to cool for a few minutes before garnishing. Top it with additional sliced green onions, nori strips, and a sprinkle of tobiko for an extra burst of flavor. Serve warm in bowls, and don’t forget to add some pickled ginger and soy sauce on the side to enhance your dining experience!
Spicy Salmon Sushi Bake Variations
Feel free to get creative and customize your Spicy Salmon Sushi Bake to suit your taste buds!
-
Tuna Twist: Use canned or fresh tuna instead of salmon for a delicious variation. It brings a different seafood flavor while still delivering that lovely casserole comfort.
-
Shrimp Delight: Substitute the salmon with cooked shrimp. The tender bits of shrimp will add a sweet touch, offering a delightful contrast to the spicy mayo.
-
Crab Variation: For a luxurious twist, use cooked crab meat in place of salmon. Its rich flavor pairs beautifully with the creamy topping and adds an elegant touch!
-
Vegan Option: Swap out the mayonnaise for a vegan version to create a dairy-free casserole. You can also use tofu as a protein source that blends well with the other flavors.
-
Spice Level: Adjust the amount of sriracha to suit your heat preferences. If you’re looking for a milder option, simply reduce the sriracha or even omit it for a comforting, creamy dish.
-
Herb Infusion: Add fresh herbs to the salmon mixture, like dill or cilantro, for an aromatic lift. These herbs can transform the whole dish and bring new depth to each bite.
-
Rice Alternatives: If you don’t have sushi rice, feel free to use leftover cooked rice or quinoa. The texture will change, but it will still hold together beautifully.
-
Cheesy Delight: Sprinkle some shredded cheese over the topping before baking for an extra indulgent twist. Melted cheese elevates the dish, contributing a whole new layer of flavor.
With these variations, you can have a new exciting dish each time you make this recipe! For even more delicious ideas, don’t forget to check out my California Roll Sushi or my Crispy Salmon and Rice Bowl for inspiration!
Storage Tips for Spicy Salmon Sushi Bake
Fridge: Store leftovers in an airtight container for up to 3 days. Make sure it’s cooled completely before sealing to avoid excess moisture.
Freezer: For longer storage, freeze individual portions for up to 2 months. Use freezer-safe containers or wrap tightly with plastic wrap and foil to prevent freezer burn.
Reheating: Reheat gently in the oven at 350°F (175°C) until warmed through, about 15-20 minutes. If you prefer a crispy top, consider broiling for the last few minutes.
Serving Suggestions: When ready to serve, consider adding a sprinkle of fresh green onions or additional sriracha mayo for extra flavor on your reheated Spicy Salmon Sushi Bake!
What to Serve with Spicy Salmon Sushi Bake
Elevate your meal by creating a harmonious dining experience that complements every cozy bite of this delicious bake.
-
Miso Soup: A warm, savory bowl of miso soup enhances the umami flavors and brings a comforting touch to your meal.
-
Seaweed Salad: Light and refreshing, this salad adds a delightful crunch and a nutty flavor that pairs beautifully with the rich salmon.
-
Stir-Fried Veggies: Colorful stir-fried vegetables offer a lovely contrast in texture and a vibrant burst of freshness to balance the dish’s creaminess.
-
Pickled Ginger: This zesty accompaniment provides a sharp contrast to the rich flavors, cleansing the palate between bites for a refreshing experience.
-
Cucumber Sushi Rolls: Light and crisp, these rolls bring a familiar sushi element to the table while adding a refreshing coolness to each meal.
-
Sake or Green Tea: Both drinks enhance the overall dining experience; sake warms the soul, while green tea offers a refreshing counterpart.
-
Fruit Sorbet: For dessert, a light fruit sorbet serves as a sweet, refreshing finish, cleansing the palate after a savory meal. A perfect way to round off your sushi-inspired dinner.
Expert Tips for Spicy Salmon Sushi Bake
-
Dry the Salmon: Pat the salmon dry with a paper towel before mixing to ensure a nice golden brown on the topping.
-
let Rice Rest: Allow the sushi rice to rest after cooking for about 10 minutes to achieve the best texture for your Spicy Salmon Sushi Bake.
-
Keep an Eye on the Oven: Watch closely while baking; it can go from perfectly golden to burnt quickly. Aim for bubbling edges without char.
-
Layer Evenly: Spread the salmon mixture evenly over the rice to ensure every bite is bursting with flavor. This prevents dry patches during baking.
-
Adjust for Heat: Feel free to modify the sriracha according to your family’s spice preferences; a little can go a long way in this dish!
-
Balance Toppings: If the topping browns too quickly, lower the oven rack or cover it loosely with foil to prevent burning while cooking through.
Make Ahead Options
These Spicy Salmon Sushi Bake preparations are perfect for busy weeknights! You can prepare the sushi rice and mix it with the seasoning up to 24 hours in advance; simply store it in an airtight container in the refrigerator to maintain freshness. You can also mix the salmon topping ahead of time and refrigerate it, ensuring it’s good for up to 3 days. When you’re ready to serve, just spread the salmon mixture over the rice and bake as directed, which allows your dish to taste just as delicious as when freshly made. This makes it an ideal option for meal prep, allowing you to savor your family’s favorite without the last-minute rush!
Spicy Salmon Sushi Bake Recipe FAQs
What type of rice should I use?
For the best texture, I recommend using sushi rice, as it provides the perfect stickiness needed for this dish. If sushi rice isn’t available, other short-grain rice can work in a pinch, but avoid long-grain varieties for the right consistency.
How should I store leftovers?
Leftovers can be stored in an airtight container in the refrigerator for up to 3 days. It’s important to let the dish cool completely before sealing to prevent moisture buildup, ensuring your Spicy Salmon Sushi Bake stays fresh!
Can I freeze the Spicy Salmon Sushi Bake?
Absolutely! For longer storage, freeze individual portions in freezer-safe containers for up to 2 months. When you’re ready to enjoy it, thaw overnight in the refrigerator, then reheat gently in the oven at 350°F (175°C) for about 15-20 minutes. This way, you’ll savor the same delicious flavors again!
What can I do if my topping browns too quickly?
If you notice the topping browning too quickly, simply lower the oven rack or cover the dish loosely with aluminum foil. This will help to slow down the browning process while ensuring the salmon cooks through properly, giving you that beautifully baked dish you desire.
Are there any dietary considerations for this recipe?
If you’re serving this to guests with allergies, note that this recipe contains fish and eggs (from the mayonnaise). I often recommend using a vegan mayo if you’re aiming for a dairy-free version. Additionally, for those who prefer alternative proteins, swapping out the salmon for tuna or cooked shrimp makes this dish versatile for various dietary preferences!
What’s the best way to tell when the Spicy Salmon Sushi Bake is done?
The bake should be in the oven for 25-30 minutes until it’s golden brown and bubbly. Keep an eye on it too; once the top shows signs of caramelization and the salmon is cooked through, it’s time to take it out. Your kitchen will smell incredible, signaling it’s ready to be enjoyed!
Spicy Salmon Sushi Bake: A Cozy Twist on Family Dinners
Ingredients
Equipment
Method
- Preheat your oven to 375°F (190°C).
- Rinse sushi rice under cold water until clear, then boil with water, cover, and simmer for 18-20 minutes.
- Let the rice rest for 10 minutes, then mix with rice vinegar, sugar, and salt.
- Spread the seasoned rice in a greased baking dish.
- Mix salmon, mayonnaise, sriracha, sesame oil, and green onions in a bowl.
- Spread the salmon mixture over the rice evenly.
- Bake for 25-30 minutes or until golden brown and bubbly.
- Garnish with green onions, nori, and tobiko before serving.
Leave a Reply