
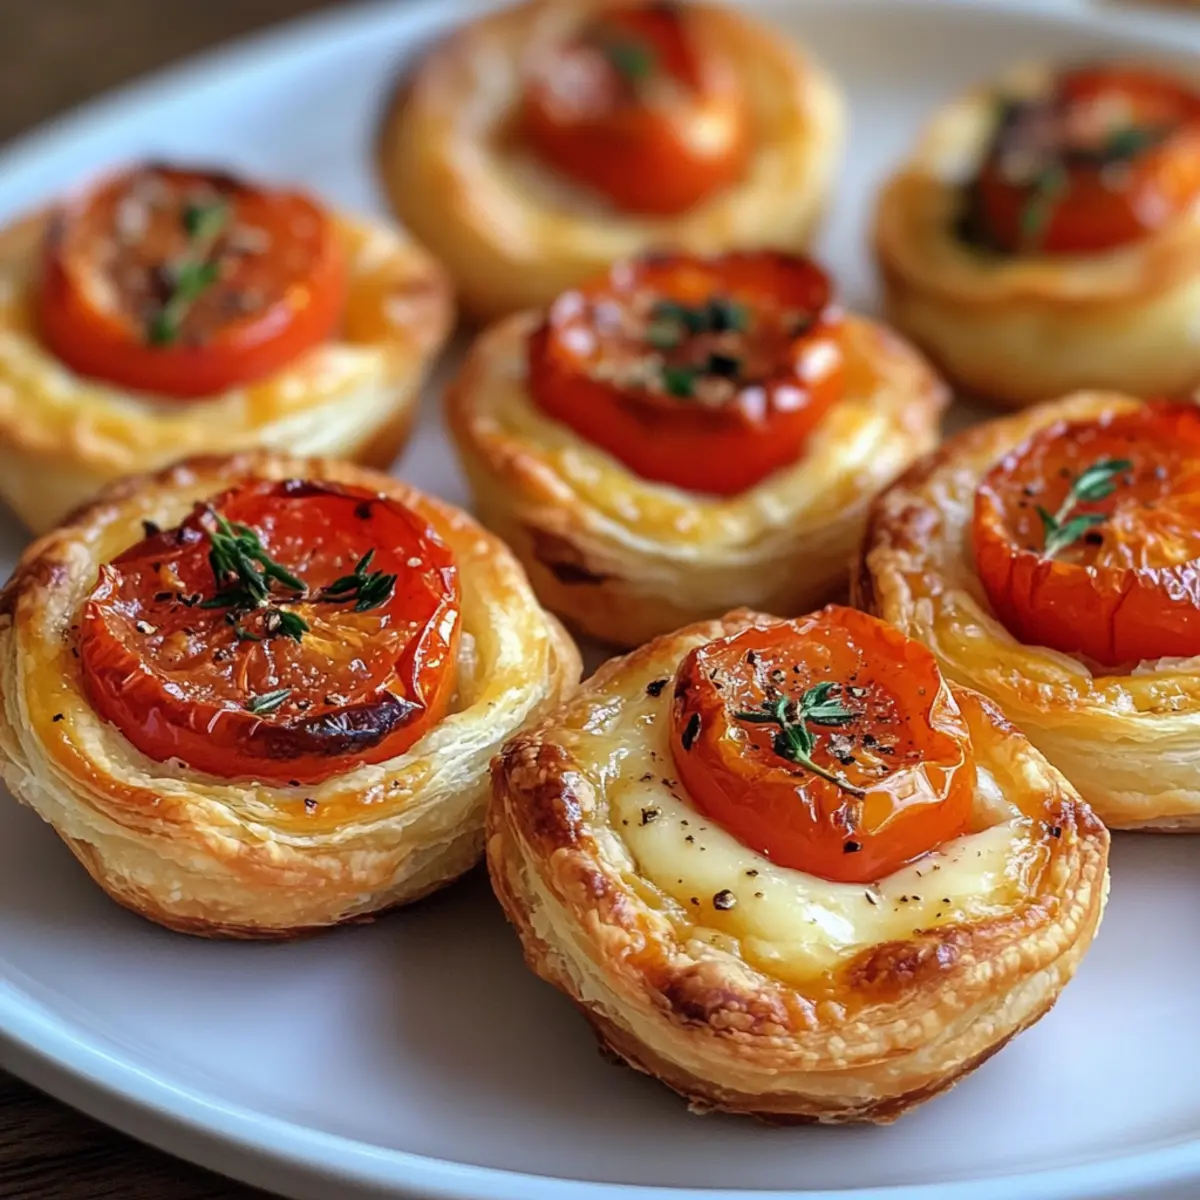
As I rummaged through my kitchen the other day, I couldn’t help but notice the vibrant tomatoes sitting in my bowl, begging for a spotlight. That’s when I decided to whip up these delightful Mini Tomato Tarts with Puff Pastry. With just six simple ingredients, this recipe showcases the sweet, juicy flavor of ripe tomatoes nestled atop a flaky, buttery crust. What I love most about these tarts is how effortlessly they elevate any gathering—from casual brunches to fancy parties—while being incredibly easy to prepare. Each bite offers the perfect combination of crispy pastry and savory cheese, making them an instant crowd-pleaser. So, are you ready to create your own little bite-sized wonders? Let’s dive into the recipe!

Why Are Mini Tomato Tartlets a Must-Try?
Simplicity at Its Best: This recipe requires only six ingredients, making it easy for anyone to whip up delicious tarts without hassle.
Flavor Explosion: The perfect balance of sweet, juicy tomatoes and creamy Gruyère cheese creates a taste sensation that’ll have your guests coming back for more!
Versatile Ingredients: Feel free to mix things up with different tomato varieties or incorporate your favorite herbs. Why not pair them with a refreshing salad or bowl of soup for a complete meal?
Perfect for Any Occasion: Whether it’s a cozy family dinner or a fancy gathering, these tarts are sure to impress. Looking for more ways to showcase tomatoes? Try these Garlic Butter Beef or Greek Turkey Meatballs.
Crowd Pleaser: They’re a hit at parties, serving as delightful finger foods that bring a touch of gourmet dining to your home!
Tomato Tartlets with Puff Pastry Ingredients
For the Pastry
• Puff Pastry – This flaky, buttery crust is the foundation of your tarts; be sure to thaw it before use for the best texture.
For the Filling
• Gruyère Cheese – Adds a creamy and nutty flavor; feel free to swap it out with mozzarella or cheddar for a twist.
• Tomatoes – The star of the dish; any ripe tomatoes work beautifully, especially if you use sweet cherry tomatoes cut in half for a pop of color and taste.
• Kosher Salt – Helps balance and enhance the flavors of the tomatoes; while kosher salt is recommended, any salt can still do the job.
• Ground Black Pepper – Provides a subtle hint of heat; freshly ground is best to maximize flavor.
• Chopped Thyme – Adds lovely earthy and aromatic notes; other herbs like basil or oregano can be used instead based on your preference.
Step‑by‑Step Instructions for Tomato Tartlets with Puff Pastry
Step 1: Prepare Puff Pastry
Begin by thawing your puff pastry until it’s pliable, then roll out each sheet on a lightly floured surface to about 1/16 inch thick. Use a fork to prick the surface of the pastry to prevent it from puffing too much during baking. This step is crucial for achieving the perfect flaky base for your delightful Tomato Tartlets.
Step 2: Cut Circles
Using a biscuit cutter, cut out approximately 30 circles from the rolled pastry and gently transfer them onto a parchment-lined baking sheet. Ensure they are evenly spaced to allow for expansion during baking. You should see the nice, clean edges of the circles, ready to hold the delicious filling.
Step 3: Assemble Tarts
Top each pastry circle with about 1 teaspoon of Gruyère cheese, creating a creamy base. Next, add one or two slices of ripe tomatoes on each tartlet, followed by a sprinkle of kosher salt, ground black pepper, and freshly chopped thyme. This assembly process highlights the vibrant colors and flavors that will shine through in your Tomato Tartlets.
Step 4: Bake
Preheat your oven to 400°F (204°C) and place the baking sheet with the assembled tarts inside. Bake for 20-25 minutes, or until the pastry is beautifully golden and puffed, and the cheese is melted and bubbly. Keep an eye on them towards the end to achieve that perfect golden finish.
Step 5: Serve
Once baked, remove the Tomato Tartlets from the oven and allow them to cool slightly. They can be enjoyed warm or at room temperature, making them a versatile appetizer. For the best experience, serve them soon after baking to savor their flaky texture and vibrant flavor.
Expert Tips for Tomato Tartlets
• Chill the Pastry: Keep puff pastry cold before shaping to maintain its flakiness. Warm pastry won’t puff up nicely when baked.
• Tomato Choice Matters: Choose ripe, juicy tomatoes for optimal sweetness. Avoid overly watery varieties to prevent sogginess in the tarts.
• Fresh Herbs: Always use fresh thyme or other herbs over dried for enhanced flavor depth in your Tomato Tartlets.
• Even Baking: Rotate the baking sheet halfway through to ensure even browning and proper puffing of the crust.
• Store Right: If you have leftovers, store them in an airtight container but know the crust may lose crispiness. Reheat in a low oven to revive it.
• Experiment with Toppings: Don’t hesitate to add toppings like balsamic glaze or grated Parmesan to elevate the flavor and presentation of your Tomato Tartlets.
What to Serve with Mini Tomato Tarts with Puff Pastry
Elevate your dining experience by pairing these delightful tarts with fresh and flavorful accompaniments that complement their essence.
-
Mixed Greens Salad: A light side salad with a zesty vinaigrette enhances the tarts’ buttery richness and adds a refreshing crunch. The blend of textures makes each bite more exciting.
-
Creamy Tomato Soup: Pairing these tarts with a bowl of warm, creamy tomato soup creates a comforting combination that indulges the senses and soothes the soul. It’s a delightful way to embrace the tomato flavor!
-
Savory Quiche: Offering a variation of flavors and textures, a slice of savory quiche complements the tarts beautifully, making it perfect for brunch gatherings. Together, they create a harmonious meal.
-
Grilled Vegetables: Smoky, grilled vegetables add depth and a hint of char that balances the tarts’ sweetness. Look for seasonal veggies like zucchini or bell peppers to bring warmth to your table.
-
Cheese Platter: Serve these tarts alongside a selection of cheeses for a delightful charcuterie board. Bold flavors contrast beautifully with the tarts’ buttery crust, enhancing the overall experience.
-
Sparkling Wine: A bubbly glass of sparkling wine pairs exquisitely, balancing all the flavors of the dish while adding a celebratory touch to any gathering. It’s an inviting way to toast with friends!
Tomato Tartlets with Puff Pastry Variations
Feel free to make these delightful Mini Tomato Tartlets your own with these fun and easy twists!
- Cheese Swap: Replace Gruyère with mozzarella or feta for a different flavor experience. Mixing cheeses can create amazing depth!
- Herb Twist: Use fresh basil or oregano instead of thyme for a Mediterranean flair. The world of herbs is your playground!
- Veggie Add-Ins: Incorporate diced zucchini or bell peppers for added texture and nutrition. The vibrant colors will make the tarts even more enticing.
- Sweet Touch: Add caramelized onions to elevate the sweetness and complexity of the tart. This enhances the savory profile and keeps things interesting!
- Spice It Up: Sprinkle crushed red pepper flakes on top for a hint of heat. This touch can elevate the flavors and tantalize your taste buds with each bite.
- Pesto Base: Spread a thin layer of pesto on the pastry before adding cheese and tomatoes. This will infuse your tarts with rich, herby flavor that pairs beautifully!
- Balsamic Drizzle: Drizzle balsamic glaze over the finished tartlets for a sweet-tangy contrast. It adds an elegant touch that transforms simple into sophisticated.
- Mini Pizza Variations: Top with slices of pepperoni or other favorite pizza toppings for a fun, pizza-inspired delight. Each bite will take you on a nostalgic flavor journey!
Embrace the magic of cooking and don’t hesitate to create your unique masterpiece! If you’re still in the mood for delicious tomato recipes, check out these flavorful Grilled Shrimp Sauce or Caramelised Soy Rice. Enjoy putting your spin on these tartlets!
Make Ahead Options
These Easy 6-Ingredient Mini Tomato Tarts with Puff Pastry are perfect for meal prep! You can assemble the tartlets up to 24 hours in advance. Simply prepare the pastry circles and layer the Gruyère cheese and tomatoes, then cover them tightly with plastic wrap and refrigerate until you’re ready to bake. This not only saves you time but also allows the flavors to meld beautifully. When it’s time to serve, simply preheat your oven to 400°F (204°C) and bake for 20-25 minutes until golden. Rest assured, they’ll be just as delicious as if you made them fresh on the spot!
How to Store and Freeze Mini Tomato Tartlets
Room Temperature: Enjoy Mini Tomato Tartlets fresh for best flavor and texture; they can sit at room temperature for up to 2 hours at events.
Fridge: If you have leftovers, store them in an airtight container in the fridge for up to 3 days. Keep in mind the pastry may lose some crispness.
Freezer: For longer storage, freeze the unbaked tartlets on a baking sheet until solid, then transfer to a freezer bag; they can last up to 2 months. Bake from frozen, adding a few extra minutes to the baking time.
Reheating: Reheat any leftover baked tartlets in a low oven (around 350°F) for about 10 minutes to help restore their flakiness and warmth. Enjoy your Mini Tomato Tartlets just like the first time!
Mini Tomato Tarts with Puff Pastry Recipe FAQs
What type of tomatoes should I use?
Absolutely! The best tomatoes for your Mini Tomato Tarts are ripe and juicy ones. Heirloom, hothouse, garden-grown, or sweet cherry tomatoes all work beautifully. Look for tomatoes that are firm but slightly yielding to touch—this indicates ripeness. Avoid those with dark spots or excessive bruising, as they may not provide the best flavor.
How do I store leftover Mini Tomato Tarts?
Very simply! If you have any leftovers, place them in an airtight container in the refrigerator. They will stay fresh for up to 3 days. Just remember, the pastry may lose its crispness over time. To help regain some of that lovely flaky texture, reheat them in a low oven at 350°F (about 10 minutes) before serving.
Can I freeze Mini Tomato Tarts?
Absolutely! To freeze your Mini Tomato Tarts, first assemble them on a baking sheet without baking. Place the sheet in the freezer until the tartlets are solid, usually about 1-2 hours. Then, transfer them to a freezer-safe bag or container. They can be stored for up to 2 months. When you’re ready to bake, just add a few extra minutes to the baking time as they go straight from the freezer to the oven!
What should I do if my puff pastry isn’t puffing up?
If your puff pastry isn’t puffing during baking, it could be due to a few factors. Make sure the pastry is cold when placing it in the oven, as a warm pastry won’t puff well. Additionally, pricking the surface with a fork is essential to allow steam to escape. If you’ve followed these steps and it’s still flat, consider checking your oven temperature with an oven thermometer, as an inaccurately regulated oven can affect puff pastry performance.
Can I use this recipe for dietary restrictions?
Certainly! If you have dietary preferences or restrictions, this recipe is flexible. You can substitute Gruyère cheese with dairy-free cheese alternatives or a cheese that fits your dietary needs (like mozzarella or cheddar). If you’re avoiding gluten, look for gluten-free puff pastry options available in stores. Just make sure to check your ingredients for any allergens, particularly the cheese and pastry.

Savory Tomato Tartlets with Puff Pastry for Effortless Entertaining
Ingredients
Equipment
Method
- Begin by thawing your puff pastry until it's pliable, then roll out each sheet on a lightly floured surface to about 1/16 inch thick. Use a fork to prick the surface of the pastry to prevent it from puffing too much during baking.
- Using a biscuit cutter, cut out approximately 30 circles from the rolled pastry and gently transfer them onto a parchment-lined baking sheet.
- Top each pastry circle with about 1 teaspoon of Gruyère cheese, then add one or two slices of ripe tomatoes, followed by a sprinkle of kosher salt, black pepper, and chopped thyme.
- Preheat your oven to 400°F (204°C) and bake for 20-25 minutes or until golden.
- Remove from the oven and allow to cool slightly before serving.
Leave a Reply