
As the autumn leaves crunch underfoot, the air fills with the scents of caramel and cinnamon, signaling that Halloween is just around the corner. This year, I’ve conjured up a delightful treat that’s sure to haunt your taste buds: Witches’ Brew Halloween Cake Jars. These adorable and easy-to-assemble jars are a feast for the eyes and the palate, featuring moist chocolate cake layered with vibrant green buttercream and topped with whimsical fondant witch legs. Not only are they a fun way to get your family involved in some festive baking, but they also make for a show-stopping centerpiece at any Halloween gathering. With minimal prep and a healthy dose of creativity, you can transform simple ingredients into a visually enchanting dessert that’s perfect for kids and adults alike. Are you ready to spin your own magic in the kitchen?
Why Make Witches’ Brew Cake Jars?
Whimsical appeal: These jars are a feast for the eyes, with vibrant colors and cute decorations that will delight all ages.
Easy assembly: Despite their stunning appearance, these Witches’ Brew Halloween Cake Jars require minimal effort, making them perfect for both novice and experienced bakers.
Flavorful layers: Moist chocolate cake paired with rich, green buttercream results in a decadent flavor explosion that’ll keep everyone coming back for more!
Customization options: Use your creativity to swap flavors or decorations, whether it’s a fruity cake base or spookier fondant designs.
Perfect for sharing: Ideal for Halloween parties or community gatherings, these jars bring people together and are the ultimate crowd-pleaser.
So, grab your ingredients and conjure up this delightful treat that combines fun, flavor, and festivity in one magical jar!
Witches’ Brew Halloween Cake Jar Ingredients
For the Cake
- Granulated Sugar – Adds sweetness and moisture; brown sugar can add a deeper flavor.
- Butter (unsalted) – Provides richness and tenderness; make sure it’s at room temperature for easier creaming.
- Eggs – Acts as a binder and structure builder; large eggs ensure consistency.
- All-Purpose Flour – Gives structure to the cake; gluten-free flour is a great substitute for a gluten-free option.
- Unsweetened Cocoa Powder – Infuses deep chocolate flavor; Dutch-processed cocoa can enhance smoothness.
- Baking Powder – Acts as a leavening agent; fresh baking powder is key for the best rise.
- Salt – Enhances overall flavor; try using sea salt for a delightful twist.
For the Buttercream
- Milk – Intent on adding moisture and tenderness; non-dairy alternatives like almond milk work beautifully.
- Vanilla Extract – Introduces depth of flavor; using pure extract is recommended for the best taste.
- Electric Green Food Coloring – Essential for the buttercream’s spooky color; gel food coloring offers vibrant results.
For the Decoration
- Fondant (orange & black) – Creates cute witch legs and shoes; prepare ahead for stress-free assembly.
- Sprinkles – Add a fun, decorative element; opt for Halloween-themed sprinkles for a festive touch.
Now that you’ve gathered all the necessary ingredients, it’s time to cast your culinary spell and create these enchanting Witches’ Brew Halloween Cake Jars!
Step‑by‑Step Instructions for Witches’ Brew Halloween Cake Jars
Step 1: Preheat the Oven
Begin by preheating your oven to 170°C (340°F). While the oven warms up, take a 9-inch square cake tin and grease it thoroughly with butter or cooking spray, then dust it lightly with flour. This preparation ensures that your Witches’ Brew Halloween Cake releases smoothly after baking.
Step 2: Cream Butter and Sugar
In a large mixing bowl, cream together 1 cup of room temperature unsalted butter and 1 ¾ cups of granulated sugar until the mixture is light and fluffy, which should take about 3-5 minutes. This step is crucial since it incorporates air into the batter, contributing to a light texture in your chocolate cake.
Step 3: Add the Eggs
Crack in four large eggs, adding them two at a time to the creamed butter and sugar mixture. Mix until well incorporated, about 2 minutes. The batter should be smooth and homogenous, which forms the foundation of your Witches’ Brew Halloween Cake.
Step 4: Combine Dry Ingredients
In a separate bowl, sift together 1 ¾ cups of all-purpose flour, ¾ cup of unsweetened cocoa powder, 1 ½ teaspoons of baking powder, and a pinch of salt for enhanced flavor. Gradually pour this dry mixture into the wet ingredients, alternating with 1 cup of milk as you mix until fully combined. The batter should be smooth and shiny when done.
Step 5: Bake the Cake
Pour the batter into your prepared cake tin, spreading it evenly with a spatula. Place the tin in the preheated oven and bake for 45-50 minutes. Check for doneness by inserting a toothpick in the center; it should come out clean. Once baked, remove from the oven and let cool in the tin for 10 minutes.
Step 6: Cool and Cut the Cake
After cooling briefly, transfer the cake to a wire rack to cool completely for at least 1 hour. Once cooled, use a round cutter to slice the cake into circles. This will be the base layer for your Witches’ Brew Halloween Cake Jars, creating a delightful layer of moist chocolate cake.
Step 7: Prepare the Buttercream
In a mixing bowl, cream 1 cup of unsalted butter until smooth, then gradually add in 4 cups of powdered sugar. Incorporate 2 tablespoons of milk and a teaspoon of vanilla extract, mixing until creamy. Finally, stir in electric green food coloring until the desired spooky hue is reached, making your buttercream vibrant and festive.
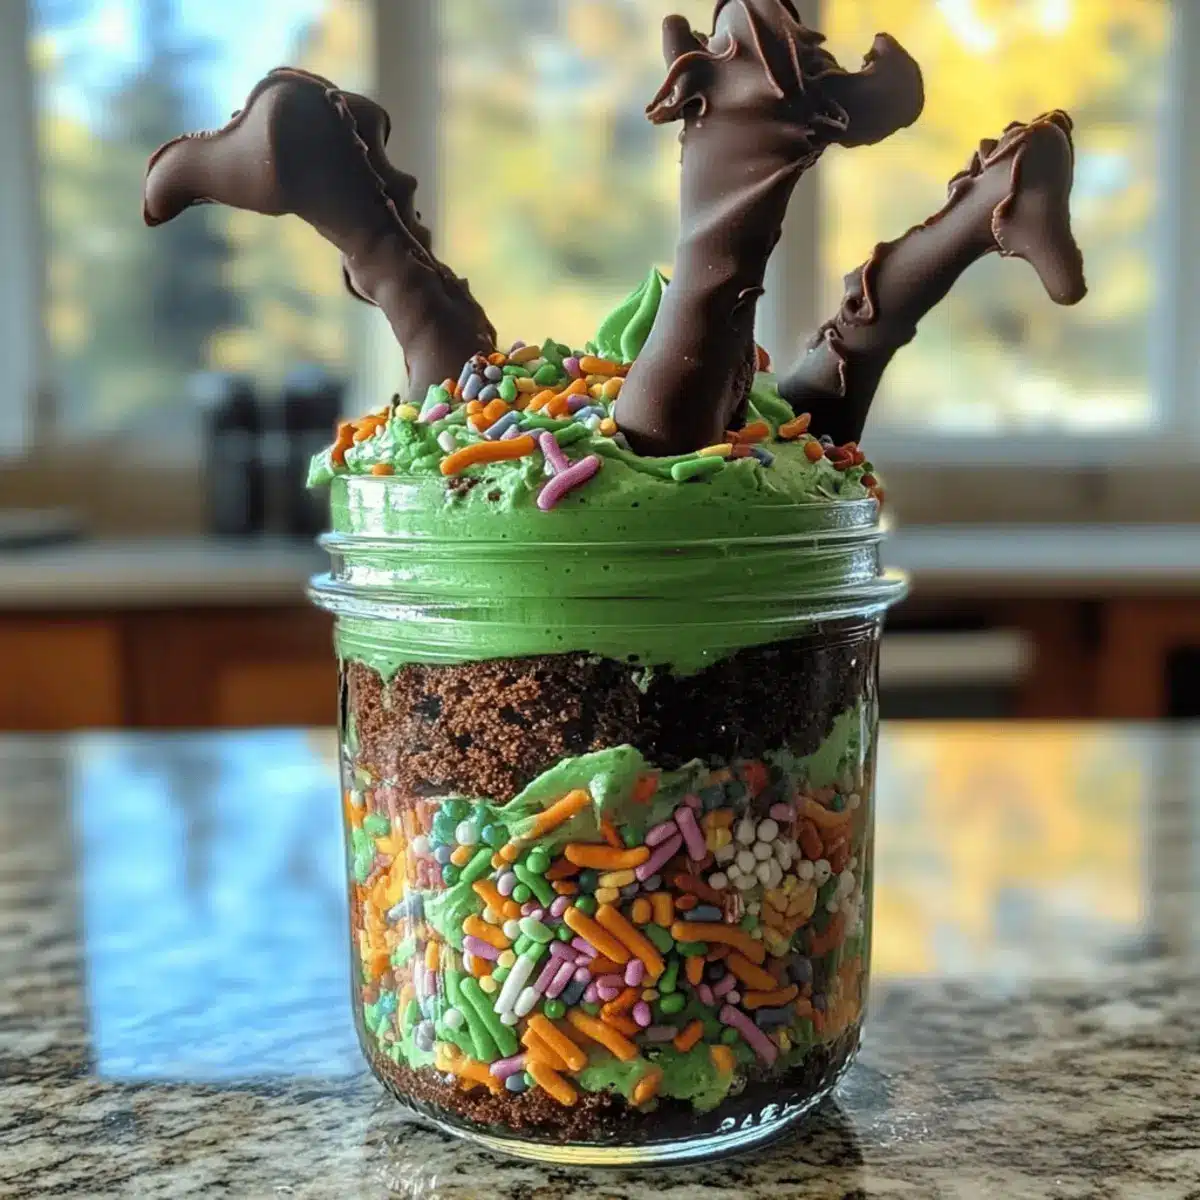
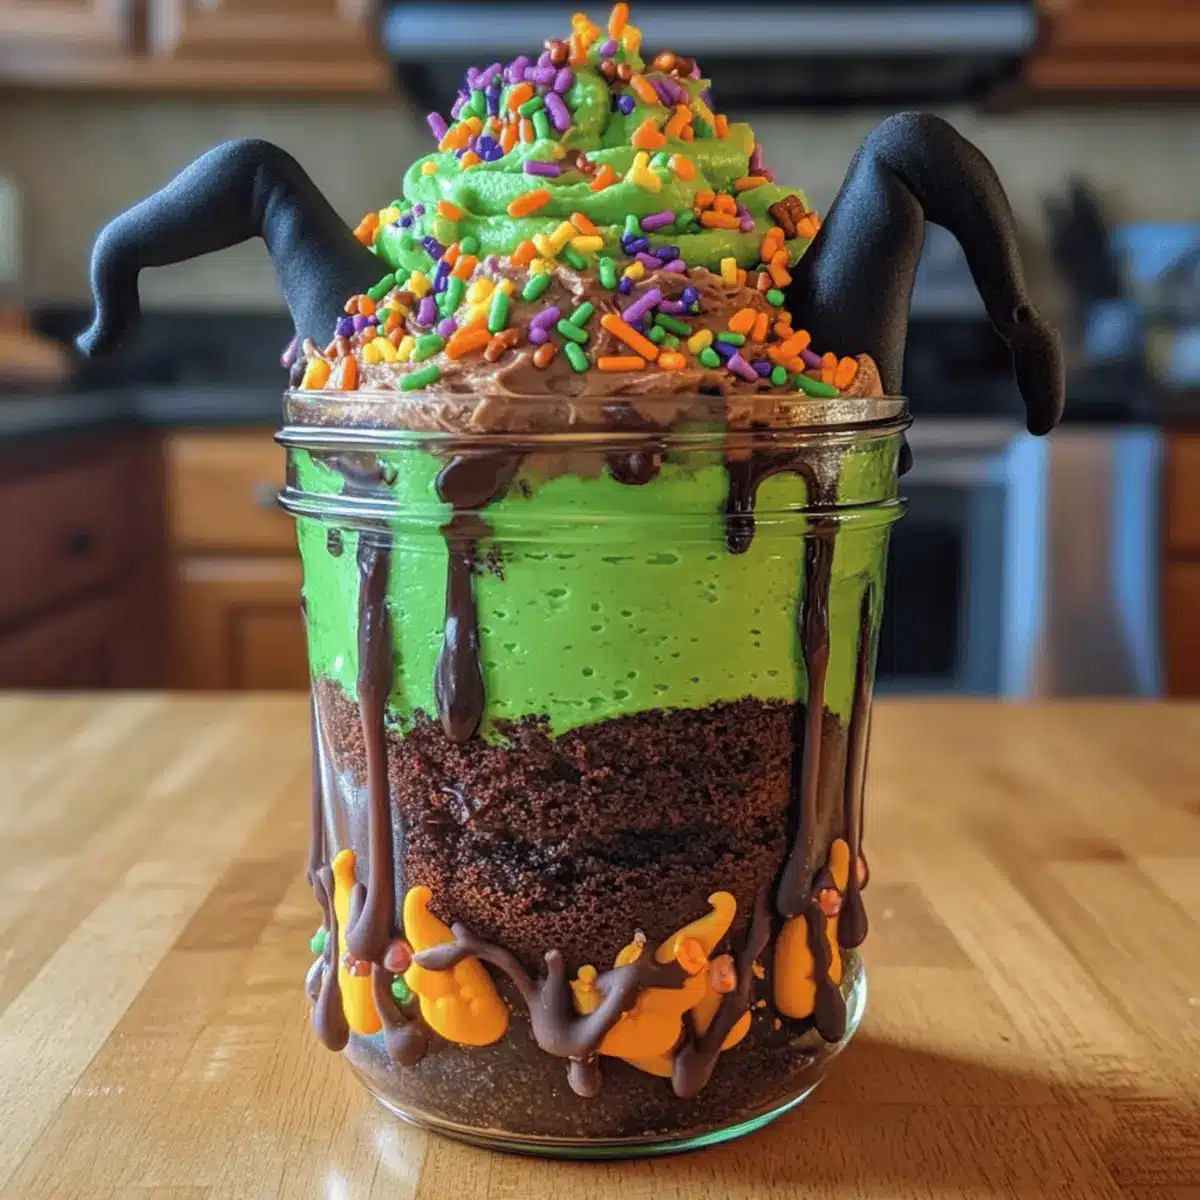
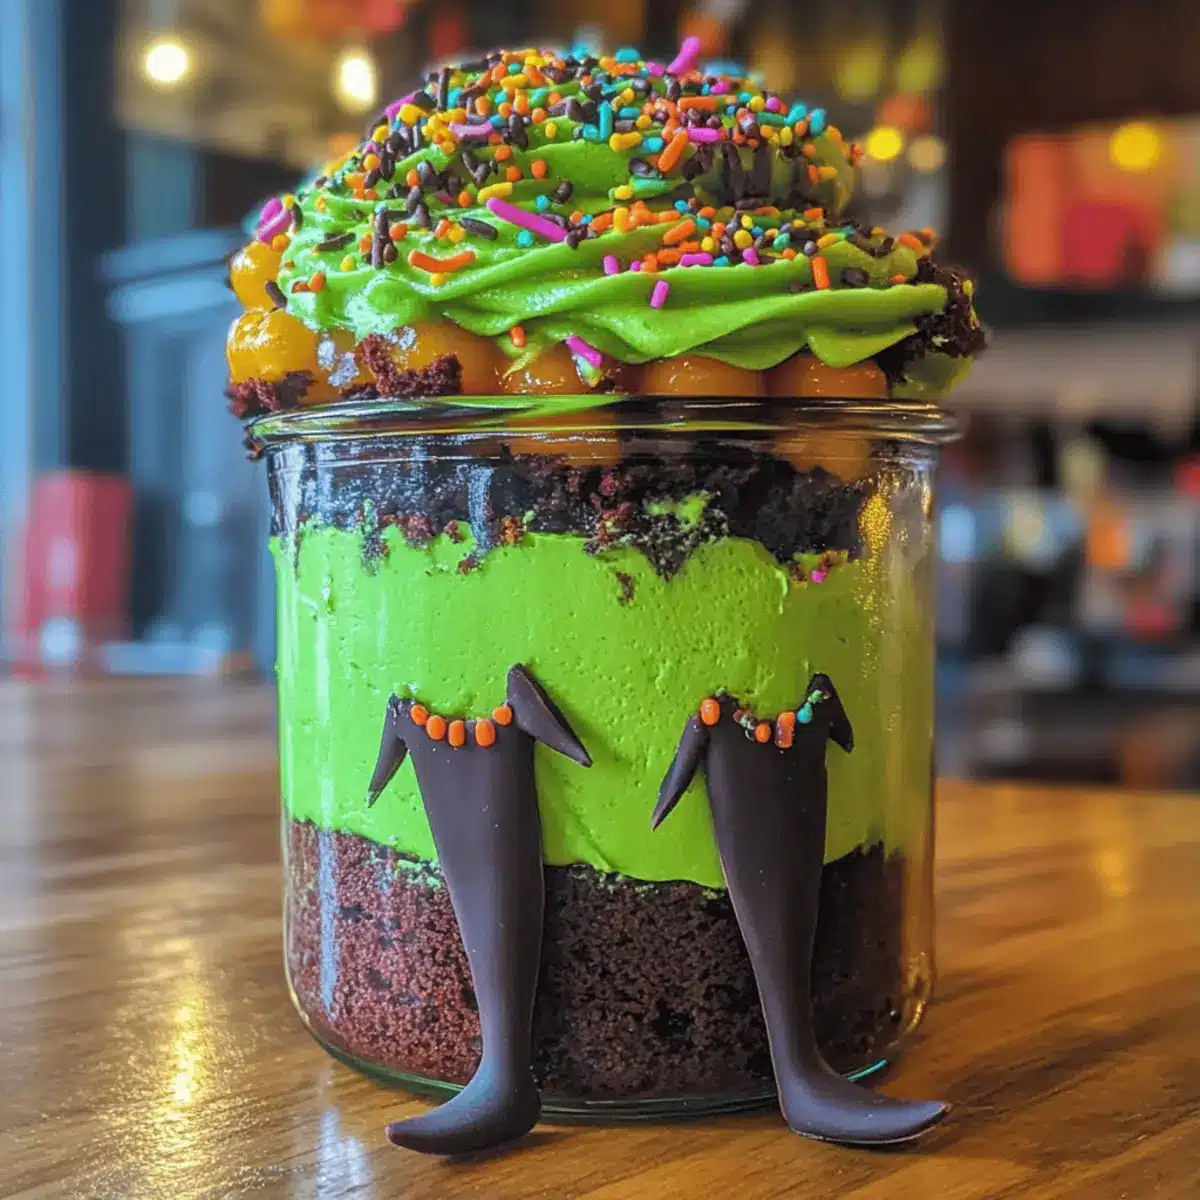
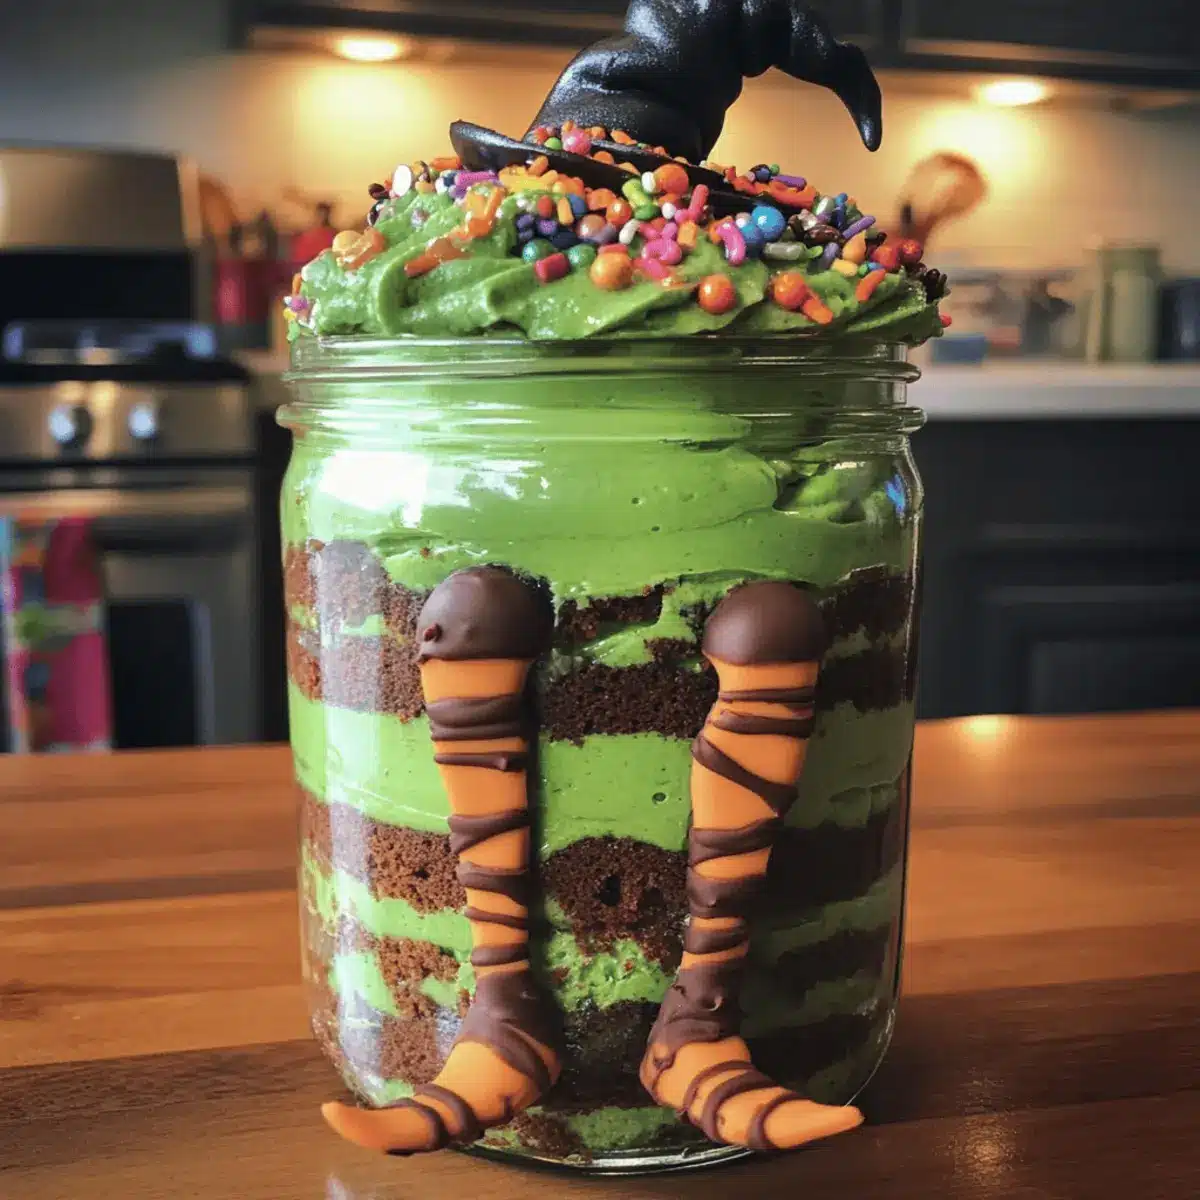
Step 8: Assemble the Cake Jars
Begin layering your cake jars by adding a sprinkle of Halloween-themed sprinkles at the bottom. Follow this with a layer of the chocolate cake circles followed by a generous dollop of the green buttercream. Repeat these layers until the jars are full, finishing with a layer of buttercream on top.
Step 9: Decorate with Fondant
For the final touch of your Witches’ Brew Halloween Cake Jars, pipe a delightful swirl of buttercream on top. Carefully insert fondant witch legs crafted from black and orange fondant into the buttercream. This not only adds a whimsical charm but also brings your haunting dessert to life!
What to Serve with Witches’ Brew Halloween Cake Jars?
Looking to complete your Halloween feast? Pair these enchanting cake jars with some delightful accompaniments for a spooktacular spread!
- Creepy Cocktails: Craft themed drinks, such as a dark and stormy or a witch’s brew cocktail, to add to the fun and flavor.
- Mocktail Elixirs: Serve vibrant fruit juices topped with soda in spooky glasses for a kid-friendly, festive touch.
- Ghostly Grub: Pair with mini cheese and ghost-shaped sandwiches for a savory bite that balances the dessert’s sweetness.
- Pumpkin Soup: A warm, creamy pumpkin soup complements the sweet cake jars beautifully, offering comforting fall flavors.
- Frightening Fruit Salad: Mix seasonal fruits like oranges, pomegranates, and apples—both refreshing and colorful against the jars’ vibrant hues.
- Mummy Hot Dogs: Easy and fun to make; they add a playful, savory element that kids adore during Halloween parties.
- Chocolate Dipped Pretzels: Crunchy and sweet, these treats can be fun to mix with candy-coated elements for textural variety.
- Haunted Harvest Salad: A fresh, leafy salad topped with nuts and dried cranberries brings a nutritious option to your dessert table.
- Spooky Snacks: Set out assorted Halloween candies so guests can munch while enjoying the cake jars.
- Chilling Ice Cream: Offer vanilla or pumpkin-flavored ice cream as a creamy complement to the rich chocolate and green buttercream.
Make Ahead Options
These Witches’ Brew Halloween Cake Jars are a fantastic option for meal prep, allowing you to savor the spooky season without the last-minute rush. You can bake the chocolate cake up to 3 days in advance; just make sure to cool it completely before wrapping it securely in plastic wrap to maintain moisture. The green buttercream can also be prepared and refrigerated for up to 48 hours—be sure to give it a quick re-whip before using to restore its creamy texture. Layer the cake and buttercream in jars up to 24 hours before serving for optimal freshness. Assemble the jars right before your Halloween gathering to keep them looking and tasting just as delightful!
Expert Tips for Witches’ Brew Halloween Cake Jars
-
Fondant Setup: Allow the fondant decorations to set overnight; this ensures they hold their shape better when added to the jars.
-
Accurate Measurements: Use a digital kitchen scale for precise ingredient measurements, ensuring your Witches’ Brew Halloween Cake Jars come out perfectly every time.
-
Humidity Awareness: Keep an eye on humidity levels when working with fondant; high humidity can cause it to become tacky and difficult to shape.
-
Cooling Time: Let the cake cool completely before decorating. This prevents the buttercream from melting and maintains the layers.
-
Buttercream Texture: Ensure the butter and sugar are well combined to achieve a smooth buttercream; lumps can disrupt the visual appeal of your jars.
-
Sprinkle Choices: Choose Halloween-themed sprinkles to enhance the festive appearance of your dessert. They add both color and texture to your cake jars!
Storage Tips for Witches’ Brew Halloween Cake Jars
Room Temperature: Keep your Witches’ Brew Halloween Cake Jars at room temperature for up to 2-3 days, making sure to cover them to retain freshness.
Fridge: If you’re planning to keep them longer, refrigerate the jars for up to a week. Ensure they are tightly sealed to maintain moisture and flavor.
Freezer: For longer storage, these cake jars can be frozen for up to 2 months. Wrap each jar tightly in plastic wrap, followed by foil, to prevent freezer burn.
Reheating: If desired, allow the jars to thaw in the refrigerator overnight before serving. You can enjoy them chilled or let them sit at room temperature for a bit before digging in!
Witches’ Brew Halloween Cake Jars Variations
Get ready to let your imagination run wild as you put your own spin on these spooktacular desserts!
- Cake Flavor: Substitute chocolate cake with vanilla or pumpkin cake for a seasonal twist. Each version brings its own unique flair to the jars!
- Fondant Designs: Use colored fondant to craft alternate Halloween characters, like ghosts or monsters, creating a fun variety for your celebration.
- Buttercream Flavor: Experiment with different flavored buttercreams, such as cinnamon or caramel, for a flavorful surprise that adds a holiday touch!
- Nutty Crunch: Add chopped nuts or crushed cookies between layers for an exciting texture boost that will delight your guests.
- Fruity Layers: Incorporate layers of fruit preserves or fresh fruits in between the cake and buttercream. It’s a fantastic way to add brightness and a burst of flavor!
- Spicy Kick: Mix in a hint of cinnamon or nutmeg to the buttercream for a warm, spiced essence that evokes fall festivities.
- Gluten-Free Option: Use a 1:1 gluten-free flour blend to cater to gluten-sensitive guests without sacrificing flavor or texture.
Feel free to unleash your creativity with these variations, and if you’re looking for more festive ideas, consider making a Neapolitan Cake Triple or trying out some Birthday Cake Overnight Oats to holiday your menu this season!
Witches’ Brew Halloween Cake Jars Recipe FAQs
What ingredients should I use for the best flavor and texture?
Absolutely! For optimal flavor and texture, use unsalted butter at room temperature, large eggs for consistency, and freshly sifted all-purpose flour. I find that adding a pinch of sea salt enhances the overall flavor beautifully. Additionally, Dutch-processed cocoa powder gives a richer chocolate flavor.
How should I store my Witches’ Brew cake jars?
These delightful cake jars can be stored at room temperature for 2-3 days if covered tightly to keep them fresh. If you want to extend their shelf life, refrigerate them for up to a week. Just make sure they’re in an airtight container to maintain that moist texture.
Can I freeze the Witches’ Brew Halloween Cake Jars?
Yes, indeed! You can freeze these cake jars for up to 2 months. To do this, wrap each jar tightly in plastic wrap and then in aluminum foil to prevent freezer burn. When you’re ready to enjoy them, simply move them to the fridge to thaw overnight, or let them sit at room temperature for a while.
What should I do if my cake is too crumbly or dense?
If your cake turns out crumbly, you might have overmixed the batter or added too much flour. To rectify this next time, make sure to measure flour accurately by spooning it into the measuring cup and leveling it off with a knife. If the cake is too dense, check that your baking powder is fresh and remember to incorporate enough air while creaming the butter and sugar—this helps create a light texture.
Can I modify the recipe for dietary restrictions?
Very! If you have gluten sensitivities, you can substitute all-purpose flour with a gluten-free blend. Additionally, for a dairy-free version, simply use almond milk and a dairy-free butter alternative. Remember to replace eggs with flax eggs (1 tablespoon flaxseed meal mixed with 2.5 tablespoons water per egg) if needed for egg-free options. These adaptations allow everyone to enjoy your spooky treat!
How far in advance can I make these cake jars?
I recommend preparing the components up to two days in advance. Bake and fully cool the cake, store it in an airtight container, and prepare the buttercream a day ahead. Assemble the jars the day before your event to ensure maximum freshness!
Witches' Brew Halloween Cake Jars
Ingredients
Equipment
Method
- Preheat your oven to 170°C (340°F) and grease a 9-inch square cake tin with butter or cooking spray.
- In a large mixing bowl, cream butter and sugar until light and fluffy (3-5 minutes).
- Add eggs two at a time, mixing well for about 2 minutes.
- In another bowl, sift flour, cocoa powder, baking powder, and salt. Gradually combine with the wet mixture, alternately adding milk.
- Pour the batter into the prepared tin and bake for 45-50 minutes. Let cool in the tin for 10 minutes.
- Transfer cake to wire rack and cool completely for at least 1 hour.
- Cream butter until smooth, then gradually add powdered sugar. Mix in milk and vanilla, then stir in food coloring.
- Use a round cutter to slice the cooled cake into circles.
- Layer the jars starting with sprinkles, then cake, and buttercream. Repeat layers until full.
- Pipe a swirl of buttercream on top and insert fondant witch legs for decoration.
Leave a Reply