
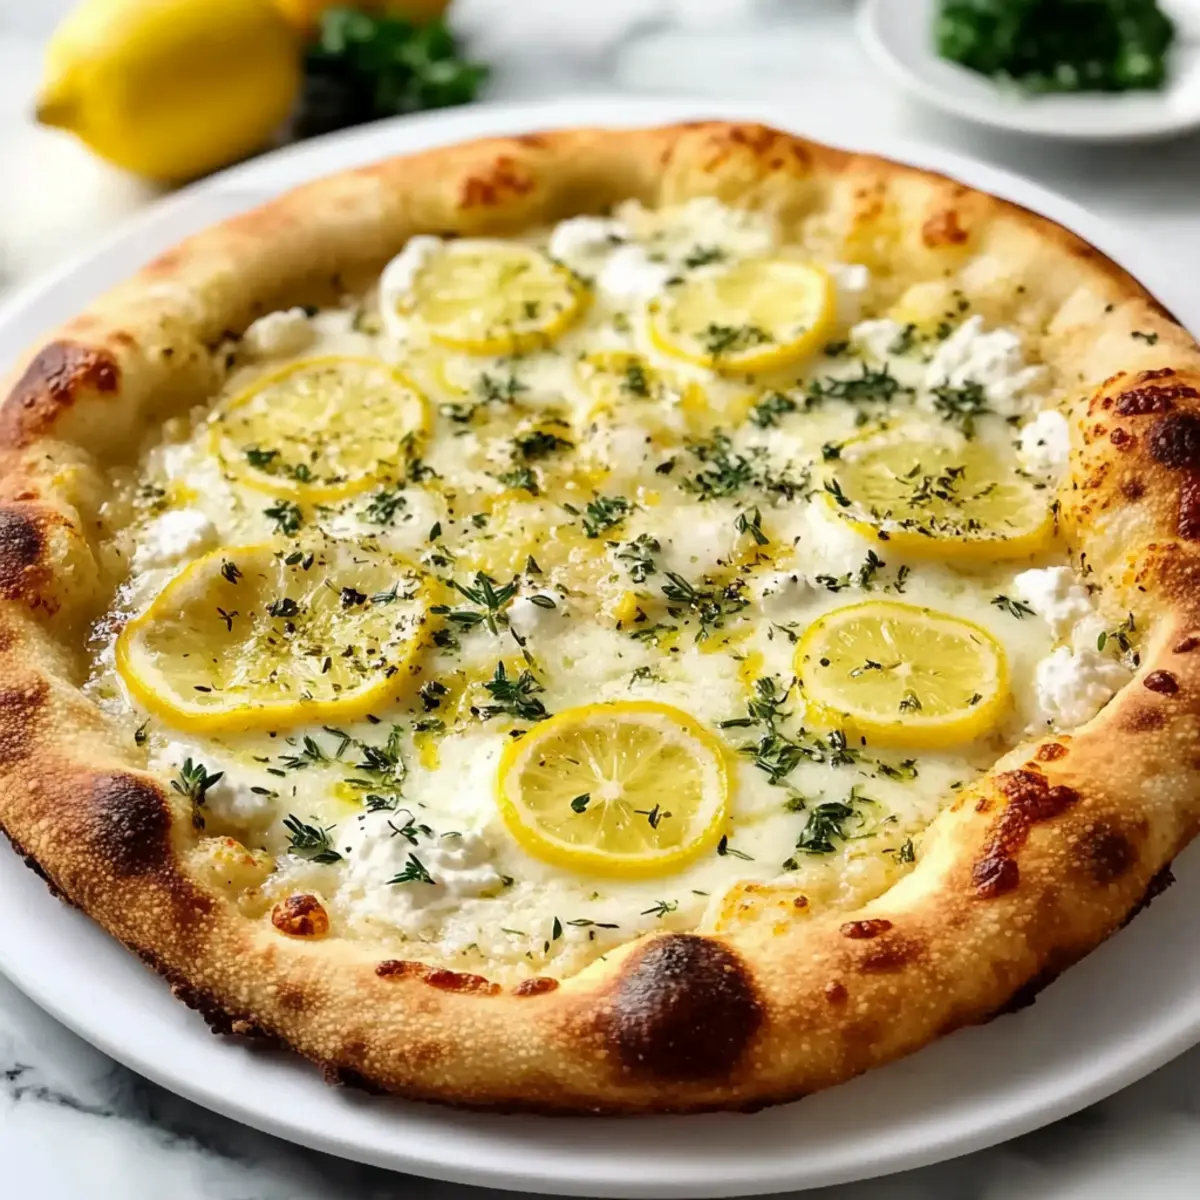
As I pulled a golden, bubbling pizza from the oven, the zesty aroma of fresh lemon instantly filled my kitchen, creating an inviting atmosphere that made my mouth water. This Zesty Lemon Pizza with Ricotta, Mozzarella, and Fresh Thyme is not just another weeknight meal—it’s a summertime celebration on a plate. With its quick prep time and satisfying, creamy toppings, this recipe is perfect for those evenings when you want something both refreshing and comforting. Whether you’re hosting friends or savoring a quiet dinner at home, one bite of this vibrant pie will transport you to sun-drenched terraces and breezy picnics. Curious about how to create this culinary delight? Let’s dive in!
Why is Lemon Pizza a Must-Try?
Bright, Zesty Flavors: This pizza brings a refreshing twist with the combination of tangy lemon and creamy cheeses, making it a standout from traditional offerings.
Easy Preparation: With simple steps and minimal fuss, it’s perfect for both novice cooks and seasoned chefs looking to whip up something extraordinary quickly.
Perfect for Any Occasion: Whether it’s a casual dinner or a festive gathering, its vibrant appeal is sure to impress your guests and make every meal feel special.
Versatile Variations: Feel free to switch out herbs or add your favorite toppings, customizing it to suit your taste or any dietary preferences! Looking for other delightful dishes? Pair your pizza with a crisp salad or serve it alongside Garlic Butter Beef for a complete and satisfying meal.
Crowd-Pleasing Appeal: Kids and adults alike will love the gooey texture and unique flavor of this dish, making it the perfect family dinner compromise!
Lemon Pizza Ingredients
For the Dough
• Active Dry Yeast – Helps the dough rise; ensure it’s fresh and active for best results.
• Warm Water – Activates the yeast; use water around 110°F (43°C) for optimal activation.
• Sugar – Feeds the yeast, enhancing crust texture and flavor; substitute with honey if desired.
• All-Purpose Flour – Provides structure; for gluten-free, use a suitable flour blend.
• Salt – Enhances flavor; don’t skip this, as it’s vital for the dough’s taste.
• Olive Oil – Adds richness and flavor to the crust; can substitute with other oils if necessary.
For the Topping
• Ricotta Cheese – Creamy base for the topping; a blend with cottage cheese can be used for a lighter option.
• Mozzarella Cheese – Melts well for a gooey texture; fresh mozzarella is recommended for flavor.
• Parmesan Cheese – Adds depth to the cheese topping; nutritional yeast can be used for a vegan option.
• Lemon Zest – Provides citrusy brightness essential to the dish; substitute with bottled lemon juice in a pinch.
• Lemon Juice – Adds acidity and enhances flavor balance; use fresh juice for best taste.
• Fresh Thyme – Imparts an herbal note; other herbs like rosemary or basil can be used for variation.
• Honey – Adds subtle sweetness and gloss; maple syrup may be used for a vegan option.
• Red Pepper Flakes – Optional for heat; use to taste.
Elevate your culinary experience with this luminous Lemon Pizza with Ricotta and Mozzarella that captures both comfort and freshness in every slice!
Step‑by‑Step Instructions for Lemon Pizza with Ricotta, Mozzarella
Step 1: Activate Yeast
In a small bowl, combine 1 cup of warm water (around 110°F or 43°C) with 2 teaspoons of sugar and 2 teaspoons of active dry yeast. Stir gently, then let it sit for about 5 minutes, or until the mixture is frothy and bubbly. This step is crucial for ensuring the dough rises beautifully in your Lemon Pizza.
Step 2: Mix Dry Ingredients
In a large mixing bowl, whisk together 3 cups of all-purpose flour and 1 teaspoon of salt. Make sure the ingredients are well combined to ensure even flavor throughout the Lemon Pizza dough. This mixture will form the base, providing structure and taste.
Step 3: Form Dough
Pour the frothy yeast mixture and 2 tablespoons of olive oil into the dry ingredients. Mix with a wooden spoon or spatula until the dough begins to come together and forms a rough consistency. This step will help to integrate the yeast and fat, ensuring a flavorful crust.
Step 4: Knead Dough
Transfer the dough onto a floured surface and knead it for about 8-10 minutes. You want to achieve a smooth and elastic texture—you’ll know it’s ready when it springs back slightly when pressed. This step develops the gluten and creates the perfect texture for your Lemon Pizza crust.
Step 5: First Rise
Place the kneaded dough into a lightly oiled bowl, covering it with a clean kitchen towel or plastic wrap. Let it rise in a warm area for 1 to 1.5 hours, or until it has doubled in size. During this time, the dough will become airy and light, ready to be transformed into a delicious Lemon Pizza.
Step 6: Prepare Cheese Mixture
While your dough is rising, mix together 1 cup of ricotta cheese, 1 cup of shredded mozzarella, ½ cup of grated Parmesan, the zest of one lemon, and the juice of half a lemon in a medium bowl. Stir until smooth and evenly combined, creating a creamy topping that enhances the lemony flavors in your pizza.
Step 7: Preheat Oven
Once the dough has risen, preheat your oven to 475°F (245°C). If you have a pizza stone, place it in the oven while it heats up to ensure that your Lemon Pizza crust achieves that perfect crispy texture. Preheating is essential for optimal pizza baking.
Step 8: Shape Dough
After the first rise, punch down the dough gently to release the air, then transfer it to a floured surface. Roll it out into a 12-inch round, keeping it thin for a crisp crust. If you prefer a thicker crust, adjust the size as needed, remembering that thinner dough is crucial for a well-cooked Lemon Pizza.
Step 9: Assemble Pizza
Transfer the rolled-out dough to a parchment-lined baking sheet or a hot pizza stone. Spread the cheese mixture evenly over the dough, leaving about a 1-inch border for the crust. Sprinkle freshly chopped thyme over the cheese for that herbal aroma which complements the zesty lemon perfectly.
Step 10: Bake Pizza
Carefully place the assembled Lemon Pizza into the preheated oven. Bake for 10-12 minutes or until the crust is golden brown and the cheese is bubbly and slightly browned. Watch closely towards the end to avoid overcooking; the goal is a beautifully toasted crust.
Step 11: Finishing Touch
Once baked, remove the pizza from the oven and drizzle lightly with olive oil and honey for added sweetness and gloss. If you’re feeling adventurous, sprinkle some red pepper flakes on top for a touch of heat, which contrasts nicely with the lemon and cheese flavors.
Step 12: Serve
Allow your Lemon Pizza to cool for a few minutes on a cutting board before slicing it into wedges. Serve warm or at room temperature, and enjoy the delightful combination of creamy cheeses and bright lemony notes that make this dish a refreshing culinary experience.
What to Serve with Zesty Lemon Pizza?
Elevate your meal experience by pairing this vibrant pizza with refreshing and complementary side dishes that enhance its zesty flavors and creamy textures.
-
Crisp Green Salad: A refreshing mix of arugula, cucumbers, and cherry tomatoes drizzled with a light vinaigrette brightens each bite and balances the richness of the pizza.
-
Garlic Roasted Vegetables: Roasting seasonal veggies, such as bell peppers and zucchini, brings out their natural sweetness, providing a delightful contrast to the lemon and cheese.
-
Chilled Gazpacho: This cold Spanish soup made from fresh tomatoes, cucumbers, and bell peppers adds a cooling element, perfect for warm evenings and enhances the meal’s freshness.
-
Balsamic Glazed Brussels Sprouts: Roasted Brussels sprouts drizzled with a tangy balsamic glaze bring a savory depth that complements the zesty notes of the pizza.
-
Olive Tapenade: A spread made from olives, capers, and anchovies provides a briny punch that pairs beautifully with the creamy cheese and lemon flavors, adding an irresistible Mediterranean flair.
-
Sparkling Lemonade: A refreshing glass of homemade sparkling lemonade, with its citrusy zing, echoes the flavors of your pizza and elevates the dining experience with every sip.
-
Zesty Lemon Sorbet: End the meal on a sweet note with a dollop of zesty lemon sorbet, offering a clean and light finish that echoes the pizza’s brightness in a delightful way.
Lemon Pizza Variations & Substitutions
Feel free to get creative with your lemon pizza, transforming it into your own delightful masterpiece!
-
Herb Swap: Try using rosemary or basil instead of thyme for a different herbal note. Each herb brings its unique aroma and flavor that may surprise and please your palate.
-
Dairy-Free Delight: For a vegan option, simply substitute ricotta and mozzarella with cashew cheese or nutritional yeast. The creamy, rich texture of cashew cheese can mimic the original while keeping it plant-based.
-
Extra Zing: Add a zestier twist by mixing in a bit of lime zest along with the lemon zest. This combination will elevate the citrusy flavor profile, making each bite burst with freshness.
-
Toppings Galore: After baking, consider adding thinly sliced red onions or prosciutto for a burst of flavor. These additions create delicious contrasts that tantalize the taste buds.
-
Gluten-Free Option: Use a gluten-free flour blend in place of all-purpose flour, ensuring you’re catering to those with dietary restrictions while still achieving a fantastic crust. Just be mindful of the rising times, as gluten-free dough may behave differently.
-
Sweet Heat: For those who enjoy a little kick, toss some crushed red pepper flakes into the cheese mixture before baking. This adds a subtle heat that complements the lemon’s brightness beautifully.
-
Creamy Blend: Consider blending ricotta with a touch of cottage cheese for a lighter topping with a unique texture. This variation maintains the creaminess while reducing fat content.
Indulging in these variations can take your lemon pizza to new heights! And if you’re in the mood for more delicious recipes, I highly recommend trying out another fresh twist with our delightful Garlic Butter Beef or inspiring your taste buds with the savory notes in Pepperoni Pizza Bombs. Happy cooking!
Expert Tips for Lemon Pizza
-
Check Yeast Freshness: Use fresh yeast for proper activation; if it doesn’t foam within 5 minutes, it may be too old for your Lemon Pizza.
-
Don’t Overwork the Dough: Knead just until smooth and elastic—over-kneading can make your crust tough instead of tender.
-
Aim for Thin Crust: Roll the dough out to about ¼ inch thickness for a crispy base. A thicker crust may not cook through properly, leading to a chewy texture.
-
Let It Rest: After shaping, allow the dough to rest uncovered for a few minutes before adding toppings. This relaxes the gluten, making it easier to shape.
-
Use Fresh Ingredients: Fresh mozzarella and herbs like thyme make a big difference in flavor—opt for them when possible for the best Lemon Pizza experience.
Storage Tips for Lemon Pizza
Fridge: Store leftover slices in an airtight container for up to 2 days. This keeps the pizza fresh and ready for a quick reheat when the craving hits!
Freezer: For longer storage, freeze individual slices wrapped tightly in plastic wrap and then placed in a freezer bag. Enjoy them within 2 months for the best quality.
Reheating: To maintain that crispy crust, reheat in the oven at 375°F (190°C) for about 10-15 minutes. Avoid microwaving, as it can make the crust soggy.
Room Temperature: If left out, consume within 2 hours to ensure food safety. Keep the pizza protected from moisture and heat to maintain flavor.
Make Ahead Options
These Zesty Lemon Pizzas with Ricotta, Mozzarella, and Fresh Thyme are perfect for meal prep enthusiasts! You can prepare the dough up to 24 hours in advance; simply complete the first rise, cover it tightly in plastic wrap, and refrigerate. The cheese mixture can also be made ahead of time and stored in the fridge for up to 3 days—just keep it in an airtight container. When you’re ready to enjoy your pizza, take the dough out to come to room temperature while preheating your oven. Roll it out, assemble your pizza with the cheese mixture, and bake for delicious, fresh-tasting results with minimal last-minute effort!
Zesty Lemon Pizza with Ricotta, Mozzarella Recipe FAQs
What if my yeast doesn’t activate?
Absolutely! If your yeast doesn’t froth and bubble after about 5 minutes, it may not be fresh enough. It’s essential to use active dry yeast and ensure your warm water is around 110°F (43°C). If there’s no frothing, discard the mixture and start over with new yeast.
How should I store leftover Lemon Pizza?
For the best flavor and texture, store leftover slices in an airtight container in the fridge for up to 2 days. If you want to keep them longer, freeze individual slices wrapped tightly in plastic wrap, then place them in a freezer bag. They will maintain quality for about 2 to 3 months.
Can I freeze Lemon Pizza?
Certainly! To freeze your Lemon Pizza, first let it cool to room temperature. Then, wrap individual slices tightly in plastic wrap and place them in a freezer-safe bag. For best results, consume them within 2 months. To reheat, bake at 375°F (190°C) for about 10-15 minutes to keep the crust crispy.
What can I do if my dough is too sticky?
Don’t worry! If your dough is too sticky during kneading, sprinkle a little more flour on your work surface as you knead. Just a small amount will do; avoid adding too much flour as it could make your crust dense. Continue kneading until you achieve a smooth, elastic texture.
Is this recipe suitable for gluten-free diets?
Absolutely! If you need to make this Lemon Pizza gluten-free, simply substitute the all-purpose flour with a gluten-free flour blend. Make sure to adjust rising times, as these blends may behave differently. Just keep an eye on your dough—it should still look fluffy and rise well!
Can I modify the toppings to suit dietary needs?
Very much so! Feel free to switch the cheeses to vegan alternatives like cashew cheese or nutritional yeast for a dairy-free option. You can also swap fresh herbs to variations like basil or oregano, depending on your preference; the versatility of this Zesty Lemon Pizza allows for many delicious customizations!
Lemon Pizza with Ricotta, Mozzarella: A Zesty Delight!
Ingredients
Equipment
Method
- In a small bowl, combine warm water with sugar and active dry yeast. Stir gently and let it sit for about 5 minutes until frothy.
- In a large bowl, whisk together the flour and salt until combined.
- Pour the yeast mixture and olive oil into the dry ingredients. Mix until the dough comes together.
- Transfer the dough onto a floured surface and knead for 8-10 minutes until smooth and elastic.
- Place kneaded dough into a lightly oiled bowl. Cover and let it rise in a warm area for 1 to 1.5 hours until doubled in size.
- While dough is rising, mix ricotta, mozzarella, Parmesan, lemon zest, and lemon juice in a bowl until smooth.
- Preheat the oven to 475°F (245°C). If using a pizza stone, place it in the oven to heat.
- Punch down the risen dough and roll it out into a 12-inch round on a floured surface.
- Transfer the dough to a parchment-lined baking sheet or hot pizza stone. Spread the cheese mixture over the dough.
- Sprinkle chopped thyme over the cheese mixture.
- Bake for 10-12 minutes until crust is golden and cheese is bubbly.
- Remove from oven, drizzle with olive oil and honey, and sprinkle red pepper flakes if desired.
- Allow to cool for a few minutes before slicing and serving.
Leave a Reply