
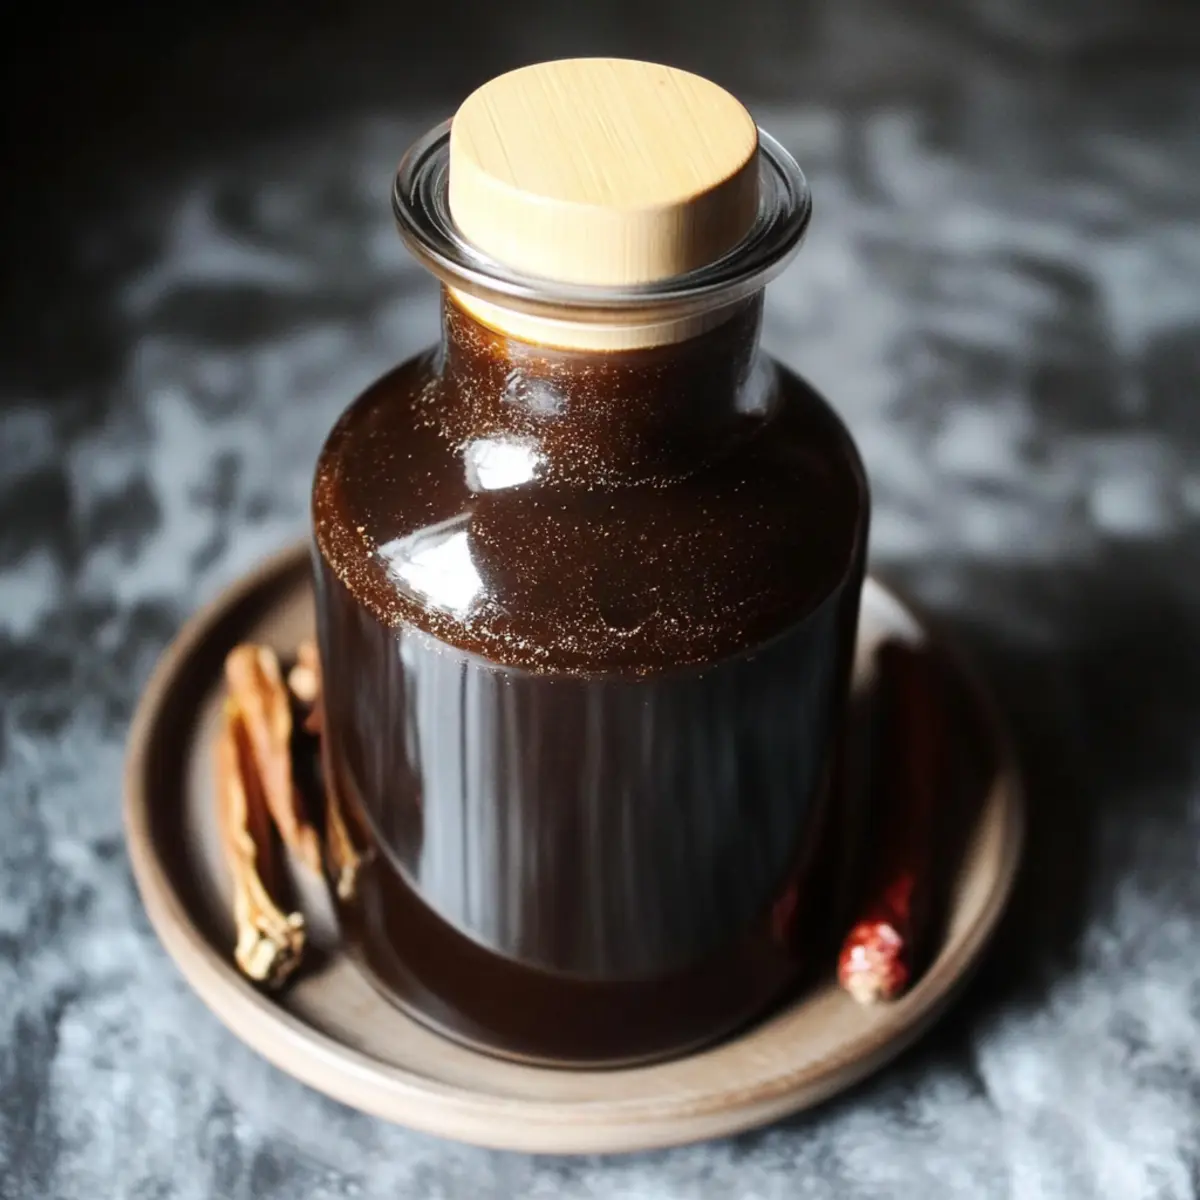
As I sift through my pantry, the familiar scent of tamarind wafts through the air, taking me back to the bustling markets of my travels where spices dance together in vibrant harmony. This Homemade Worcestershire Sauce is my secret weapon, a richly layered condiment that elevates everything from marinades to soups with its umami-packed depth. With just about 30 minutes of active prep time, this gluten-free delight not only saves you from the pitfalls of store-bought versions loaded with preservatives but also unlocks a custom flavor profile tailored to your taste buds. Plus, as it ages for a month, the flavors deepen, resulting in a sauce that promises to make your dishes sing. Are you ready to transform your cooking game and impress your family with this delicious DIY condiment?
Why Make Homemade Worcestershire Sauce?
Unmatched Flavor: This homemade Worcestershire sauce boasts a depth of flavor that far surpasses any store-bought version. Each ingredient plays a vital role in creating a complex taste sensation.
Quick Prep: With just 30 minutes of active prep, you can create a DIY condiment that truly impresses.
Customizable Recipe: Feel free to adjust sweetness or spice levels to cater to your family’s preferences, letting you control the flavors as you like.
Healthier Choice: Free from preservatives and loaded with pantry staples, you’re investing in both health and taste with this gluten-free delight.
Versatile Use: Elevate marinades, dressings, and even soups or stews with this sauce to enhance any dish effortlessly. If you love rich flavors, you might also enjoy pairing it with Homemade Meatballs Savory or using it in sauces like the Grilled Shrimp Sauce.
Homemade Worcestershire Sauce Ingredients
For the Base
• Raisins – Adds sweetness and depth; soak in boiling water to soften before blending.
• Boiling Water – Used to soften the raisins; cooling is not necessary; just drain after soaking.
• Unsulfured Molasses – Provides a deep sweetness and complexity; blackstrap molasses can be used for a richer flavor.
• Tamarind Paste – Supplies fruity tartness, critical for flavor; no suitable substitute available.
• Anchovies (2-ounce can) – Introduces umami flavor; canned anchovies are preferred for authenticity.
• Onion (1 large, coarsely chopped) – Adds savoriness and depth; can be omitted for an allium-free version.
• Fresh Ginger (1 inch, peeled & chopped) – Adds warmth and spice; dried ginger can substitute at a ratio of ½ tsp ground for 1 inch fresh.
• Garlic (6-8 cloves, crushed) – Provides aromatic richness; use asafoetida powder for an allium-free version or omit.
• White Vinegar (2 cups, divided) – Acts as a preserving agent and contributes acidity; apple cider vinegar can provide a different flavor profile.
For the Spice Blend
• Cardamom Pods (2 whole) – Adds a warm, aromatic note; no direct substitute.
• Kosher or Canning Salt (2 Tbsp) – Enhances flavor and acts as a preservative; accurate measurement is important.
• Brown Sugar (2 Tbsp) or Maple Syrup – Provides sweetness; interchangeable with coconut sugar for extra flavor.
• Crushed Red Pepper Flakes (1 Tbsp) – Adds a hint of heat; omit for a milder sauce or adjust to taste.
• Dry Mustard (1 Tbsp) – Contributes pungency; prepared mustard can substitute using a 1:1 ratio.
• Whole Cloves (1 tsp) – Enhances spiciness and aroma; no direct substitute for unique flavor.
• Black Peppercorns (1 tsp) – Adds warmth; ground black pepper can replace it but reduces infusion time.
• Ground Cinnamon (½ tsp) – Provides warmth and sweetness; allspice is a possible substitute.
By gathering these balanced ingredients, your homemade Worcestershire sauce will not only enrich your culinary creations, but it will also become a beloved staple in your kitchen!
Step‑by‑Step Instructions for Homemade Worcestershire Sauce
Step 1: Soak Raisins
Begin by pouring boiling water over 1 cup of raisins in a medium bowl. Let them sit for about 15 minutes, allowing them to soften fully. This step is crucial as it ensures a smoother consistency in your homemade Worcestershire sauce later on.
Step 2: Blend Base
In a food processor, combine the softened raisins, ½ cup of unsulfured molasses, 2 tablespoons of tamarind paste, and the contents of a 2-ounce can of anchovies (including the oil). Add one large coarsely chopped onion, 1 inch of peeled and chopped fresh ginger, and 6-8 crushed garlic cloves. Pour in 1 cup of white vinegar, then blend until everything is smooth and well mixed.
Step 3: Combine and Boil
Transfer the blended mixture from the food processor into a medium saucepan. Add another cup of white vinegar along with the spice blend: 2 whole cardamom pods, 2 tablespoons of kosher salt, 2 tablespoons of brown sugar, 1 tablespoon of crushed red pepper flakes, 1 tablespoon of dry mustard, 1 teaspoon of whole cloves, 1 teaspoon of black peppercorns, and ½ teaspoon of ground cinnamon. Stir well, bring the mixture to a boil over medium heat, and then remove it from the heat once it bubbles vigorously.
Step 4: Jar and Age
Allow the sauce to cool slightly before transferring it to a 1-quart canning jar with a plastic lid. This is important; using a plastic lid prevents corrosion from the vinegar. Seal the jar and store it in a cool, dark pantry for at least 1 month to allow the flavors to meld and deepen, ideally up to 3 months for richer results.
Step 5: Strain
After the aging period, it’s time to strain the sauce. Using a fine mesh sieve, pour the Worcestershire sauce into another clean jar, separating the smooth liquid from any remaining solids. The solids can be reserved for use in soups or dehydrating into a powder, allowing you to make the most of every ingredient in your homemade Worcestershire sauce.

Make Ahead Options
These homemade Worcestershire sauce preparations are perfect for busy home cooks! You can soak the raisins and blend the sauce up to 24 hours ahead, allowing you to save precious time on meal prep. Simply follow the soaking step and blend all the ingredients, then store the mixture in an airtight container in the fridge. When you’re ready to complete the recipe, transfer the blended sauce to a saucepan, add the remaining vinegar and spices, and bring it to a boil. Letting the sauce age for at least a month will enhance the flavor, so it’s ideal to make it well in advance. Just remember to use a plastic lid for storage to maintain the sauce’s quality!
Homemade Worcestershire Sauce Variations
Feel free to get creative with your homemade Worcestershire sauce and customize it to your taste!
- Vegan Version: Swap the anchovies for soy sauce or tamari paired with dried mushroom powder for a rich umami profile.
- Low-Sodium Option: Halve the kosher salt for a low-salt version; just remember to refrigerate the sauce for safety.
- Sweetness Adjustment: Experiment with different sweeteners such as honey or maple syrup to match your family’s preferences.
- Heat Level Variation: Increase crushed red pepper flakes for a spicier kick, or omit them entirely for a milder sauce, depending on your taste buds.
- Herb Infusion: Add fresh herbs like thyme or rosemary during the boiling process for an aromatic twist; strain before aging for best results.
- Citrus Twist: Incorporate a splash of lemon or lime juice to brighten the flavor, perfect for marinades or dressings.
- Smoky Flavor: Try adding a touch of liquid smoke or smoked paprika for that delightful barbecue essence, making your sauce even more versatile.
- Fruit-Forward: Blend in some chopped dried fruits like apricots or figs for a sweet and tangy variation that pairs beautifully with meats and cheeses.
As you experiment, consider this homemade Worcestershire sauce as a foundation to enhance dishes like Beef Enchiladas Homemade or your favorite marinades!
How to Store and Freeze Homemade Worcestershire Sauce
Pantry: Store your homemade Worcestershire sauce in a cool, dark place for up to 1 year when sealed properly. Ensure the jar has a plastic lid to avoid corrosion.
Refrigerator: If you’ve made modifications, like reducing salt or vinegar, refrigerate the sauce to maintain freshness for up to 2 years.
Freezer: For longer storage, pour the sauce into an airtight container and freeze. It can keep well for up to 6 months, though flavors are best before then.
Reheating: When ready to use, simply thaw in the refrigerator overnight or under cold water, and give it a good shake before enjoying its umami-rich goodness.
What to Serve with Homemade Worcestershire Sauce
As you prepare to elevate your culinary creations, think about pairing dishes that will harmonize with the tangy and umami notes of this beloved condiment.
- Savory Meat Marinades: Use this sauce in your favorite marinated chicken or beef for a flavor boost that tenderizes meats and adds complexity.
- Fresh Garden Salad: Drizzle a delicate vinaigrette made with your homemade Worcestershire sauce over greens, balancing freshness with a savory touch. This pairing adds depth without overwhelming the veggies.
- Spicy Grilled Vegetables: Toss assorted vegetables like bell peppers and zucchini with Worcestershire sauce before grilling; the heat enhances the sauce’s savory notes while caramelizing the veggies beautifully.
- Rich Beef Stew: Enhance your stews with a splash of this sauce to deepen the flavor profile, creating a hearty dish perfect for cozy family dinners.
- Flavorful Deviled Eggs: Mix a hint of Worcestershire sauce into your egg yolk filling for an exciting and umami-rich twist on the classic appetizer.
- Tangy Barbecue Slider Sauce: Blend Worcestershire sauce into your barbecue sauce for sliders that will make your taste buds dance with joy—a perfect fusion of flavors!
- Bold Bloody Mary Cocktail: Mix this sauce into your next Bloody Mary for a flavorful kick that pairs perfectly with your brunch spread and adds an unexpected surprise to your drink.
- Sweet and Tangy Glaze: Blend Worcestershire with honey for a glaze on roasted carrots or Brussels sprouts, bringing together sweetness and umami in a delightful way.
- Philly Cheese Steak Filling: Stir a tablespoon of your homemade Worcestershire sauce into the sautéed vegetables and beef for a cheesy steak sandwich that’s bursting with flavor.
Expert Tips for Homemade Worcestershire Sauce
Use Quality Ingredients: A little goes a long way, so choose high-quality tamarind paste and anchovies for the best homemade Worcestershire sauce flavor.
Soak Thoroughly: Soaking raisins in boiling water ensures they’re soft, making blending much easier. Don’t skip this important prep step!
Aging is Key: Allow the sauce to age for at least one month to let the flavors blend together beautifully. Be patient; it’s worth the wait!
Use Plastic Lids: When jarring the sauce, opt for a plastic lid as metal can react with vinegar, altering the flavor and quality.
Adjust to Taste: Feel free to tweak the sweetness or spice levels according to your family’s preferences, ensuring a personalized condiment every time.
Strain Well: After aging, straining the sauce ensures a smooth, thick consistency without bitterness from the solids.
Homemade Worcestershire Sauce Recipe FAQs
What is the best way to select ripe ingredients?
Absolutely! When making homemade Worcestershire sauce, it’s important to ensure your ingredients are of top quality. Choose plump, shiny raisins without dark spots or signs of mold. The anchovies should be canned, ensuring freshness and maintaining their umami richness. Look for firm, vibrant ginger and garlic cloves that don’t exhibit sprouting or softness, as this affects flavor.
How should I store my homemade Worcestershire sauce, and for how long?
Store your homemade Worcestershire sauce in a cool, dark pantry in a tightly sealed jar for up to 1 year. If you’ve altered the recipe by reducing salt or vinegar, refrigerate it to keep it fresh for up to 2 years. Using a plastic lid is essential, as metal can corrode over time due to the vinegar.
Can I freeze homemade Worcestershire sauce? If so, how?
Very! To freeze your homemade Worcestershire sauce, pour it into an airtight container, leaving some space at the top to allow for expansion. The sauce can be stored this way for up to 6 months. For best flavor, aim to use it sooner. When you’re ready, simply thaw in the refrigerator overnight, or place the container under cold running water to speed up the process.
What should I do if my sauce turns out too acidic or salty?
Don’t worry if you find the sauce too acidic or salty! You can balance it out by adding a touch more sugar or sweetness, such as brown sugar or maple syrup, which will mellow the flavors. You could also dilute it with a bit of water or unsalted broth if adjusting sweetness isn’t enough. Blend well and allow it to sit for at least an hour to let flavors integrate before tasting again.
Can I make this sauce allergen-free?
Absolutely! To make a gluten-free version, ensure that all your ingredients, especially the vinegar, are labeled as gluten-free. If you have seafood allergies, you can omit the anchovies entirely and replace them with a combination of soy sauce or tamari and dried mushroom powder for that umami kick. Be sure to adjust the salt content to maintain the flavor balance.
How should I know when my homemade Worcestershire sauce is ready?
The aging process is key! Ideally, you should keep the sauce sealed and stored for at least 1 month, although 3 months will provide a richer and more harmonious flavor. After aging, your sauce should have a deep tan to brown color, and it will be thick and slightly viscous. If you’ve followed the instructions, you’ll notice a delightful blend of sweetness, tanginess, and umami that makes it truly unique!
Savor the Flavor: Homemade Worcestershire Sauce Recipe
Ingredients
Equipment
Method
- Soak raisins in boiling water for 15 minutes.
- In a food processor, blend softened raisins, molasses, tamarind paste, anchovies, onion, ginger, garlic, and 1 cup of white vinegar until smooth.
- Transfer the blended mixture to a saucepan, add another cup of white vinegar and spice blend. Stir and bring to boil.
- Cool slightly, transfer to a canning jar with a plastic lid, and store in a cool dark place for at least 1 month.
- Strain the sauce into another jar, separating solids from liquid.
Leave a Reply