
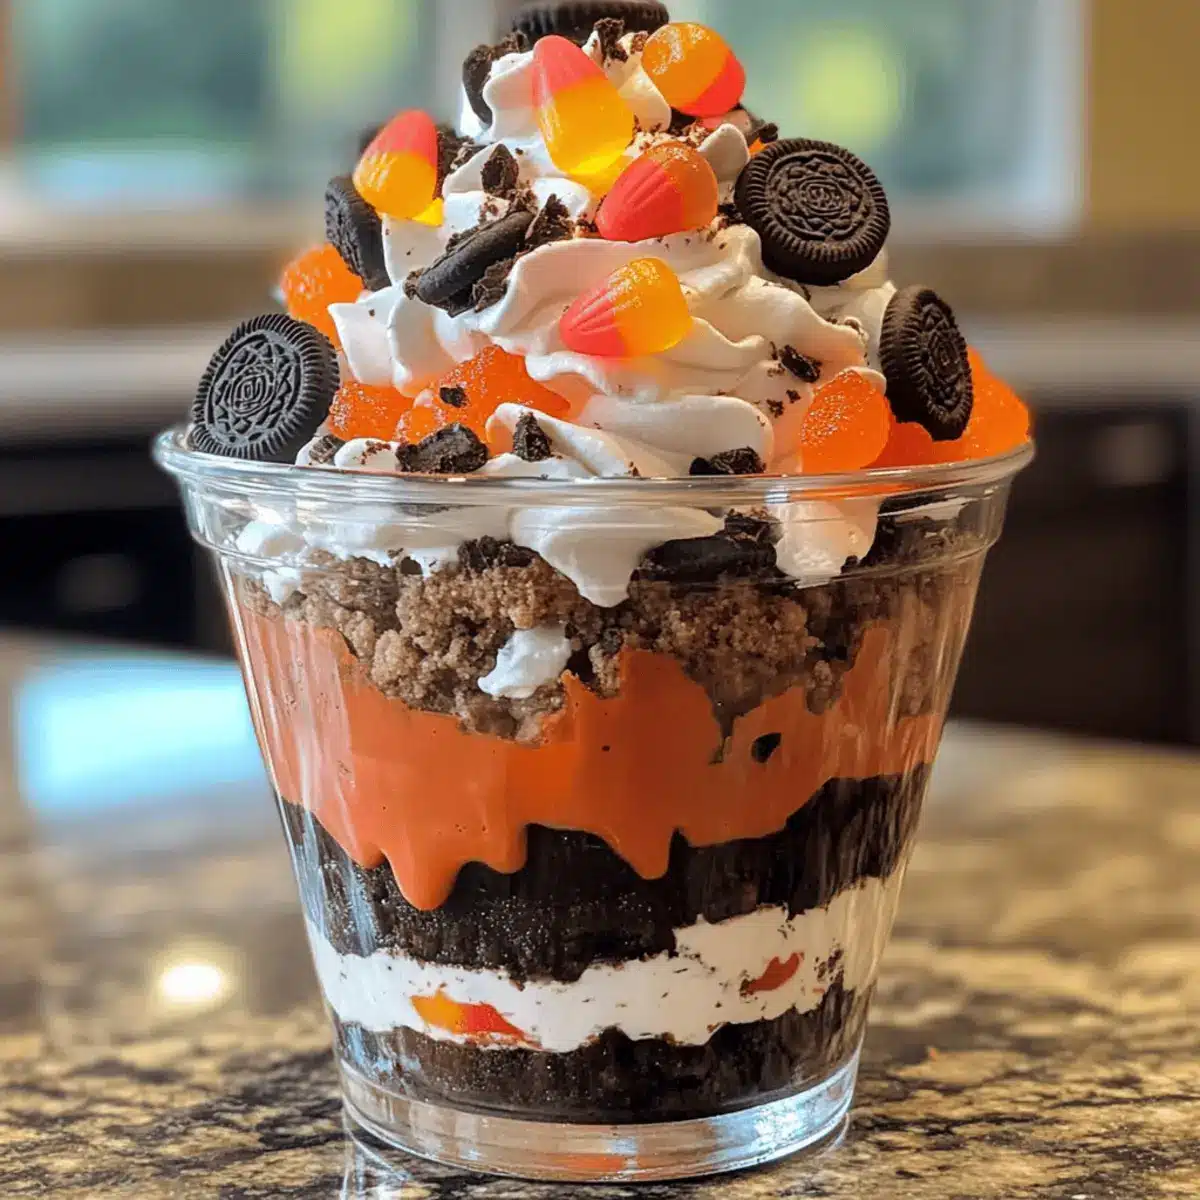
Standing in the kitchen, I couldn’t help but chuckle at the sight of my daughter trying to make a “dirt cake” for her Halloween party. It made me realize how much joy simple and fun treats bring to our lives. That’s why I’m excited to share my recipe for Pumpkin Patch Dirt Cups, a playful dessert that’s perfect for any fall gathering. With layers of creamy chocolate pudding and crunchy crushed Oreos, these delightful cups are eye-catching and delicious, making them a hit with both kids and adults. Plus, they’re incredibly easy to whip up—ideal for busy home chefs like us! Join me in creating a spooky treat that will have everyone smiling and coming back for seconds. What unique twist will you add to make these cups your own?

Why Are Pumpkin Patch Dirt Cups So Fun?
Whimsical Presentation: These delightful cups look like mini gardens, instantly bringing smiles to faces young and old.
Easy to Make: With just a few simple steps, you’ll have a stunning dessert that requires minimal cooking skills—perfect for busy home chefs!
Customizable: Adapt the recipe for different occasions by swapping in favorite cookies or festive decorations; try Cheesecake Cookie Cups for a sweet change!
Family Favorite: Every layer bursts with flavor, combining creamy pudding and crunchy Oreos that keep everyone coming back for more.
Theme Variations: You can even transform these into a Christmas dessert by incorporating seasonal candies—a treat that evolves with you!
Gluten-Friendly Options: Thanks to gluten-free substitutions, anyone can enjoy this festive dessert, making it a sure crowd-pleaser at gatherings.
Pumpkin Patch Dirt Cups Ingredients
• Fun to make with family!
For the Pudding
- Chocolate pudding mix – Provides a rich, creamy base; can be substituted with non-dairy pudding mix for a dairy-free option.
- Milk – Used to prepare the pudding; feel free to use non-dairy milk as a substitute.
For the Layers
- Oreos (crushed) – Adds a crunchy, “dirt-like” texture; gluten-free cookies can replace Oreos to make the dish suitable for those with gluten sensitivities.
- Whipped cream – A topping that adds creaminess and visual appeal.
For the Decorations
- Gummy worms and candy pumpkins – Decorative elements that enhance the fun and thematic presentation of the Pumpkin Patch Dirt Cups.
- Clear cups or jars – Essential for serving, showcasing the beautiful layers and making them look irresistible.
Step‑by‑Step Instructions for Pumpkin Patch Dirt Cups
Step 1: Prepare Ingredients
Start by gathering all your ingredients: chocolate pudding mix, milk, crushed Oreos, whipped cream, gummy worms, and candy pumpkins. Clear cups or jars will be your serving vessels, so have those ready too! This prep ensures a smooth workflow and makes it easier to assemble your delightful Pumpkin Patch Dirt Cups.
Step 2: Make Pudding
In a mixing bowl, whisk together 2 cups of cold milk and the chocolate pudding mix for about 2-3 minutes. You’ll know it’s ready when the mixture is thick and luscious. The creamy chocolate pudding forms the heart of your cups, giving each bite its rich flavor and silky texture.
Step 3: Crush Oreos
Take a pack of Oreos and place them into a zip-lock bag, sealing it tightly. Use a rolling pin or your hands to crush the cookies into small pieces—think of making them resemble dirt. This crunchy layer adds both texture and whimsy to your Pumpkin Patch Dirt Cups, so let those crumbs fly!
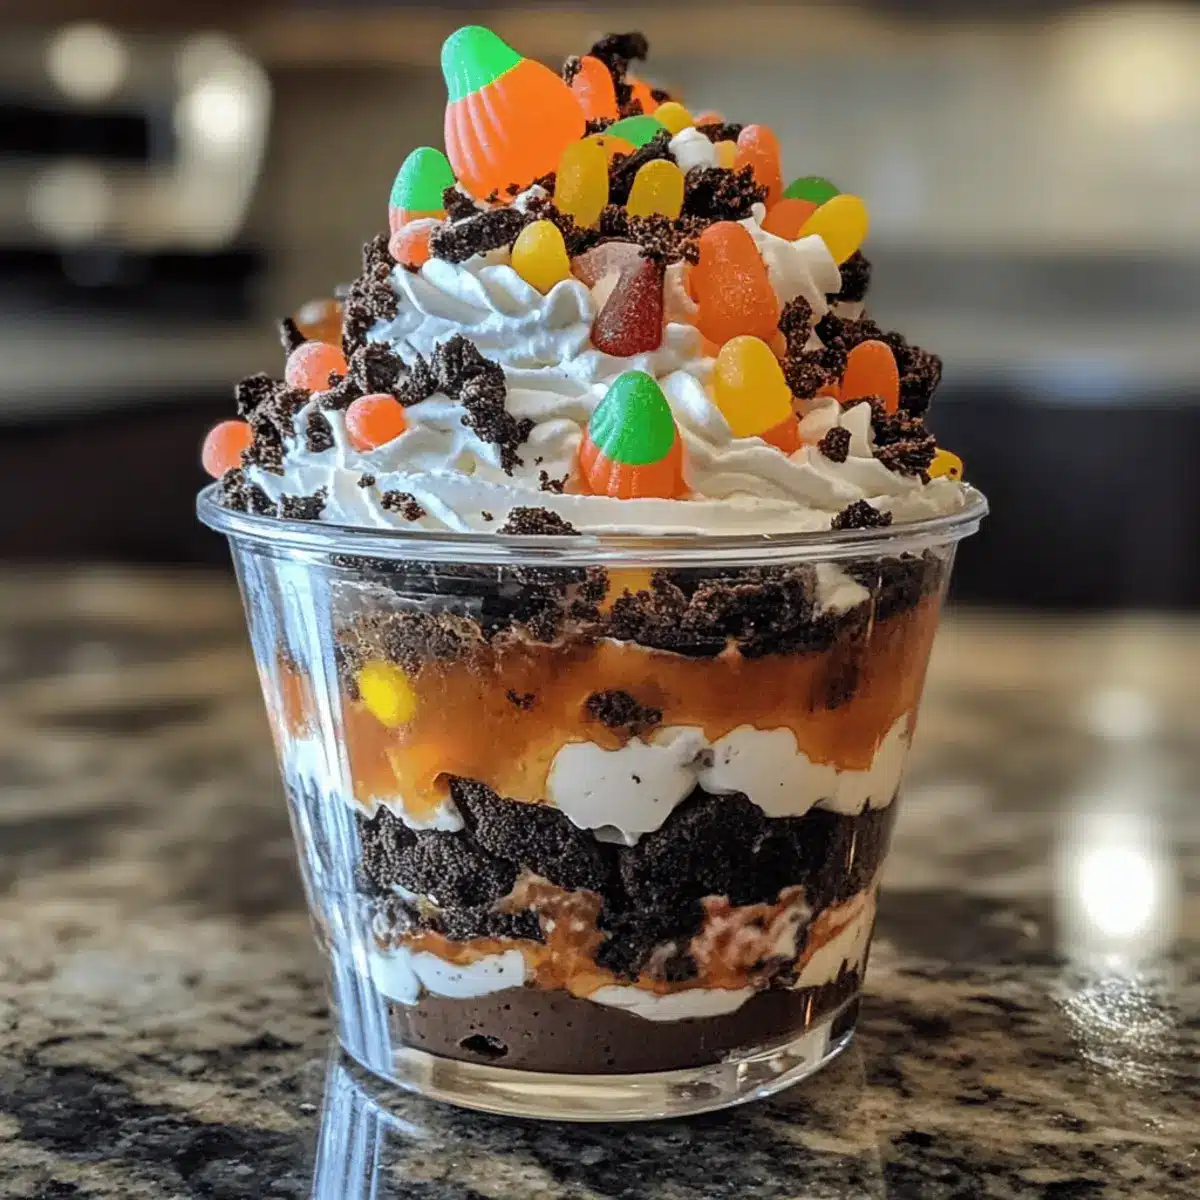
Step 4: Layer Dessert
Begin assembling your cups by adding a layer of crushed Oreos at the bottom—about 1 inch thick. This creates the foundation of your dessert. Pour a generous layer of the prepared chocolate pudding over the Oreos. Make sure the pudding is evenly spread, creating a beautiful, creamy layer above the crunchy ‘dirt.’
Step 5: Repeat Layers
Continue building your Pumpkin Patch Dirt Cups by adding another layer of crushed Oreos followed by more pudding. Repeat this process until the cups are filled, typically 2-3 layers work best for a delightful visual and textural contrast. The layers should alternate, ensuring a fun presentation.
Step 6: Top and Decorate
Spoon a fluffy dollop of whipped cream on top of each cup to finish off your Pumpkin Patch Dirt Cups. Then, get creative with decorations by placing gummy worms and candy pumpkins on the whipped cream. This playful presentation will make your dessert look both festive and enticing.
Step 7: Chill (optional)
If desired, cover your assembled cups with plastic wrap and chill them in the refrigerator for about 30 minutes. Chilling allows the flavors to meld beautifully and can enhance the overall texture. You can choose to serve them immediately or let them rest for a bit in the fridge.
Step 8: Serve and Enjoy
Once you’re ready to serve, present the delightful Pumpkin Patch Dirt Cups at your gatherings. Watch as everyone delights in their whimsical appearance and delicious flavors. Each cup is a tasty treat to be enjoyed, and the smiles will certainly be worth the effort!
How to Store and Freeze Pumpkin Patch Dirt Cups
Refrigerator: Store your Pumpkin Patch Dirt Cups covered with plastic wrap or in an airtight container for up to 3-4 days. They’re best enjoyed fresh, but can last a bit longer if necessary.
Freezer: If you want to freeze the cups, assemble them without decorations. Wrap each cup tightly and freeze for up to 2 months. Thaw in the fridge overnight before serving and add toppings just before enjoying.
Preparation Ahead: You can prepare the layers in advance—make the pudding and crushed Oreos a day prior, then assemble and decorate the cups when ready to serve for optimal freshness.
Reheating: There’s no need to reheat these treats; serve them chilled to maintain their delightful textures and flavors!
Make Ahead Options
These Pumpkin Patch Dirt Cups are perfect for meal prep enthusiasts! You can prepare the chocolate pudding and layer the crushed Oreos up to 24 hours ahead of time, keeping the layers separate in the refrigerator to maintain quality. Just store the pudding in an airtight container and keep the crushed Oreos in a zip-lock bag to prevent them from getting soggy. When you’re ready to serve, simply layer the pudding and Oreos in clear cups, dollop with whipped cream, and decorate with gummy worms and candy pumpkins right before presenting. This approach saves you time and ensures that your dessert is just as delightful and fresh!
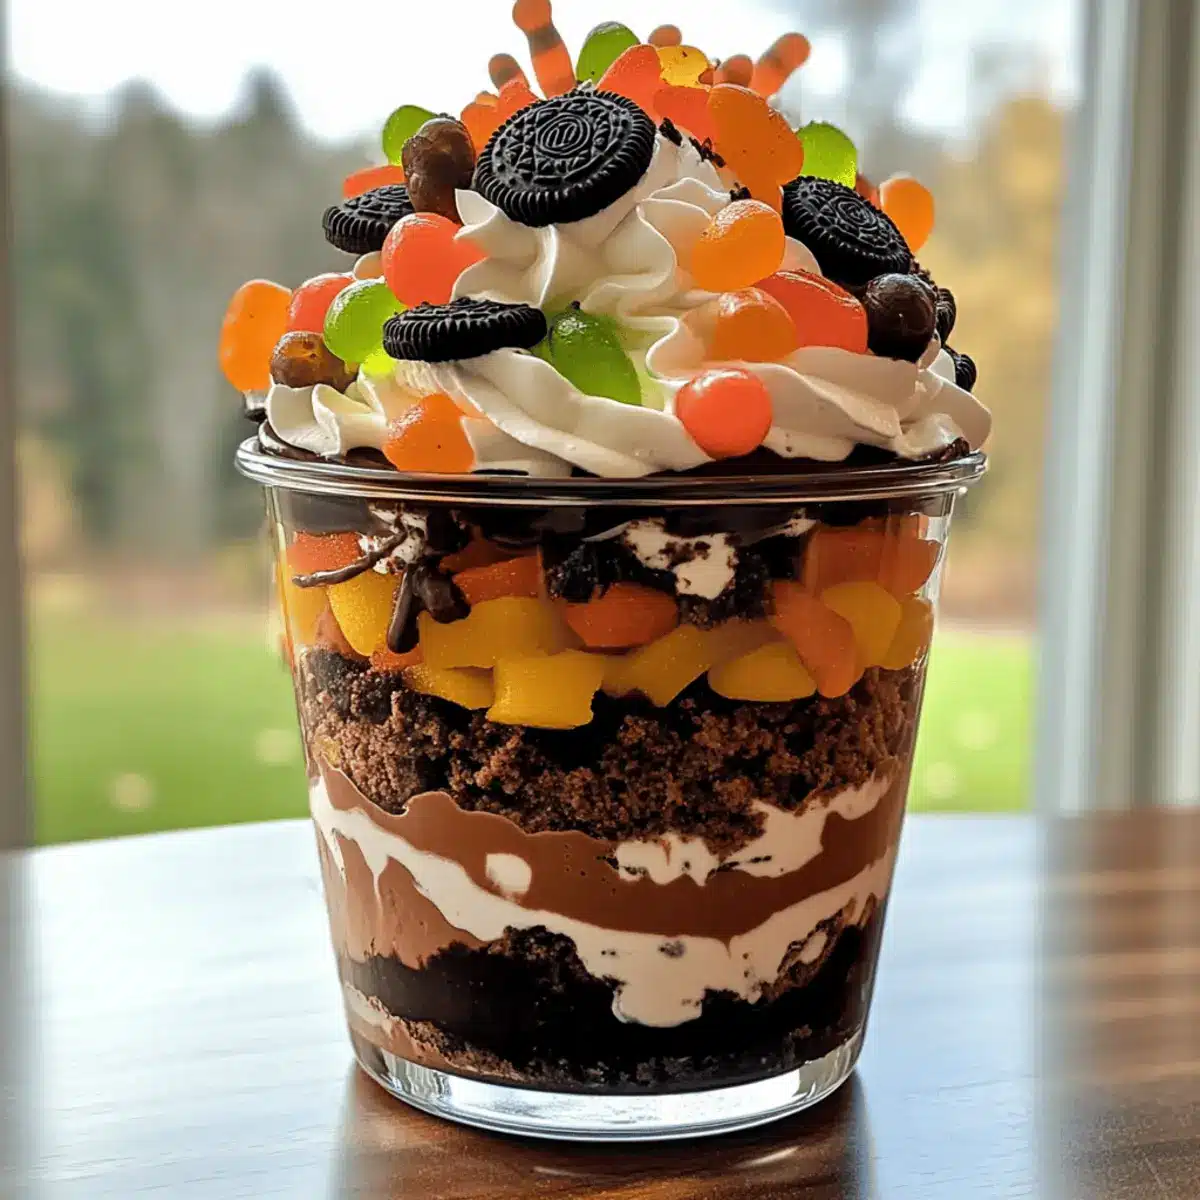
Pumpkin Patch Dirt Cups Variations & Substitutions
Get ready to unleash your creativity with these Pumpkin Patch Dirt Cups; the possibilities are endless!
-
Cookie Swap: Use any favorite chocolate or vanilla cookie for a new flavor experience. Try incorporating gingersnaps for a spicy twist that’s perfect for fall!
-
Dairy-Free Delight: Substitute the chocolate pudding mix and milk with non-dairy options to make a vegan-friendly treat. Enjoy the same creamy goodness without the dairy!
-
Seasonal Toppings: Switch up the decorations according to the occasion. For a spring gathering, consider pastel candies or edible flowers—how delightful would that be?
-
Fruity Layers: Add some diced bananas or strawberries between the layers for a fresh and fruity surprise. This twist adds a burst of flavor that complements the creamy pudding beautifully.
-
Chocolate Burst: Drizzle some chocolate syrup between layers for an extra decadent treat. The added richness will make each bite even more indulgent!
-
Crumble Toppings: Instead of whole cookies, experiment with crushed pretzels for a sweet and salty combo. This adds an unexpected crunch that everyone will love!
-
Heat It Up: For those who enjoy a kick, sprinkle some cayenne pepper into the pudding for a surprising heat that contrasts beautifully with the sweetness. Just a pinch goes a long way!
-
Try Other Desserts: If you want to switch it up entirely, blend the concept of pumpkin patch dirt cups with Pumpkin Overnight Oats for a healthier breakfast version!
With these variations, you can have fun customizing your Pumpkin Patch Dirt Cups while ensuring every bite is a delightful surprise!
Expert Tips for Pumpkin Patch Dirt Cups
-
Pudding Perfection: Ensure your chocolate pudding thickens fully by whisking for the full 2-3 minutes. Under-mixed pudding will lead to a disappointing runny texture.
-
Layering Mastery: For the most appealing presentation, aim for uniform layers of Oreos and pudding. This creates a stunning visual effect and keeps the flavors balanced.
-
Keep It Fresh: If prepping in advance, hold off on adding your gummy worms and candy pumpkins until just before serving. This keeps them vibrant and fresh!
-
Texture Variation: Don’t be afraid to experiment with different cookies. Swap Oreos for gluten-free options or even chocolate chip cookies for a delightful twist that works well in the Pumpkin Patch Dirt Cups.
-
Serving Style: Consider using clear jars with varying heights for added visual interest. A mix of cup sizes makes for a fun display at any gathering!
What to Serve with Pumpkin Patch Dirt Cups
Elevate your dessert experience with delicious accompaniments that complement the whimsical Pumpkin Patch Dirt Cups.
- Autumn Spiced Apple Cider: This warm, spiced drink complements the rich chocolate flavor, creating a cozy atmosphere perfect for fall gatherings.
- Vanilla Ice Cream: A scoop of creamy vanilla ice cream on the side provides a delightful contrast to the textured layers of the dessert.
- Pumpkin Bread: Moist pumpkin bread, with its warm spices, enhances the seasonal theme, offering a sweet aroma that draws everyone in.
- Chocolate Dipped Pretzels: The salty, crunchy pretzels balance the sweetness of the cups beautifully, creating a fun, sharable treat for all.
- Sugary Ghost Cookies: Whip up some cute, festive cookies for an extra touch of Halloween fun, making your dessert spread a visual delight!
- Cinnamon Sugar Tortilla Chips: Light, crispy, and just the right amount of sweetness, they’re perfect for dipping into the creamy filling of the cups.
- Fresh Fruit Skewers: Colorful fruit skewers add a refreshing lift to the dessert table, offering a burst of freshness that perfectly balances the indulgence.
- Horchata: This sweet, creamy rice drink adds a unique flavor dimension, enhancing the overall dessert experience with each sip.
- Spiced Pumpkin Latte: Serve this cozy beverage alongside your treats for an extra seasonal touch, making your spread feel festive and inviting.
Pumpkin Patch Dirt Cups Recipe FAQs
What kind of pudding should I use for Pumpkin Patch Dirt Cups?
Absolutely! For the best flavor, I recommend using a rich chocolate pudding mix. However, if you’re looking for a dairy-free option, you can easily substitute it with a non-dairy chocolate pudding mix. Be sure to check the ingredients to accommodate any dietary restrictions.
How should I store leftover Pumpkin Patch Dirt Cups?
For optimal freshness, store your Pumpkin Patch Dirt Cups covered with plastic wrap or in an airtight container in the refrigerator for up to 3-4 days. They taste best when enjoyed fresh, but if you need to keep them longer, just remember that the texture of the whipped cream may soften over time.
Can I freeze Pumpkin Patch Dirt Cups?
Very! If you’d like to freeze them, assemble the cups without the decorations. Wrap each cup tightly with plastic wrap and place them in an airtight container or freezer-safe bag. They can be frozen for up to 2 months. To enjoy, thaw them in the refrigerator overnight and add the toppings just before serving.
How can I ensure my pudding thickens properly?
To achieve perfect pudding, you’ll want to whisk the chocolate pudding mix and milk together until fully combined, ensuring there are no lumps. Keep whisking for 2-3 minutes until the mixture is thick and creamy. If your pudding is runny, it may need more mixing time to reach that luscious consistency!
What should I do if someone has food allergies?
Make sure to check all your ingredient labels. For gluten sensitivities, gluten-free cookies can replace Oreos. If there are dairy allergies, use non-dairy milk and pudding. By customizing your Pumpkin Patch Dirt Cups, everyone can enjoy this spooky treat without worry.
Pumpkin Patch Dirt Cups
Ingredients
Equipment
Method
- Gather all your ingredients: chocolate pudding mix, milk, crushed Oreos, whipped cream, gummy worms, and candy pumpkins. Clear cups or jars will be your serving vessels.
- In a mixing bowl, whisk together 2 cups of cold milk and the chocolate pudding mix for about 2-3 minutes until thick and luscious.
- Place the Oreos in a zip-lock bag and crush them into small pieces.
- Layer crushed Oreos at the bottom of each cup, about 1 inch thick, then pour a layer of chocolate pudding over them.
- Continue to alternate layers of crushed Oreos and pudding until the cups are filled.
- Top each cup with a dollop of whipped cream and decorate with gummy worms and candy pumpkins.
- If desired, cover and chill the cups in the refrigerator for about 30 minutes.
- Serve and enjoy your delightful Pumpkin Patch Dirt Cups!
Leave a Reply