
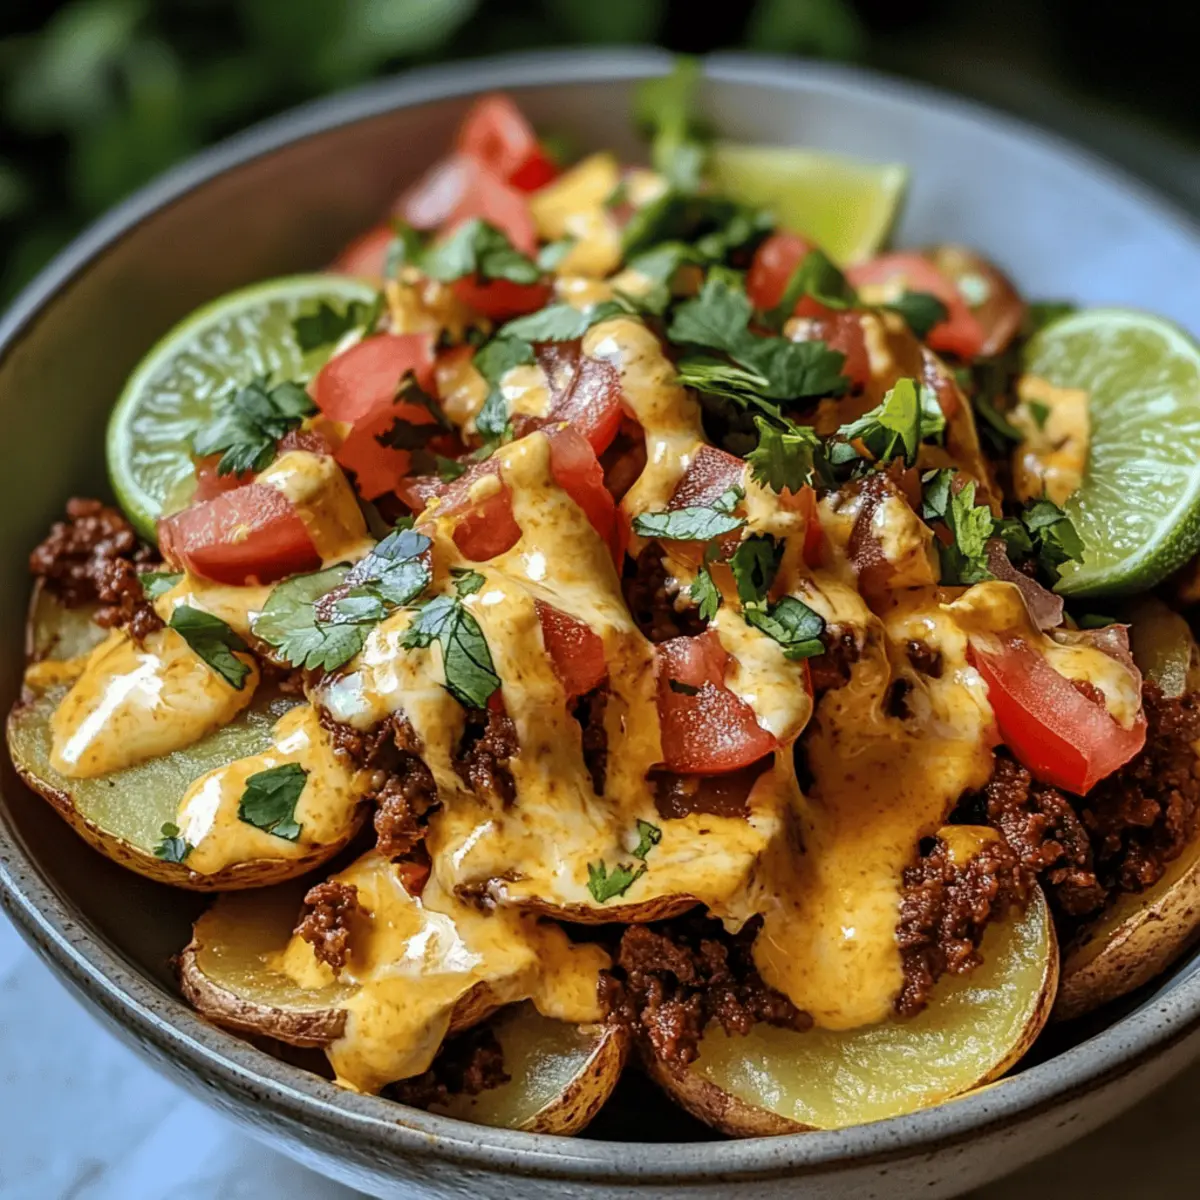
As I took my first bite of these Loaded Fiesta Potato Bowls, I felt like I was dancing at a vibrant street fair. This dish brings together crispy potato slices, savory taco meat, and creamy cheese sauce to create a weeknight dinner that’s as comforting as it is exciting. Perfectly customizable, this recipe ensures everyone at the table can tailor their bowls to their taste—even the pickiest eaters will find a favorite. Plus, with quick prep and easy cleanup, it transforms hectic nights into joyful culinary adventures. Ready to take your family meals to the next level? Let’s dive into this fiesta!
Why Are Loaded Fiesta Potato Bowls Amazing?
Flavor Explosion: Each bite is a delightful harmony of crispy potatoes, savory taco meat, and creamy cheese sauce that transforms your dinner into a culinary fiesta.
Customizable: Perfect for families, this dish allows everyone to dress their bowls with toppings like fresh cilantro, zesty lime, and spicy jalapeños, catering to diverse tastes.
Quick Prep: With minimal prep time and easy-to-find ingredients, you can whip these up during a busy weeknight without stress.
Heartwarming Comfort: This dish resonates with the comforting essence of a family meal, reminiscent of homemade dinners filled with laughter and joy—an absolute crowd-pleaser!
Versatile Ingredients: Feeling adventurous? Swap ground beef for turkey or even try a plant-based option to satisfy different dietary preferences. Or check out our Crockpot Hamburger Potato recipe for another comforting option!
Loaded Fiesta Potato Bowls Ingredients
For the Crispy Potatoes
• Russet Potatoes – Base ingredient providing structure and texture; fresh, organic potatoes yield the best flavor.
• Olive Oil – Adds richness and helps achieve that crispy texture everyone loves.
• Onion Powder – Enhances the flavor, adding a subtle sweetness.
• Garlic Powder – Gives a warm, aromatic touch to the potatoes.
• Chili Powder – Elevates the overall taste with smoky depth.
• Cayenne Pepper – Adjust this for heat preference; a little goes a long way!
• Salt and Pepper – Essential for flavor enhancement and balancing all the ingredients.
For the Savory Taco Meat
• Ground Beef (80/20 or 85/15) – Main protein source; adds savory depth and pairs perfectly with potatoes. Can substitute with ground turkey, chicken, or even plant-based alternatives for a healthier twist.
• Onion – Adds sweetness and complements the beef’s rich flavor; save some for topping!
• Taco Seasoning – Convenient spice mix that brings all the flavors together; check for gluten-free if necessary.
• Water or Beef Broth – Used to cook the meat, with broth providing an extra layer of flavor.
For the Creamy Cheese Sauce
• Unsalted Butter – The base for the cheese sauce, contributing creaminess and richness.
• All-Purpose Flour – Thicken the cheese sauce; a gluten-free blend can be used if needed.
• Whole Milk – Creates that creamy consistency; dairy-free alternatives can work just as well.
• Cheddar Cheese – The main cheese in the sauce, making it ooey-gooey and delectable—freshly grated is best!
For Garnishes and Toppings
• Fresh Lime Juice – Adds that zesty brightness when served.
• Roma Tomato – Diced for a fresh and juicy bite that complements the bowls.
• Fresh Cilantro – Brightens the dish and adds a burst of flavor.
• Additional Onion – Chopped for a crisp and sweet topping option.
• Hot Sauce – For those who like an extra kick!
• Optional Toppings – Sour cream, jalapeños, and avocado lend a finishing touch and artistic flair.
Now, with these essential ingredients, you’re all set to create your own Loaded Fiesta Potato Bowls and join the fiesta!
Step‑by‑Step Instructions for Loaded Fiesta Potato Bowls
Step 1: Prep Potatoes
Preheat your oven to 425°F (220°C). While it heats, wash and slice the Russet potatoes into thin rounds. In a large bowl, toss the potatoes with olive oil, onion powder, garlic powder, chili powder, cayenne, salt, and pepper until evenly coated. Spread the potato slices on a lined baking sheet in a single layer. Bake for 45 minutes, flipping every 15 minutes until golden brown.
Step 2: Increase Oven Temperature
Once the potatoes are nicely roasted, increase the oven temperature to 450°F (230°C). This final burst of heat will help achieve that irresistible crunch. Continue baking the potatoes for an additional 10-15 minutes until they’re crispy and perfectly golden. Keep an eye on them to avoid over-browning, and then remove them from the oven when done.
Step 3: Cook Taco Meat
While the potatoes are roasting, heat a skillet over medium heat. Add the ground beef and diced onions, cooking for 8-10 minutes until the meat is browned and the onions are softened. Drain excess fat, then stir in the taco seasoning and your choice of water or beef broth. Let the mixture simmer for 5-7 minutes, allowing it to thicken and absorb those zesty flavors.
Step 4: Make Cheese Sauce
In a medium saucepan, melt the unsalted butter over medium heat. Whisk in the all-purpose flour, onion powder, and garlic powder, cooking for about 1-2 minutes until it forms a paste. Gradually pour in the whole milk while whisking continuously. Stir until the sauce thickens, roughly 3-5 minutes, then add the freshly grated cheddar cheese. Stir until smooth and creamy.
Step 5: Assemble Bowls
With all components ready, it’s time to create your Loaded Fiesta Potato Bowls! Start by dividing the crispy potato slices among bowls. Top generously with the savory taco meat mixture. Drizzle the creamy cheese sauce over the top, ensuring every bite is flavorful. Finally, finish with a sprinkle of lime juice, diced tomato, fresh cilantro, and any additional toppings your family enjoys.
Expert Tips for Loaded Fiesta Potato Bowls
• Crispy Potatoes: Ensure you don’t overcrowd the baking sheet. This lets the heat circulate around the potatoes, achieving perfect crispiness.
• Fresh Cheese: Always grate your cheddar cheese fresh! Pre-shredded varieties often contain anti-caking agents that prevent perfect melting, leading to a clumpy sauce.
• Flavor Boost: Don’t shy away from adding extra spices or herbs to your taco seasoning. Personalize your Loaded Fiesta Potato Bowls by adjusting the heat and flavors to suit your family’s taste.
• Prep Ahead: You can prepare your ingredients ahead of time! Store the potato slices, taco meat, and cheese sauce separately in the fridge, then reheat before assembly on busy nights.
• Substitute Wisely: If you’re looking for healthier options, swap out ground beef for turkey or a plant-based alternative, ensuring everyone can enjoy delicious Loaded Fiesta Potato Bowls!
What to Serve with Loaded Fiesta Potato Bowls
Bringing these vibrant Loaded Fiesta Potato Bowls to the table is like hosting an exciting fiesta—now, let’s make it a complete meal!
-
Tortilla Chips: Perfectly crunchy and salty, they add a delightful texture and pair well with the creamy cheese sauce.
-
Fresh Side Salad: A crisp, refreshing side with mixed greens, cherry tomatoes, and a zesty lime vinaigrette to balance the richness of the bowls.
-
Grilled Corn on the Cob: Sweet and smoky, grilled corn enhances the fiesta flavors and brings a touch of summer to your meal.
-
Guacamole: Creamy and rich, this classic dip adds a fresh avocado flavor that beautifully complements the savory elements of the potato bowls.
-
Margaritas: For an adult twist, serve with a lime margarita. The citrusy refreshment pairs wonderfully with the dish’s bold flavors.
-
Pico de Gallo: A chunky salsa with tomatoes, onions, and jalapeños gives an extra burst of freshness and garnishing flair to each bowl.
-
Cilantro Lime Rice: Light and aromatic, this rice provides a comforting base that echoes the vibrant flavors of the main dish.
Elevate your family dinner experience with these delightful accompaniments—you’ll have everyone asking for seconds!
Make Ahead Options
These Loaded Fiesta Potato Bowls are perfect for busy weeknights! You can prepare the crispy potato slices and the savory taco meat up to 2 days in advance. Simply roast the potatoes and let them cool completely before refrigerating, ensuring they stay crisp. For the taco meat, cook and let it cool before storing in an airtight container. When you’re ready to serve, simply reheat the meat on the stove, and re-crisp the potatoes in the oven at 425°F (220°C) for about 10-15 minutes. Finally, whip up the cheese sauce fresh in about 5 minutes for just as delicious results, saving you valuable time and ensuring your family meal is a flavorful fiesta!
Storage Tips for Loaded Fiesta Potato Bowls
Fridge: Keep all components stored separately in airtight containers for up to 3-4 days. This ensures freshness and flavor retention until you’re ready to enjoy your Loaded Fiesta Potato Bowls again.
Freezer: The taco meat freezes beautifully for up to 3 months. Just make sure it’s cooled completely before transferring it to a freezer-safe bag or container.
Reheating: When ready to serve, thaw frozen taco meat in the fridge overnight. Reheat on the stovetop over medium heat or in the microwave until warmed through.
Cheese Sauce: You can freeze the cheese sauce, but be aware it may change in texture. To reheat, gently warm on the stovetop while stirring until smooth and creamy again.
Loaded Fiesta Potato Bowls Variations
Feel free to get creative with your Loaded Fiesta Potato Bowls and make them uniquely yours!
-
Healthier Meat: Substitute ground beef with lean ground turkey or chicken for a lighter option that still packs flavor.
-
Sweet Potato Twist: Swap traditional Russet potatoes for sweet potatoes to add a delicious hint of sweetness and extra nutrients. Your taste buds will enjoy the change!
-
Cheese Varieties: Try different cheeses like Monterey Jack, pepper jack, or a Mexican cheese blend for a new flavor profile. Each cheese offers a different gooey goodness that enhances the overall experience.
-
Vegetarian Delight: Use a plant-based meat alternative, such as lentils or crumbled tofu, to create a hearty vegetarian version that doesn’t skimp on flavor. This twist ensures everyone at the table can enjoy!
-
Extra Veggies: Add diced bell peppers, corn, or black beans to the taco meat for added texture and flavor. The more, the merrier when it comes to nutrition and taste!
-
Spice It Up: For those who crave heat, toss in jalapeños into the meat mix or serve as a topping to give the bowls a spicy kick. Your adventurous diners will appreciate the fiery addition.
-
Creamy Sauces: Instead of a traditional cheese sauce, drizzle avocado crema or a tangy chipotle sauce over the top for a fresh, zesty twist. It will elevate your fiesta vibe!
-
Dipping Action: Serve with tortilla chips on the side or layer your bowls with tortilla strips for an extra crunch. The combination of textures makes every bite delightful. For a similar vibe, try our Cheesy Meat Potato recipe for a snack that’s still full of heart!
Let your imagination run wild as you prepare your own Loaded Fiesta Potato Bowls!
Loaded Fiesta Potato Bowls Recipe FAQs
What type of potatoes work best for Loaded Fiesta Potato Bowls?
For the best results, use fresh, organic Russet potatoes. They provide a sturdy base and excellent texture, helping you achieve crispy slices when roasted. If you prefer a sweeter option, sweet potatoes can also be a delightful substitute!
How should I store leftovers of Loaded Fiesta Potato Bowls?
Store all components separately in airtight containers in the fridge for up to 3-4 days. This helps maintain their individual flavors and freshness. If you’re planning to eat them later, container storage keeps everything tasting its best!
Can I freeze the taco meat and cheese sauce from Loaded Fiesta Potato Bowls?
Absolutely! The taco meat freezes beautifully for up to 3 months. Just let it cool completely before placing it in a freezer-safe bag or container. The cheese sauce can be frozen too, but keep in mind it may alter in texture; when reheating, do so gently over low heat while stirring until smooth again.
What are common issues when preparing Loaded Fiesta Potato Bowls?
One common issue is overcrowding the baking sheet when roasting the potatoes. This can prevent them from getting crispy. To avoid this, make sure to lay the potato slices in a single layer. Additionally, for the cheese sauce, always use freshly grated cheese for the best melting quality. Pre-shredded cheese often contains starches that can lead to clumps.
Are Loaded Fiesta Potato Bowls suitable for dietary restrictions?
Yes, they are quite versatile! You can substitute ground beef with ground turkey, chicken, or plant-based options to accommodate different diets. Additionally, check that your taco seasoning is gluten-free if necessary. Don’t forget to adjust the spices and toppings based on your family’s preferences and dietary needs!
How do I enhance the flavors in my Loaded Fiesta Potato Bowls?
Personalizing your bowls provides a fun flavor adventure! Add extra spices or herbs to your taco seasoning to elevate the taste. Feel free to experiment with toppings, such as varying the types of cheese used, or including colorful vegetables. The more, the merrier—don’t hesitate to get creative!
Loaded Fiesta Potato Bowls: A Flavorful Dinner Adventure
Ingredients
Equipment
Method
- Preheat your oven to 425°F (220°C). Wash and slice Russet potatoes into thin rounds. Toss with olive oil, onion powder, garlic powder, chili powder, cayenne, salt, and pepper. Spread on a baking sheet and bake for 45 minutes, flipping every 15 minutes.
- Increase the oven temperature to 450°F (230°C) and bake the potatoes for an additional 10-15 minutes until crispy.
- While the potatoes roast, heat a skillet over medium heat. Cook ground beef and diced onions for 8-10 minutes until the meat is browned and onions are softened. Drain excess fat, stir in taco seasoning and water or beef broth, and simmer for 5-7 minutes.
- In a medium saucepan, melt unsalted butter, whisk in flour, onion powder, and garlic powder for 1-2 minutes. Gradually add milk while whisking. Stir until thickened (3-5 minutes), then add cheddar cheese until smooth.
- To assemble, divide crispy potato slices among bowls. Top with taco meat mixture, drizzle cheese sauce, and finish with lime juice, diced tomato, fresh cilantro, and any additional toppings.
Leave a Reply