
As I stood in the kitchen, the smell of warm puff pastry began to fill the air, instantly transporting me to childhood Halloween memories filled with laughter and delicious sweets. Today, I’m thrilled to share my recipe for Vegan Nutella Mummy Hand Pies—an enchanting twist on classic Halloween treats! With a crispy, flaky exterior embracing a luscious filling of creamy vegan Nutella and sweet banana, these hand pies are not only spookily delightful but also simply easy to prepare. The best part? They are vegan, dairy-free, gluten-free, and egg-free, making them suitable for everyone—from family gatherings to friendly trick-or-treaters! So, why not surprise your loved ones with these charming treats that scream fun and flavor? Ready to become the star of your festive celebrations? Let’s unwrap this recipe together!
Why are these hand pies a must-try?
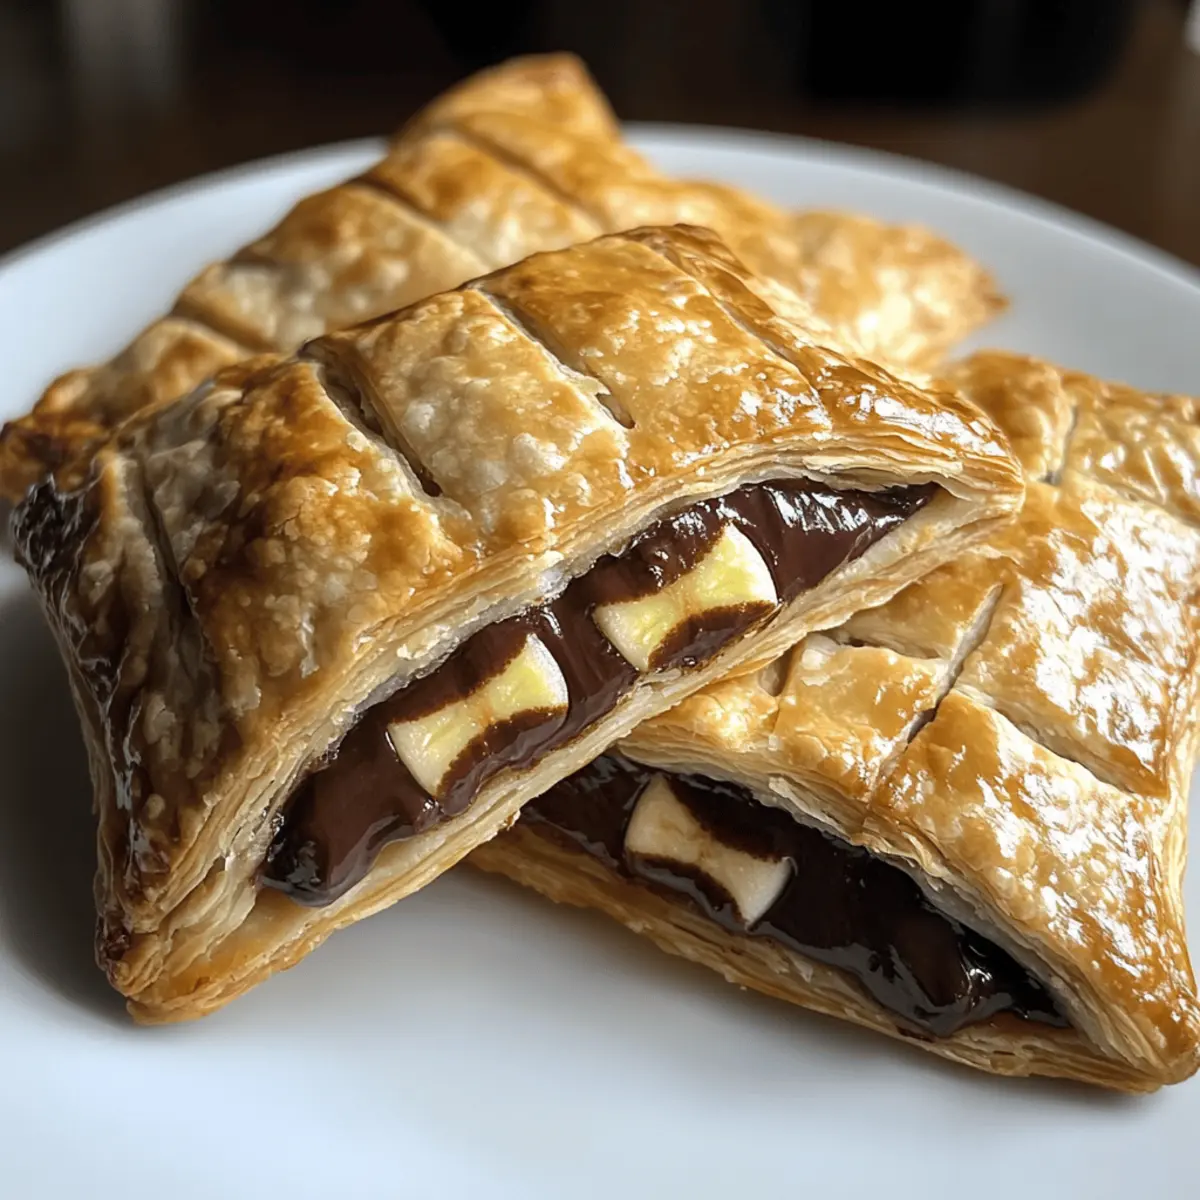
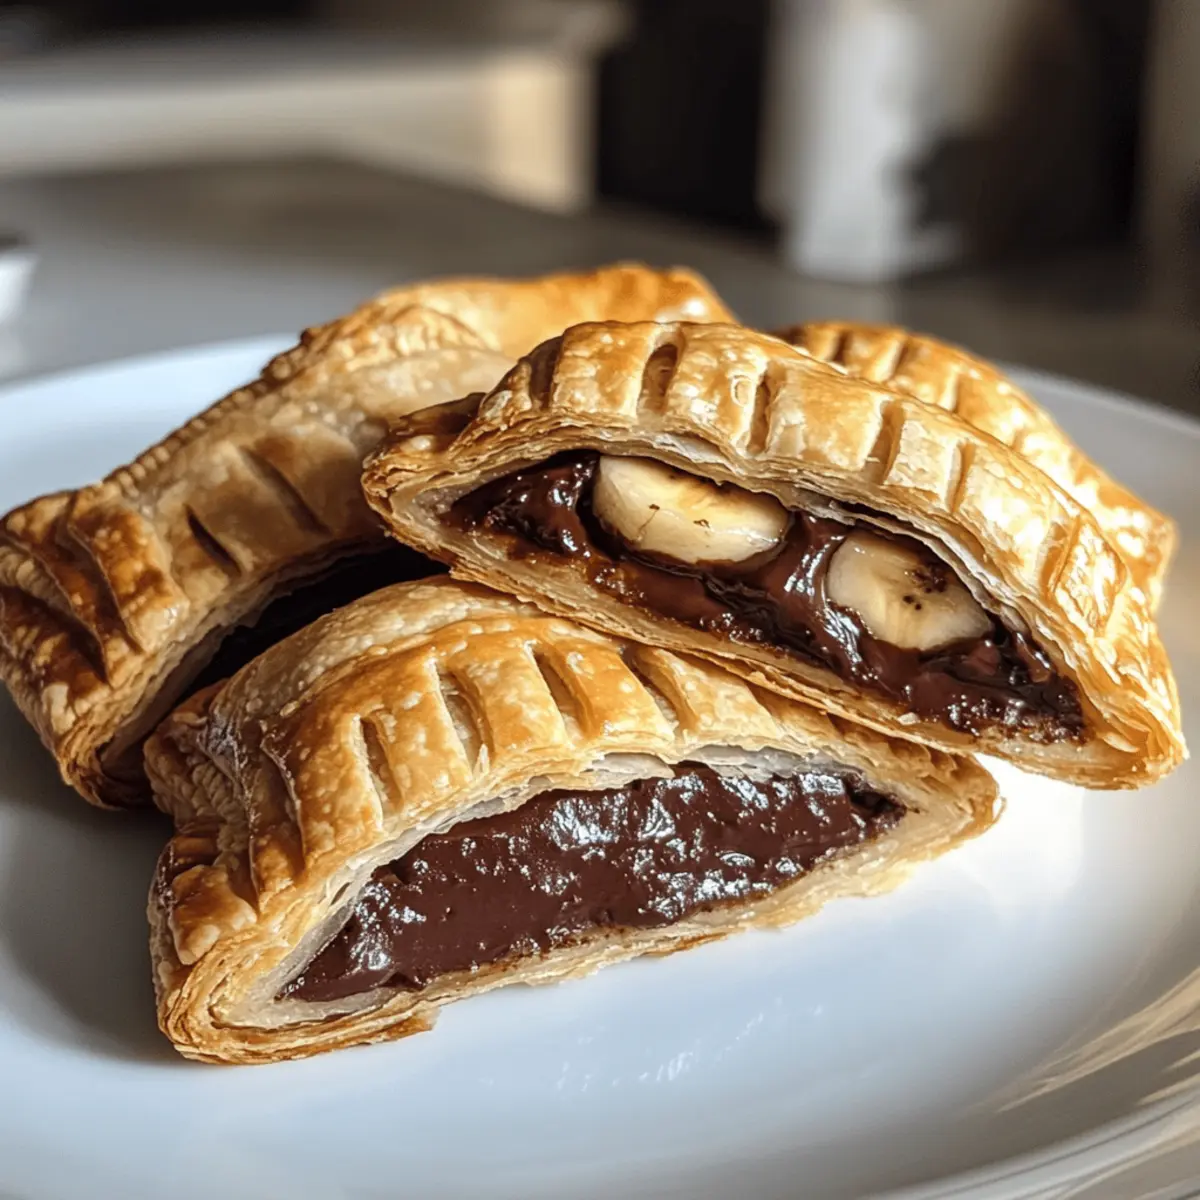
Deliciously Indulgent: These Nutella mummy hand pies are a rich delight, blending gooey vegan Nutella with fresh banana slices for a decadent filling.
Easy to Make: With just a few simple steps, you’ll whip up these spooky treats in no time. Perfect for kitchen novices and seasoned chefs alike!
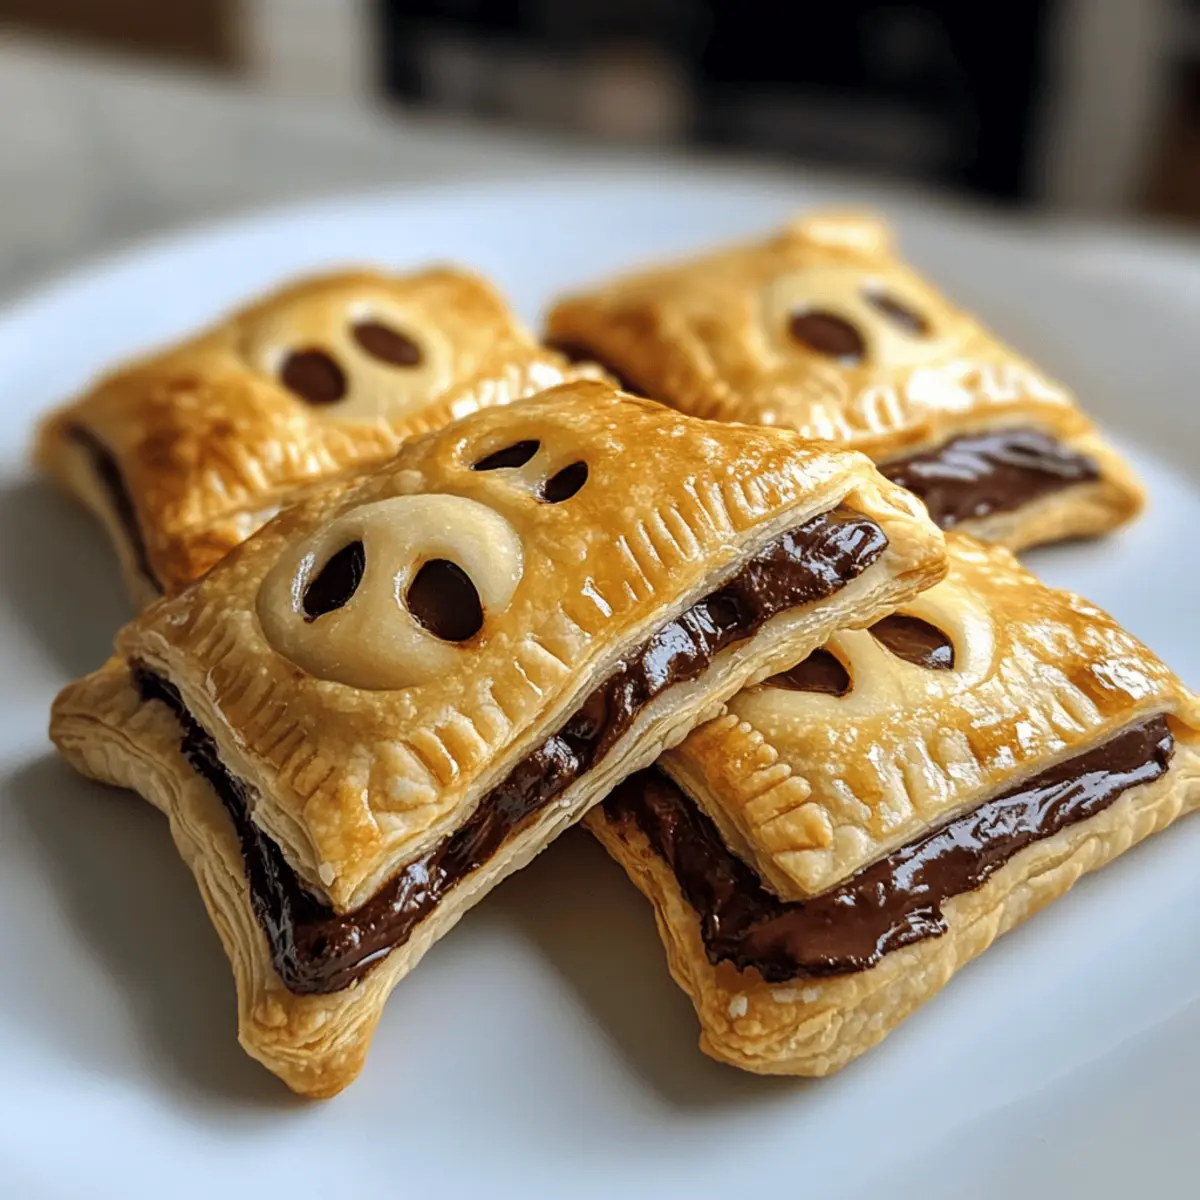
Perfectly Festive: Ideal for Halloween parties, their charming mummy design makes them a crowd-pleaser for all ages.
Diet-Friendly: Enjoy guilt-free indulgence as these hand pies are vegan, dairy-free, gluten-free, and egg-free—allowing everyone to join in the fun!
Versatile Options: Feel free to experiment! Substitute bananas for your favorite fruit or use different spreads to create unique flavors each time you bake.
Treat yourself and your loved ones to these scrumptious Nutella Mummy Hand Pies—click to discover more about Halloween-themed treats.
Nutella Mummy Hand Pie Ingredients
For the Pastry
• Puff Pastry – Provides the flaky crust; use ready-made to save time, ensuring it’s vegan and gluten-free if necessary.
• Dairy-Free Milk – Helps brush and seal pastry edges; any plant-based milk like almond or oat works great.
For the Filling
• Vegan Nutella – This creamy chocolatey spread is the star of the filling; feel free to substitute with your favorite vegan chocolate spread.
• Bananas – They add natural sweetness and moisture; for a nut-free option, you can omit them or use apples.
For Decoration
• Googly Eyes – A fun touch for your mummy hand pies; while optional, they add an extra layer of spookiness.
• Dairy-Free White Chocolate Buttons – Perfect for creating googly eyes; can be swapped out for other vegan-friendly decorations if preferred.
• Caster/Granulated Sugar – Adds sweetness and helps with browning; sprinkling on top is entirely optional for a finishing touch.
• Icing Sugar – For a light dusting that adds a sweet finish; it’s optional but makes for a lovely presentation.
Dive into these delightful Nutella Mummy Hand Pies and let the spooky celebration begin! 🕷️
Step‑by‑Step Instructions for Nutella Mummy Hand Pies
Step 1: Preheat the Oven
Begin by preheating your oven to 180°C (fan). While the oven is heating, prepare two baking trays by lining them with grease-proof paper to prevent sticking. This step ensures that your Nutella Mummy Hand Pies will bake evenly and come out with a beautiful, golden color.
Step 2: Prepare the Pastry
Roll out the puff pastry sheets slightly to smooth out any wrinkles, ensuring an even texture. Using a sharp knife or a pizza cutter, cut the pastry into rectangles measuring approximately 4×2.5 inches for your hand pies, along with some thin strips for the mummy wrapping. This shapes the basis for your delightful treats.
Step 3: Chill the Pastry
Place the rectangles in the refrigerator to chill for about 5 minutes. Chilling the pastry helps maintain its flaky texture when baking, ensuring that your Nutella Mummy Hand Pies come out light and crispy. Use this time to prepare your filling!
Step 4: Add the Filling
Retrieve the chilled pastry from the fridge and spread or pipe a generous amount of vegan Nutella onto each rectangle. Next, layer a few banana slices over the Nutella, adding a burst of sweetness and moisture. This delicious filling will melt perfectly during baking, creating a gooey center.
Step 5: Create the Mummy Look
Brush the edges of each filled rectangle with dairy-free milk to help seal the pastry. Lay the thin strips of pastry over the filling in a zig-zag manner, mimicking a mummy’s bandages. Make sure to press down at the edges to seal in the delicious Nutella and banana filling, securing your spooky design.
Step 6: Final Touches Before Baking
Give the top of your assembled Nutella Mummy Hand Pies a quick brush with dairy-free milk for a lovely golden color as they bake. If you like, sprinkle a bit of caster sugar for added sweetness and sparkle. This step enhances the visual appeal and adds a delightful crunch to the finished pies.
Step 7: Bake to Perfection
Carefully place your prepared hand pies in the preheated oven and bake for 15-18 minutes. Keep an eye on them as they bake; you’re looking for a beautiful golden-brown color on the crust and a delightful puffiness that indicates they’re perfectly done.
Step 8: Cool and Decorate
Once baked, remove the Nutella Mummy Hand Pies from the oven and allow them to cool slightly on a wire rack. After cooling, feel free to add googly eyes for a fun touch, and dust with icing sugar for a sweet finishing flourish. These charming treats are now ready to be enjoyed!
Expert Tips for Nutella Mummy Hand Pies
Avoid Overfilling: Ensure you don’t overfill the pastry with Nutella and bananas to prevent messy spills during baking.
Chill, Chill, Chill: Always chill your pastry before assembling your hand pies; this step maintains a flaky texture and helps them hold their shape.
Seal the Edges: Brush the edges with dairy-free milk and press them well to prevent the pastry from lifting while baking.
Mind the Baking Time: Keep an eye on your hand pies while baking; take them out once they’re golden brown to avoid overbaking.
Experiment with Fillings: Feel free to swap out bananas or use different spreads, allowing you to create your unique spin on these Nutella Mummy Hand Pies.
Make Ahead Options
These Nutella Mummy Hand Pies are perfect for busy home cooks looking to save time during festive celebrations! You can prepare the pastry shapes and fill them with vegan Nutella and banana slices up to 24 hours in advance. Simply follow the first four steps of the recipe, then cover the assembled hand pies tightly with plastic wrap and refrigerate. To maintain their flaky texture, bake them fresh before serving—just pop them in the oven straight from the fridge, and they’ll turn out just as delicious and spooky! You’ll have tasty treats ready with minimal effort, making your Halloween celebrations a breeze!
Nutella Mummy Hand Pies Variations
Feel free to get creative with these delightful hand pies and make them your own with these tasty variations!
-
Fruit Swap: Replace bananas with apples, pears, or strawberries for a refreshing twist. Each fruit brings its unique flavor that complements the Nutella beautifully!
-
Nut Butter Delight: Opt for almond butter or peanut butter in place of vegan Nutella for a nutty richness. This switch adds a delightful crunch and a different flavor profile that peanut butter lovers will adore.
-
Spooky Sprinkles: Decorate your mummy hand pies with colorful sprinkles or melted vegan chocolate to give them an extra festive flair. The added color not only makes them visually appealing but also adds to the fun!
-
Savory Option: For a unique savory twist, consider filling the pastries with a mix of cream cheese and herbs. A hint of garlic and chives can transform your hand pies into an unexpected appetizer that will surprise and tantalize your guests.
-
Gluten-Free Crust: Use gluten-free puff pastry to make your hand pies suitable for anyone with dietary restrictions. With the same flaky goodness, no one will miss the gluten!
-
Heat it Up: Add a pinch of cayenne pepper or a sprinkle of cinnamon to the Nutella filling for a surprising kick of heat or warmth. This adds an extra layer of complexity that makes each bite even more enjoyable.
-
Mini Mummies: Instead of traditional hand pies, cut the pastry into smaller shapes for bite-sized mummy treats. Perfect for parties, these mini versions are a delightful way to share!
-
Icing Variations: Drizzle your hand pies with a simple icing made from powdered sugar and dairy-free milk to create a glossy finish. This adds another level of sweetness and a lovely presentation for your spooky delights.
Each of these variations can add a personal touch to your Nutella Mummy Hand Pies, transforming them into an array of unique treats that speak to your inner chef. Happy baking! For more fun recipe ideas, check out these delightful Halloween-themed treats to impress any crowd!
What to Serve with Nutella Mummy Hand Pies
Enhance your spooky dessert experience with these delightful pairings that complement the sweet, gooey goodness of Nutella mummy hand pies.
- Coconut Whipped Cream: A light, airy topping that adds a creamy, tropical flair, perfectly balancing the rich chocolate filling.
- Fresh Berries: Plump raspberries or strawberries provide a tangy freshness that cuts through the sweetness, adding vibrant color to your plate.
Pair these pies with a cozy pumpkin spice latte for an autumnal twist. The warm spices mirror the nostalgia of Halloween treats, making it a comforting choice to sip alongside your yummy treats.
- Vegan Ice Cream: Accompany your hand pies with a scoop of creamy vegan vanilla ice cream, offering a delightful contrast to the warm, flaky pastry.
- Apple Cider: Warm spiced apple cider perfectly embraces the fall spirit, with a hint of spice that complements the chocolate and banana flavors beautifully.
- Chocolate Sauce: For the ultimate indulgence, drizzle some vegan chocolate sauce over your pies, enhancing the decadent chocolate experience.
Let these pairings transform your Nutella mummy hand pies into a full-fledged Halloween celebration!
Storage Tips for Nutella Mummy Hand Pies
Room Temperature: Keep your Nutella Mummy Hand Pies in a cool, dry place for up to 1 day. They’re best enjoyed fresh on the same day they’re made.
Fridge: Store the hand pies in an airtight container in the refrigerator for up to 2 days. Allow them to come to room temperature before serving to enjoy their delightful texture.
Freezer: To extend their shelf life, freeze the baked hand pies in a single layer for up to 2 months. Wrap them well in plastic wrap and place them in a freezer-safe bag.
Reheating: Reheat frozen Nutella Mummy Hand Pies in the oven at 180°C (350°F) for about 10-15 minutes, or until warmed through and flaky again. Enjoy!

Nutella Mummy Hand Pies Recipe FAQs
How do I select the best puff pastry for this recipe?
Absolutely! When choosing puff pastry, look for a brand that specifically indicates it is vegan and gluten-free, if necessary. Check the ingredients for any hidden dairy products or animal-derived ingredients. I recommend opting for pre-rolled sheets for convenience, ensuring they are kept frozen until ready to use for the best results!
What is the best way to store leftover Nutella Mummy Hand Pies?
To keep your Nutella Mummy Hand Pies fresh, store them in an airtight container in the refrigerator for up to 2 days. Allow them to come to room temperature for the best texture before serving. If you have more than you can eat, consider freezing them; they will stay good for up to 2 months!
Can I freeze Nutella Mummy Hand Pies? How?
Yes, you can certainly freeze your Nutella Mummy Hand Pies! After baking, let them cool completely. Wrap each pie tightly in plastic wrap to prevent freezer burn and place them in a freezer-safe bag or container. When you’re ready to enjoy them again, simply reheat from frozen in the oven at 180°C (350°F) for about 10-15 minutes, or until they’re warmed through and crispy.
What if my pastry rips while making the hand pies?
Very! If your puff pastry rips, don’t worry—just use a small piece of leftover pastry to patch it up! Gently press the edges together with a little dairy-free milk to seal. Ensure you don’t overfill the pastry as this can cause more ripping during baking.
Can these hand pies be made nut-free or allergen-free?
Absolutely! If you need to avoid nuts, you can simply omit the banana or substitute it with another fruit like apples or even a sunflower seed spread instead of Nutella. Always check the labels on the ingredients for any allergen information, and feel free to ask questions to ensure it’s safe for your guests, especially in an allergy-friendly bake!
Are these hand pies suitable for pets?
No, these Nutella Mummy Hand Pies are not suitable for pets. The chocolate spread we use contains ingredients that can be harmful to animals, such as chocolate itself. Always keep your baking goodies away from pets and consider making pet-friendly treats if you want to include them in your culinary adventures!
Nutella Mummy Hand Pies That Will Spook and Delight You
Ingredients
Equipment
Method
- Preheat your oven to 180°C (fan) and prepare two baking trays by lining them with grease-proof paper.
- Roll out the puff pastry sheets slightly and cut into rectangles measuring approximately 4x2.5 inches.
- Chill the pastry rectangles in the refrigerator for about 5 minutes.
- Spread or pipe vegan Nutella onto each rectangle and layer banana slices over the Nutella.
- Brush the edges with dairy-free milk and lay thin pastry strips over the filling in a zig-zag manner.
- Brush the tops with dairy-free milk and sprinkle with caster sugar if desired.
- Bake the hand pies in the preheated oven for 15-18 minutes until golden-brown.
- Allow to cool slightly, then decorate with googly eyes and dust with icing sugar.
Leave a Reply