
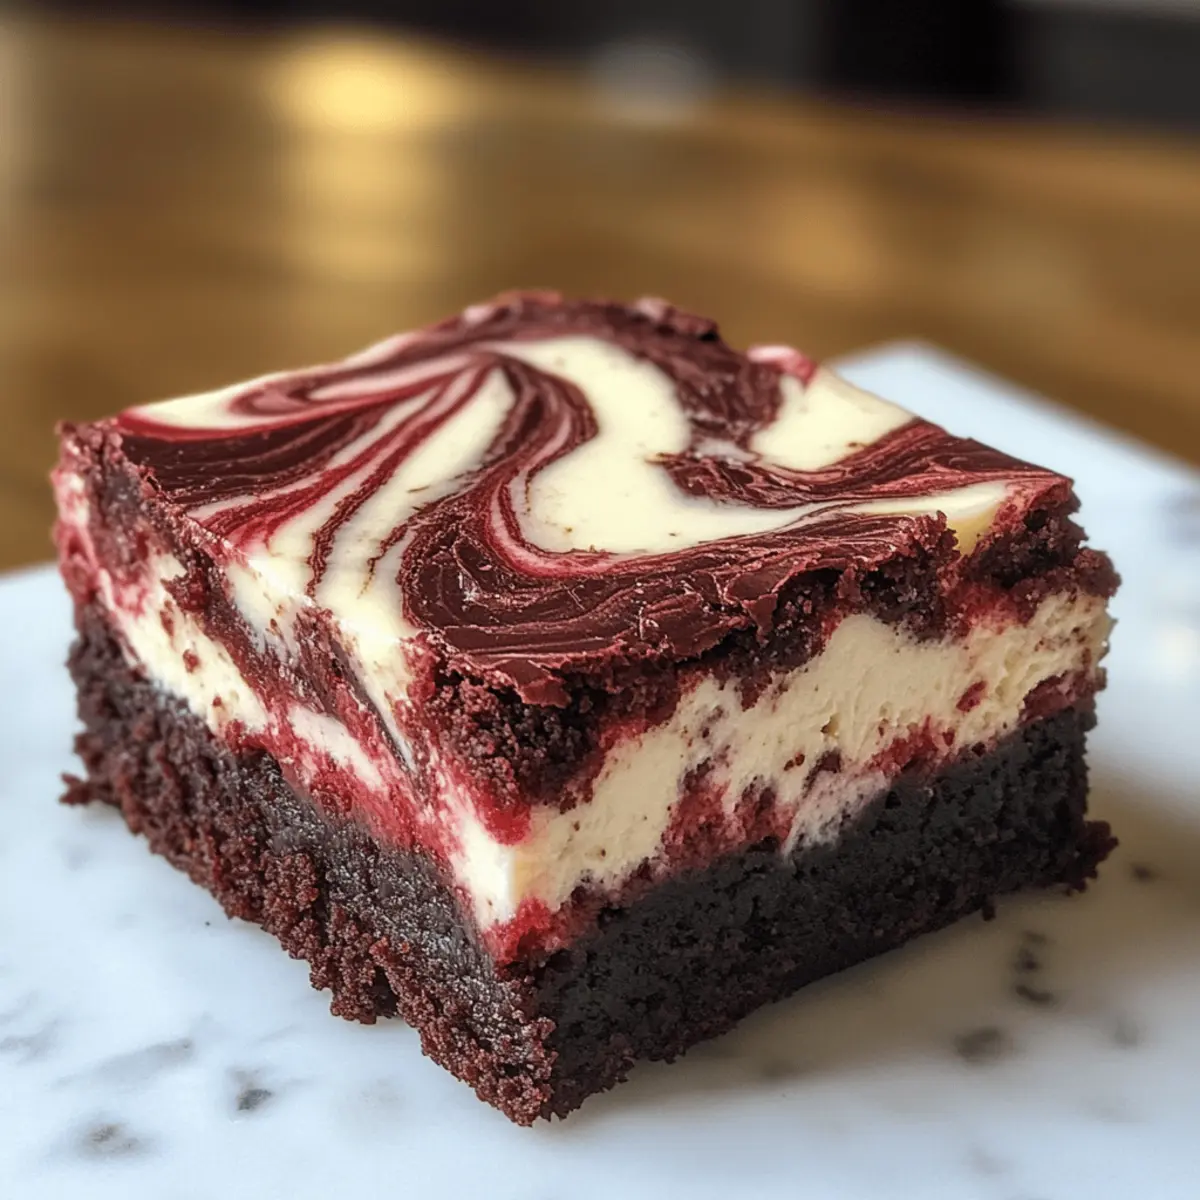
As I stirred the rich, velvety batter, an unexpected wave of nostalgia swept over me, transporting me back to my grandmother’s kitchen, where decadent desserts were born. Today, I’m excited to share my beloved recipe for Red Velvet Cheesecake Brownies—a delightful fusion of chocolatey red velvet and creamy cheesecake that’ll have you swooning with every bite. These irresistible brownies are not only an eye-catching centerpiece for any gathering but also an easy way to indulge in a bit of comfort. With minimal preparation time and crowd-pleasing flavors, they’re perfect for both special celebrations and cozy nights in. Are you ready to discover your new favorite dessert?
Why are these brownies so special?
Irresistible flavor combination: The fusion of rich red velvet and creamy cheesecake creates an indulgent taste that’s hard to resist.
Easy to make: With simple ingredients and straightforward steps, these brownies are perfect for bakers of any skill level.
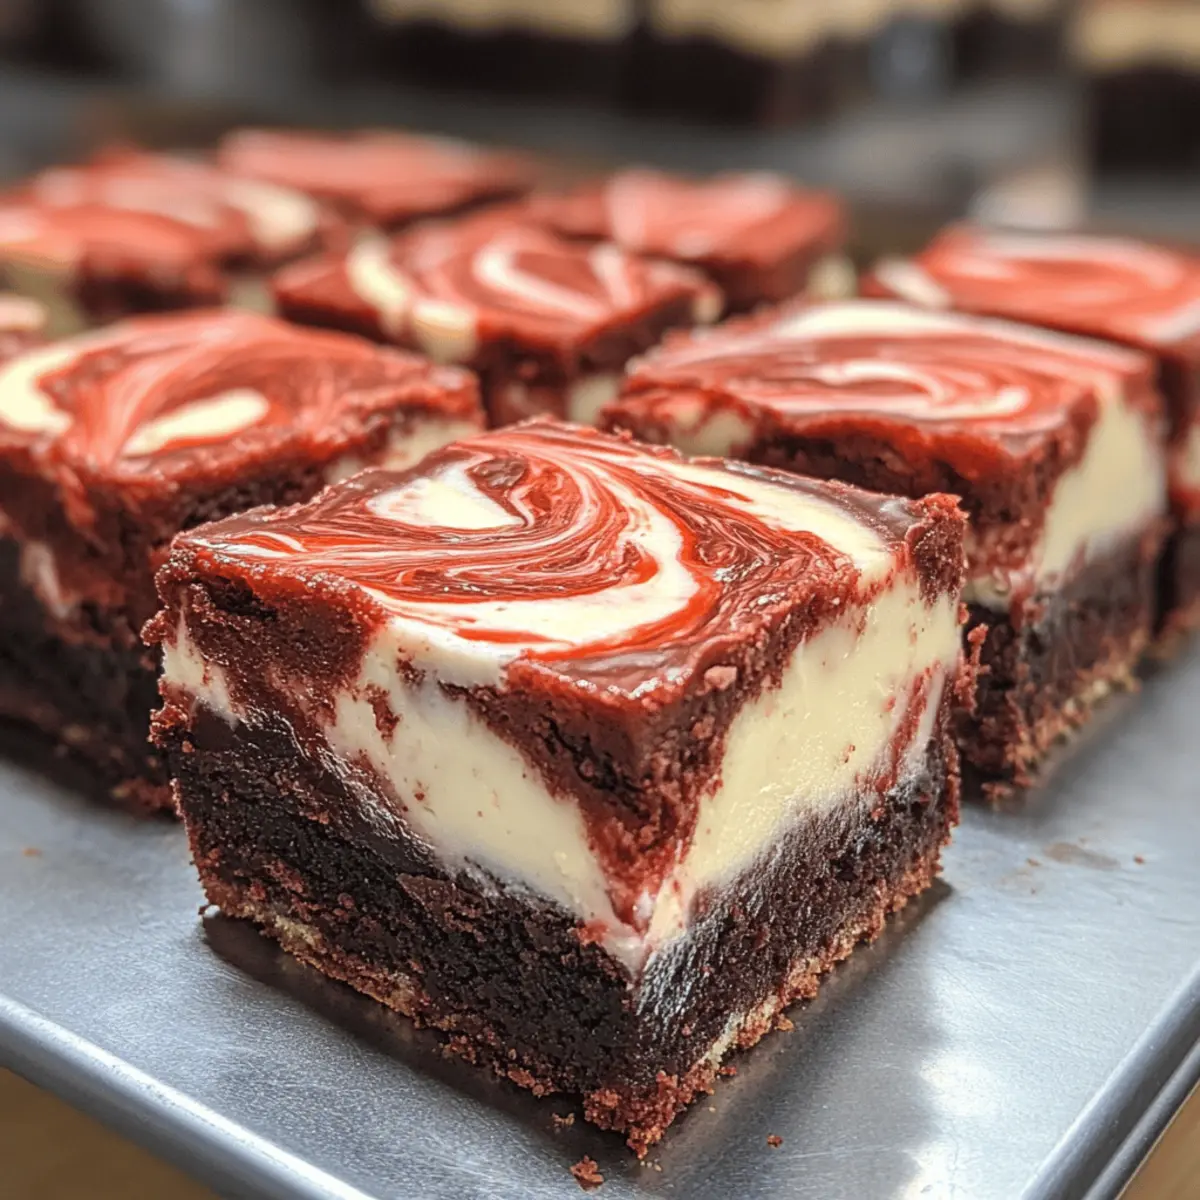
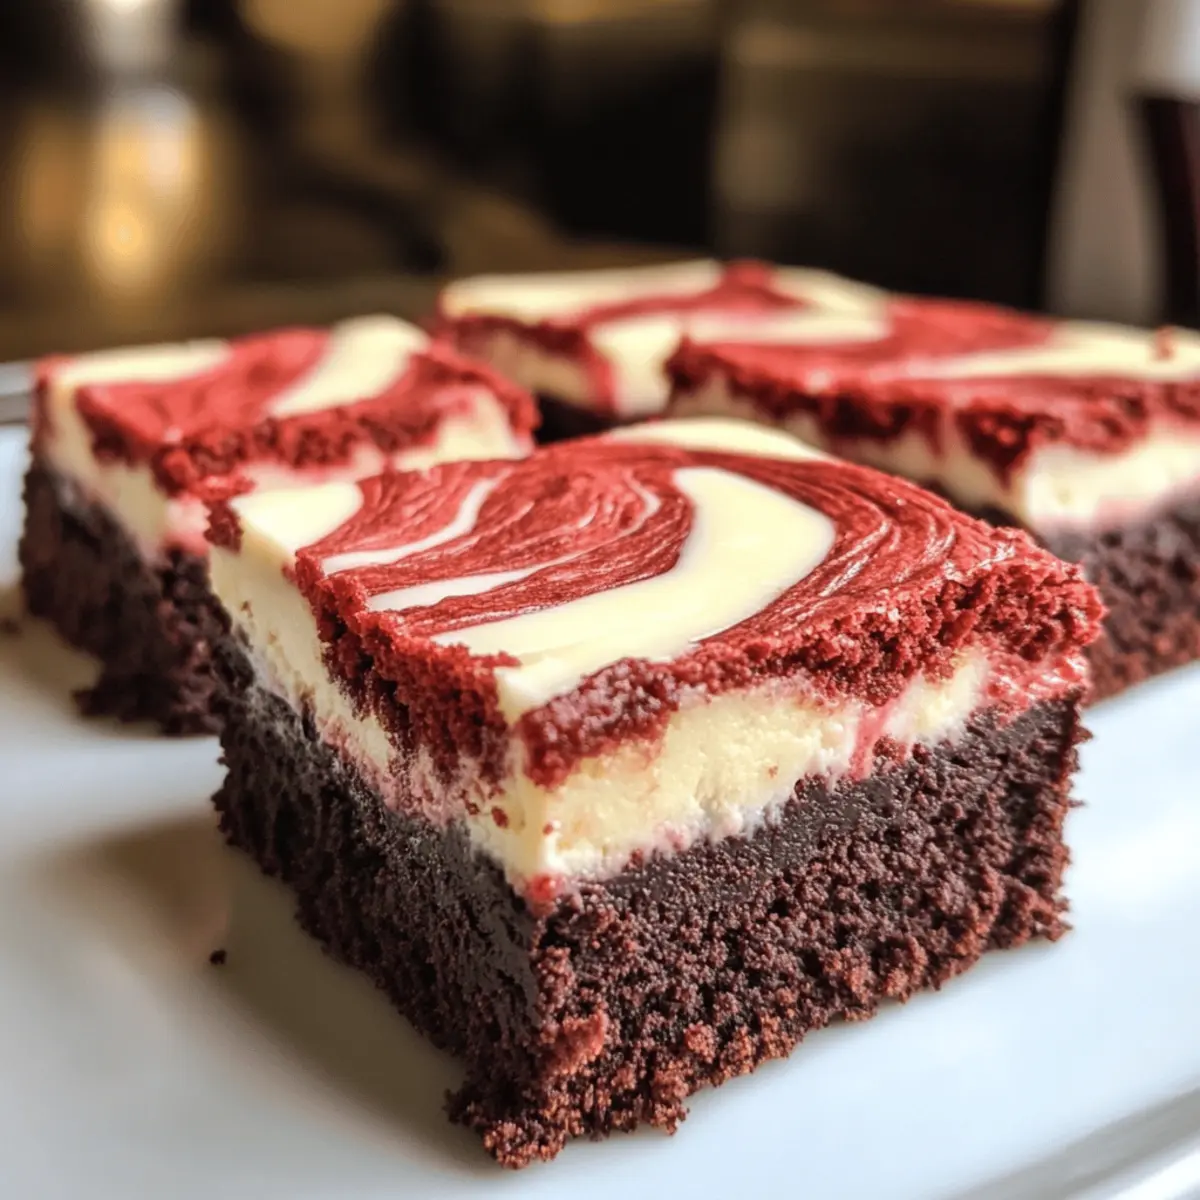
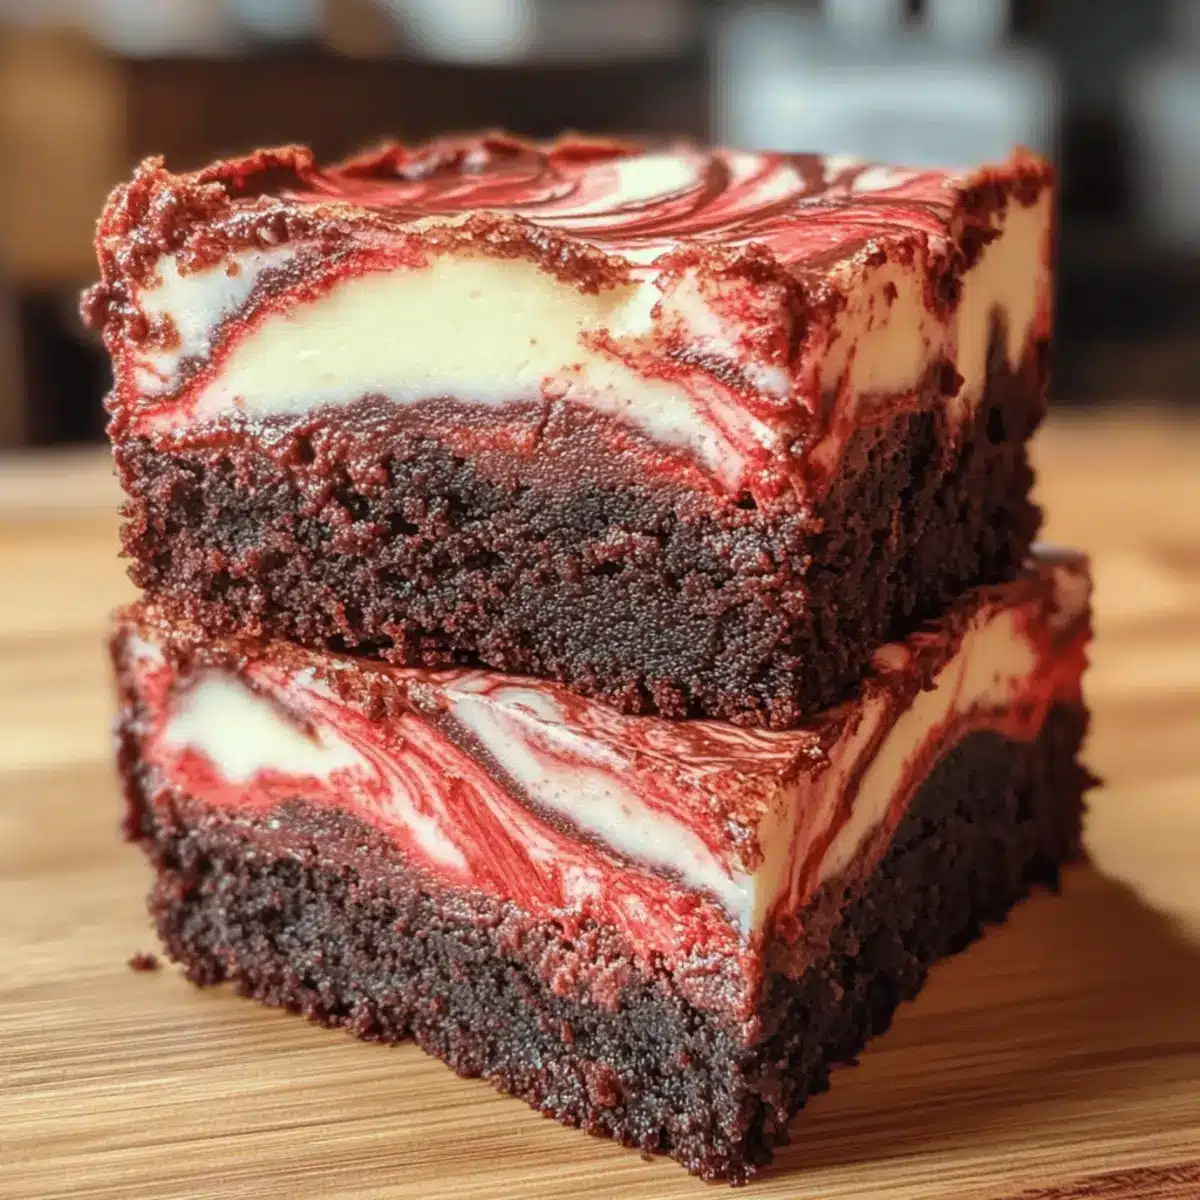
Visual delight: The vibrant red and white swirls not only taste delicious, but make for an eye-catching presentation at any gathering.
Versatile options: Feel free to mix in chocolate chips or try using mascarpone for a creamy twist! Looking for more creative desserts? Check out my Fried Strawberry Cheesecake or Oreo Cheesecake Cookie Cups.
Time-saving: Bake a batch in under an hour, making them an easy choice for unexpected guests or last-minute desserts.
Red Velvet Cheesecake Brownies Ingredients
• Get ready to create something extraordinary!
For the Brownie Base
- Unsalted Butter – Adds moisture and richness; substitute with oil for a lighter texture.
- Granulated Sugar – Sweetens and enhances the chewy texture; brown sugar can deepen the flavor.
- Large Eggs – Binds the ingredients together; ensure they’re at room temperature for better mixing.
- Vanilla Extract – Elevates the overall flavor profile; almond extract can be used for a nutty twist.
- Red Food Coloring – Delivers the signature red hue; feel free to omit for classic chocolate brownies.
- Cocoa Powder – Infuses a rich chocolate flavor; unsweetened cocoa is preferred for balance.
- All-Purpose Flour – Provides structure to the brownies; for gluten-free brownies, use a gluten-free flour blend.
- Salt – Enhances sweetness and overall flavor; remember, a pinch goes a long way!
For the Cheesecake Layer
- Cream Cheese – Creates a creamy cheesecake layer; ensure it’s softened to mix easily.
- Additional Sugar – Sweetens the cheesecake layer and can be adjusted to personal taste.
With these ingredients in hand, you’re just steps away from baking your gorgeous Red Velvet Cheesecake Brownies!
Step‑by‑Step Instructions for Red Velvet Cheesecake Brownies
Step 1: Preheat Oven
Begin by preheating your oven to 350°F (175°C). While the oven warms, line an 8×8-inch baking pan with parchment paper, allowing some overhang for easy removal later. This step is crucial for achieving perfectly baked Red Velvet Cheesecake Brownies with a smooth texture.
Step 2: Make Brownie Batter
In a medium bowl, melt the unsalted butter until fully liquid. Stir in granulated sugar until well combined, then mix in large eggs one at a time, along with vanilla extract and red food coloring, until it’s a beautiful deep red. Sift in cocoa powder, all-purpose flour, and a pinch of salt, folding gently until just combined—avoid overmixing for fudgy brownies.
Step 3: Prepare the Cheesecake Layer
In a separate bowl, beat the softened cream cheese with additional sugar until creamy and smooth. Add one egg and a teaspoon of vanilla extract, mixing until fully incorporated and silky. This rich cheesecake layer will complement the brownie base beautifully, providing that irresistible creamy texture in your Red Velvet Cheesecake Brownies.
Step 4: Assemble the Layers
Pour approximately 3/4 of the brownie batter into your prepared pan, spreading it evenly across the bottom. Carefully dollop the cream cheese mixture on top, ensuring an even layer. Then, drop spoonfuls of the remaining brownie batter over the cheesecake layer and use a knife or skewer to gently swirl the two mixtures together, creating a marbled effect.
Step 5: Bake
Place the pan in the preheated oven and bake for 30 to 35 minutes. Keep an eye on the brownies; they’re ready when the edges pull away slightly and a toothpick inserted in the center comes out with moist crumbs. Don’t overbake, as you want that fudgy texture in your Red Velvet Cheesecake Brownies.
Step 6: Cool and Slice
Once baked, remove the brownies from the oven and let them cool in the pan on a wire rack. For cleaner cuts, refrigerate the cooled brownies for at least 30 minutes. Use the parchment overhang to lift them out, and slice into squares to serve, revealing those stunning red and white swirls!
How to Store and Freeze Red Velvet Cheesecake Brownies
Fridge: Store your brownies in an airtight container lined with parchment paper for up to 5 days. This helps maintain their moisture and freshness, so you can enjoy them even longer!
Freezer: For longer storage, freeze the brownies in a single layer on a baking sheet, then transfer them to an airtight container or freezer bag. They’ll keep well for up to 3 months.
Thawing: When ready to indulge, simply transfer the frozen brownies to the fridge to thaw overnight, or leave them at room temperature for a couple of hours before serving.
Reheating: If you prefer them warm, pop individual squares in the microwave for 10-15 seconds. Enjoy those gooey, delectable layers of Red Velvet Cheesecake Brownies!
Expert Tips for Red Velvet Cheesecake Brownies
- Perfect Texture: Avoid overmixing the brownie batter to maintain that irresistibly fudgy texture we all love.
- Swirling Technique: Gently swirl the cheesecake layer with the brownie mix; this will create beautiful marbling without losing the distinct layers.
- Chill Before Slicing: For the neatest cuts, refrigerate the brownies for about 30 minutes once they cool; this helps maintain clean edges when slicing.
- Room Temperature Ingredients: Ensure your cream cheese and eggs are at room temperature for easier mixing and a smoother cheesecake layer.
- Baking Tip: Keep an eye on baking time; remove your Red Velvet Cheesecake Brownies when the center has set but still moist crumbs cling to the toothpick.
What to Serve with Irresistible Red Velvet Cheesecake Brownies
Imagine sinking your teeth into these luscious treats, complemented by delightful sides that elevate your dessert experience.
-
Dollop of Whipped Cream: This light and airy topping adds a creamy contrast, enhancing the overall velvety mouthfeel of the brownies.
-
Fresh Berries: Ripe strawberries or raspberries offer a fruity brightness that balances the richness of the brownies, making every bite a delightful explosion of flavor.
-
Chocolate Drizzle: A drizzle of warm chocolate sauce not only intensifies the chocolate flavor but also creates a visually appealing touch.
-
Vanilla Ice Cream: The smooth, cold scoop softens the decadent brownie, perfectly marrying the flavors in a delicious indulgence.
-
Nutty Caramel Sauce: A sprinkle of crushed nuts paired with a drizzle of caramel adds a delightful crunch and sweetness that complements the brownie’s texture.
Indulging in these treats is a sensory journey. The warmth of the brownies with silky cream and bright berries transforms your dessert moment into a celebration of flavors.
Make Ahead Options
These delightful Red Velvet Cheesecake Brownies are perfect for busy weeknights or special occasions when you want to save time! You can prepare the brownie batter and the cheesecake layer up to 24 hours in advance. Simply mix the brownie batter and the cheesecake filling, then store them separately in airtight containers in the refrigerator to maintain freshness. When you’re ready to bake, pour the brownie batter into your pan, followed by the cheesecake layer, swirl them together, and bake as directed. This method ensures you’ll have that same decadent taste, just as delicious as when freshly made, making it a breeze to impress your guests with minimal effort!
Red Velvet Cheesecake Brownies Variations
Feel free to personalize your Red Velvet Cheesecake Brownies with creative twists and substitutions that will delight your senses!
-
Dairy-Free: Substitute cream cheese with vegan cream cheese and use plant-based butter for a lactose-free version.
This ensures everyone can enjoy these decadent brownies, regardless of dietary preferences. -
Gluten-Free: Replace all-purpose flour with a gluten-free flour blend.
Everyone deserves to indulge, and this simple swap opens the doors for gluten-sensitive friends. -
Nutty Flavor: Add chopped pecans or walnuts for a delightful crunch in the brownie batter.
The nutty addition enhances the overall texture, bringing a new dimension of flavor to each bite. -
Chocolate Lovers: Mix in dark chocolate chunks or white chocolate chips for an extra chocolatey experience.
These little bursts of chocolate will elevate the richness, making these brownies even more irresistible. -
Spicy Kick: Stir in a pinch of cayenne pepper or some chili powder for a surprising heat.
This will tantalize your taste buds in a whole new way, combining sweetness with a hint of spice! -
Matcha Swirl: For a unique flavor, replace some cheesecake with a creamy matcha layer.
This bright green twist not only looks stunning but adds an earthy taste that complements the sweetness perfectly. -
Creamy Custard: For an even richer texture, replace the cheesecake layer with a sweet custard.
Just imagine that creamy goodness meeting the fudgy brownie base—heavenly! -
Topping Ideas: Serve topped with caramel sauce or a drizzle of your favorite fruit puree.
This adds a refreshing brightness that balances the richness of the brownies and makes for a delightful presentation.
With these variations, the possibilities are endless! If you’re curious about more delightful treats, don’t miss my recipes for Millionaires Cheesecake and Marshmallow Whip Cheesecake. Happy baking!
Red Velvet Cheesecake Brownies Recipe FAQs
How do I know if my ingredients are fresh enough for baking?
Absolutely! For the best results, ensure your eggs are fresh—check the expiration date on the carton, and remember to use room temperature eggs for a smooth batter. When using cream cheese, it should be soft to the touch and free from any dark spots or a sour smell, which indicates spoilage. Always use unsalted butter that doesn’t have any signs of rancidity, like a strong or off smell.
What’s the best way to store leftover Red Velvet Cheesecake Brownies?
Very! To keep your brownies fresh and delicious, store them in an airtight container lined with parchment paper to maintain moisture. They can stay good in the fridge for up to 5 days. If you won’t finish them within that time, consider freezing them to preserve their flavor and texture.
Can I freeze Red Velvet Cheesecake Brownies?
Yes! I often make a double batch and freeze half for later. Start by cooling the brownies completely, then cut them into squares. Place them in a single layer on a baking sheet to freeze for about 2 hours until solid. Afterward, transfer the brownies to an airtight container or freezer bag, and they’ll be good for up to 3 months!
What if my cheesecake layer is too runny?
No worries! If you find your cheesecake layer is too runny, it might be due to overmixing or using cold cream cheese. To troubleshoot, you can beat your softened cream cheese and sugar first, ensuring no lumps remain before adding the egg and vanilla. If it still seems too thin, a bit of cornstarch (1 tablespoon) can help thicken it, giving you that perfect creamy layer you’re looking for.
Can I modify this recipe for dietary restrictions?
Of course! For a gluten-free version, substitute the all-purpose flour with a gluten-free flour blend. If you’re avoiding dairy, you can swap cream cheese for a dairy-free alternative like cashew cream or blend silken tofu with a little lemon juice for added flavor. And if you’re watching your sugar intake, using a sugar substitute can keep these brownies indulgent while still being mindful of health concerns.
Decadent Red Velvet Cheesecake Brownies for Sweet Indulgence
Ingredients
Equipment
Method
- Preheat your oven to 350°F (175°C) and line an 8x8-inch baking pan with parchment paper.
- Melt the unsalted butter and stir in granulated sugar until combined. Mix in large eggs, vanilla extract, and red food coloring.
- Sift in cocoa powder, all-purpose flour, and salt, folding gently until just combined.
- Beat softened cream cheese with additional sugar until smooth. Add one egg and vanilla, mixing until silky.
- Spread 3/4 of brownie batter in the pan, dollop cream cheese mixture on top, and swirl with remaining batter.
- Bake for 30 to 35 minutes until edges pull away and toothpick comes out with moist crumbs.
- Cool in the pan, refrigerate for 30 minutes, then slice into squares.
Leave a Reply