
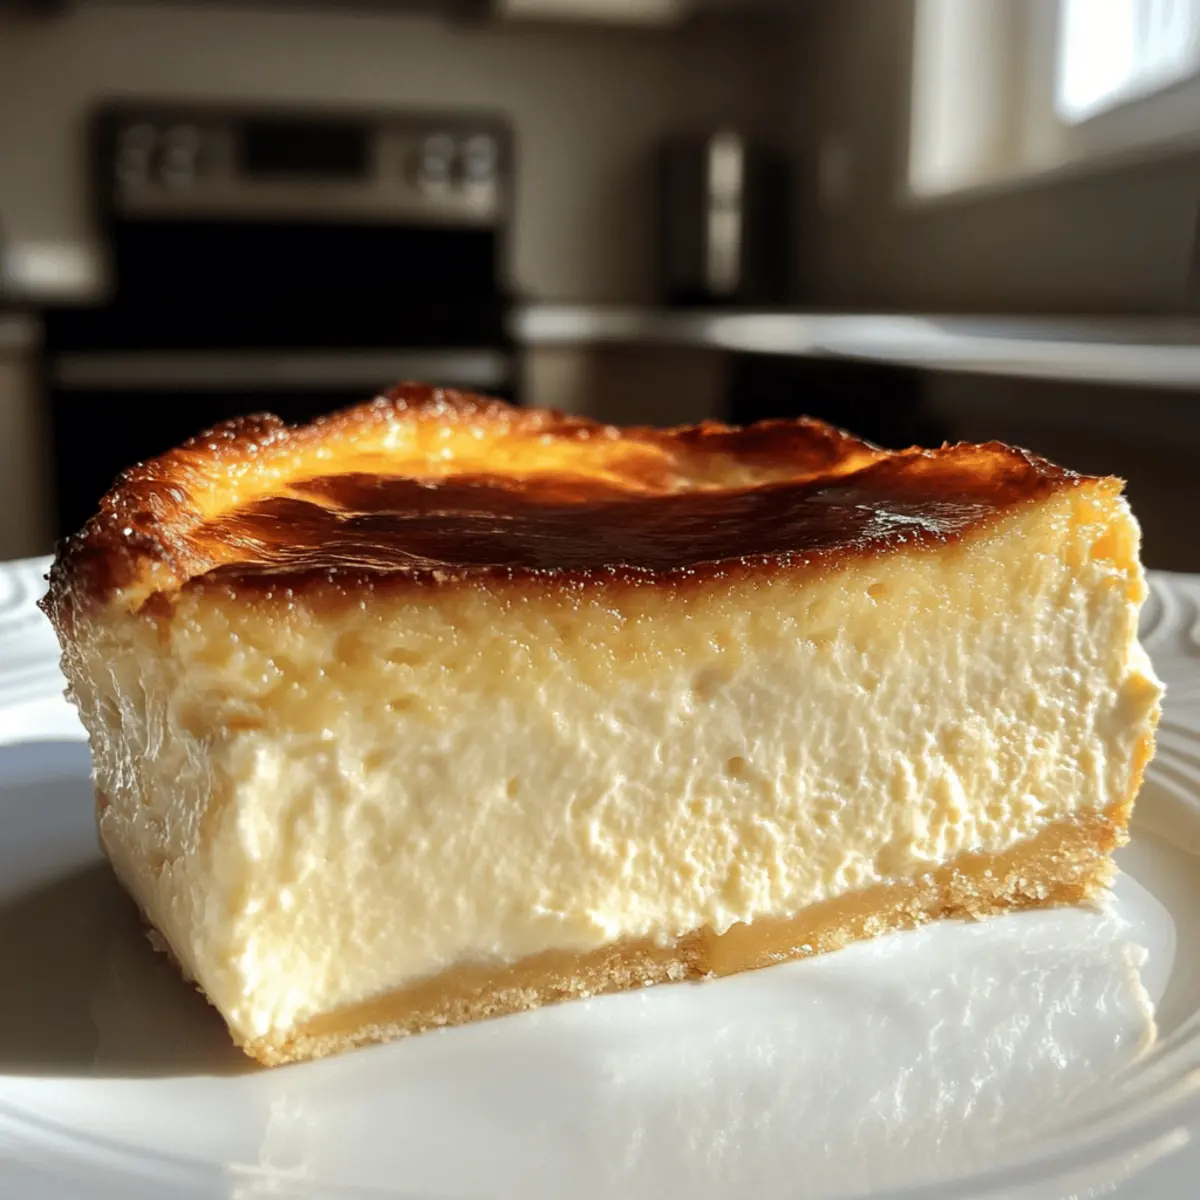
As I stood in my kitchen, the sweet aroma of caramelized sugar danced in the air, and I couldn’t help but smile. Today, I’m thrilled to share my take on the classic Burnt Basque Cheesecake in a Loaf Pan—a small-batch delight that transforms this traditional dessert into a modern, manageable treat. This version is not only effortless to prepare, but it also boasts that iconic burnt top and a creamy center that simply melts in your mouth. Plus, it’s vegetarian-friendly and offers a gluten-free twist, making it perfect for everyone at the table. Whether you’re celebrating a special occasion or just indulging in some self-care with dessert, this cheesecake is bound to impress. So, are you ready to embark on this scrumptious journey with me?
Why is this cheesecake a must-try?
Indulgent, rich flavor: The Burnt Basque Cheesecake is a luscious dessert that perfectly balances burnt caramel and creamy smoothness.
Simple preparation: You only need basic ingredients and utensils to whip up this delightful treat.
Versatile options: Make it gluten-free by swapping in a gluten-free flour blend or customize it with your choice of toppings like fresh berries or a drizzle of caramel.
Crowd-pleaser: This small-batch dessert is perfect for intimate gatherings or cozy nights in. Your friends and family will rave about it!
Unique presentation: Serving it in a loaf pan adds a charming twist to the classic cheesecake format, making it easy to slice and share. For an easy yet stunning dessert experience, check out my recipe for Marshmallow Whip Cheesecake as another sweet option!
Burnt Basque Cheesecake Ingredients
For the Cheesecake
- Cream Cheese – Provides the creamy base and rich flavor; full-fat is best for a smooth texture.
- Granulated Sugar – Adds sweetness and helps create the caramelization on top; feel free to use a sugar alternative if you’d like.
- Eggs – Provide structure and richness; use fresh eggs for the most vibrant flavor.
- Heavy Cream – Contributes to the creamy texture; substitute with plant-based cream for a dairy-free version.
- All-Purpose Flour – Helps stabilize the batter; for gluten-free, swap with a gluten-free flour blend.
- Salt – Enhances overall flavor; a tiny pinch balances the sweetness, making your Burnt Basque Cheesecake sing!
For the Topping (optional)
- Whipped Cream – Adds a fluffy, light contrast to the cheesecake; homemade is always a treat!
- Fresh Berries – Provides a burst of freshness; go for strawberries or blueberries for a colorful finish.
- Caramel Sauce – A sweet drizzle takes it to the next level; try making it from scratch for an extra special touch!
Step‑by‑Step Instructions for Burnt Basque Cheesecake
Step 1: Preparation
Preheat your oven to 425°F (220°C). While the oven heats up, take a standard 9×5 inch loaf pan and line it with parchment paper, ensuring the paper hangs over the edges for easy removal later. This simple step sets the foundation for your Burnt Basque Cheesecake and helps it achieve that signature caramelized top.
Step 2: Mix Ingredients
In a large mixing bowl, beat together the cream cheese and granulated sugar until smooth and creamy, about 1-2 minutes. Next, add the eggs one at a time, mixing well after each addition to incorporate air. Then, stir in the heavy cream, flour, and a pinch of salt, ensuring the batter is well combined and velvety. Your rich cheesecake batter is now ready!
Step 3: Bake
Pour the silky batter into the prepared loaf pan, smoothing the top with a spatula for even baking. Carefully place the loaf pan in the preheated oven and bake for 45 minutes or until the top is deeply golden brown and slightly burnt, forming that characteristic crust. The edges should be set, while the center may still have a slight jiggle, indicating a creamy texture.
Step 4: Cool Down
Once the baking time is complete, turn off the oven and leave the cheesecake inside with the door ajar to cool slowly. Allow it to rest in this warm environment for about 1 hour; this gradual cooling process will help prevent cracking and enhance the flavors of your Burnt Basque Cheesecake.
Step 5: Chill
Once the hour has passed, carefully transfer the loaf pan to the refrigerator. Chill the cheesecake for at least 4 hours, or preferably overnight, to ensure it firms up perfectly. This resting time allows the flavors to meld together beautifully, creating that luscious custard-like texture that makes this cheesecake irresistible.
Make Ahead Options
These Burnt Basque Cheesecake treats are perfect for busy home cooks eager to streamline their meal prep! You can prepare the cheesecake batter up to 24 hours in advance by mixing the ingredients and storing the mixture in the refrigerator. Simply cover the bowl tightly to maintain freshness and prevent any unwanted odors from seeping in. When ready to bake, pour the batter into the lined loaf pan and proceed with the baking instructions. After baking, allow it to cool in the oven for 1 hour and then refrigerate for at least 4 hours—or overnight—for the best results. This way, you’ll have a show-stopping dessert waiting for you, just as delicious and creamy as if freshly made!
Tips for the Best Burnt Basque Cheesecake
- Use Full-Fat Cream Cheese: A creamy base ensures that your Burnt Basque Cheesecake achieves the right texture. Low-fat versions can lead to a less indulgent result.
- Cool Slowly: To prevent sinking, let the cheesecake cool in the oven with the door ajar for an hour. This step is crucial for achieving that ideal structure.
- Jiggle is Good: Don’t worry if the center seems jiggly after baking; it will firm up beautifully in the fridge, creating that luscious custard-like center you crave.
- Parchment Perk: Always line your pan with parchment paper. It makes lifting the cheesecake out a breeze and helps maintain its stunning shape.
- Avoid Freezing: Freezing can adversely affect the creamy texture, so enjoy your cheesecake within a few days for the best experience.
Burnt Basque Cheesecake Variations & Substitutions
Feel free to explore these delightful twists that will make your Burnt Basque Cheesecake even more irresistible!
- Gluten-Free: Swap all-purpose flour for a gluten-free blend to cater to gluten-sensitive friends. A simple exchange, yet it makes a world of difference!
- Dairy-Free: Use a plant-based cream cheese and cream for a dairy-free delight. Your guests may not even notice the difference!
- Sugar-Free: Substitute granulated sugar with a granulated sweetener like erythritol or monk fruit for a healthier alternative. Your cheesecake will still be sweet and satisfying.
- Flavor Boosts: Enhance the cheesecake by adding a teaspoon of vanilla extract or lemon zest to the batter. These flavors elevate the cheesecake’s profile beautifully!
- Nutty Infusion: Fold in crushed nuts like almonds or hazelnuts into the batter for a delightful crunch. This adds an exciting texture that contrasts wonderfully with the creamy filling.
- Tropical Twist: Mix in some mashed ripe banana or pineapple for a unique fruity flavor that creates a new summer classic! It’s a delicious way to surprise your taste buds.
- Chocolate Decadence: Add cocoa powder to the batter for a chocolatey variation that will please any chocoholic. A perfect way to indulge in simultaneous flavors!
- Serving Suggestions: For variety, serve with a dollop of homemade whipped cream or fresh berries on top. Fresh accompaniments bring brightness and enhance this creamy dessert.
For an alternative sweet treat, be sure to check out my recipe for Marshmallow Whip Cheesecake, another dessert that will delight your family and friends!
What to Serve with Burnt Basque Cheesecake
Indulging in a slice of this creamy delight calls for thoughtful pairings that elevate your dessert experience.
-
Fresh Berries: A sprinkle of raspberries or strawberries adds a refreshing tang that beautifully contrasts the richness of the cheesecake.
-
Whipped Cream: Light and airy, homemade whipped cream brings a soft texture and subtle sweetness, making each bite feel luxurious.
-
Chocolate Shavings: Rich chocolate adds a decadent touch, creating a pleasing visual contrast while enhancing the dessert’s complexity.
-
Espresso Coffee: A strong, bold cup of espresso pairs perfectly, balancing the sweetness with its deep flavors and providing a warm finish to your meal.
-
Caramel Sauce: Drizzling homemade caramel over the cheesecake not only intensifies the sweetness but also adds an alluring sticky texture.
-
Vanilla Ice Cream: The creamy, cold ice cream offers a delightful temperature contrast and a classic flavor that compliments the burnt notes beautifully.
These pairings will uplift each slice, transforming simple enjoyment into a truly memorable dessert experience.
How to Store and Freeze Burnt Basque Cheesecake
Fridge: Store your Burnt Basque Cheesecake in an airtight container in the refrigerator for up to 5 days. Ensure it’s fully chilled for optimal flavor and texture.
Freezer: Avoid freezing this cheesecake, as it can negatively impact the custard-like texture, making it less enjoyable when thawed.
Reheating: If desired, let the cheesecake sit at room temperature for about 10-15 minutes before serving to enhance its creamy consistency and taste.
Burnt Basque Cheesecake Recipe FAQs
What type of cream cheese should I use?
Absolutely, I recommend using full-fat cream cheese for the best texture and flavor. Low-fat options may result in a less creamy cheesecake, which isn’t what we’re aiming for. For a deliciously rich outcome, stick with the full-fat variety!
How should I store leftovers?
Once your Burnt Basque Cheesecake has cooled and set, store it in an airtight container in the refrigerator. It will stay fresh for up to 5 days. If you’re like me and enjoy the nuances of flavor, chilling it overnight allows the flavors to deepen and develop even further.
Can I freeze Burnt Basque Cheesecake?
I would advise against freezing this cheesecake, as it can affect the wonderfully soft and custard-like texture. If you’re tempted to save it for later, enjoy it within a few days. The best way to savor each bite is to keep it fresh and ready to indulge!
What if my cheesecake didn’t rise as expected?
If your cheesecake didn’t rise properly, don’t fret! Often, a jiggly center is completely normal. Remember, after baking, the cheesecake should cool slowly in the oven with the door ajar. This step is crucial to maintain its structure, preventing it from sinking during the cooling process.
Are there any dietary concerns?
Good question! This recipe is vegetarian-friendly, and you can easily make it gluten-free by substituting all-purpose flour with a suitable gluten-free blend. If you’re cooking for someone with specific allergies, just check the labels of your ingredients, especially creams and sugars, to ensure everything meets their dietary needs.
Irresistible Burnt Basque Cheesecake in a Loaf Pan Magic
Ingredients
Equipment
Method
- Preheat your oven to 425°F (220°C). Line a 9x5 inch loaf pan with parchment paper.
- In a large mixing bowl, beat together cream cheese and granulated sugar until smooth and creamy, about 1-2 minutes.
- Add eggs one at a time, mixing well after each addition. Stir in heavy cream, flour, and salt until well combined.
- Pour the batter into the prepared loaf pan and bake for 45 minutes until the top is golden brown and the edges are set.
- Turn off the oven and leave the cheesecake inside with the door ajar to cool for 1 hour.
- Transfer the cheesecake to the refrigerator and chill for at least 4 hours, preferably overnight.
Leave a Reply