
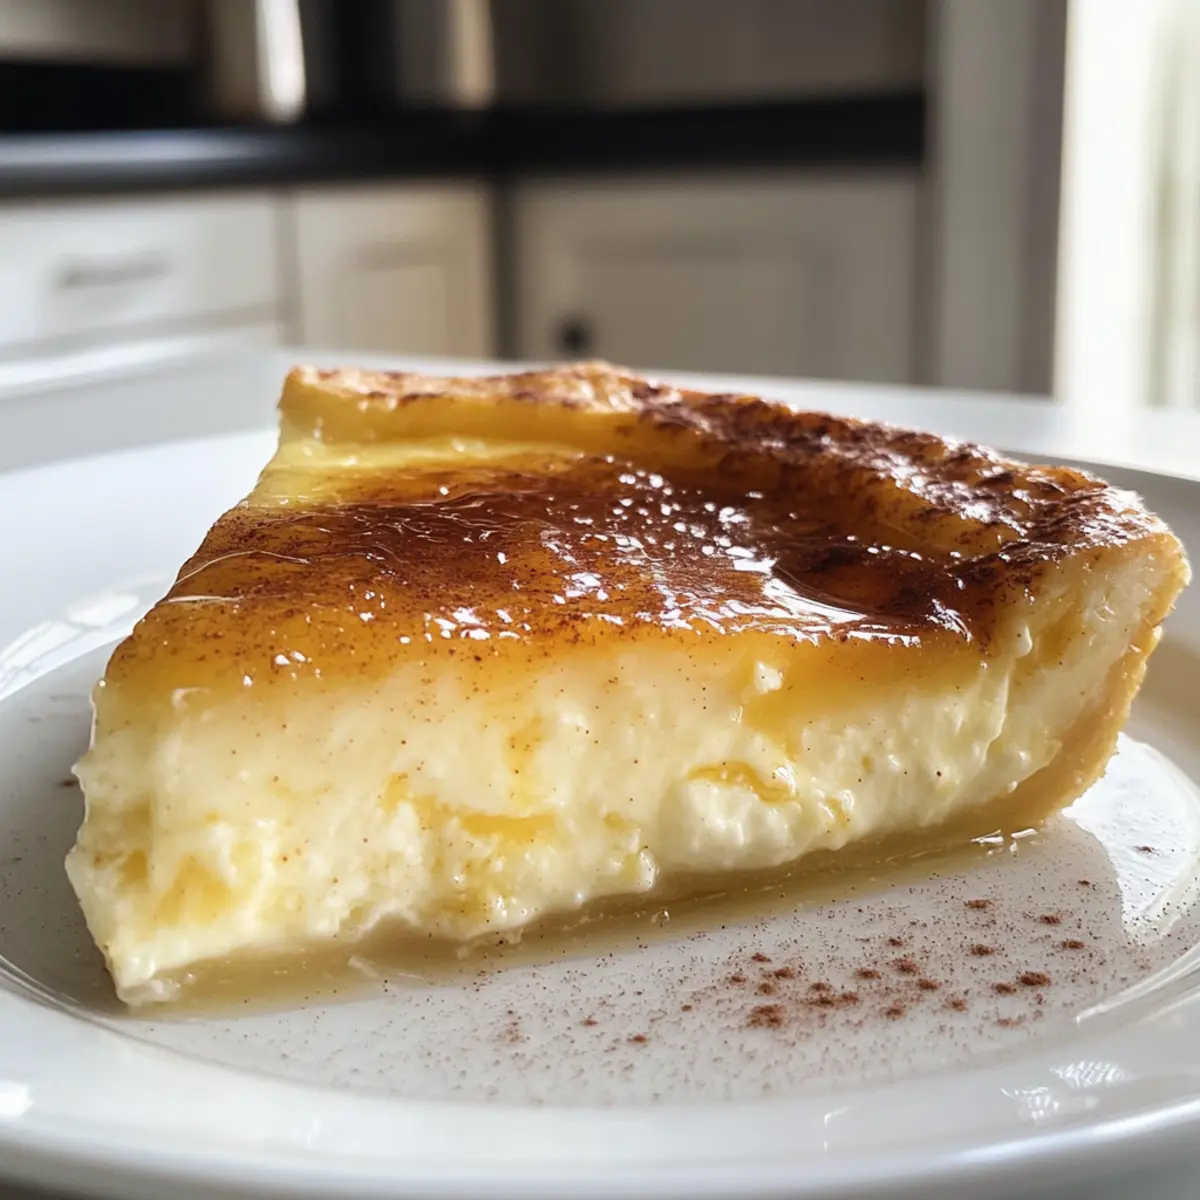
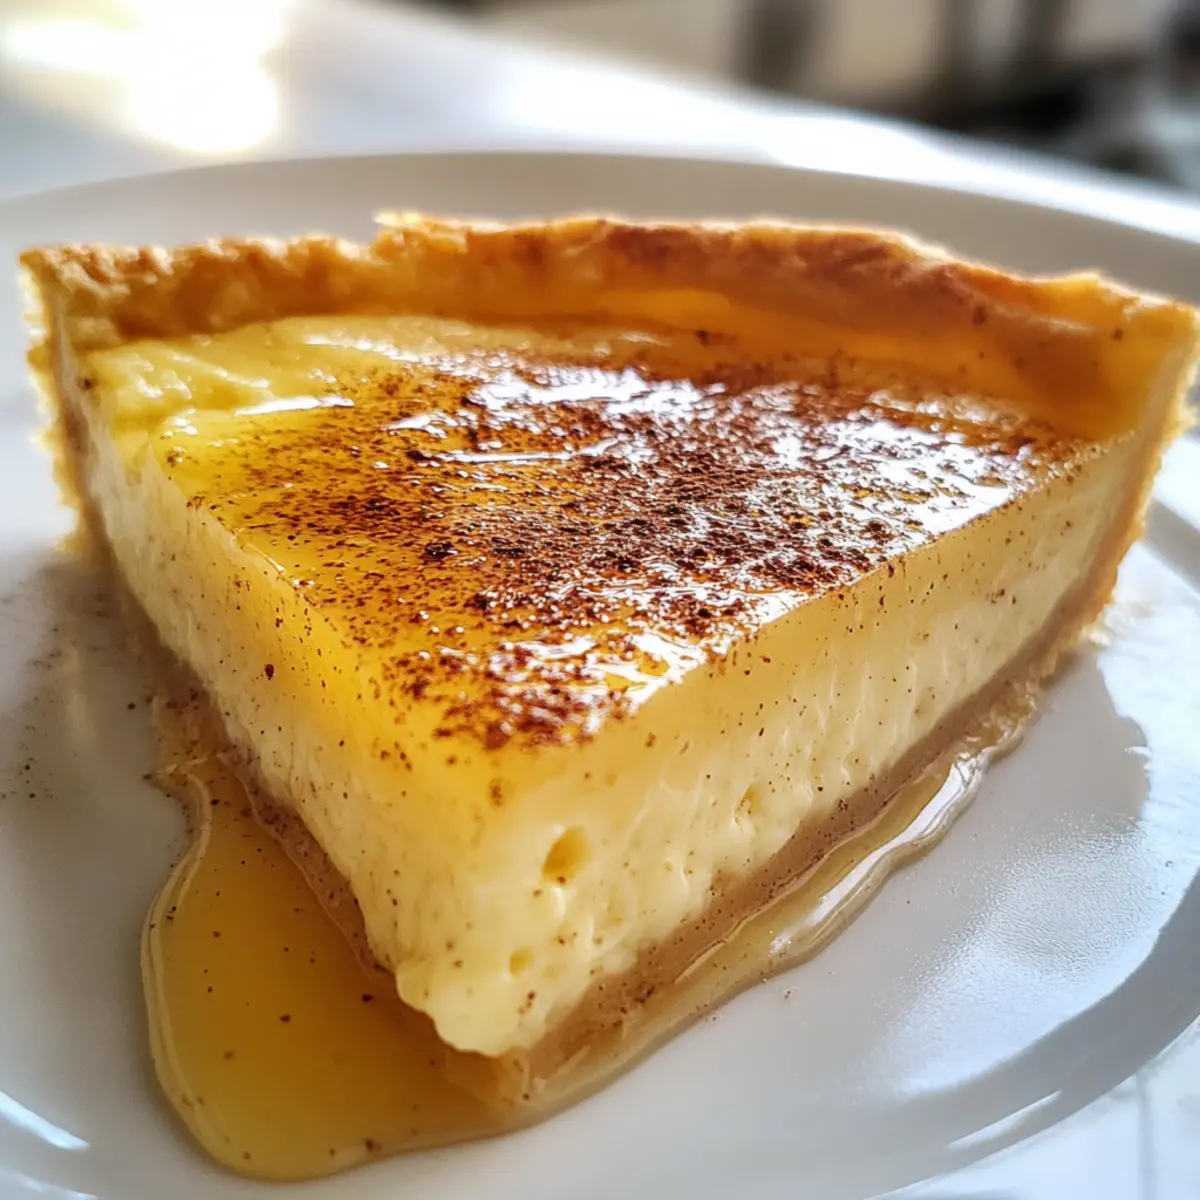
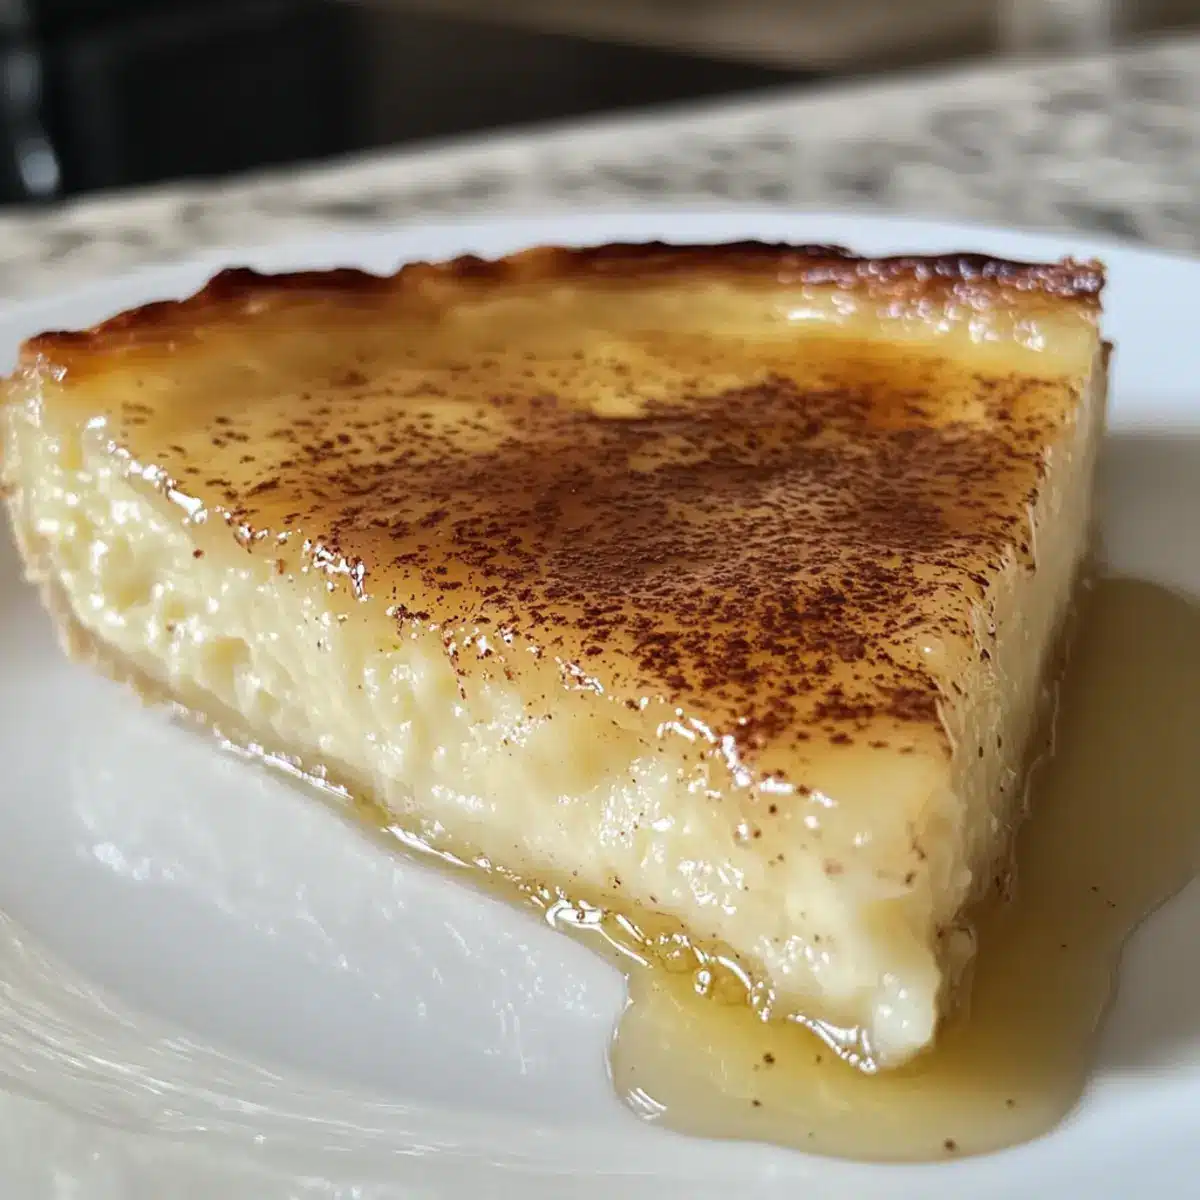
As I stood in my kitchen, the sweet and nutty aroma of honey filled the air, instantly transporting me to the sun-kissed shores of Greece. Today, I’m thrilled to share my take on Melopita, a delightful Greek Honey & Cheese Pie that’s not only a breeze to whip up but also a showstopper for any gathering. This crustless cheesecake requires just five simple ingredients, making it an ideal choice for those busy weeknights when you crave something special without the fuss. Plus, it’s easily adaptable for gluten-free diets, ensuring everyone can savor this traditional treat. Wouldn’t you love to impress your loved ones with a slice of this creamy, dreamy pie? Let’s dive into this delightful dessert!
Why is Melopita a must-try dessert?
Deliciously Simple: With only five ingredients, this recipe is perfect for those moments when simplicity is key, yet you want to impress.
Creamy Texture: The texture of Melopita is a blend of cheesecake delight and soft custard, making every bite a luxurious experience.
Versatile Options: Feel free to customize with substitutions like mascarpone or even silken tofu for a dairy-free version. You can explore unique variations, similar to my Baked Cream Cheese Spaghetti Casserole for pairing ideas!
Crowd-Pleaser: Whether for a holiday gathering or a simple family meal, everyone will love this unique pie. It’s sure to spark conversations and satisfy even the pickiest eaters.
Easy Prep: No complicated steps! Just mix, bake, and enjoy—a perfect weeknight dessert that won’t keep you in the kitchen for long!
Greek Honey & Cheese Pie Ingredients
• Create your own delicious Melopita with these simple components!
For the Pie
- Ricotta Cheese – Offers a creamy texture that’s essential for this cheesecake; substitute with goat cheese for a tangy twist.
- Honey – Infuses the pie with sweetness; opt for local varieties to enhance the flavor profile.
- Eggs – These are the key binding agents, giving structure and richness; no substitutes are recommended here.
- Corn Starch (Corn Flour) – Helps thicken and set the pie; ensure you use corn starch instead of flour for the right texture.
- Vanilla Extract – Elevates the overall flavor; consider adding lemon zest for a refreshing citrus note.
For Serving
- Cinnamon (for drizzling) – Adds warmth and depth of flavor; a delightful finishing touch to your Melopita.
Step‑by‑Step Instructions for Greek Honey & Cheese Pie
Step 1: Preheat and Prepare
Begin by preheating your oven to 180°C (350°F). While the oven warms up, take a 20cm (8-inch) springform pan and generously grease it with butter or cooking spray. This ensures your crustless Greek honey & cheese pie releases effortlessly once baked. Set the prepared pan aside as the oven reaches temperature.
Step 2: Mix the Filling
In a large mixing bowl, add the ricotta cheese, honey, eggs, corn starch, and vanilla extract. Using a whisk, blend these ingredients together until the mixture is completely smooth and creamy. Make sure to mix thoroughly but avoid overmixing, which can create a lumpy texture. This creamy filling is the heart of your Melopita!
Step 3: Pour and Bake
Pour the smooth mixture into the prepared springform pan, ensuring it’s evenly distributed. Carefully place the pan in the preheated oven and bake for 45-50 minutes. Keep an eye on the pie during the last few minutes; the top should be beautifully golden brown while the center is set and not wobbly.
Step 4: Cool Down
Once baked, remove the pan from the oven and let it cool in the pan for about 5 minutes. This gentle cooling process helps the Melopita firm up slightly. After that, transfer the pie onto a wire rack to cool completely. Allowing it to cool properly enhances the flavors of the Greek honey & cheese pie.
Step 5: Serve with Delight
When the pie has cooled, drizzle it generously with honey and dust with ground cinnamon for an aromatic touch. This final step elevates your Melopita, adding sweetness and warmth. Slice up the pie and serve it chilled or at room temperature, ensuring that each bite captures the essence of this delightful Greek dessert.

Greek Honey & Cheese Pie Variations
Feel free to explore different twists on this delightful Melopita that will surely tantalize your taste buds!
-
Dairy-Free: Use silken tofu blended until smooth to replace ricotta for a creamy texture without dairy.
This swap not only keeps it light but also opens up new flavor adventures! -
Citrusy Boost: Incorporate lemon or orange zest to brighten the flavor profile and elevate this traditional pie.
That zesty twist makes every bite a refreshing surprise, perfect for warm days! -
Nutty Texture: Top the Melopita with crushed nuts like pistachios or walnuts for a delightful crunch.
This adds a pleasing contrast to the creamy filling, enhancing both flavor and texture. -
Honey Twist: Experiment with different types of honey, such as lavender or orange blossom, to impart unique floral notes to the pie.
Each honey can provide a distinct character, making this recipe endlessly versatile. -
Mascarpone Magic: Swap out ricotta for mascarpone cheese for an ultra-rich and velvety filling.
The added creaminess elevates the decadence, making it an indulgent dessert option. -
Gluten-Free: Replace corn starch with arrowroot powder to keep the pie gluten-free while maintaining that lovely texture.
This ensures everyone can indulge without worry! -
Spice It Up: Add a pinch of nutmeg or allspice for an intriguing flavor kick that plays well with the honey and cheese.
A few warm spices can transform this pie into a comforting dessert that’s perfect for fall gatherings. -
Fruit Infusion: Fold in fresh berries or sliced stone fruits into the filling before baking for a fruity twist.
These additions not only add vibrant color but also a burst of natural sweetness you’ll absolutely adore.
For serving ideas, pair this Melopita with a refreshing fruit medley or a dollop of whipped cream, similar to how I enjoy my Fresh Apple Cake with Cream Cheese. Each variation brings new flavors to the table, making your Greek Honey & Cheese Pie an unforgettable treat!
Storage Tips for Greek Honey & Cheese Pie
Fridge: Store the Melopita in an airtight container in the refrigerator for up to 3 days to maintain its creamy texture and flavor.
Freezer: If you want to keep it longer, freeze slices wrapped tightly in plastic wrap for up to 2 months. Thaw in the fridge before serving.
Reheating: To enjoy, simply let it come to room temperature or warm gently in the microwave for a few seconds—just enough to soften without heating through.
Serving Cold: This crustless pie can be served cold straight from the fridge, which enhances the honey’s sweetness and the cheese’s creaminess, offering a refreshing taste!
What to Serve with Simple Crustless Greek Honey & Cheese Pie
Indulging in a slice of Melopita isn’t just about the pie; it’s the perfect opportunity to create a delightful dining experience.
- Fresh Berries: Bursting with sweetness and adding a tart contrast, berries are a vibrant side that enhances the pie’s honey notes.
- Whipped Cream: A fluffy dollop adds a luxurious touch, balancing the creamy texture of the Melopita beautifully.
- Poached Pears: Their gentle sweetness and soft texture offer a sophisticated pair, elevating your dessert to elegant new heights.
Imagine the rich honey and cheese pie alongside a fresh fruit salad, where the crispness of the fruit complements the creamy filling. It creates a colorful, refreshing plate that appeals to both the eyes and the palate!
- Greek Yogurt: A dollop of yogurt brings a tangy, creamy element that can cut through the sweetness while enhancing the pie’s flavors.
- Almond Biscotti: The crunchy texture of these delightful cookies adds a lovely contrast and a bit of sophistication to your dessert table.
- Mint Tea: A soothing drink that perfectly balances the sweet richness of the Melopita, enhancing the overall flavor profile of your meal.
Crafting a dessert spread can foster connection with friends and family, turning a sweet moment into a cherished memory!
Expert Tips for Melopita
• Avoid Overmixing: Gentle mixing is key to a smooth filling; overmixing can lead to a lumpy texture in your Greek honey & cheese pie.
• Monitor Baking Time: Keep an eye on your pie as it bakes; a golden top means it’s almost done, but the center should still be set, not jiggly.
• Temperature Check: If you’re using a larger pan, be ready to add 10-15 minutes to the baking time, adjusting accordingly to prevent overcooking.
• Serving Suggestions: For an added treat, serve with fresh berries or a dollop of whipped cream to elevate the flavors of your Melopita.
• Storage Tips: Store any leftovers in an airtight container in the refrigerator, where it will last for up to 3 days, maintaining its deliciousness.
Make Ahead Options
These Greek Honey & Cheese Pie (Melopita) preparations are a lifesaver for busy weeknights! You can prepare the filling by mixing the ricotta, honey, eggs, corn starch, and vanilla extract up to 24 hours in advance; simply store it in an airtight container in the refrigerator to maintain its creamy texture. Additionally, you can bake the Melopita, let it cool completely, and store it in the fridge for up to 3 days before serving. When it’s time to enjoy, all you have to do is drizzle with honey and dust with cinnamon just before serving to keep that fresh flavor intact. This way, you’ll have a delicious dessert ready to impress with minimal effort!
Greek Honey & Cheese Pie Recipe FAQs
How do I choose the right ricotta cheese?
Selecting a good ricotta makes all the difference! Look for fresh ricotta with a creamy texture and a slightly grainy consistency. You want it to be moist but not watery. If you spot dark spots all over or the container is swollen, it’s best to skip that one! You can also experiment with goat or sheep’s milk ricotta for a more distinct flavor.
How should I store leftover Melopita?
Absolutely! To maintain the deliciousness of your Greek Honey & Cheese Pie, store it in an airtight container in the refrigerator for up to 3 days. You can either serve it chilled straight from the fridge or let it sit at room temperature for a bit before digging in. This allows the flavors to pop!
Can I freeze Melopita for later?
Yes, you can freeze slices of your Melopita! Wrap each piece tightly in plastic wrap, ensuring no air pockets remain, and place them in a freezer-safe container. It will keep nicely in the freezer for up to 2 months. When you’re ready to enjoy it, just thaw the slices in the fridge overnight and serve them cold or at room temperature.
What should I do if my pie jiggled in the oven?
If your Melopita’s center wobbled while baking, it likely needs a bit more time. Gently shake the pan; if it jiggles a lot, it’s not done yet. You can add 10-15 minutes more baking time, but keep an eye on it to avoid overcooking. Look for a golden brown top and ensure the center is set, not wobbly, for that perfect texture.
Is this recipe suitable for people with dairy allergies?
For those with dairy allergies, you can indeed make Melopita dairy-free! Substitute the ricotta with silken tofu blended until smooth. This will provide a creamy texture similar to the original. Just make sure to adjust your sweetener slightly to taste since dairy-free alternatives may have different sweetness levels.
Can I modify the flavors in my Melopita?
The more the merrier! You can certainly modify and experiment with flavor. For a zestier profile, add lemon or orange zest to the mixture. You could also drizzle some fresh fruit sauce over the top for added flavor and presentation, or incorporate crushed nuts for a delightful crunch!
Delight in Easy Greek Honey & Cheese Pie Bliss at Home
Ingredients
Equipment
Method
- Preheat your oven to 180°C (350°F) and grease a 20cm (8-inch) springform pan with butter or cooking spray.
- In a large mixing bowl, add the ricotta cheese, honey, eggs, corn starch, and vanilla extract. Blend until smooth and creamy.
- Pour the mixture into the prepared springform pan and bake for 45-50 minutes, until the top is golden brown and the center is set.
- Let the pie cool in the pan for about 5 minutes before transferring it to a wire rack to cool completely.
- Once cooled, drizzle with honey and dust with cinnamon before serving chilled or at room temperature.
Leave a Reply