
As I dipped my spoon into the creamy filling, a wave of excitement washed over me—being adventurous in the kitchen has its sweet rewards! Let’s shake things up with my Berrylicious Cheesecake Tacos, a delightful twist on the classic dessert. These gems feature a crispy graham cracker shell that cradles a velvety cheesecake filling, beautifully topped with vibrant blueberry and strawberry jams. Perfect for summer gatherings or a light brunch, this recipe not only brings joy to the table but also ensures a quick prep that will leave your guests in awe. Why settle for ordinary desserts when you can serve these playful tacos that are sure to spark conversations? Ready to take your dessert game to the next level?
Why are Berrylicious Cheesecake Tacos a Must-Try?
Uniqueness: This recipe offers a fun twist on traditional tacos, turning them into a sweet sensation that is sure to surprise and delight your guests.
Easy Preparation: With simple ingredients and straightforward steps, you can whip these up quickly, allowing you to spend more time enjoying your gathering.
Versatile toppings: Use your favorite jams or fresh fruits to customize each taco to your guests’ tastes, making every bite as unique as they are.
Crowd-Pleasing Appeal: Perfect for summer parties or casual brunches, these tacos make dessert something to talk about and leave everyone craving more!
Light and Fluffy Texture: The crispy graham cracker shell paired with the smooth cheesecake makes for an irresistible texture contrast that everyone will love.
Perfectly Balanced Flavor: With just the right mix of sweetness and tartness from the creamy filling and blueberry-strawberry topping, these tacos are a delightful end to any meal! For similar delicious treats, don’t miss out on my Oreo Cheesecake Cookie Cups and Fried Strawberry Cheesecake.
Berrylicious Cheesecake Tacos Ingredients
For the Taco Shells
• Tortilla – Use 8-inch flour or corn tortillas; gluten-free options are perfect for those with dietary restrictions!
• Graham Cracker Crumbs – These give the classic cheesecake flavor; swap with crushed digestive biscuits for a twist.
• Unsalted Butter – This adds richness and helps crumbs stick; coconut oil is a great alternative for dairy-free tacos.
For the Cheesecake Filling
• Cream Cheese – The star of the filling; ensure it’s room temperature for easy mixing, or try dairy-free cream cheese for vegan tacos.
• Heavy Cream – Whips up fluffy texture; opt for coconut cream as a non-dairy substitute.
• Powdered Sugar – Sweetens the filling; granulated sugar can work in a pinch but may create a grainier texture.
• Lemon Juice – Brightens the flavors; if you’re out, lime juice makes an excellent substitute!
• Vanilla Extract – Enhances the filling’s flavor; real vanilla extract is ideal for the best taste.
For the Toppings
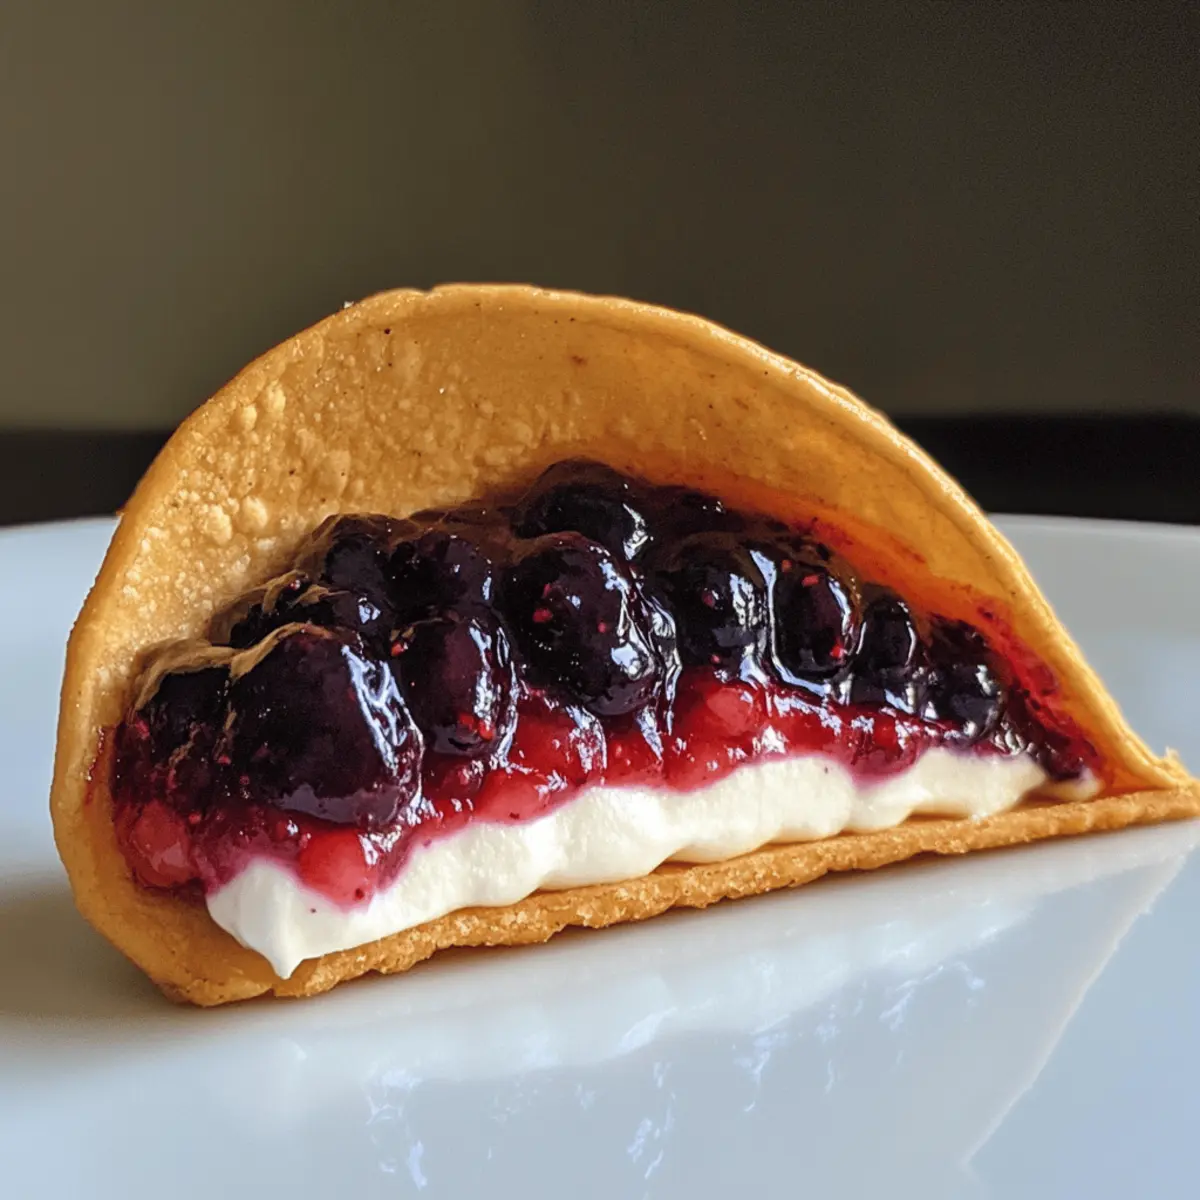
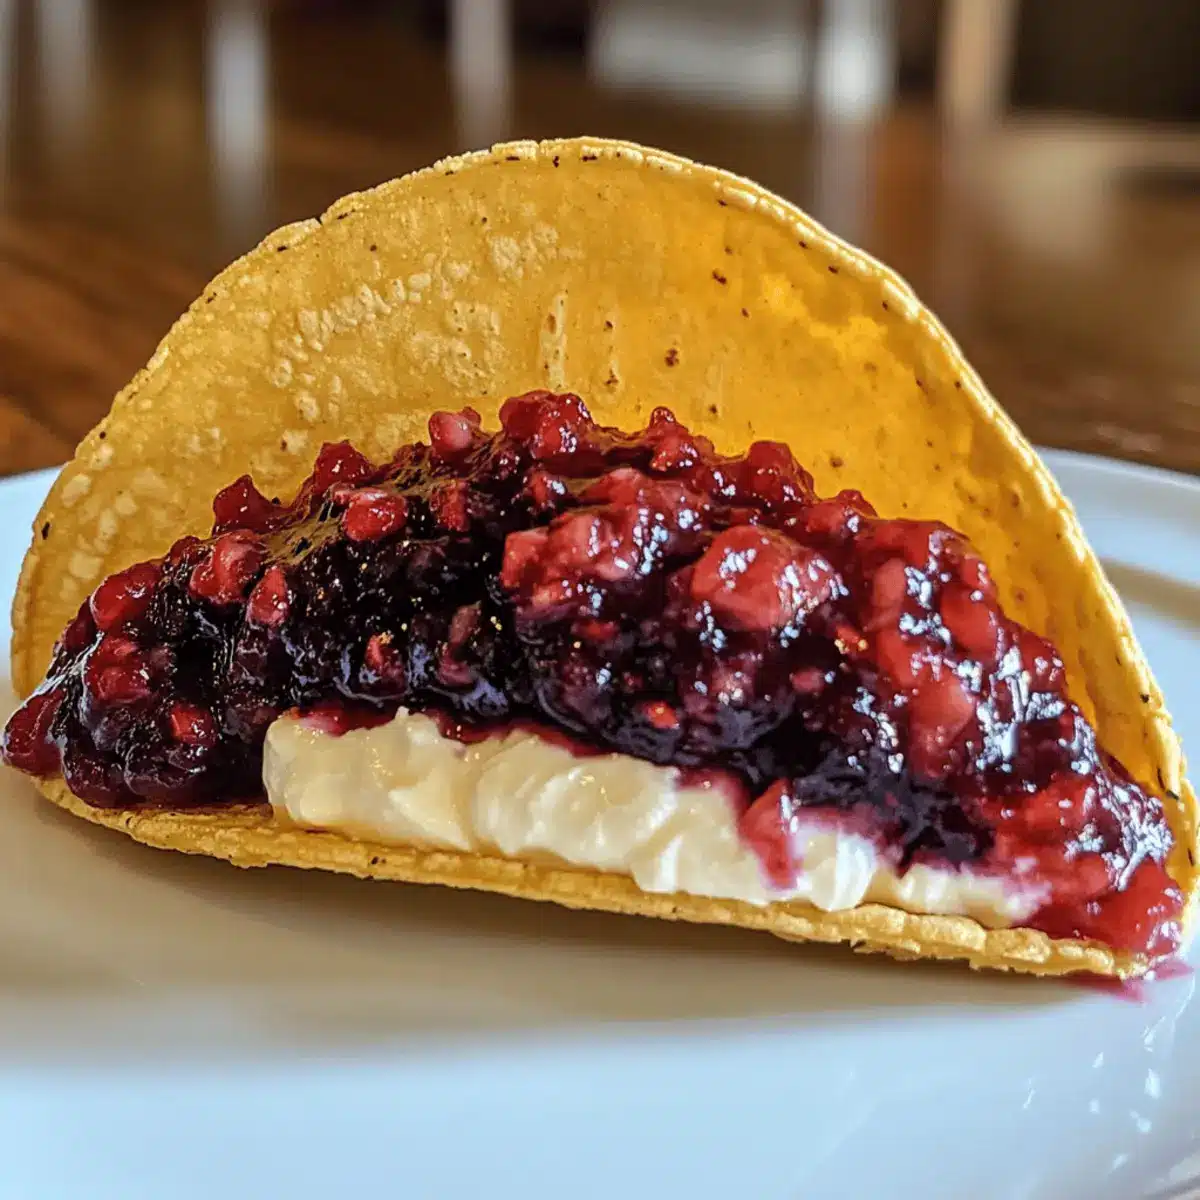
• Blueberry Jam – Adds a vibrant sweetness; feel free to use any fruit jam that tickles your fancy!
• Strawberry Jam – A fruity finishing touch; fresh fruit works just as well for a lighter option.
Step‑by‑Step Instructions for Berrylicious Cheesecake Tacos
Step 1: Preheat Your Oven
Start by preheating your oven to 400℉ (200℃). This ensures your Berrylicious Cheesecake Tacos will bake evenly and achieve a perfect golden brown color. While the oven warms up, gather your tortilla and other ingredients to streamline your preparation.
Step 2: Prepare the Tortillas
Take your 8-inch tortillas and stack them neatly. Using a 1.5-inch cookie cutter, cut out approximately five circles from the stack; this will be the base for your taco shells. As you cut, pierce each circle gently with a fork to prevent them from puffing in the oven and ensure they maintain their lovely taco shape.
Step 3: Shape the Taco Shells
In a small bowl, melt some unsalted butter. Dip each tortilla circle into the melted butter, allowing excess to drip off. Next, coat them generously with graham cracker crumbs, ensuring a delightful crunch. Then, press each buttered and crumb-coated circle into the cups of an inverted cupcake pan to shape them like tacos.
Step 4: Bake the Taco Shells
Place the cupcake pan in the preheated oven and bake the tortilla shells for about 10–12 minutes, or until they turn golden brown. Keep an eye on them; they should have a crisp texture when done. Once baked, remove the pan from the oven and let the shells cool completely to help them hold their shape.
Step 5: Make the Cheesecake Filling
In a mixing bowl, blend room temperature cream cheese, fresh lemon juice, and vanilla extract until you achieve a smooth and creamy consistency. Use a hand mixer on medium speed for about 2-3 minutes. This creamy filling will be the star of your Berrylicious Cheesecake Tacos, so take your time to ensure it’s free of lumps.
Step 6: Whip the Cream
In a separate bowl, pour in the heavy cream and add powdered sugar. Using an electric mixer, whip the cream on high until stiff peaks form, which usually takes about 3-5 minutes. Be careful not to over-whip, as you want it to remain light and airy for an indulgent filling.
Step 7: Combine Mixtures
Gently fold the whipped cream into the cream cheese mixture. Use a spatula to incorporate the two, making sure to maintain that fluffy texture you’ve just whipped up. This light and creamy filling will complement the crunch of your taco shells beautifully, making for irresistible Berrylicious Cheesecake Tacos.
Step 8: Assemble Your Tacos
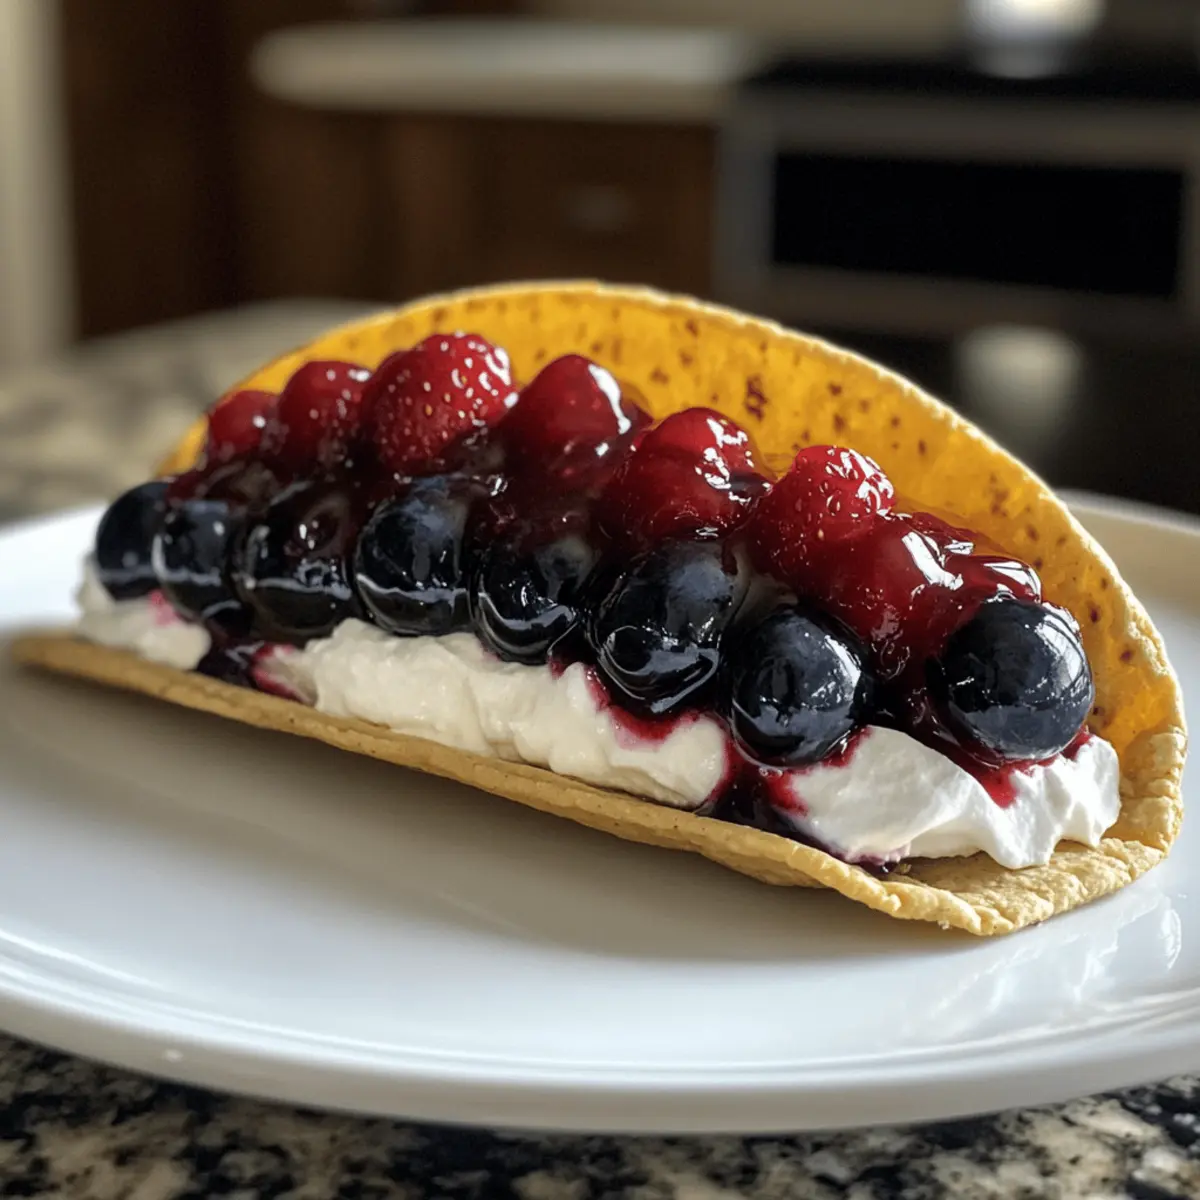
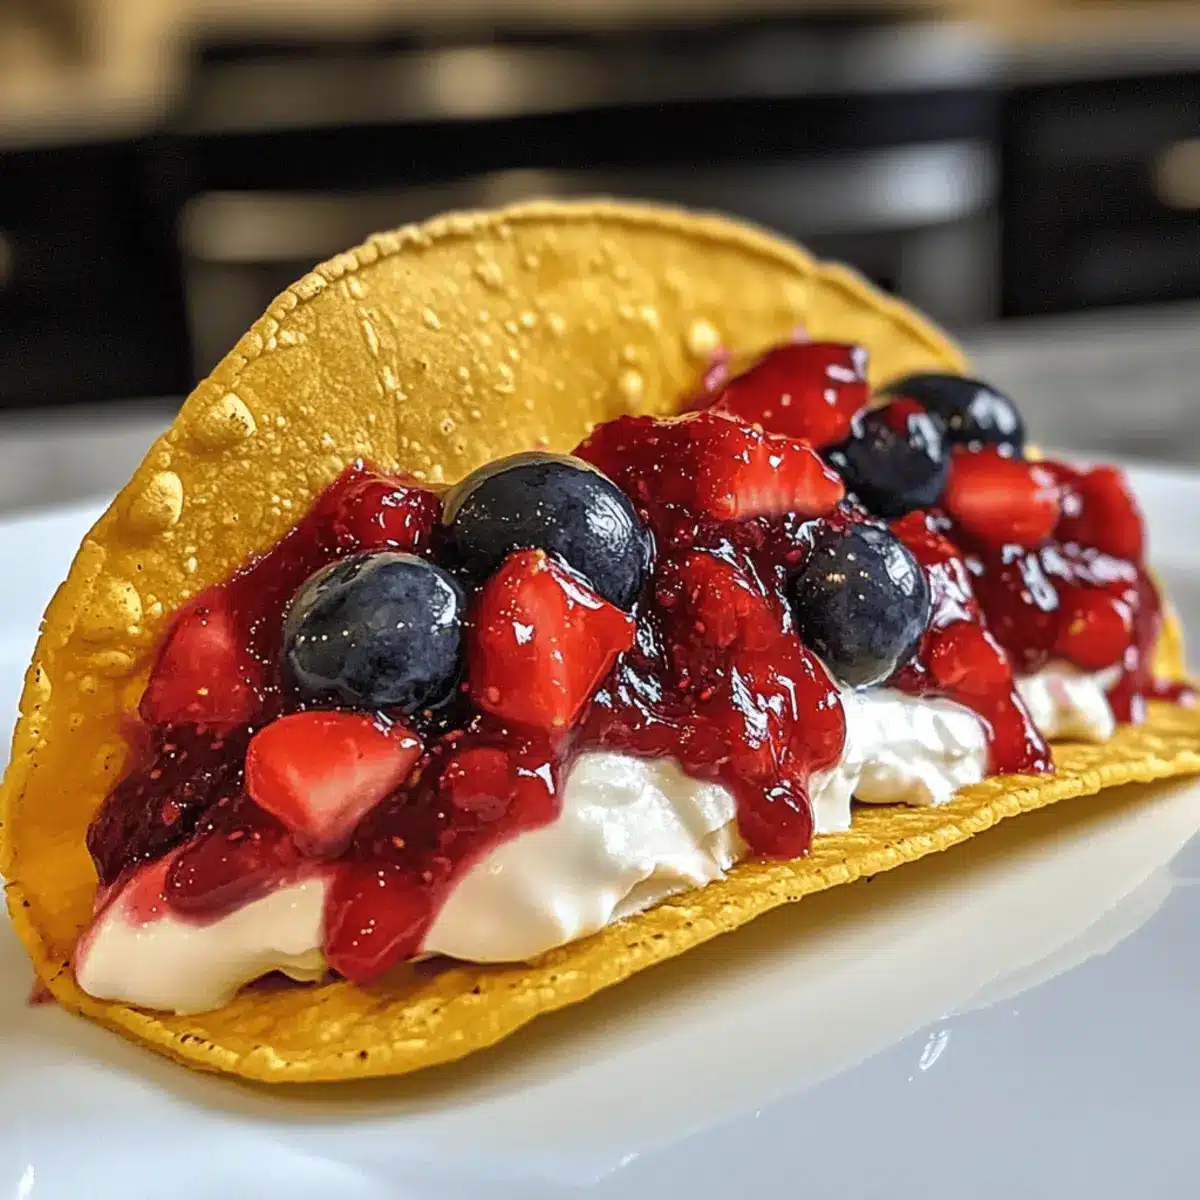
Now comes the fun part! Take your cooled taco shells and pipe or scoop the luscious cheesecake mixture into each shell. Fill them generously but avoid overstuffing. Finish by spooning a vibrant dollop of blueberry and strawberry jam on top, adding a fruity touch that elevates each delicious bite.
Step 9: Serve Immediately
For the best taste and texture, serve your Berrylicious Cheesecake Tacos right away. These delightful treats are best enjoyed fresh, allowing the crispy shell and creamy filling to shine. Watch as smiles light up the room when your guests take their first bite of this playful, scrumptious dessert!
Expert Tips for Berrylicious Cheesecake Tacos
- Room Temperature Cheese: Ensure your cream cheese is at room temperature to mix smoothly and prevent lumps in your filling for the Berrylicious Cheesecake Tacos.
- Gentle Folding: Carefully fold the whipped cream into your cream cheese mixture. Over-mixing can deflate the filling, resulting in a denser texture.
- Crispy Shells: If your taco shells are soft after baking, pop them back in the oven for an additional minute to achieve the desired crunch.
- Jam Alternatives: Experiment with different fruit jams or use fresh fruit toppings to customize flavors without overly sweetening your dessert.
- Prep Ahead: Make the taco shells ahead of time and store them in an airtight container until you’re ready to assemble, ensuring maximum texture!
What to Serve with Berrylicious Cheesecake Tacos
Imagine a vibrant summer gathering filled with laughter, sunshine, and tantalizing desserts that radiate joy.
- Fresh Berries: Serve an assortment of strawberries, blueberries, and raspberries to enhance the fruity flavors and add a refreshing burst to each bite.
- Vanilla Ice Cream: A scoop of creamy vanilla ice cream perfectly complements the rich cheesecake filling and melts beautifully into the crunchy taco shell.
- Whipped Cream: Light and airy, a dollop of whipped cream adds an indulgent and cloud-like texture, making the dessert even more delightful.
- Fruit Salad: Toss up a bright fruit salad with citrus notes and seasonal fruits to provide a light and zesty contrast to the sweetness of the tacos.
- Lemonade or Iced Tea: Refreshing beverages like homemade lemonade or iced tea offer a crisp, contrasting flavor that perfectly balances the rich dessert.
- Chocolate Sauce: Drizzling warm chocolate sauce over the tacos provides a luxurious layer of flavor that elevates the entire dessert experience.
How to Store and Freeze Berrylicious Cheesecake Tacos
Fridge: Keep unassembled taco shells in an airtight container for up to 3 days. For the best flavor, store the cheesecake filling separately and combine just before serving.
Freezer: You can freeze the cooked taco shells for up to 1 month; ensure they’re cooled and stored in a zip-top bag. Avoid freezing the cheesecake filling as it may alter the texture.
Reheating: If the taco shells lose their crispness after refrigeration, pop them in a preheated oven at 350℉ (175℃) for about 5 minutes to regain their crunch.
Assembly Reminder: For the best texture and flavor experience, assemble your Berrylicious Cheesecake Tacos just before serving, especially after freezing the shells.
Make Ahead Options
These Berrylicious Cheesecake Tacos are a wonderful option for meal prep, allowing you to enjoy a delicious dessert without last-minute fuss! You can prepare the taco shells up to 3 days in advance; simply store them in an airtight container to keep them fresh and crunchy. The cheesecake filling can also be made ahead and kept in the refrigerator for up to 24 hours. Just remember to gently fold in the whipped cream just before assembling to maintain that light and airy texture. When you’re ready to serve, simply pipe the filling into the taco shells and finish with the vibrant jams for a delightful treat that tastes just as fresh as the day it was made!
Berrylicious Cheesecake Tacos Variations
Feel free to let your creativity shine by customizing these delicious tacos to suit your taste and dietary needs!
-
Fruit Jam Variety: Use seasonal fruits or your favorite jams; mix it up with raspberry or peach for a unique twist!
-
Ricotta Filling: Swap cream cheese for ricotta for a lighter, fluffy filling that still keeps the cheesecake vibe.
-
Coconut Cream Substitute: For a dairy-free option, coconut cream makes a luxurious filling that’s rich and tasty.
-
Flavored Extracts: Switch vanilla extract for almond or orange extract to add a delightful touch to your cheesecake.
-
Mini Tacos: Use smaller tortillas to create bite-sized cheesecake tacos—perfect for parties or snacks!
-
Nutty Crust: Mix crushed nuts like almonds or pecans with graham cracker crumbs for an added crunch and flavor dimension.
-
Spicy Heat: Add a pinch of chili powder or cayenne pepper to the filling for a surprising kick against the sweetness.
-
Fresh Fruit Toppings: Top each taco with fresh berries or sliced bananas instead of jam for a fresher, natural flavor.
Exploring these variations lets you embrace the fun in your kitchen! And if you’re looking for more creative desserts, don’t miss my Burnt Basque Cheesecake or Marshmallow Whip Cheesecake. Enjoy the delicious journey!
Berrylicious Cheesecake Tacos Recipe FAQs
How do I choose the right tortillas for my Berrylicious Cheesecake Tacos?
Absolutely! For the best base, opt for 8-inch flour tortillas for a soft, pliable shell. If you need a gluten-free option, corn tortillas work beautifully, providing a different texture and flavor while keeping things deliciously light.
How should I store my Berrylicious Cheesecake Tacos?
If you want to keep the components fresh, store unassembled taco shells in an airtight container for up to 3 days at room temperature. Make sure to store the cheesecake filling separately in the fridge, also for a maximum of 3 days. Combining them just before serving ensures the optimal texture and flavor!
Can I freeze Berrylicious Cheesecake Tacos?
You can freeze the taco shells for up to 1 month! First, make sure they’re completely cooled, then pack them into a zip-top bag, removing as much air as possible. It’s best to avoid freezing the cheesecake filling, as it can change the texture. You can always make it fresh when you’re ready to serve!
What should I do if my taco shells are too soft after baking?
Very! If your taco shells aren’t crisp enough, simply pop them back into a preheated oven at 350℉ (175℃) for about 5 minutes. Keep a close eye on them to ensure they don’t over-bake, bringing them back to that perfect crunchy texture!
Are there any dietary considerations I should keep in mind?
Definitely! For anyone with dairy sensitivities, you can substitute cream cheese with a dairy-free version, such as cashew cream, and try coconut cream instead of heavy cream. Always check your jam ingredients for any added sugars or allergens if you’re serving guests with dietary restrictions!
Berrylicious Cheesecake Tacos: A Delicious Summer Treat
Ingredients
Equipment
Method
- Preheat your oven to 400℉ (200℃) for even baking.
- Prepare the tortillas by cutting 5 circles from the stack using a cookie cutter and pierce each circle gently.
- Melt the unsalted butter and dip each tortilla circle into it, then coat with graham cracker crumbs.
- Shape the tortilla circles into taco shells using an inverted cupcake pan and bake for 10–12 minutes until golden brown.
- Blend the cream cheese, lemon juice, and vanilla in a bowl until smooth and creamy.
- Whip the heavy cream with powdered sugar until stiff peaks form, being careful not to over-whip.
- Gently fold the whipped cream into the cream cheese mixture.
- Assemble the tacos by pipe the cheesecake mixture into each shell and top with blueberry and strawberry jam.
- Serve immediately for the best taste and texture.
Leave a Reply