
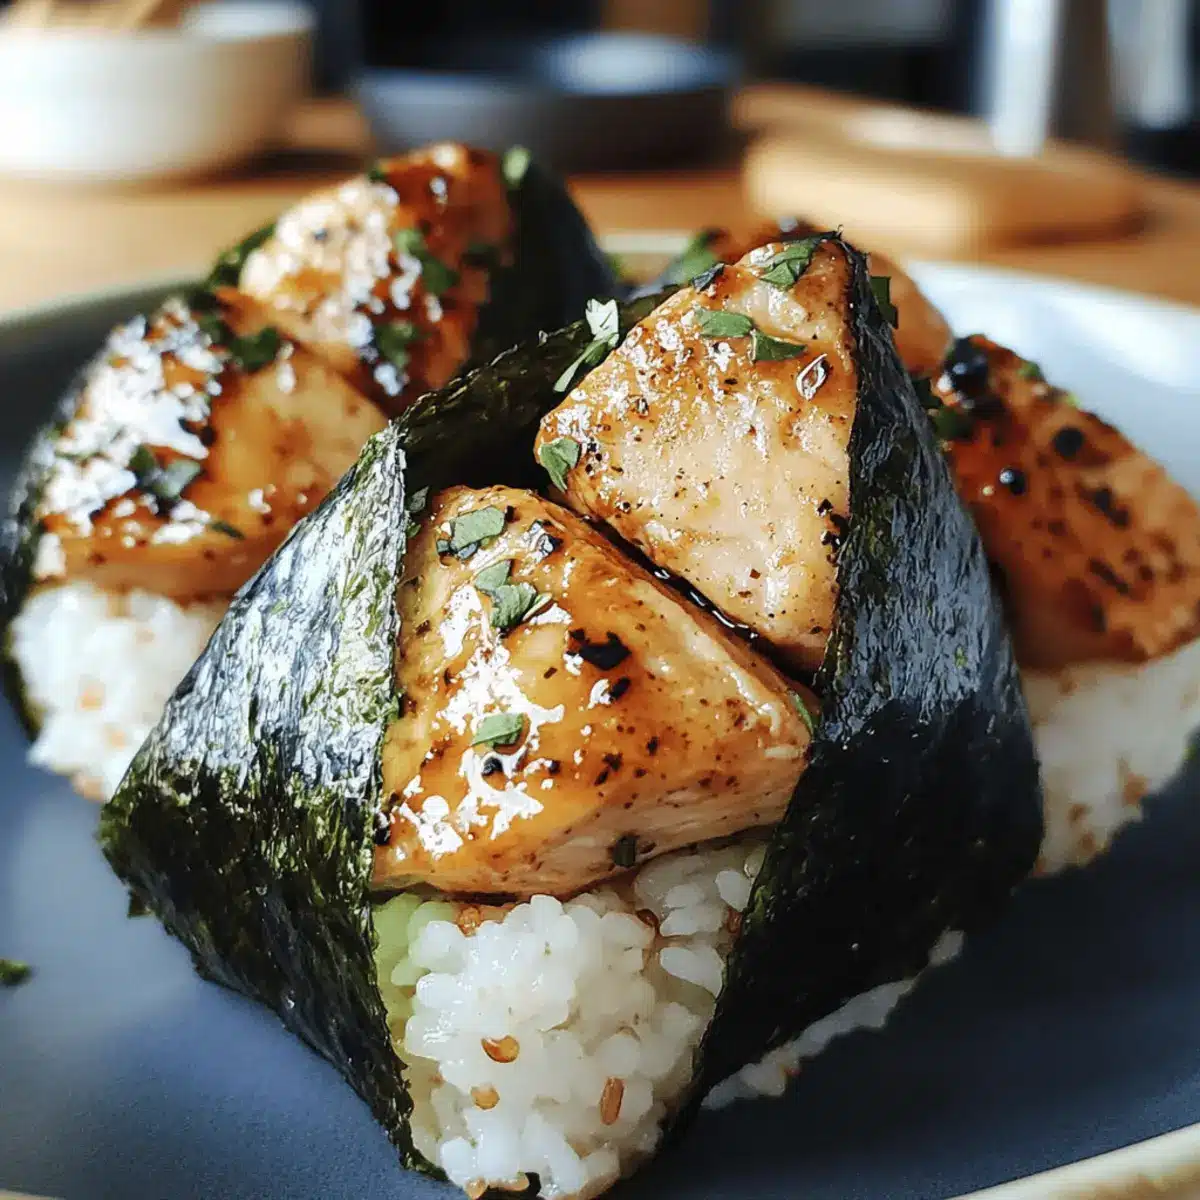
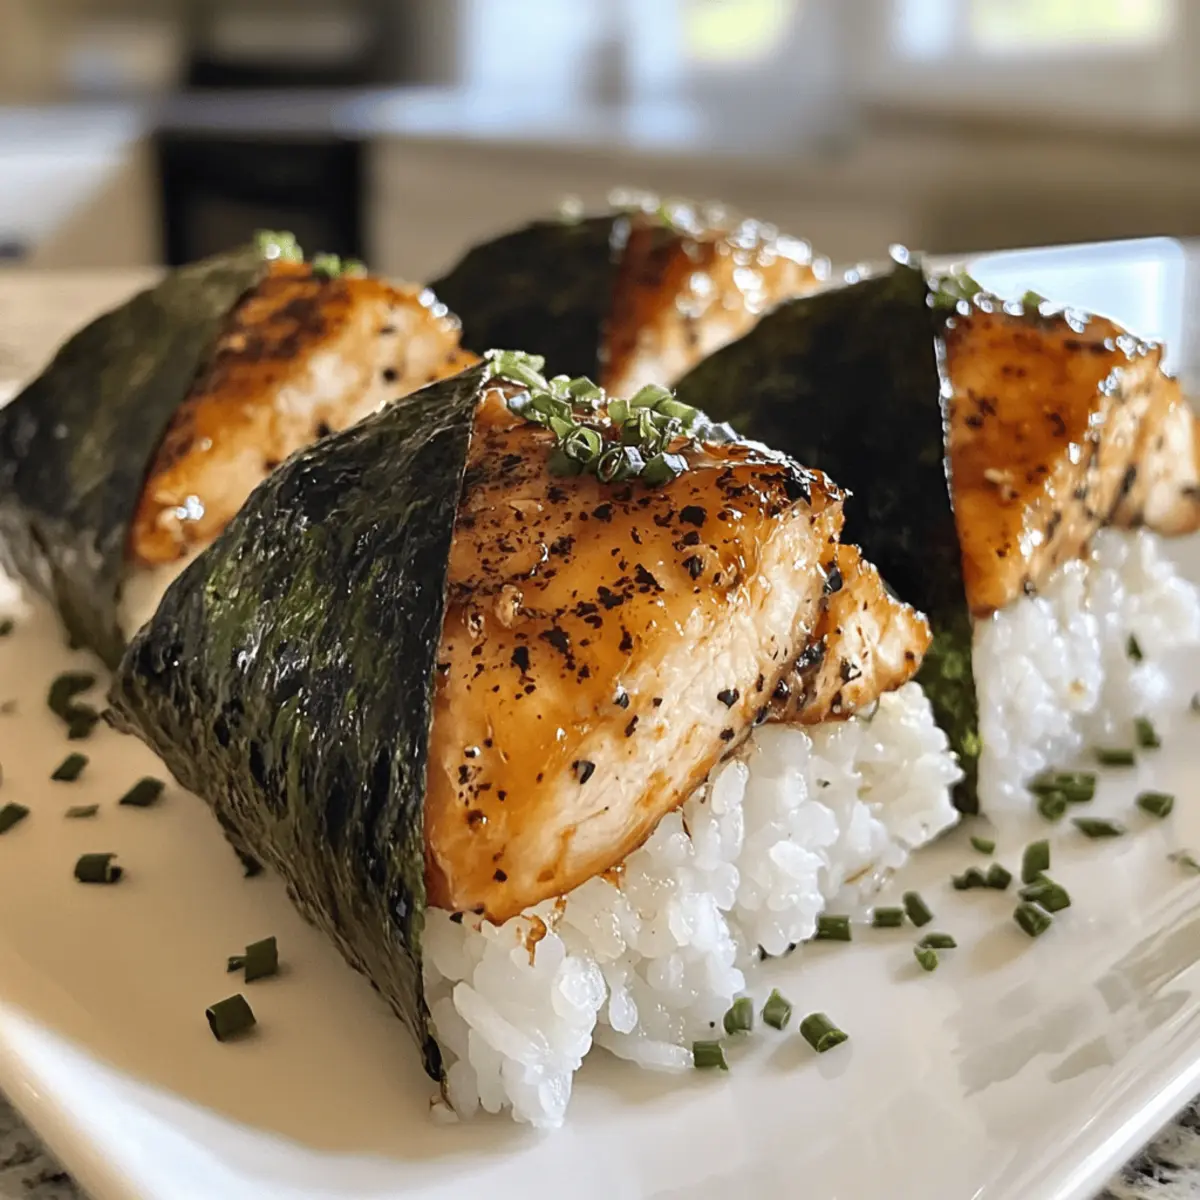
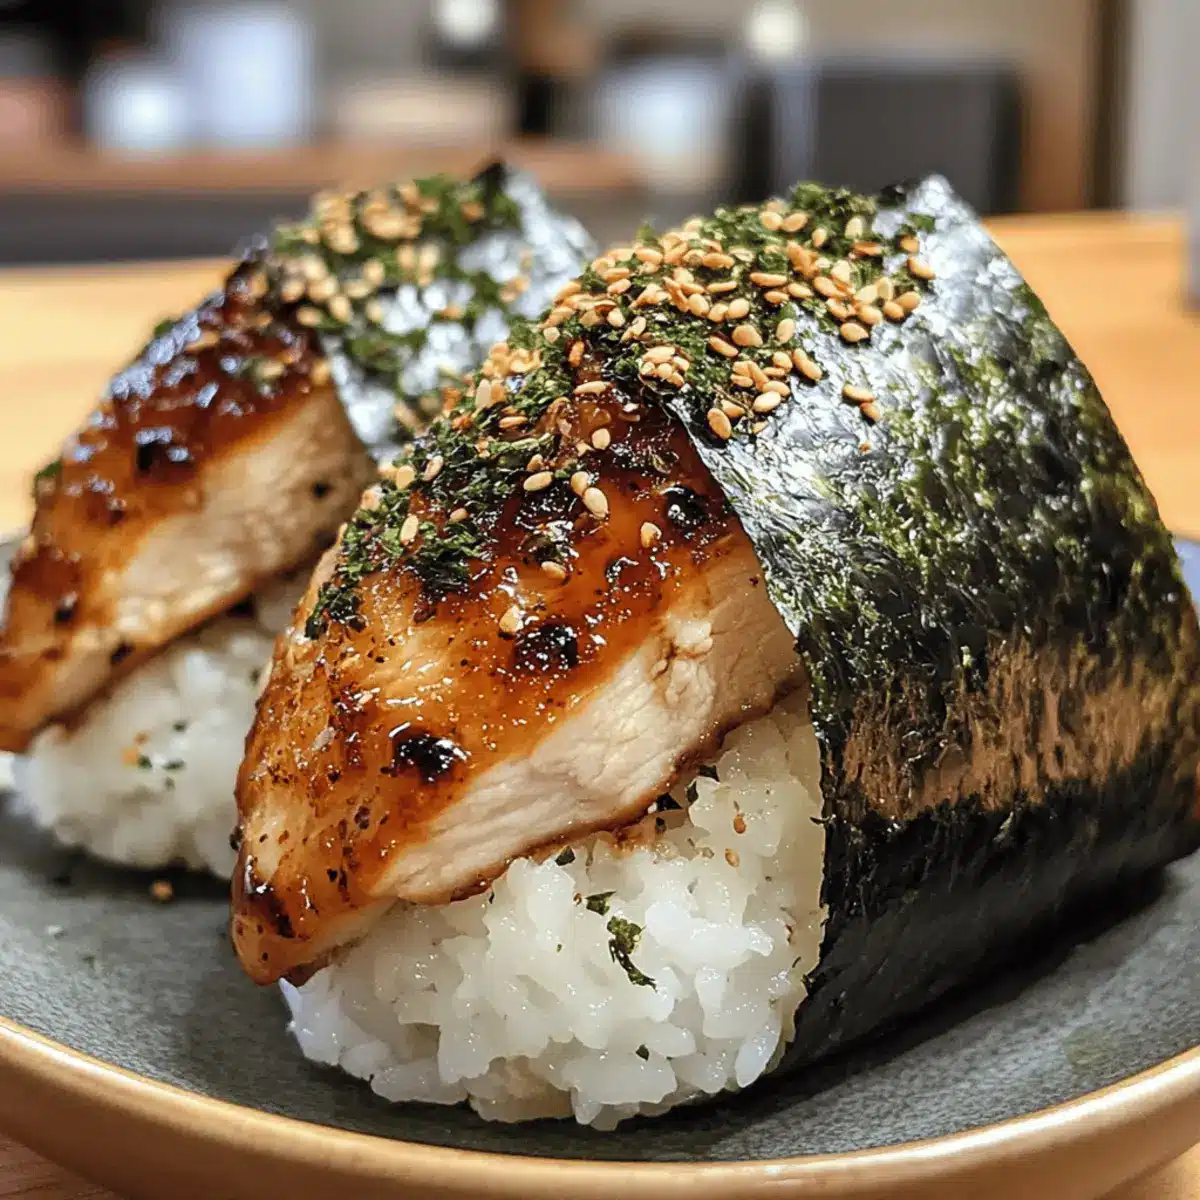
As I stood in my kitchen, the aroma of savory teriyaki chicken filled the air, whisking me away to the bustling streets of Japan. This Teriyaki Chicken Onigiri is a delightful snack that seamlessly combines tenderness with a hint of sweetness, making it the perfect finger food for any gathering or solo indulgence. With just a few simple steps, you can craft these rice balls filled with marinated chicken, allowing you to enjoy a quick, satisfying meal without the fuss of complex cooking. Not only are these onigiri easy to prepare, but they also transport beautifully, making them an ideal companion for picnics or lunchboxes. Are you ready to bring a taste of Japan into your home with this delicious recipe?
Why will you adore Chicken Onigiri?
Simplicity at Its Best: This recipe is straightforward, requiring minimal cooking skills while offering maximum flavor.
Savory and Sweet: The teriyaki filling brings together a perfect balance of sweetness and umami, making every bite irresistible.
Portable Snack: Ideal for picnics, lunchboxes, or on-the-go meals, you’ll find these onigiri easy to pack and enjoy anytime.
Customizable Delights: Feel free to experiment with fillings—try tofu for a vegetarian twist or add avocado for creaminess!
Cultural Experience: Enjoy a taste of Japan right at home, celebrating a traditional snack that’s loved by many. Don’t miss out on pairing it with Cheddar Bay Chicken for an exciting culinary adventure!
Chicken Onigiri Ingredients
For the Onigiri
• Cooked Sushi Rice – Essential for its sticky texture to hold the shape of your Chicken Onigiri.
• Salt – Enhances flavor; opt for fine salt for better distribution.
• Furikake (optional) – Adds umami and seasoning; sprinkle on top or mix into the rice for extra flavor.
• Nori Sheet – Wraps the onigiri, adding character and making it easy to handle; cut into small rectangles.
For the Teriyaki Filling
• Boneless Skinless Chicken Meat – The main protein for the onigiri filling; chicken thighs or ground chicken work as tasty substitutes.
• Soy Sauce – Adds umami and saltiness; a crucial ingredient for the marinade and sauce.
• Sake (or Water) – Provides moisture and flavor for the marinade; sake adds a distinctive touch.
• Baking Soda – Tenderizes the chicken for an inviting texture.
• Cornstarch – Creates a lovely glaze on the chicken when cooked.
• Mirin – Sweet rice wine that enhances the depth of the teriyaki sauce’s flavor.
• Brown Sugar – Sweetens the teriyaki sauce; pack it firmly for the best results.
• Oil – Essential for cooking the chicken; choose non-stick or vegetable oil for better frying.
• Minced Garlic – Infuses aromatic flavor into the chicken, elevating your Chicken Onigiri experience.
This collection of ingredients is all you need to make delicious Chicken Onigiri that will bring a taste of Japan into your home!
Step‑by‑Step Instructions for Teriyaki Chicken Onigiri
Step 1: Prepare Rice
Begin by cooking your sushi rice according to package instructions, ensuring it becomes sticky—this will help shape your Chicken Onigiri. Once the rice is cooked, gently mix in a pinch of salt and optional furikake for added flavor. Allow the rice to cool slightly while you prepare the chicken filling, keeping it warm but not hot to the touch.
Step 2: Marinate Chicken
While the rice cools, take your boneless skinless chicken and cut it into small, bite-sized pieces. In a bowl, combine the chicken with soy sauce, sake, baking soda, and cornstarch. Mix well to ensure each piece is coated, then cover the bowl and refrigerate for about 30 minutes to let the flavors meld, making your teriyaki filling extra delicious.
Step 3: Make Teriyaki Sauce
In a separate mixing bowl, combine soy sauce, mirin, and firmly packed brown sugar, stirring until the sugar dissolves completely. This sweet and savory teriyaki sauce will enhance the chicken filling in your onigiri. Set the sauce aside, ready for use once the chicken is cooked, and prepare your workspace for frying.
Step 4: Cook Chicken
Heat a non-stick pan over medium heat and add a splash of oil. Once hot, add the marinated chicken pieces, stir-frying for 2-3 minutes until they are golden brown and cooked through, with no pink remaining. The chicken should be sizzling and fragrant, fully absorbing the marinade’s flavors before you move on to the next step.
Step 5: Add Garlic & Sauce
Lower the heat slightly, then add minced garlic to the pan with the chicken. Cook for about 30 seconds until fragrant, taking care not to burn the garlic. Pour in the prepared teriyaki sauce and allow it to simmer, stirring until it thickens and glazes the chicken, creating a glossy coating. Once thickened, remove from heat and let it cool a moment.
Step 6: Shape Onigiri
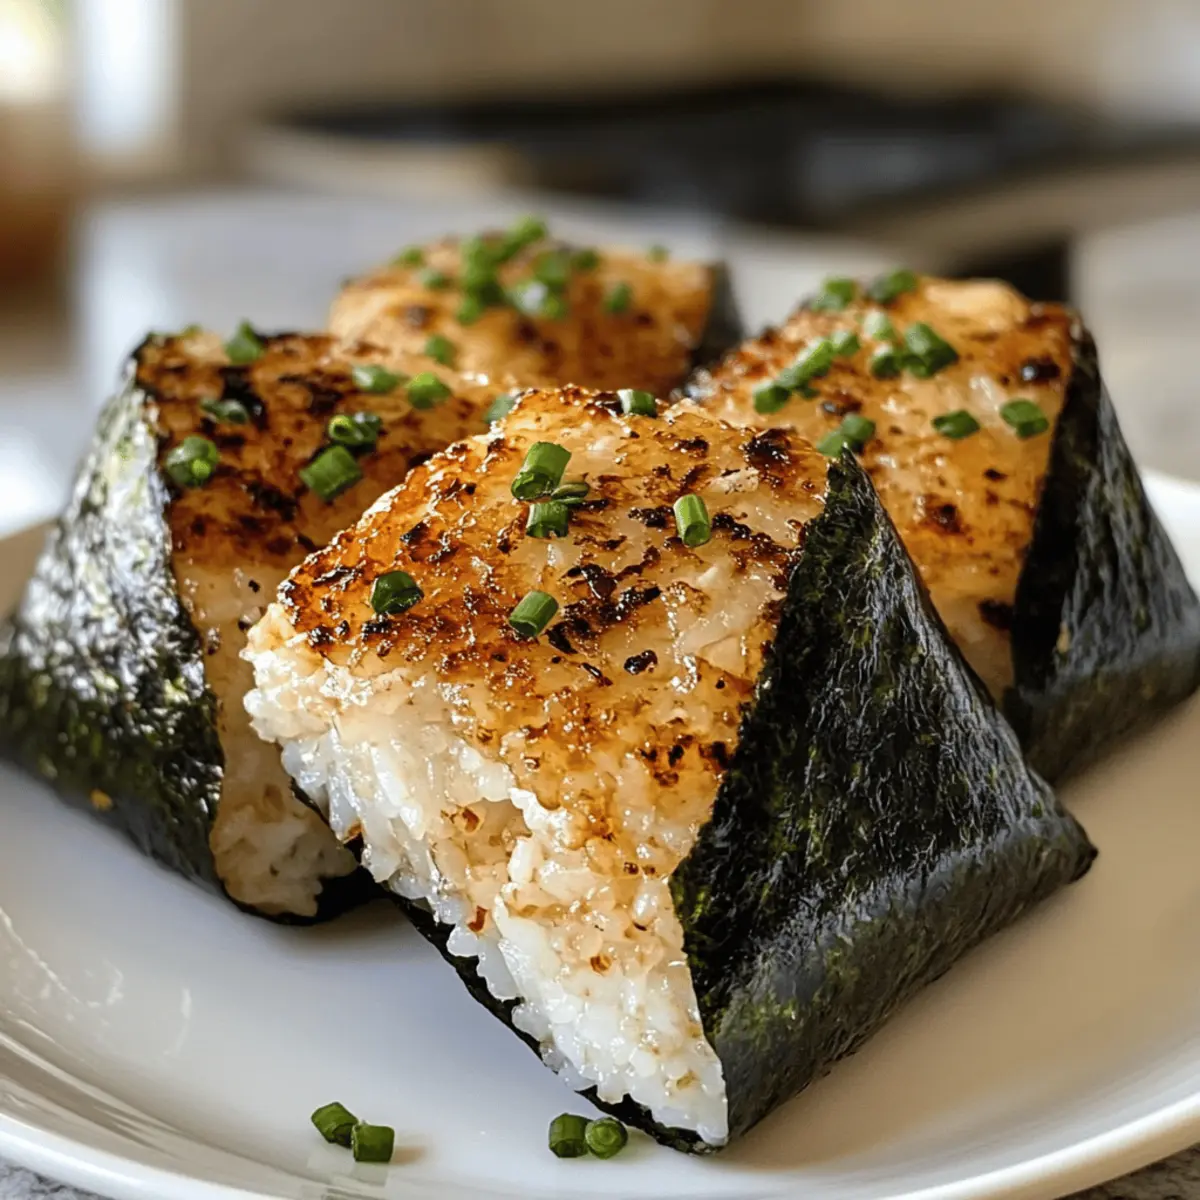
To form your Chicken Onigiri, wet your hands to prevent sticking and scoop out about ⅓ cup of the warm sushi rice. Make a small well in the center and fill it with the teriyaki chicken mixture. Gently cover the filling with more rice, pressing firmly but delicately to shape it into a triangle. Finally, wrap each onigiri with a piece of nori for easy handling and extra flavor.
Make Ahead Options
These Chicken Onigiri are perfect for busy weeknights and meal prepping enthusiasts! You can easily prepare the sushi rice and marinate the chicken up to 24 hours in advance. Simply cook your sushi rice, mix in salt and optional furikake, then store it in an airtight container in the refrigerator. For the chicken, combine it with soy sauce, sake, baking soda, and cornstarch, sealing it in a bowl for maximum flavor infusion. When you’re ready to serve, stir-fry the marinated chicken and shape the onigiri with the cooled rice. This way, you can enjoy a delicious homemade snack with minimal effort and just as much flavor!
Storage Tips for Chicken Onigiri
Room Temperature: Enjoy fresh Chicken Onigiri at room temperature for up to 2 hours; they are best consumed shortly after preparation for optimal flavor and texture.
Fridge: Store any leftovers in an airtight container in the fridge for up to 2 days. Although they’re still tasty, note that the rice may lose some of its original texture.
Freezer: To freeze, wrap each onigiri individually in plastic wrap and place them in a freezer-safe bag. They can be stored for up to 2 months; defrost in the fridge overnight before eating.
Reheating: If desired, reheat in a microwave wrapped in a damp paper towel for about 20-30 seconds until warm, bringing some life back to your Chicken Onigiri!
Chicken Onigiri Variations & Substitutions
Feel free to make these delightful Chicken Onigiri your own with these tempting suggestions!
-
Vegetarian Option: Substitute chicken with tofu marinated in teriyaki sauce for a plant-based twist. The tofu absorbs all the lovely flavors, providing a satisfying bite.
-
Spicy Kick: Add sriracha or chili paste to the teriyaki sauce for extra heat. A hint of spice can create a whole new experience that elevates your onigiri.
-
Avocado Bliss: Include slices of avocado inside the onigiri for a creamy texture. Not only does it enhance flavor, but it also adds a delightful richness that rounds out the dish.
-
Pickled Veggies: Mix in pickled vegetables like ginger or daikon for a tangy crunch. These little additions can brighten each bite and pay homage to traditional Japanese flavors.
-
Chirashi Style: For a colorful twist, top your onigiri with shredded carrots and cucumber. This adds both texture and visual appeal, making it a stunning snack.
-
Furikake Variation: Experiment with different flavors of furikake to sprinkle on top or mix into the rice. Seaweed, sesame, or even spicy variations can add a delightful umami touch.
If you’re interested in further flavorful chicken dishes, don’t forget to check out Dolly’s Chicken and Stuffing Casserole for a comforting meal or Thai Peanut Chicken Wraps when you crave something exotic!
-
Coconut Rice: Swap out regular sushi rice for coconut-infused rice for added sweetness and a tropical flair. It’ll transport your taste buds on an unforgettable journey!
-
Sesame Oil Drizzle: Finish your onigiri with a drizzle of toasted sesame oil for a luscious, nutty flavor. This simple addition can elevate your Chicken Onigiri from delicious to unforgettable!
Expert Tips for Chicken Onigiri
- Sticky Rice: Ensure the sushi rice is adequately sticky by adding up to 15% more water during cooking. This helps maintain the perfect shape for your Chicken Onigiri.
- Hands Up: Wetting your hands before handling rice prevents it from sticking. But avoid using excessive moisture, as this can make shaping tricky.
- Gentle Molding: When forming the onigiri, press firmly yet gently. Over-compressing can lead to a dense texture instead of the desired light and fluffy rice.
- Fresh Chicken: Use fresh, high-quality chicken for the filling. Avoid overcooking to maintain juiciness and tenderness in your Chicken Onigiri.
- Extra Flavor: For added depth, consider including fresh herbs or grated ginger in your teriyaki filling. These small tweaks can elevate your dish remarkably!
What to Serve with Teriyaki Chicken Onigiri
Transform your meal into a feast by pairing these delightful onigiri with equally exciting sides and treats.
-
Crispy Edamame:
These lightly salted pods offer a fresh, crunchy contrast to the tender onigiri. Their pop-in-your-mouth goodness makes them a perfect companion. -
Miso Soup:
The warm, savory broth of miso soup enhances the umami experience while providing a comforting, warm element to the meal. -
Seaweed Salad:
With its tangy dressing and refreshing crunch, this salad adds a bright note to the meal, complementing the rich teriyaki chicken nicely. -
Pickled Vegetables:
The tangy, crisp bites of pickled vegetables cut through the sweetness of the teriyaki filling, offering a delightful contrast on the palate. -
Green Tea:
A soothing cup of green tea balances the flavors of the onigiri and aids digestion. It brings a gentle warmth to your meal. -
Tempura Vegetables:
Crispy, lightly battered veggies provide both texture and flavor, creating a delicious duo that perfectly complements the savory onigiri. -
Japanese Fruit Dessert:
Try sliced mochi or fresh melon for a sweet yet light ending to your meal that echoes the flavors of Japan, leaving you satisfied.
Chicken Onigiri Recipe FAQs
What type of rice should I use for onigiri?
For the best results, you’ll want to use short-grain sushi rice. This type of rice becomes sticky when cooked, which is essential for shaping into onigiri. If you can’t find sushi rice, you can use medium-grain rice, but ensure it has a similar texture.
How do I know when the chicken is cooked through?
Cook the marinated chicken for 2-3 minutes until it’s golden brown, and no pink remains. For safety, the internal temperature should reach 165°F (74°C). If you’re unsure, using a meat thermometer is a great way to check!
Can I make Chicken Onigiri in advance?
Absolutely! You can prepare the chicken filling and rice ahead of time. Store the chicken in an airtight container in the fridge for up to 2 days. Just assemble the onigiri before serving for the best texture. Enjoy them fresh for optimal flavor!
How should I store leftover Chicken Onigiri?
Leftovers can be kept in an airtight container in the fridge for up to 2 days. The rice may lose some texture over time, but they’re still tasty! If you want to extend their life, you can freeze them by wrapping each onigiri in plastic wrap and placing them in a freezer-safe bag for up to 2 months.
Can I freeze Chicken Onigiri? If so, how?
Yes! To freeze your Chicken Onigiri, wrap each one individually in plastic wrap so they’re secure. Then, place them in a freezer-safe bag. They’ll stay fresh for up to 2 months. When you’re ready to eat, simply defrost them in the fridge overnight. Reheat in the microwave wrapped in a damp paper towel for about 20-30 seconds until warm.
Are there any dietary considerations for Chicken Onigiri?
Absolutely! If you have allergies, always check ingredients like soy sauce for wheat and gluten. Additionally, if you’re preparing these for a pet, avoid any seasonings like garlic that can be harmful to them. For a vegetarian option, substitute chicken with tofu or your favorite vegetables!
Delicious Chicken Onigiri: Your New Favorite Japanese Snack
Ingredients
Equipment
Method
- Prepare the sushi rice according to package instructions and mix in salt and optional furikake. Allow it to cool slightly.
- Marinate chicken in a bowl with soy sauce, sake, baking soda, and cornstarch, then refrigerate for about 30 minutes.
- In a separate bowl, combine soy sauce, mirin, and brown sugar to make the teriyaki sauce, stirring until sugar dissolves.
- Cook the marinated chicken in a non-stick pan over medium heat until golden brown and cooked through, about 2-3 minutes.
- Add minced garlic to the pan, cook for 30 seconds, then pour in teriyaki sauce and let simmer until thickened.
- Wet your hands, scoop out rice, place chicken filling in the center, cover with more rice, and shape into onigiri. Wrap with a nori piece.
Leave a Reply