
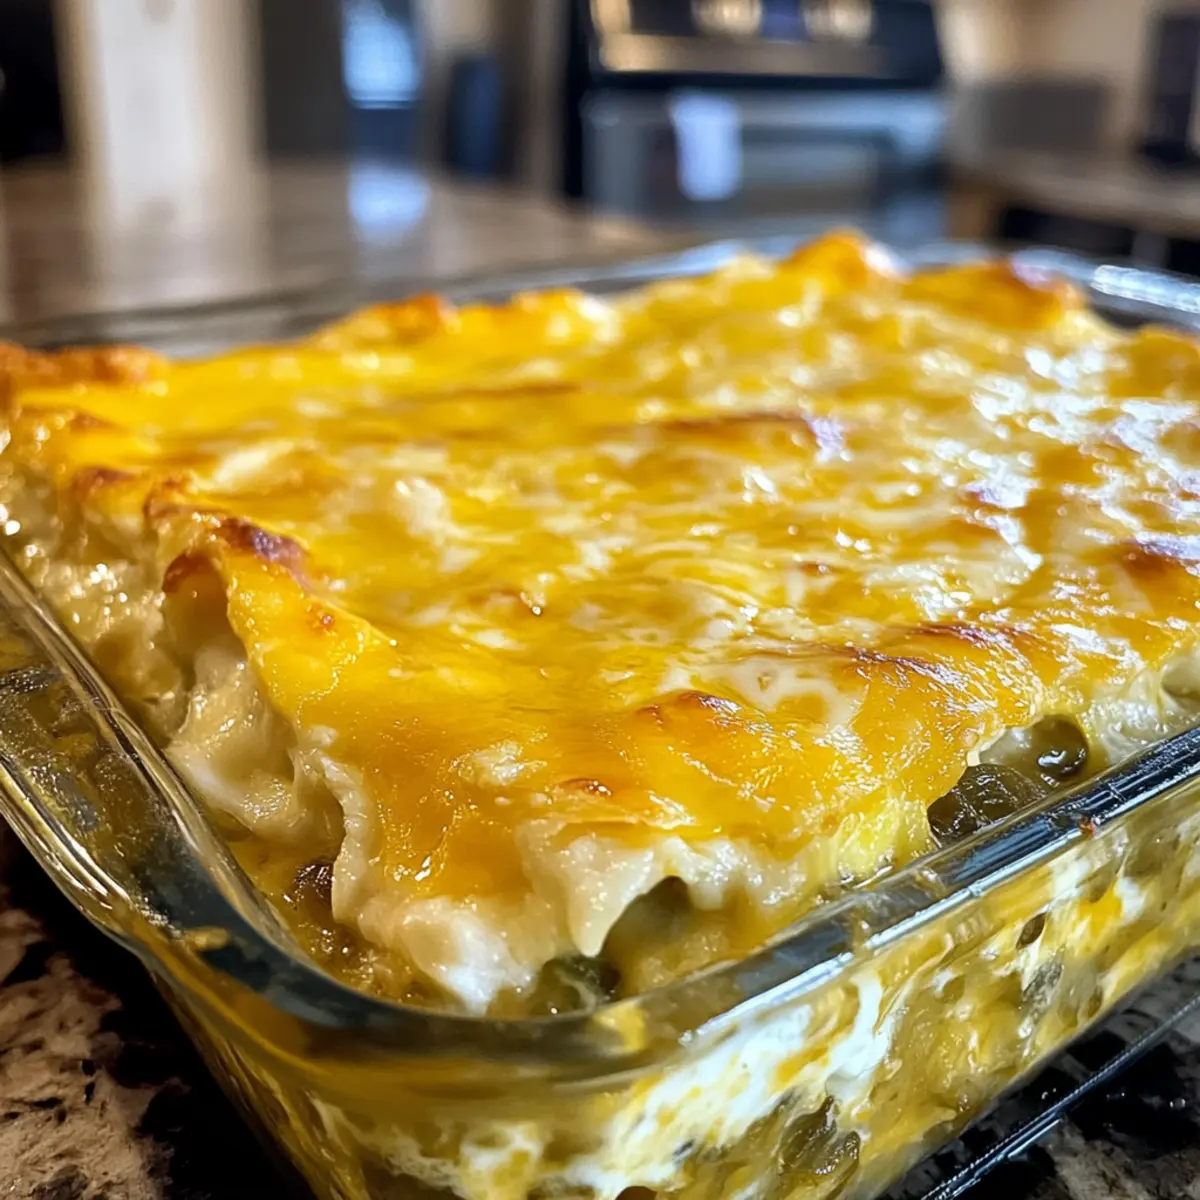
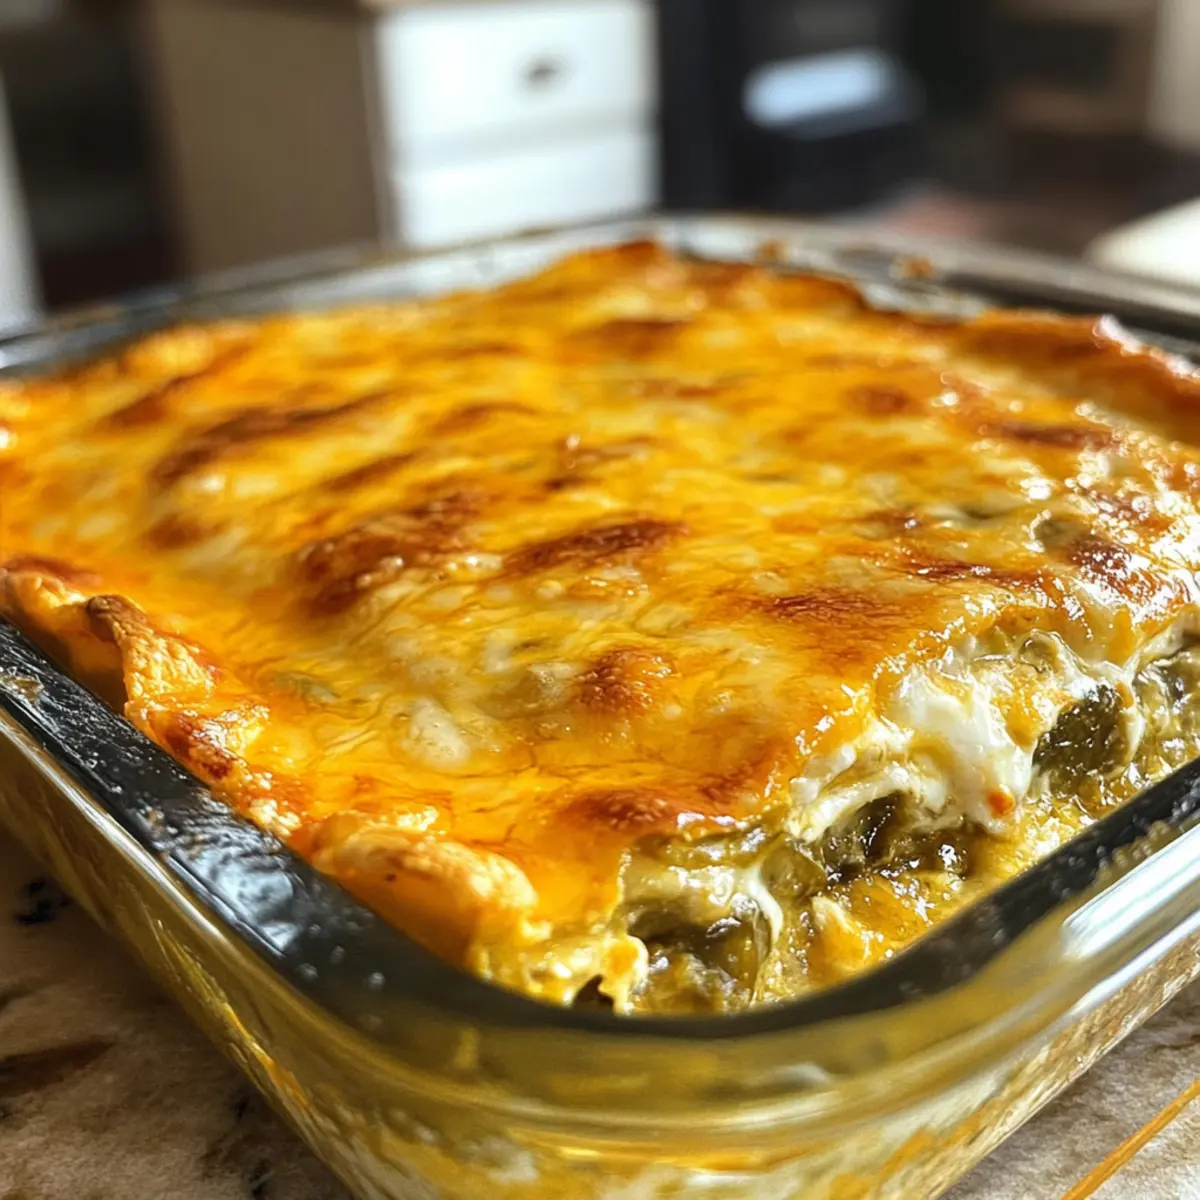
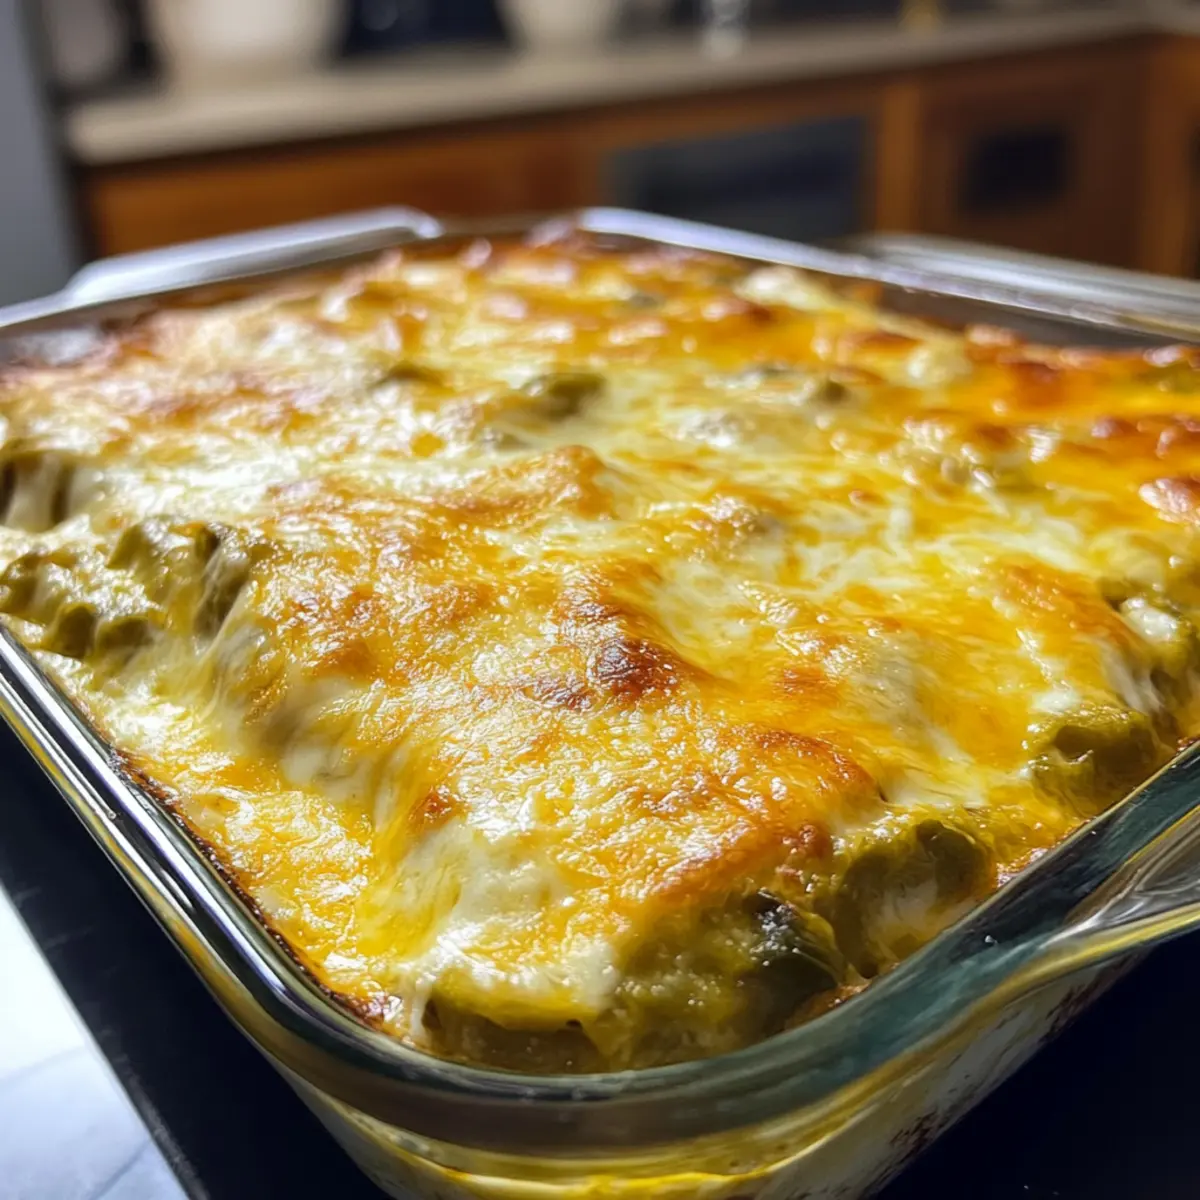
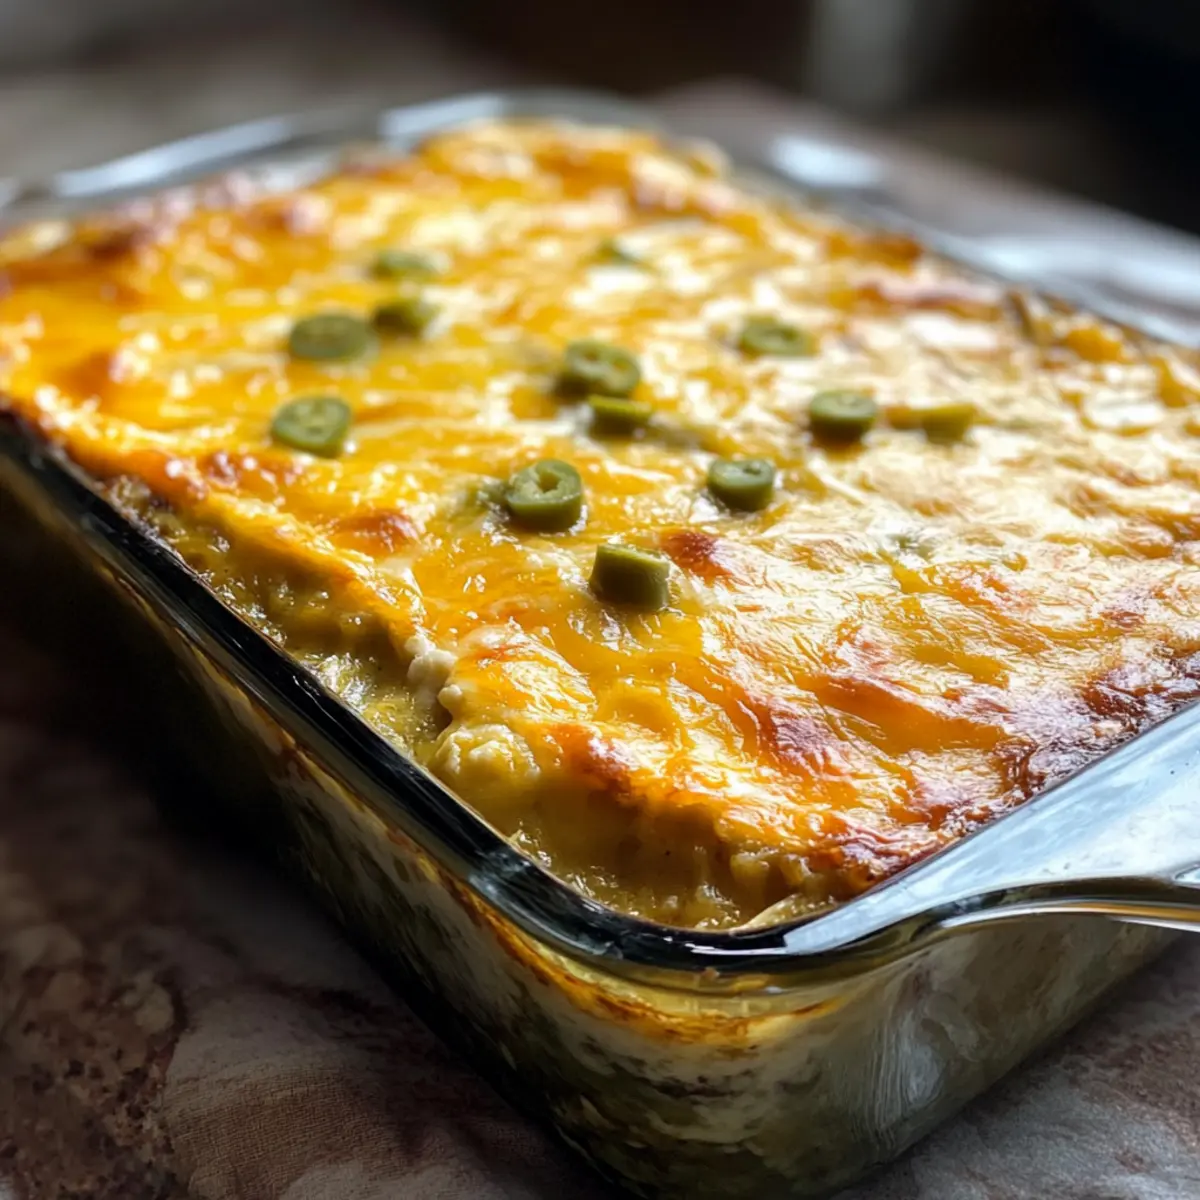
The moment I opened my oven door, I was greeted by a comforting wave of warmth and the enticing scent of roasted green chiles mingling with melted cheese. My take on the classic Chile Rellenos has transformed into an easy, oven-baked casserole that captures all the vibrant flavors we know and love. With each slice of this delicious Chile Rellenos Casserole, you’re treated to a delightful blend of spicy peppers, creamy cheeses, and a pillowy egg base that makes it perfect for breakfast, lunch, or dinner. Not only is it budget-friendly, but it also makes meal-prepping a breeze for those busy weekdays. Who can resist a dish that brings the family together while being effortlessly delicious? Have you ever tried turning a beloved traditional dish into a casserole? Let’s dive in!
Why is Chile Rellenos Casserole a Must-Try?
Comforting Deliciousness: This casserole blends roasted green chiles with gooey cheeses, creating a comforting dish that’s perfect for any meal.
Budget-Friendly: With simple ingredients, it’s easy on your wallet while delivering big flavors.
Make-Ahead Magic: Prepare it the night before and bake fresh in the morning—ideal for busy days!
Versatile Pairing: Serve it with black beans, salsa, or a fresh salad to round out your meal.
Crowd-Pleasing: Friends and family will love this flavorful twist on a classic Mexican dish. Your next gathering deserves a centerpiece like this!
Chile Rellenos Casserole Ingredients
For the Veggie Base
- Roasted Green Chiles – Provides the characteristic smoky-spicy flavor; canned fire-roasted chiles are a great substitution if fresh are unavailable.
For the Cheesy Layers
- Monterey Jack Cheese – Known for its excellent meltability and creamy texture; try substituting with Mozzarella or Pepper Jack for different flavors.
- Cheddar Cheese – Adds a sharp, rich flavor; a Colby or Mexican cheese blend works well for a varied taste.
For the Egg Mixture
- Eggs – Essential for the structure and richness of the casserole.
- Whole Milk – Contributes creaminess; half-and-half can make it richer, or use unsweetened almond milk for a dairy-free option.
- All-Purpose Flour – Provides structure; you can replace it with a gluten-free flour blend if needed.
For Seasoning
- Salt and Pepper – Enhances the overall flavor profile of the dish; adjust to taste.
This Chile Rellenos Casserole brings the traditional flavors you love into an easy-to-make format, perfect for satisfying every appetite!
Step‑by‑Step Instructions for Chile Rellenos Casserole
Step 1: Preheat the Oven
Start by preheating your oven to 350°F (175°C) to create the perfect baking environment for the Chile Rellenos Casserole. This initial step ensures even cooking throughout the dish, allowing the flavors to meld beautifully as they bake.
Step 2: Whisk the Egg Mixture
In a mixing bowl, combine eggs and whole milk, whisking until the mixture is smooth and frothy. This will form the base of your casserole, adding richness and structure. Take your time here to ensure everything is well blended for a fluffy texture once baked.
Step 3: Layer the Chiles
In a greased 9×13 inch baking dish, layer half of the roasted green chiles evenly across the bottom. These chiles not only add a smoky-spicy flavor but will also act as the flavorful foundation of the Chile Rellenos Casserole. Spread them out to cover the entire dish.
Step 4: Add the Cheese
Sprinkle half of the Monterey Jack and cheddar cheeses over the chiles, allowing the cheese to melt and create that ooey-gooey texture that everyone loves. This cheesy layer will meld perfectly with the chiles, adding richness to every bite.
Step 5: Pour the Egg Mixture
Carefully pour half of the egg mixture over the layered chiles and cheese in the baking dish. Move slowly to ensure even distribution; this will help bind the casserole together as it bakes, making the flavors combine beautifully.
Step 6: Repeat the Layers
Now, repeat the layering process by adding the remaining roasted green chiles followed by the rest of the cheeses. This second layer will mirror the first, ensuring that every slice of your Chile Rellenos Casserole has that delightful combination of flavors.
Step 7: Finish with the Egg Mixture
Pour the remaining egg mixture evenly over the top layer. This final pour will meld all the ingredients together while baking, creating a cohesive and delicious casserole that holds its shape beautifully.
Step 8: Bake the Casserole
Place your assembled dish in the preheated oven and bake for about 35 minutes. Keep an eye on it; the top should be golden brown, and a knife inserted into the center should come out clean, signaling that your Chile Rellenos Casserole is perfectly cooked.
Step 9: Cool and Serve
Once baked, remove the casserole from the oven and allow it to cool slightly for about 10 minutes. This resting period helps the dish set, making it easier to slice and serve. The fragrant, mouthwatering aroma will make it hard to wait!
What to Serve with Chile Rellenos Casserole
Enhance your meal experience with delightful sides that complement the rich flavors of this comforting casserole.
- Warm Tortillas: Serve fluffy tortillas on the side for wrapping up bites of the casserole, providing a satisfying texture contrast.
- Tangy Salsa: A bright, zesty salsa adds a refreshing kick that balances the richness of the cheese, making each bite more vibrant.
- Fresh Green Salad: A simple salad with crisp greens, cherry tomatoes, and a light vinaigrette brings freshness to your plate and cuts through the creaminess.
- Black Beans: Protein-packed black beans on the side offer a hearty element, enhancing the overall flavor profile while keeping it nutritious.
- Guacamole: Creamy guacamole adds a cool, smooth touch that perfectly complements the spicy chiles in the casserole, elevating the taste experience.
- Rice and Beans: A side of fluffy rice and beans creates a comforting combo that fills out the meal while paying homage to traditional Mexican fare.
- Margaritas: For a fun pairing, consider serving refreshing margaritas, bringing a festive mood and delightful citrus notes to the table.
- Churros: For dessert, indulge in sweet, crispy churros dusted with cinnamon sugar, providing a delightful finish to your flavorful meal.
Make Ahead Options
These Chile Rellenos Casserole preparations are perfect for busy home cooks looking to save time! You can assemble the entire casserole up to 24 hours in advance. Simply layer the chiles, cheeses, and egg mixture as instructed, then cover tightly with plastic wrap and refrigerate. To maintain the casserole’s quality, wait to bake it until just before serving. When you’re ready, pop it in the preheated oven and bake for about 35 minutes. This way, you’ll enjoy a fresh, golden, and cheesy meal that tastes just as delicious as when it was first made, all without the last-minute rush!
How to Store and Freeze Chile Rellenos Casserole
Refrigerator: Store leftover Chile Rellenos Casserole tightly wrapped in plastic wrap or aluminum foil for up to 4 days to maintain its moisture and flavor.
Freezer: For longer storage, freeze the casserole in an airtight container for up to 2 months. Make sure it’s completely cooled before wrapping.
Reheating: To reheat, thaw overnight in the fridge if frozen, then bake at 350°F (175°C) until warmed through, about 20–30 minutes.
Make-Ahead: Consider assembling the casserole the night before and refrigerating it unbaked. Simply pop it in the oven the next day for a fresh, delicious meal!
Expert Tips for Chile Rellenos Casserole
-
Even Layers: Ensure you layer ingredients evenly to guarantee consistent cooking throughout the casserole, preventing any soggy or overly dry spots.
-
Cheese Choice: Experiment with different cheeses like Pepper Jack or a Mexican blend to add varied flavors to your Chile Rellenos Casserole without losing that creamy texture.
-
Egg Mixture: Whisk eggs and milk until well combined for a fluffy texture. Avoid over-mixing, as this can create a denser casserole than desired.
-
Watch the Bake: Keep an eye on the baking time; take it out as soon as the top is golden, and a knife comes out clean to avoid dryness.
-
Storage Tips: Leftover casserole can be tightly wrapped and refrigerated for up to 4 days or frozen for up to 2 months, perfect for meal prep!
Chile Rellenos Casserole Variations
Feel free to make this comforting dish your own with these exciting twists and substitutions!
-
Spice It Up: Use jalapeños or habaneros for a fiery kick. Adding a little heat can elevate the flavor profile beautifully.
-
Protein Boost: Mix in cooked sausage or shredded chicken for an extra protein punch. The savory meat will balance wonderfully with the creamy texture.
-
Vegetarian Protein: Replace meat with black beans or tofu to keep it hearty and satisfying. These options maintain great flavor and texture while being budget-friendly.
-
Creamy Dairy-Free: Swap whole milk for unsweetened almond milk or a creamy cashew milk to make it dairy-free yet luscious. Your taste buds won’t miss the dairy!
-
Flavorful Cheese Blend: Instead of just Monterey Jack, consider using a blend of Queso Fresco and Cotija for an authentic Mexican flair. The variety adds depth to each bite.
-
Crunchy Topper: Add crushed tortilla chips on top during the last 10 minutes of baking for a delightful crunch. This can bring your casserole to a whole new level of texture.
-
Herb Infusion: Toss in fresh herbs like cilantro or green onions for a burst of freshness. They’ll brighten the entire dish, making every slice feel extra special.
-
Zesty Lime: Squeeze fresh lime juice over each serving for a delightful zing. This small addition can really enhance the overall flavor experience.
If you’re looking for more delicious casseroles, be sure to check out our Spicy Southern Casserole or Baked Cream Casserole for more inspiration!
Chile Rellenos Casserole Recipe FAQs
How do I choose the right chiles for the casserole?
Choosing the right chiles is essential for that signature flavor! Look for fresh, firm roasted green chiles without dark spots or blemishes. If unavailable, canned fire-roasted chiles work perfectly as a substitute, offering a good amount of smoky flavor without the extra work.
How should I store the leftover casserole?
Absolutely! Leftover Chile Rellenos Casserole should be stored tightly wrapped in plastic wrap or aluminum foil in the refrigerator. It will stay fresh for up to 4 days. Just make sure to cool it completely before wrapping to avoid condensation, which can make it soggy.
Can I freeze the Chile Rellenos Casserole?
Yes, freezing is a great option for this dish! To freeze, allow the casserole to cool completely, then place it in an airtight container or wrap it tightly in plastic wrap followed by aluminum foil. It can last in the freezer for up to 2 months. When you’re ready to enjoy it, thaw overnight in the fridge and reheat in the oven at 350°F (175°C) for about 20-30 minutes.
What if my casserole is too dry?
If your Chile Rellenos Casserole turns out too dry, it could be due to over-baking or not enough moisture in the egg mixture. To remedy this, try adding a bit more milk next time, or remove it from the oven as soon as the top is golden and a knife comes out clean. You can also serve it with a dollop of sour cream or salsa to add moisture when serving.
Are there any dietary considerations for this recipe?
Very! This casserole is vegetarian-friendly, perfect for meatless meals. For dietary restrictions, consider using unsweetened almond milk as a dairy-free alternative and a gluten-free flour blend if needed. Always check labels for hidden allergens in sauces or wraps!
Can I prepare this casserole in advance?
Absolutely! To save time on busy days, you can assemble the Chile Rellenos Casserole the night before. Just cover it and pop it in the fridge overnight, then bake it fresh in the morning for a delightful breakfast or a comforting dinner!
Satisfying Chile Rellenos Casserole for Comforting Meals
Ingredients
Equipment
Method
- Preheat your oven to 350°F (175°C).
- In a mixing bowl, combine eggs and whole milk, whisking until smooth and frothy.
- In a greased 9x13 inch baking dish, layer half of the roasted green chiles evenly across the bottom.
- Sprinkle half of the Monterey Jack and cheddar cheeses over the chiles.
- Carefully pour half of the egg mixture over the layered chiles and cheese.
- Repeat the layering process with the remaining roasted green chiles followed by the rest of the cheeses.
- Pour the remaining egg mixture evenly over the top layer.
- Place the assembled dish in the oven and bake for about 35 minutes, or until the top is golden brown.
- Once baked, allow to cool for about 10 minutes before serving.
Leave a Reply