
As I rummaged through my pantry, I stumbled upon a treasure trove of oats and cocoa powder, igniting a spark of inspiration. Suddenly, the kitchen transformed into my playground, and I created something heavenly—Gluten-Free No-Bake Chocolate Oat Cookies. This simple yet delightful recipe is a game-changer for those hectic weekdays when you crave something sweet without the guilt. These chewy nuggets provide a quick energy boost while keeping your snacking healthy. They’re also super versatile, allowing you to swap in your favorite nut butter or even sneak in some dried fruits. Are you ready to whip up a batch of these delicious cookies that will leave everyone coming back for seconds?
Why are these cookies a must-try?
Easy Preparation: You don’t need to be a professional chef to whip up these delightful no-bake cookies. Quick & Convenient: Ready in just 30 minutes, they’re perfect for those busy days. Health-Conscious Indulgence: Packed with fiber and protein, these treats satisfy cravings without the guilt. Versatile Options: Swap in nut butter or toss in dried fruits to make your own unique flavor. Crowd-Pleaser: Perfect for kids and adults alike, these cookies are sure to impress! If you love a savory twist as well, check out the mouthwatering Dollys Chicken Stuffing for a comforting meal.
Chocolate Oat Cookie Ingredients
• For those craving deliciousness!
For the Cookie Mixture
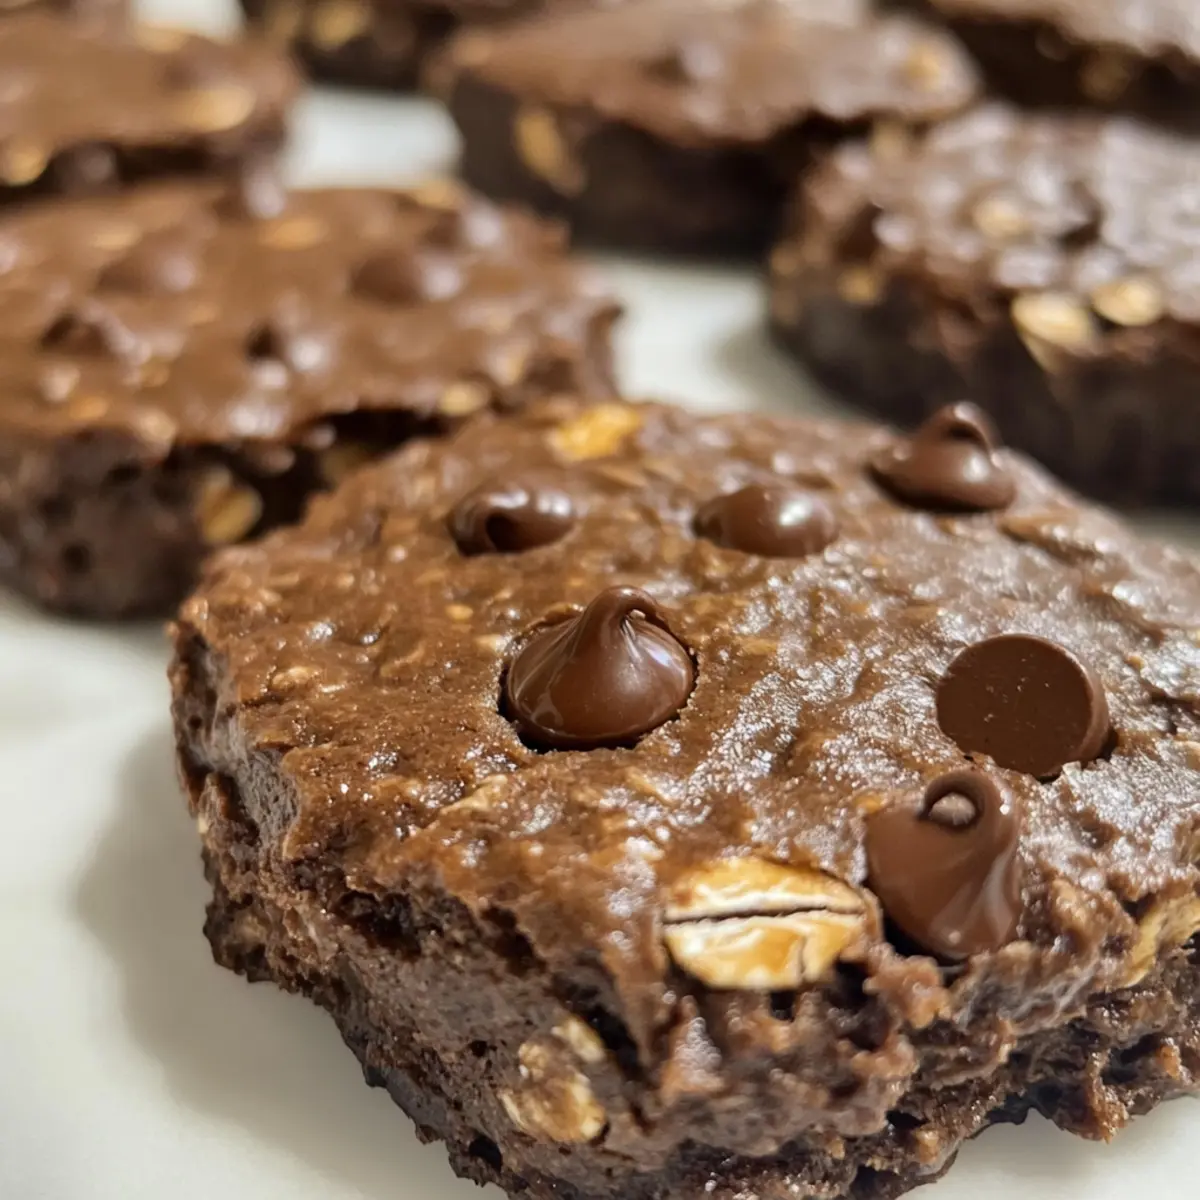
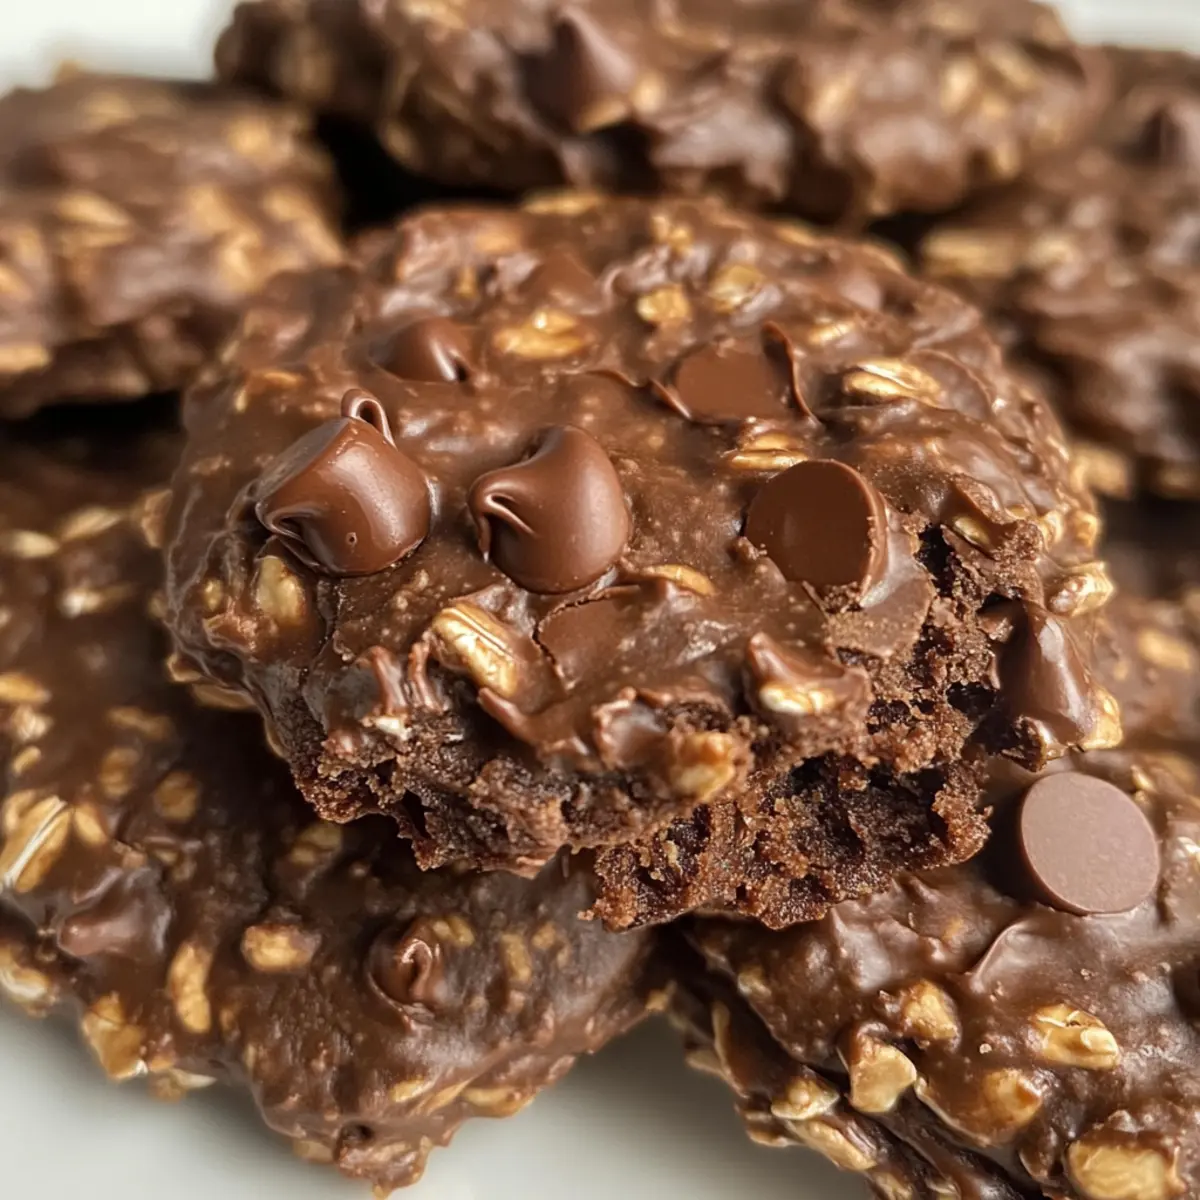
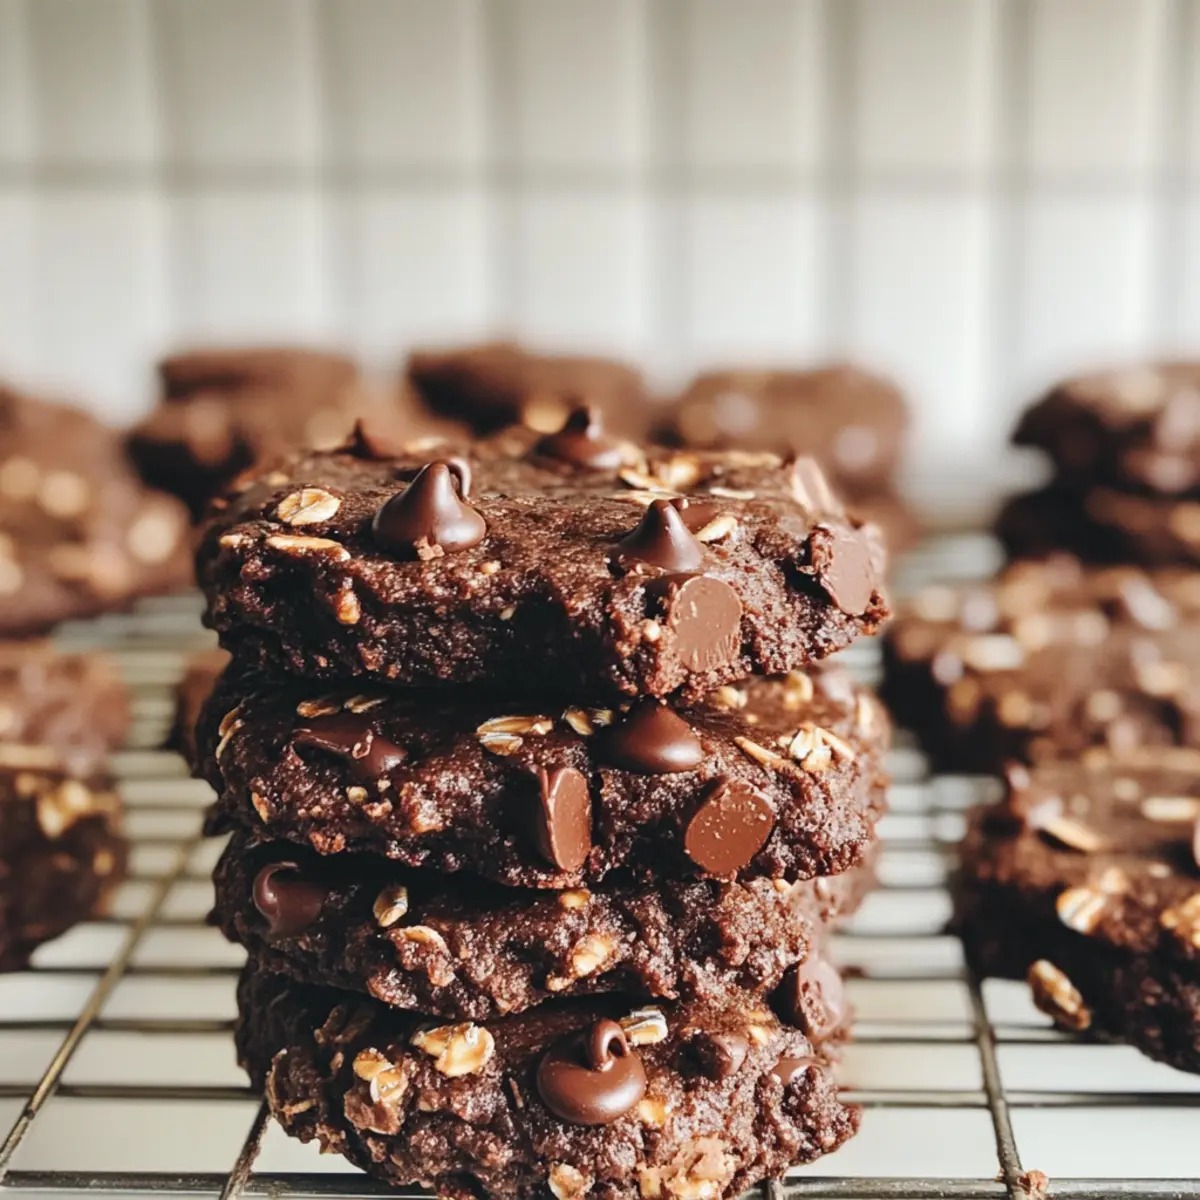
- Oats – Rolled oats add structure and heartiness, making them ideal for perfect texture.
- Peanut Butter – A binding agent that adds creaminess; can be swapped with almond butter for nut-free options.
- Honey or Maple Syrup – Provides natural sweetness; agave nectar works well as a vegan alternative.
- Cocoa Powder – This unsweetened cocoa creates a rich chocolate flavor, ensuring a delightful treat.
- Vanilla Extract – Enhances the overall flavor; remember to use pure vanilla for the best depth of taste.
- Chocolate Chips – Adds indulgence and texture; consider dairy-free chips for a vegan variation.
Optional Add-Ins
- Dried Fruits – Like cranberries or raisins for a fruity twist that brightens every bite.
- Flaxseeds or Chia Seeds – Boosts nutrition, making these Chocolate Oat Cookies even healthier.
Get ready to experience how these marvelous ingredients come together for delightful no-bake cookies that everyone will love!
Step‑by‑Step Instructions for Gluten-Free No-Bake Chocolate Oat Cookies
Step 1: Mix Dry Ingredients
In a large mixing bowl, combine 2 cups of rolled oats, 1/2 cup of unsweetened cocoa powder, and 1/2 cup of chocolate chips. Stir these ingredients together thoroughly with a wooden spoon until they are evenly dispersed, creating a lovely chocolatey base for your gluten-free no-bake chocolate oat cookies. Set this mixture aside while you prepare the wet ingredients.
Step 2: Combine Wet Ingredients
In a separate bowl, whisk together 1 cup of peanut butter, 1/2 cup of honey (or maple syrup), and 1 teaspoon of pure vanilla extract. Mix vigorously for about 1-2 minutes until the mixture is smooth and creamy. This step is crucial, as it ensures a seamless blend of flavors that will bind your cookies together beautifully.
Step 3: Combine Mixtures
Pour the smooth wet mixture into the bowl with the dry ingredients. Using a spatula, gently fold together until everything is well combined, ensuring no dry oats remain. You’ll see the chocolate chips start to incorporate into the dough. This should take about 2-3 minutes, and the mixture will be thick but manageable—perfect for forming your cookies.
Step 4: Form Cookies
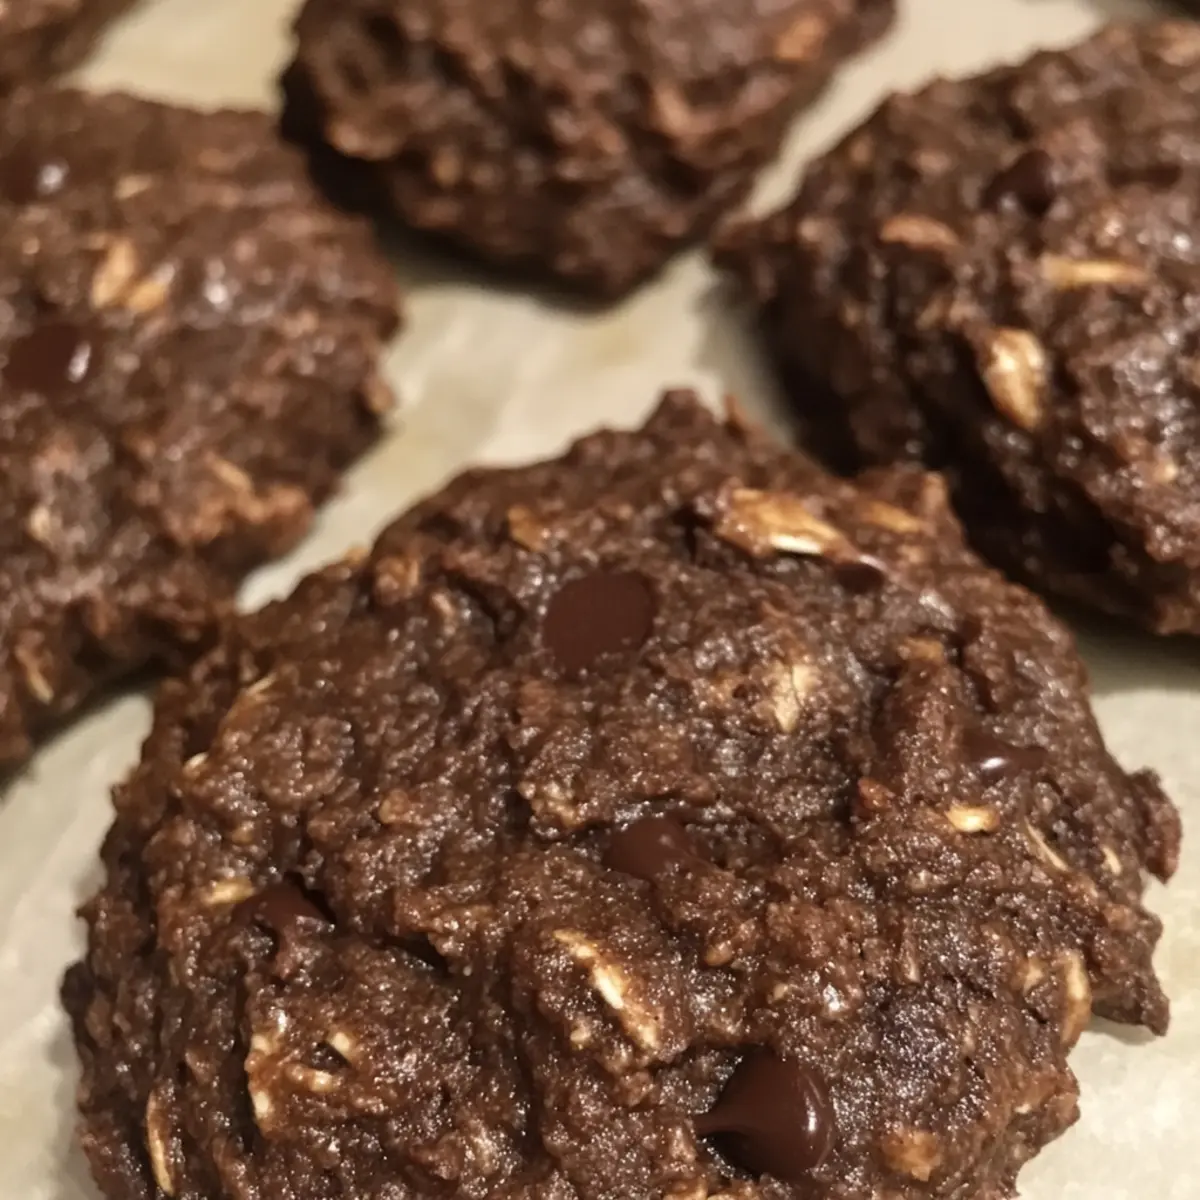
Prepare a baking sheet lined with parchment paper. Using your hands or a spoon, scoop out portions of the cookie mixture and form them into round shapes, flattening them slightly to create cookie disks. Aim for about 1 tablespoon per cookie, and space them about an inch apart. You’ll create a nice batch of gluten-free no-bake chocolate oat cookies ready for chilling!
Step 5: Chill
Once all the cookies are shaped and placed on the baking sheet, transfer them to the refrigerator. Allow the cookies to chill for at least 30 minutes, which is essential for setting the texture. As they cool, the cookies will firm up, creating the perfect chewy bite that makes these treats irresistible.
Step 6: Serve
After the chilling time is over, remove the cookies from the fridge. You can enjoy them straight away as delightful gluten-free no-bake chocolate oat cookies or let them come to room temperature for a few minutes if preferred. These are great paired with a glass of milk or a cup of coffee, so dig in and enjoy your delicious creation!
What to Serve with Gluten-Free No-Bake Chocolate Oat Cookies
Indulging in rich chocolatey flavors is even better when paired with the perfect sides that complement the delightful chew of these cookies.
-
Creamy Vanilla Ice Cream: A scoop of vanilla ice cream adds a luscious creaminess that beautifully contrasts the chewy texture of the cookies. Perfect for a delightful dessert duo.
-
Fresh Berries: Strawberries, raspberries, or blueberries bring a burst of freshness and natural sweetness that balances the richness of the chocolate. Enjoy the vibrant colors and refreshing flavors!
-
Nutty Trail Mix: A sprinkle of nutty trail mix on the side adds crunch and a satisfying savory element, enhancing the overall snacking experience. The variety of textures keeps every bite exciting.
-
Chilled Almond Milk: Pair with a glass of chilled almond milk for a refreshing drink option. The nutty flavor pairs excellently with the chocolate notes, making each mouthful heavenly.
-
Dark Chocolate Dipped Fruits: Elevate your cookie moment by serving alongside fruits dipped in dark chocolate. Bananas or strawberries work wonderfully and create an indulgent yet fruity bite.
-
Coconut Yogurt: A dollop of coconut yogurt adds a creamy, tropical flair that lightens the mood — perfect for a warm afternoon treat. Top with a sprinkle of granola for added texture.
-
Espresso or Dark Roast Coffee: For a cozy pairing, enjoy these cookies with a strong cup of espresso or dark roast coffee. The coffee enhances the chocolate flavor and provides a rich finish to your snacking.
Make Ahead Options
These Gluten-Free No-Bake Chocolate Oat Cookies are a fantastic choice for meal prep enthusiasts! You can mix the dry ingredients (oats, cocoa powder, and chocolate chips) up to 3 days in advance and store them in an airtight container to maintain freshness. Additionally, the wet ingredients (peanut butter, honey, and vanilla extract) can be prepared and refrigerated for up to 24 hours—just give them a quick stir before combining. When you’re ready to enjoy these delicious cookies, simply mix the wet and dry components, form the cookies, and chill them for at least 30 minutes, ensuring they maintain their delightful chewy texture. With these make-ahead tips, you’ll save time and have a sweet treat ready with minimal effort!
Expert Tips for Chocolate Oat Cookies
• Mixing Order Matters: Start with dry ingredients first; this ensures even distribution of cocoa and chocolate chips while preventing clumping.
• Peanut Butter Consistency: Make sure your peanut butter is at room temperature for easier mixing; this helps incorporate it smoothly into the mixture.
• Don’t Skip Chilling: Chilling the cookies is essential for achieving a firm, chewy texture. Avoid skipping this step to ensure good results.
• Customize Your Flavor: Feel free to swap peanut butter for sunflower seed butter for a nut-free version. Experiment to find your favorite blend!
• Proper Storage: Keep your cookies in an airtight container in the fridge for up to a week. They also freeze wonderfully for longer enjoyment!
How to Store and Freeze Chocolate Oat Cookies
Fridge: Store your Chocolate Oat Cookies in an airtight container in the refrigerator for up to 1 week to maintain their chewy texture and freshness.
Freezer: For longer storage, place the cookies in a single layer on a baking sheet to freeze for about 1 hour, then transfer to a freezer-safe bag. They can last for up to 3 months.
Thawing: When ready to enjoy, simply thaw the frozen cookies in the fridge overnight or at room temperature for a couple of hours.
Reheating: If you prefer a warm treat, microwave the cookies for 10-15 seconds to restore some of their original softness before savoring.
Chocolate Oat Cookies Variations & Substitutions
Feel free to get creative and tailor these delicious cookies to your taste buds!
- Nut-Free: Swap peanut butter for sunflower seed butter to make these cookies safe for nut allergies without losing flavor.
- Vegan Option: Use agave nectar instead of honey and dairy-free chocolate chips for a completely vegan treat.
- Texture Twist: Add 1/4 cup of crushed nuts like almonds or walnuts for a delightful crunch that adds richness to every bite.
- Fruity Delight: Toss in dried fruits such as cranberries or raisins for a sweet, chewy surprise in each cookie.
- Extra Nutrition: Mix in 2 tablespoons of chia seeds or flaxseeds to boost the fiber and omega-3 content, supporting your healthy snacking goals.
- Spicy Kick: Add a pinch of cinnamon or a sprinkle of sea salt for a flavor boost that creates a delightful contrast with the sweetness.
- Chocolate Lovers: Increase the chocolate chips by an extra 1/4 cup or switch to dark chocolate for a richer taste experience.
- Savory Twist: Try adding a hint of savory by incorporating a tiny pinch of sea salt—this balances the sweetness beautifully and enhances the overall chocolate flavor.
And if you’re interested in exploring other delicious options, consider trying out the mouthwatering Vegetarian Southern Comfort or the tempting Caramelized Onion Spinach for a wholesome meal filled with flavor!
Chocolate Oat Cookies Recipe FAQs
What kind of oats should I use for the cookies?
Absolutely! For the best texture, I highly recommend using rolled oats. They provide the structure and heartiness the cookies need, making them chewy yet satisfying. Avoid using instant oats, as they can make the cookies too mushy.
How should I store Chocolate Oat Cookies, and how long will they last?
Store your Chocolate Oat Cookies in an airtight container in the refrigerator for up to 1 week. This helps maintain their chewy texture and freshness. If you find yourself with leftover cookies, feel free to freeze them for longer enjoyment!
Can I freeze the cookies, and how do I do it?
Yes, you can freeze these delicious cookies! To freeze, lay them in a single layer on a baking sheet and place them in the freezer for about 1 hour. Once firm, transfer them to a freezer-safe bag or container. They can last for up to 3 months! When you’re ready to enjoy, simply thaw them in the fridge overnight or at room temperature for a couple of hours.
What if my cookies are crumbly?
If you notice your cookies are crumbly, it might be because the wet ingredients weren’t mixed thoroughly enough, or you didn’t add enough peanut butter. To remedy this, you can mix a bit more peanut butter into the existing mixture or gently microwave the mixture for 10-15 seconds before shaping the cookies to help them stick together better.
Are these cookies safe for people with nut allergies?
Very! You can easily adapt this recipe to be nut-free by swapping peanut butter for sunflower seed butter, which will still give you that creamy texture everyone loves without the risk of nuts. Just ensure to check any additional ingredients for allergens!
Can I add other ingredients to the recipe?
Most definitely! Feel free to customize your cookies by adding in dried fruits like cranberries or raisins for a fruity flair or incorporate flaxseeds or chia seeds for a healthy nutrient boost. The more, the merrier!
Delicious Stuffing Pin Cushion for Your Next Cozy Meal
Ingredients
Equipment
Method
- In a large mixing bowl, combine rolled oats, cocoa powder, and chocolate chips. Stir thoroughly.
- In a separate bowl, whisk together peanut butter, honey (or maple syrup), and vanilla extract until smooth.
- Pour the wet mixture into the dry ingredients and fold together until well combined.
- Scoop out portions of the mixture, form into round shapes, and flatten slightly.
- Chill the cookies in the refrigerator for at least 30 minutes.
- Serve the cookies chilled or at room temperature.
Leave a Reply