
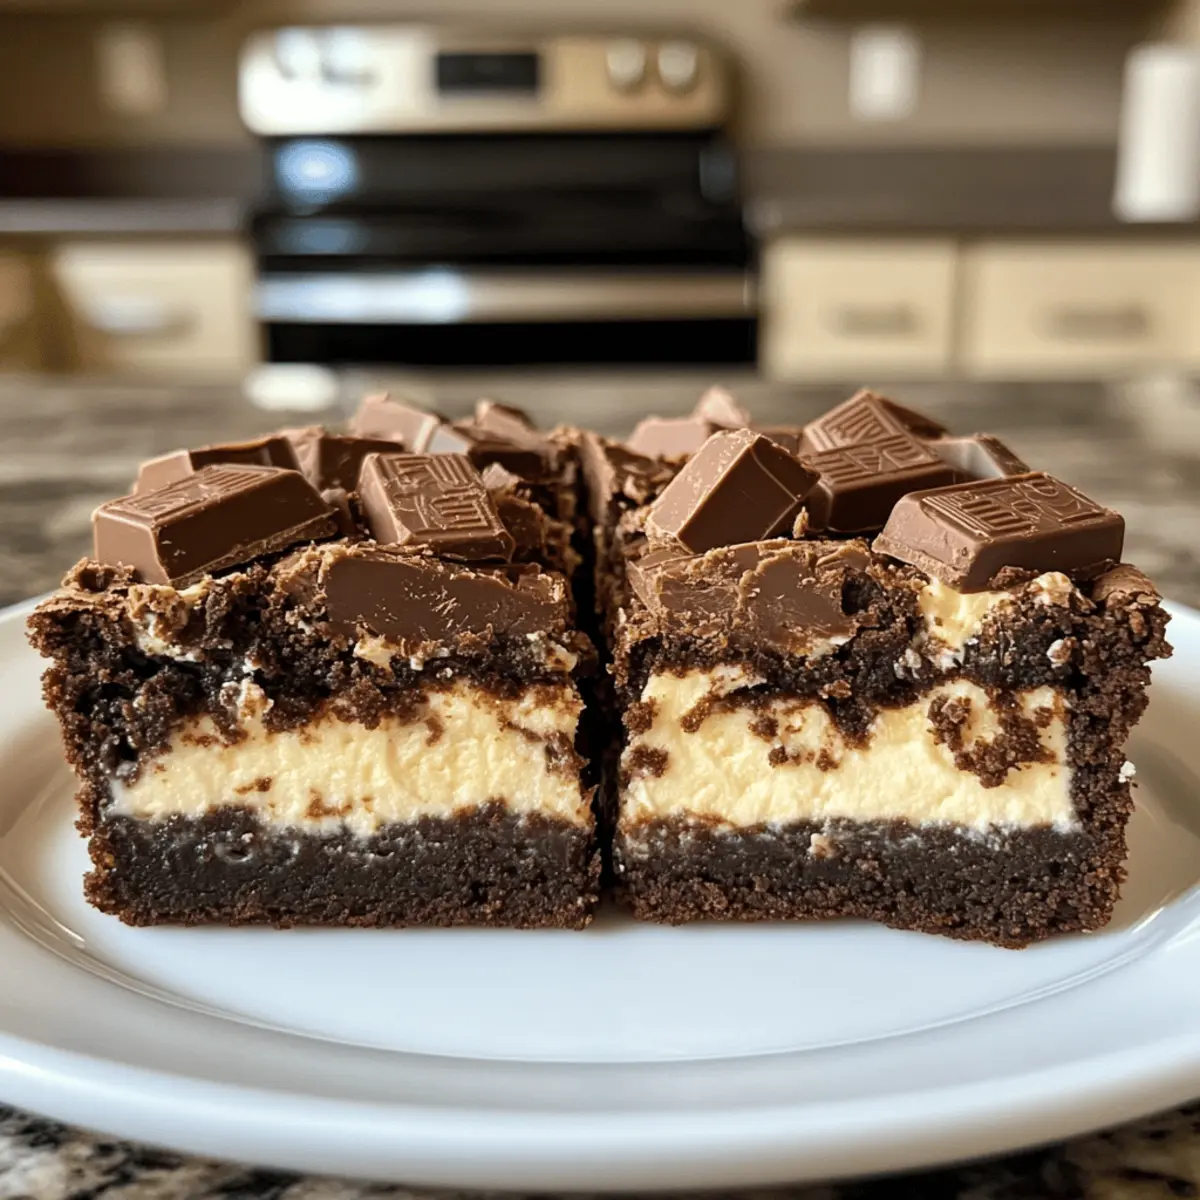
As I opened my pantry one cozy afternoon, my eyes landed on a neglected stash of Kit Kat bars, and a delightful idea struck me: what if I transformed these candy bars into the ultimate indulgent dessert? That’s how my Kit Kat Cream Cheese Brownies were born—a rich, fudgy concoction with layers of creamy cheesecake and crunchy chocolate goodness. These brownies are not only a showstopper for parties, but they also make for the perfect treat during a cozy night in. With their quick prep time and a delightful mix of textures, they’re bound to become a satisfying addition to your dessert rotation. Are you ready to elevate your baking game with this delicious twist?
Why are Kit Kat Cream Cheese Brownies irresistible?
Indulgent Flavor: The heavenly blend of chocolate and creamy cheesecake with crunchy Kit Kat pieces makes every bite a testament to indulgence.
Quick Prep Time: With just a few simple steps, you can whip up these brownies in no time, perfect for a last-minute dessert craving!
Decadent Texture: Experience the luscious mouthfeel as the rich, fudgy brownie base meets the smooth cream cheese layer, complemented by the delightful crunch of candy.
Crowd-Pleasing Treat: Whether it’s a festive gathering or a cozy movie night, these brownies are sure to impress guests and family alike! Consider pairing them with a scoop of ice cream or warm whipped cream for an unforgettable experience that rivals even a Marshmallow Whip Cheesecake.
Versatile Variations: Feel free to swap out Kit Kats with other favorite candies like Snickers or Twix, letting you customize these decadent brownies to your taste!
Kit Kat Cream Cheese Brownies Ingredients
For the Brownie Base
- Melted Butter – Adds richness and moisture to the brownie base. Substitution: Can use vegetable oil for a lighter version.
- Granulated Sugar – Sweetness and helps with texture. No substitution recommended for the best results.
- Brown Sugar – Provides additional moisture and a toffee-like flavor. Light brown sugar can be used interchangeably with dark brown sugar.
- Eggs – Acts as a binder, giving structure and richness. Ensure they are at room temperature for better incorporation.
- Vanilla Extract – Enhances flavors in the brownie and cream cheese layers. Use pure vanilla extract for best quality.
- All-Purpose Flour – Main structure component. Ensure measurement is accurate; spoon and level for the best results.
- Cocoa Powder – Provides chocolate flavor and contributes to the fudgy texture. Dutch-process cocoa can be a substitute for a different flavor profile.
- Salt – Balances sweetness and enhances flavors. Use fine sea salt for even distribution.
- Baking Powder – A leavening agent to provide a slight rise. Can be omitted for denser brownies.
- Chopped Kit Kat Bars – Adds texture and flavor contrast. Substitute with other candy bars like Twix or Snickers for a twist.
For the Cream Cheese Layer
- Cream Cheese – Creates the cheesecake layer, essential for creaminess. Make sure it’s softened for smooth mixing.
- Sugar (for Cream Cheese layer) – Adds sweetness to the cheesecake portion. Adjust based on preference.
- Egg (for Cream Cheese layer) – Adds structure to the cream cheese mixture, ensuring it sets appropriately.
- Vanilla Extract (for Cream Cheese layer) – Enhances the flavor of the cheesecake.
Dive into this delightful recipe for Kit Kat Cream Cheese Brownies, where layers of rich chocolate and creamy cheesecake collide in perfect harmony!
Step‑by‑Step Instructions for Kit Kat Cream Cheese Brownies
Step 1: Preheat & Prep
Begin by preheating your oven to 350°F (175°C) to create the perfect baking environment. Line an 8×8-inch baking pan with parchment paper, allowing for easy removal of your delicious Kit Kat Cream Cheese Brownies later. Ensure to let the parchment hang over the edges for easy lifting.
Step 2: Make Brownie Batter
In a large mixing bowl, whisk together the melted butter, granulated sugar, and brown sugar until the mixture is smooth and well combined. Next, incorporate the eggs one at a time, blending in the vanilla extract until fully mixed. You should have a glossy batter with no lumps, ready for the dry ingredients.
Step 3: Add Dry Ingredients
Sift in the all-purpose flour, cocoa powder, salt, and baking powder directly into the brownie batter. Carefully stir until just combined, ensuring not to overmix, which keeps your brownies fudgy. Gently fold in the chopped Kit Kat bars, allowing the chocolatey pieces to be evenly distributed throughout the batter.
Step 4: Prepare Cream Cheese Layer
In a separate bowl, beat the softened cream cheese until creamy and smooth. Gradually add the sugar, egg, and a splash of vanilla extract, mixing until completely combined. The mixture should be velvety, with no lumps remaining, creating a rich creaminess that adds depth to your Kit Kat Cream Cheese Brownies.
Step 5: Assemble
Spread half of the brownie batter evenly across the bottom of the prepared baking pan. Dollop the cream cheese mixture on top and use a knife to swirl it together gently, creating a marbled effect. Finally, spoon the remaining brownie batter on top, and sprinkle any leftover Kit Kat pieces to satisfy that chocolatey crunch.
Step 6: Bake
Pop the assembled brownies into the preheated oven and bake for 30-35 minutes. Check for doneness by inserting a toothpick into the center; it should come out with moist crumbs, not wet batter. Take care not to overbake, as you want to maintain that fudgy, gooey texture in your Kit Kat Cream Cheese Brownies.
Step 7: Cool & Serve
Once baked, remove the brownies from the oven and let them cool completely in the pan on a wire rack. Once cooled, carefully lift them out using the parchment paper and slice them into squares. These decadent Kit Kat Cream Cheese Brownies are now ready to be enjoyed, whether served plain or with a scoop of ice cream on the side!
What to Serve with Kit Kat Cream Cheese Brownies
Indulging in Kit Kat Cream Cheese Brownies calls for complementary delights that enhance their rich chocolate and creamy flavors.
-
Vanilla Ice Cream: The cool, creamy richness of vanilla ice cream balances the brownies’ fudgy texture, creating a decadent pairing.
-
Whipped Cream: A dollop of lightly sweetened whipped cream adds an airy contrast, perfect for those who love a touch of elegance with their dessert.
-
Fresh Berries: Juicy strawberries or raspberries add a burst of tartness and freshness, cutting through the richness of the brownies for a balanced bite.
-
Chocolate Sauce: Drizzling warm chocolate sauce over the brownies elevates the chocolate experience to a whole new level of indulgence.
-
Espresso: A strong cup of espresso enhances the brownie flavors, providing a delightful coffee kick that complements chocolate perfectly.
-
Nutty Praline Topping: Sprinkling crushed nuts or a praline mix adds delightful crunch and deep nutty flavors, introducing a wonderful texture contrast.
-
Caramel Sauce: Rich caramel drizzled on top creates a sweet, sticky indulgence that pairs beautifully with the chocolate and cream layers of the brownies.
-
Mint Tea: A soothing cup of mint tea offers a refreshing palate cleanser after a rich dessert, enhancing the overall baking experience.
-
Chocolate Milkshake: For a truly indulgent treat, pair with a thick chocolate milkshake to amplify that chocolatey goodness, inviting you into chocolate heaven!
Storage Tips for Kit Kat Cream Cheese Brownies
Room Temperature: Keep brownies in an airtight container at room temperature for up to 3 days. This allows the flavors to meld while maintaining a fudgy texture.
Fridge: Refrigerate the brownies for up to a week. This extra coolness can enhance the creaminess of the cheesecake layer but may firm up the brownies a bit.
Freezer: For longer storage, freeze the brownies for up to 3 months. Wrap them tightly in plastic wrap and then place in a freezer-safe bag. Thaw in the fridge before enjoying the Kit Kat Cream Cheese Brownies again.
Reheating: If you prefer your brownies warm, pop them in the microwave for about 10-15 seconds before serving. This makes the cream cheese layer melt slightly, enhancing that rich flavor and texture.
Make Ahead Options
These Kit Kat Cream Cheese Brownies are perfect for meal prep enthusiasts looking to save time during busy weeknights! You can prepare the brownie batter up to 24 hours in advance by mixing the melted butter, sugars, eggs, and dry ingredients, then refrigerating it in an airtight container; this helps to maintain its fudgy texture. The cream cheese layer can also be made ahead and stored separately for up to 3 days in the fridge. When you’re ready to bake, simply spread the brownie batter in the pan, dollop the cream cheese mixture on top, and swirl them together before baking. With these make-ahead tips, you’ll have delicious, indulgent Kit Kat Cream Cheese Brownies ready to wow your family and friends with minimal effort!
Expert Tips for Kit Kat Cream Cheese Brownies
- Room Temperature Ingredients: Ensure all ingredients, especially cream cheese and eggs, are at room temperature for smooth mixing and better texture.
- Avoid Overmixing: When combining dry ingredients, mix just until combined. Overmixing can lead to dense brownies instead of the fudgy texture we love in Kit Kat Cream Cheese Brownies.
- Use Quality Ingredients: Opt for high-quality cocoa powder and pure vanilla extract for the best flavor. The quality of the ingredients makes a noticeable difference.
- Cooling Time: Allow the brownies to cool completely in the pan before slicing. This helps achieve clean, perfect squares and enhances the flavors.
- Storage Best Practices: Store leftovers in an airtight container at room temperature to maintain freshness for up to 3 days, or refrigerate for a week.
Kit Kat Cream Cheese Brownies Variations
Feel free to get creative with these delightful brownies and tailor them to your cravings!
-
Other Candy Bars: Swap Kit Kats with Twix, Snickers, or Milky Way for a unique flavor journey. Each candy brings its own delicious twist!
-
Nutty Surprise: Add chopped nuts like walnuts or pecans for an extra crunchy texture. They will complement the fudgy brownies beautifully.
-
Minty Freshness: Incorporate peppermint extract for a refreshing holiday version, turning your brownies into a seasonal delight that your family will love.
-
Dairy-Free Option: Use dairy-free cream cheese and a vegan chocolate bar to make these brownies dairy-free without losing any deliciousness.
-
Flavored Cream Cheese: Try mixing in some orange or lemon zest to the cream cheese layer for a delightful citrus twist, adding bright flavors to your indulgent treat.
-
Toppings Galore: Top your cooled brownies with a drizzle of chocolate or caramel sauce for an eye-catching finishing touch that enhances the dessert’s elegance.
-
Chocolate Overload: If you love chocolate, add chocolate chips into the brownie batter for an extra rich experience that will satisfy even the fiercest chocolate cravings.
-
Spicy Kick: For those who enjoy a bit of heat, sprinkle in some cayenne pepper or chili powder in the brownie mix for a surprising, spicy kick that complements the sweetness!
These variations are just a few ways to explore and personalize your Kit Kat Cream Cheese Brownies. Enjoy the process and don’t hesitate to experiment—just like in my favorite recipe for Baked Cream Cheese or those fluffy Sweet Coconut Cream pancakes, you can create something truly unique!
Kit Kat Cream Cheese Brownies Recipe FAQs
What kind of chocolate bars can I use for the Kit Kat Cream Cheese Brownies?
Absolutely! While Kit Kat bars are delicious in this recipe, feel free to experiment with your favorite chocolate bars such as Snickers or Twix. Each type will lend a unique flavor and texture, allowing you to customize these brownies to suit your taste preferences.
How do I know if my brownie ingredients are fresh, especially the eggs and cream cheese?
Very! For the freshest results, eggs should be checked for firmness by cracking them open—no off-smell means they’re good to go. For cream cheese, make sure it’s smooth and free of any lumps or discoloration. If it has a sour odor or dark spots, discard it!
How should I store leftover Kit Kat Cream Cheese Brownies?
For optimal freshness, store your brownies in an airtight container. At room temperature, they can last for up to 3 days. If you prefer, refrigerate them for up to a week, which can help enhance the creaminess of the cheesecake layer.
Can I freeze Kit Kat Cream Cheese Brownies, and if so, what’s the best method?
Yes, you can freeze these brownies! First, allow them to cool completely. Then, wrap the brownies tightly in plastic wrap, followed by placing them in a freezer-safe bag. They can be frozen for up to 3 months. When you’re ready to enjoy, simply thaw them in the fridge.
What should I do if my brownies turn out too dry after baking?
If you find that your brownies are dry, it may be due to overbaking. Always check for doneness at the lower end of the baking time. Additionally, consider adding a drizzle of chocolate sauce or serving them with a scoop of ice cream to reintroduce some moisture and enhance the indulgent experience!
Are Kit Kat Cream Cheese Brownies safe for those with allergies?
It’s essential to consider allergies before serving. These brownies contain gluten (from flour), dairy (cream cheese and butter), and eggs. For a safer alternative, you can use gluten-free flour and dairy-free cream cheese, adjusting other ingredients accordingly to fit dietary needs. Always check packaging labels!
Decadent Kit Kat Cream Cheese Brownies You'll Crave Daily
Ingredients
Equipment
Method
- Preheat your oven to 350°F (175°C) and line an 8×8-inch baking pan with parchment paper.
- In a large bowl, whisk together melted butter, granulated sugar, and brown sugar until smooth.
- Incorporate eggs one at a time, blending in vanilla extract until fully mixed.
- Sift in flour, cocoa powder, salt, and baking powder, stirring until just combined; fold in chopped Kit Kat pieces.
- In a separate bowl, beat cream cheese until smooth, gradually mixing in sugar, egg, and vanilla extract.
- Spread half of the brownie batter in the prepared pan, dollop cream cheese mixture on top, swirl together, and cover with remaining brownie batter.
- Bake for 30-35 minutes, check for doneness with a toothpick, then cool completely before slicing.
Leave a Reply