
As I opened the fridge, the sight of those silky-smooth cheesecake filling jars brought an unexpected spark of joy. I had an idea brewing: what if I combined that luscious creaminess with the beloved crunch of Oreos? That’s how my recipe for Heavenly Oreo Cheesecake Cookie Cups was born. These delightful treats boast a crunchy Oreo cookie crust that cradles a rich cheesecake filling, topped with fluffy whipped cream and sprinkled with even more crumbled Oreos. They’re not just a dessert; they’re a quick triumph that everyone will adore, seamlessly transitioning from cozy family dinners to festive gatherings. Plus, their individual sizes make them a fun addition to any dessert table, allowing everyone to indulge without fuss. Ready to dive into this sweet adventure? Let’s whip up some magic with these Oreo Cheesecake Cookie Cups!
Why will you love Oreo Cheesecake Cups?
Unforgettable Flavor: The combination of rich, creamy cheesecake and crispy Oreo crust creates a taste sensation that’s hard to resist.
Easy to Make: With simple steps, anyone can whip these up, making them ideal for bakers of all skill levels.
Perfect for Any Occasion: These cookie cups impress at parties, serve as a delicious dessert after dinner, or satisfy your sweet cravings anytime.
Customizable Delight: Feeling adventurous? Swap the Oreos for your favorite cookies or mix in flavored cream cheese for a twist.
Portable Treats: Individually sized, these cups are easy to share and perfect for potlucks or movie nights. For a delightful finish, pair them with a rich dessert like Marshmallow Whip Cheesecake.
Oreo Cheesecake Cookie Cups Ingredients
• You’ll love how simple these ingredients are!
For the Crust
- Oreo Cookies – A classic base that adds rich chocolate flavor; feel free to swap with any chocolate sandwich cookies.
- Butter – This binds the crumbs together for a sturdy, delectable crust; margarine works well as a substitute for a dairy-free option.
For the Cheesecake Filling
- Cream Cheese – The heart of your filling, providing that luscious, creamy texture; full-fat is best for indulgence!
- Sugar – Sweetness is key to the filling; consider a healthier alternative for a guilt-free treat but adjust to taste.
- Sour Cream – Adds tang and creamy richness; Greek yogurt serves as a lighter replacement if desired.
- Mini Chocolate Chips – For an optional chocolatey crunch; you can customize with flavored chips if you’re feeling adventurous.
For the Topping
- Whipped Cream – Adds a light and fluffy finish; use homemade or store-bought depending on your time!
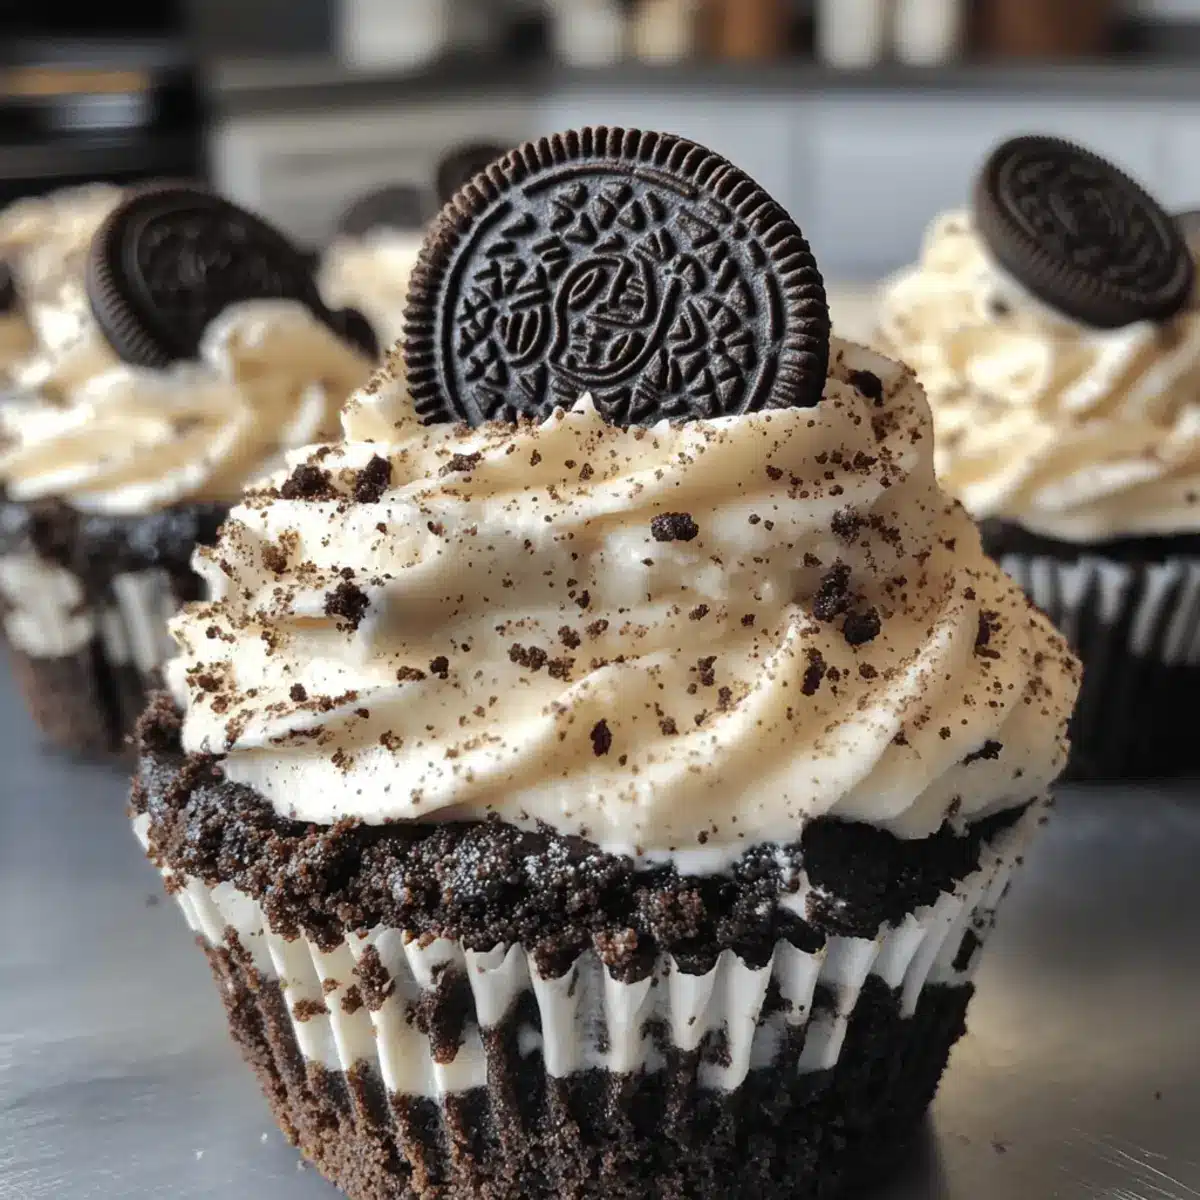
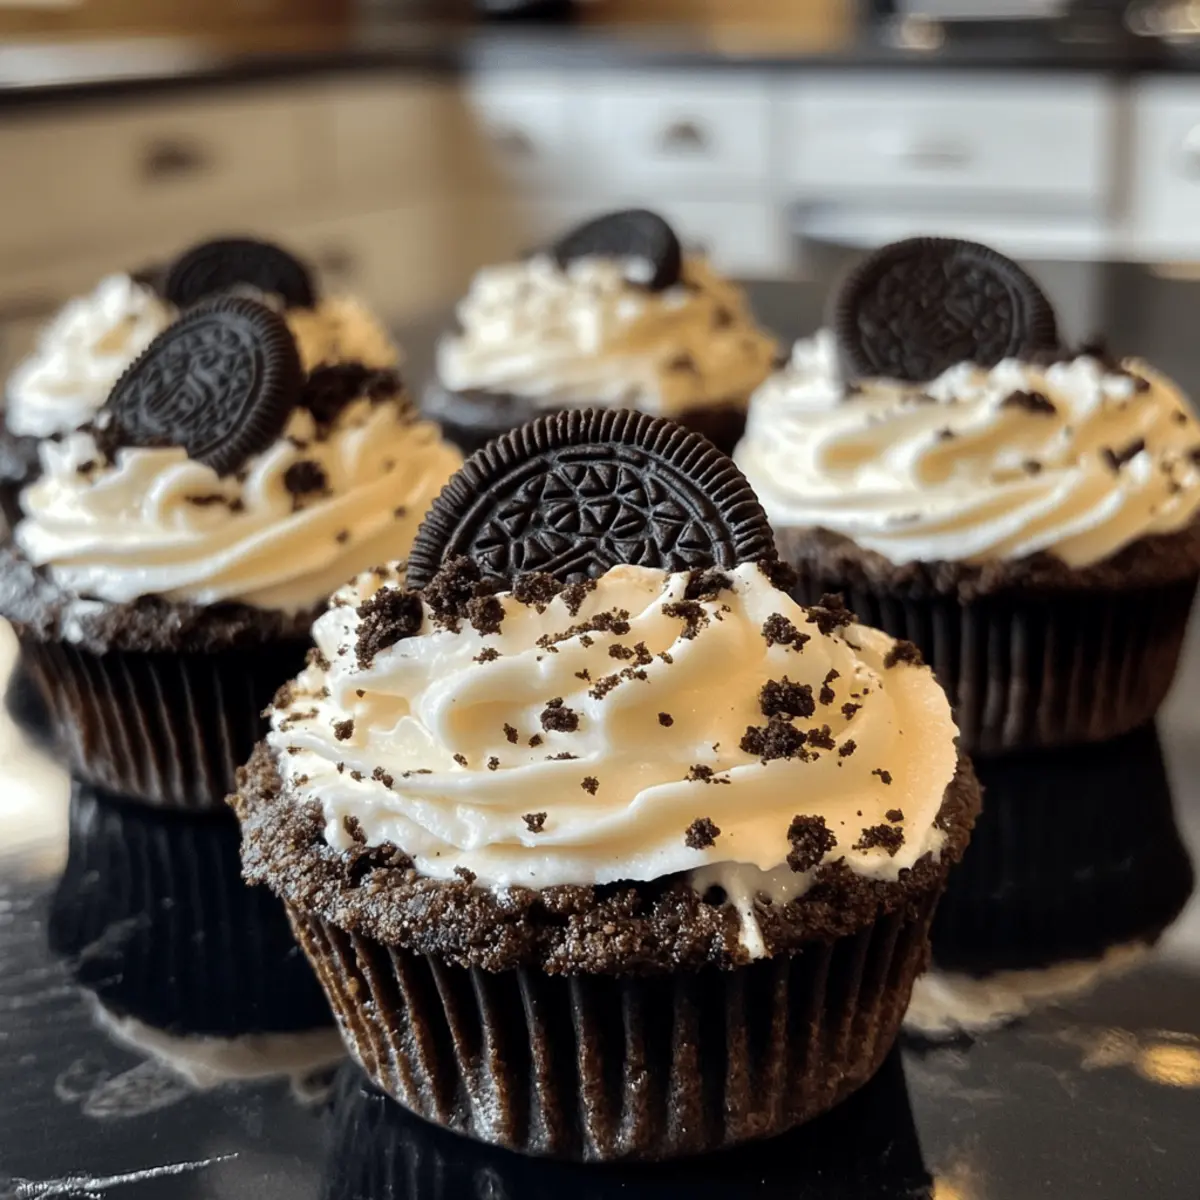
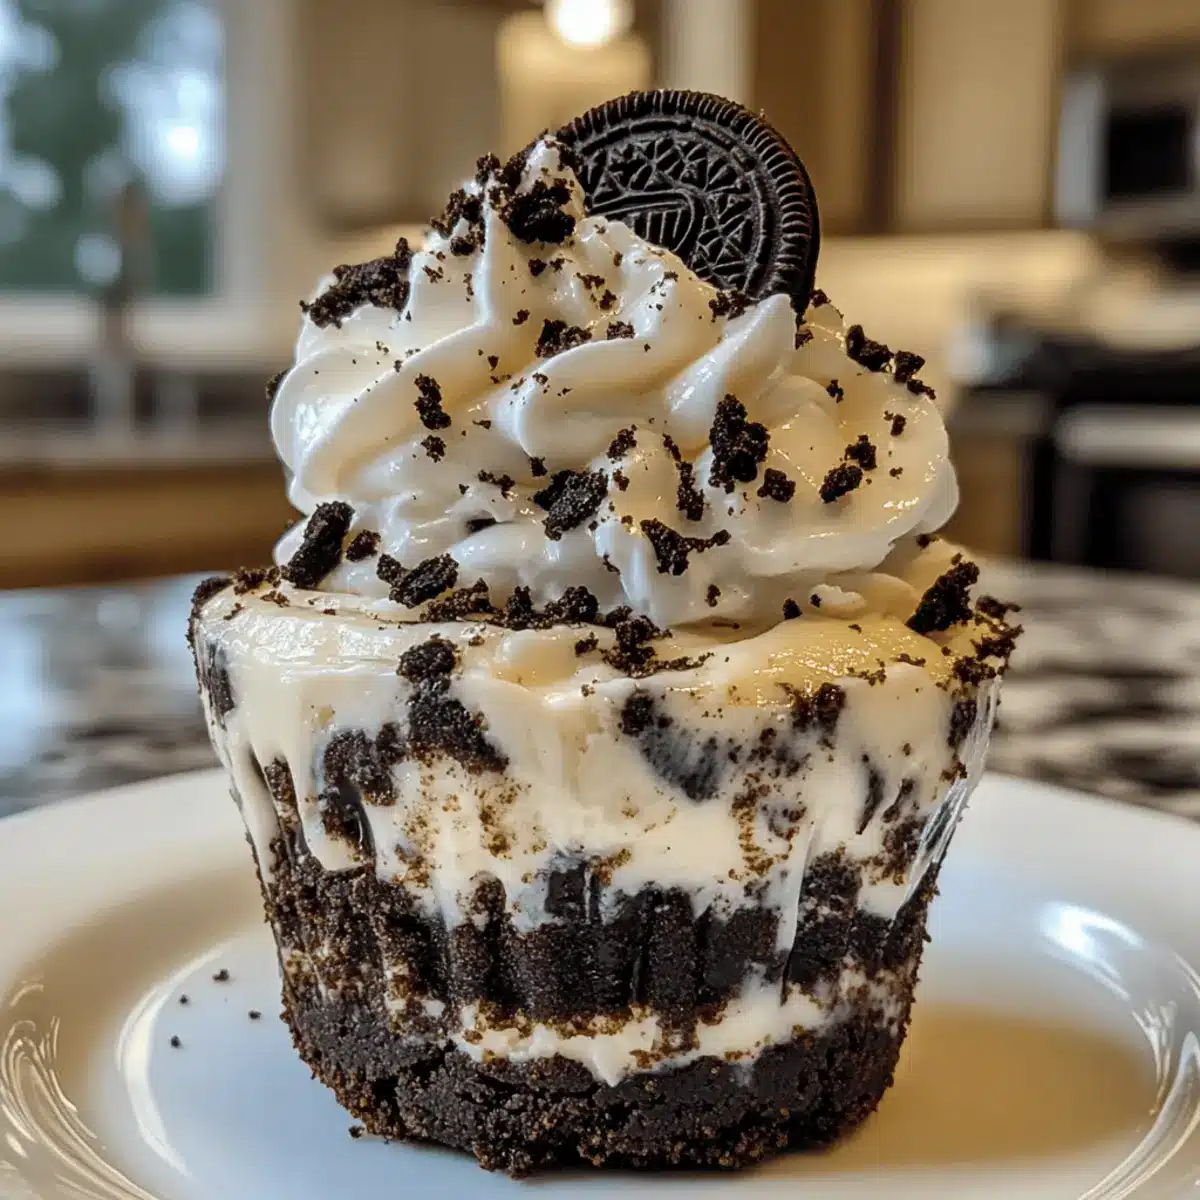
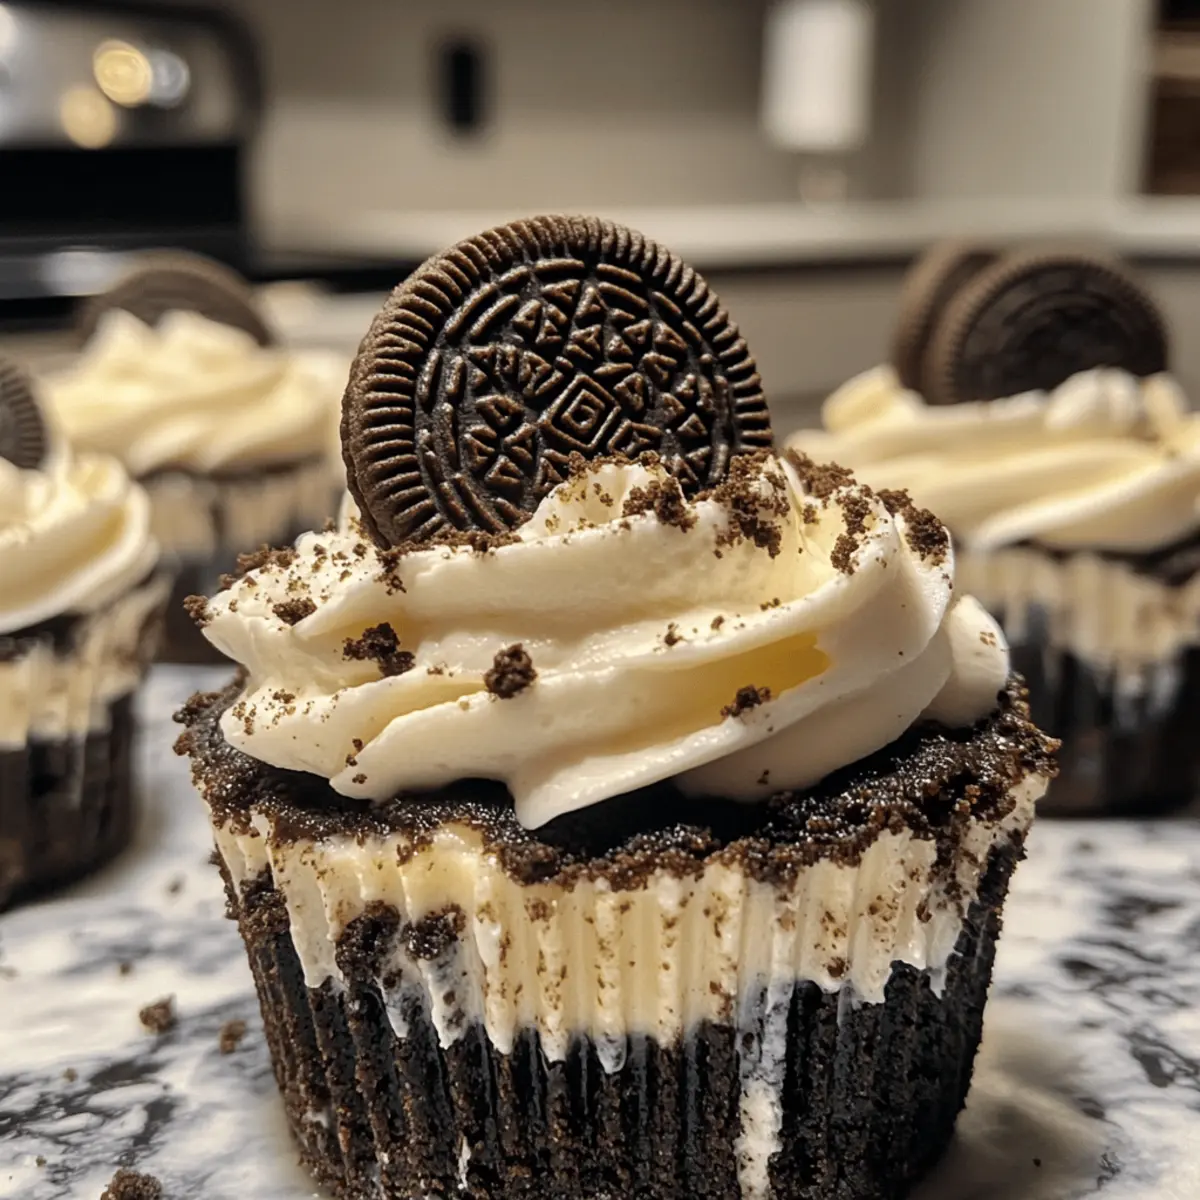
- Crushed Oreos – A delightful sprinkle to top it all off, enhancing the theme of Oreo Cheesecake Cookie Cups!
Step‑by‑Step Instructions for Oreo Cheesecake Cookie Cups
Step 1: Preheat the Oven
Begin by preheating your oven to 350°F (175°C). This step ensures a properly baked crust for your Oreo Cheesecake Cookie Cups. While your oven warms up, gather your ingredients and prepare your muffin tin with cupcake liners, setting the stage for a delightful treat.
Step 2: Make the Cookie Crust
Crush about 20 Oreo cookies into fine crumbs using a food processor or a zip-top bag and rolling pin. In a mixing bowl, combine the crumbs with melted butter until everything is well blended and the mixture resembles wet sand. This will form a deliciously crunchy crust for the cookie cups.
Step 3: Form the Cups
Line your muffin tin with cupcake liners to make the perfect molds for your Oreo Cheesecake Cookie Cups. Take about 1 tablespoon of the cookie crust mixture and press it firmly into the bottom of each liner. Aim for an even layer that extends slightly up the sides, ensuring a sturdy base that holds together beautifully.
Step 4: Prepare the Cheesecake Filling
In a large mixing bowl, beat softened cream cheese with sugar using an electric mixer until light and fluffy, about 2-3 minutes. Add in sour cream and mix until smooth; if desired, fold in mini chocolate chips for an extra decadent touch. Your filling should be creamy and well-combined for that irresistible cheesecake texture.
Step 5: Fill and Bake
Spoon the cheesecake filling onto each crust, filling each cup almost to the top while being careful to leave a little space. Bake in the preheated oven for 15-18 minutes, or until the edges are set and centers are slightly jiggly. The slight jiggle will ensure a creamy consistency in your stunning Oreo Cheesecake Cookie Cups.
Step 6: Cool and Refrigerate
Once baked, remove your muffin tin from the oven and let it cool completely at room temperature. After cooling, transfer the tin to the refrigerator and let the cookie cups chill for at least 2 hours, allowing the flavors to meld and the filling to firm up to a delightful texture.
Step 7: Top and Serve
After chilling, remove the Oreo Cheesecake Cookie Cups from the fridge. Pipe or dollop whipped cream on top of each cup, creating a fluffy layer that perfectly complements the rich filling. Finally, sprinkle crushed Oreos on top for an extra touch of goodness before serving these delightful treats to your family and friends.
How to Store and Freeze Oreo Cheesecake Cookie Cups
Fridge: Store your Oreo Cheesecake Cookie Cups in an airtight container in the refrigerator for up to 5 days. This keeps them fresh and delicious for your late-night cravings.
Freezer: For longer storage, place the cookie cups in a single layer in a freezer-safe container or wrap them individually in plastic wrap. They can last for up to 2 months in the freezer.
Reheating: When you’re ready to enjoy, let them thaw in the fridge overnight or microwave for 10-15 seconds until they’re just warm and the flavors are brought back to life!
Before Serving: After thawing, feel free to add a fresh topping of whipped cream and crushed Oreos for that signature touch!
Make Ahead Options
These Oreo Cheesecake Cookie Cups are perfect for meal prep, allowing you to enjoy delicious desserts with minimal fuss! You can prepare the cookie crust up to 3 days in advance, storing the pressed mixture in the muffin tin covered with plastic wrap in the fridge. The cheesecake filling can also be made 1 day ahead; just refrigerate it separately in an airtight container. When you’re ready to bake, simply spoon the chilled filling into the prepared crusts and bake as directed. To ensure the ultimate flavor and texture, avoid pouring the filling into warm crusts. With these make-ahead tips, you’ll have delightful treats ready to impress with ease!
What to Serve with Oreo Cheesecake Cookie Cups
Elevate your dessert experience with complementary dishes and flavors that harmonize beautifully with your creamy cookie cups.
-
Fresh Berries: A burst of flavor, their tartness balances the sweetness of the cookie cups perfectly, creating a refreshing contrast.
-
Chocolate Drizzle: Drizzling warm chocolate sauce over the top enhances the chocolatey goodness, adding a rich touch that will delight any sweet tooth.
-
Coffee or Espresso: The bold bitterness of coffee pairs beautifully, cutting through the richness and providing a sophisticated finish to your sweet treats.
-
Vanilla Ice Cream: A scoop of creamy vanilla ice cream next to your Oreo Cheesecake Cookie Cups offers a delightful temperature contrast that will have everyone reaching for seconds.
-
Mint Chocolate Chip Milkshake: This rich, green shake adds a fun twist to dessert and brings a cool minty freshness that goes well with chocolate flavors.
-
Caramel Sauce: Drizzling caramel over the whipped cream adds an extra layer of indulgence, elevating each bite into a blissful experience.
-
Mini Fruit Tart: A light and fruity option, the tartness from the fruit beautifully contrasts with the rich cheesecake, creating a well-rounded dessert table.
-
Red Velvet Cake: For those who adore a little extra decadence, the distinct flavors and textures of red velvet cake provide a beautifully colorful addition to your dessert spread.
-
Sparkling Lemonade: A refreshing drink option, the citrus notes cleanse the palate, making sure every bite of your Oreo Cheesecake Cookie Cups feels vibrant and exciting.
Oreo Cheesecake Cookie Cups Variations
Feel free to explore these delightful twists that will take your Oreo Cheesecake Cookie Cups to the next level and surprise your taste buds!
-
Gluten-Free: Substitute regular Oreos with gluten-free chocolate cookies. This way, everyone can enjoy a cookie cup without worry.
-
Nutty Crunch: Add crushed pecans or almonds to the cookie crust for an added crunch. It brings a delightful nutty flavor that complements the creaminess.
-
Mint Chocolate: Use mint-flavored Oreo cookies for a refreshing twist. These minty delights will transport you straight to a cool summer evening.
-
Dairy-Free: Swap cream cheese with a dairy-free alternative like cashew cream. You won’t miss the creaminess, and they’ll be suitable for those avoiding dairy.
-
Spicy Heat: Incorporate a pinch of cayenne pepper into the cheesecake filling for a surprising kick. The heat pairs unexpectedly well with the sweetness.
-
Fruit Fusion: Top your cookie cups with fresh berries or a fruit compote. The burst of fruity flavor contrasts beautifully with the rich cheesecake.
-
Chocolate Overload: Drizzle gooey chocolate sauce over the whipped cream topping. For true chocolate lovers, it’s an indulgent touch that elevates the dessert.
For even more inspiration, consider pairing your cookie cups with a slice of mouthwatering Marshmallow Whip Cheesecake for a dessert table that will leave guests in awe!
Expert Tips for Oreo Cheesecake Cookie Cups
• Soften Your Cream Cheese: Ensure the cream cheese is at room temperature to achieve a smooth filling, preventing lumps in your Oreo Cheesecake Cookie Cups.
• Avoid Overbaking: Keep an eye on the baking time; the centers should remain slightly jiggly to maintain the ideal creamy texture. Overbaking can lead to dryness.
• Chill Thoroughly: Allow your cookie cups to cool completely before refrigerating. Chilling them sufficiently helps the filling properly set, enhancing flavor.
• Customize Your Toppings: Feel free to get creative with optional toppings. Consider adding fresh berries or drizzling chocolate for a personalized touch to your Oreo Cheesecake Cookie Cups.
• Choose Quality Ingredients: Quality ingredients make a difference; opt for full-fat cream cheese and real butter for a richer, more indulgent flavor.
Oreo Cheesecake Cookie Cups Recipe FAQs
How do I choose ripe ingredients for Oreo Cheesecake Cookie Cups?
Absolutely! When selecting your ingredients, particularly the cream cheese, ensure it’s at room temperature for optimal mixing and a smooth filling. Fresh, full-fat cream cheese works best for that rich texture. For the best flavor, try using Oreos that are fresh and not past their expiration date, as stale cookies can affect the crunchiness of the crust.
How should I store leftover Oreo Cheesecake Cookie Cups?
You can store your delightful treats in an airtight container in the refrigerator for up to 5 days. This keeps them nice and fresh for your late-night indulgence. If you find yourself with leftovers (though I doubt it!), placing them in the fridge prevents them from drying out and losing their delicious flavor.
Can I freeze Oreo Cheesecake Cookie Cups?
Yes, you can! To freeze them, wrap each cookie cup individually in plastic wrap or place them in a single layer in a freezer-safe container. They can be stored in the freezer for up to 2 months. When you’re ready to enjoy them, thaw the cookie cups in the fridge overnight or microwave each cup for about 10-15 seconds until they are warmed through.
What if my cheesecake filling doesn’t turn out creamy?
Very! If your filling is lumpy or not as creamy as you’d like, ensure that your cream cheese is properly softened before mixing. It should be at room temperature; if it’s cold, it won’t mix well. If you’ve overbaked the cookie cups, they may also lose their creaminess. Make sure to pull them out of the oven while the centers are still slightly jiggly for that perfect cheesecake texture.
Are there any dietary considerations for Oreo Cheesecake Cookie Cups?
Yes! If you’re preparing these cookie cups for someone with dietary restrictions, you can make several substitutions. For a dairy-free option, use dairy-free cream cheese and margarine instead of butter. Additionally, if allergies are a concern, always check the ingredient list on your Oreo cookies and any other pre-packaged items for potential allergens.
Can I customize the flavors in Oreo Cheesecake Cookie Cups?
Of course! The beauty of these cookie cups lies in their versatility. Swap out Oreos for different types of sandwich cookies, such as chocolate chip or peanut butter cookies, for a unique twist. Plus, you can experiment with flavored cream cheese (like vanilla or chocolate) to elevate the taste even more!
Oreo Cheesecake Cookie Cups: Your New Favorite Dessert Delight
Ingredients
Equipment
Method
- Preheat your oven to 350°F (175°C). Prepare a muffin tin with cupcake liners.
- Crush about 20 Oreo cookies into fine crumbs and combine with melted butter until it resembles wet sand.
- Press about 1 tablespoon of the cookie crust mixture into the bottom of each liner.
- Beat softened cream cheese with sugar until light and fluffy, then mix in sour cream and optional chocolate chips.
- Fill each cup with the cheesecake filling and bake for 15-18 minutes or until centers are slightly jiggly.
- Let cool completely at room temperature then refrigerate for at least 2 hours.
- Top each cup with whipped cream and sprinkle crushed Oreos before serving.
Leave a Reply