
“Is it possible to marry the charm of red velvet cake with the creamy goodness of cheesecake in one delicious dessert? Absolutely! This Red Velvet Oreo Cheesecake is a delightful creation that combines the best of both worlds. With its smooth, luscious texture and a crunchy Oreo crust, this gluten-free treat makes for an ideal indulgence, whether for a special occasion or a simple weeknight craving. You won’t believe how easy this dessert is to whip up, using common pantry staples you already have. Ready to impress your friends and family with a showstopper that’s not only beginner-friendly but also utterly delicious? Let’s dive into the sweet world of cheesecake magic!”
Why is Red Velvet Oreo Cheesecake a must-try?
Irresistible Flavor Fusion: This dessert beautifully blends the classic tanginess of cheesecake with the rich cocoa notes of red velvet, creating a flavor experience that’s hard to resist.
Beginner-Friendly: You don’t need to be a pro baker to whip this up. The straightforward steps make it accessible for everyone!
Gluten-Free Delight: Perfect for those with dietary restrictions, simply use gluten-free Oreo cookies for a treat everyone can enjoy.
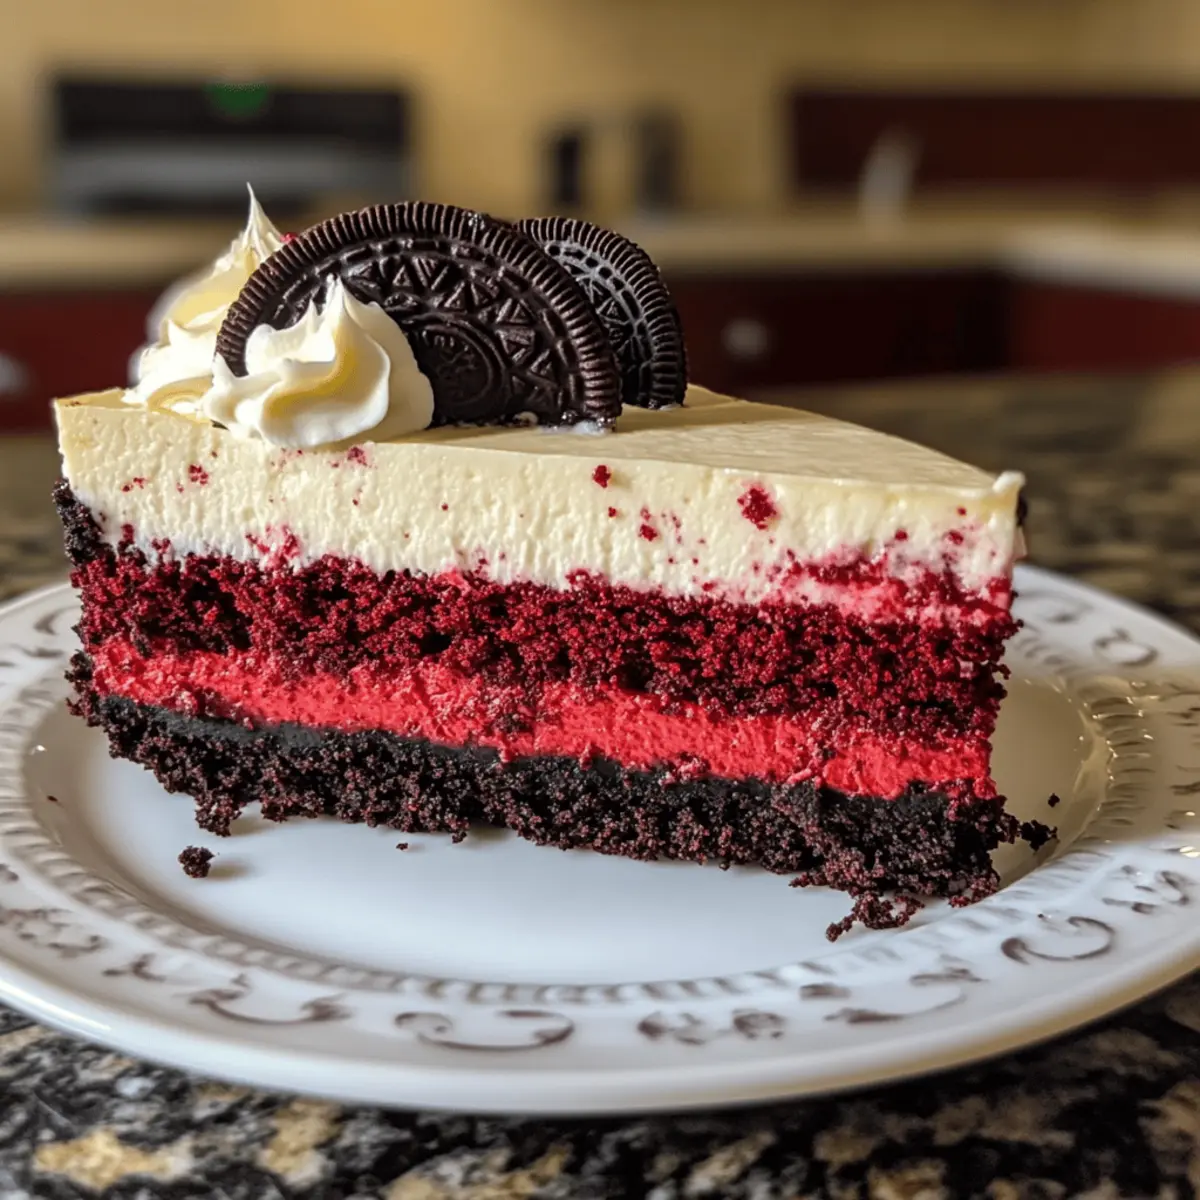
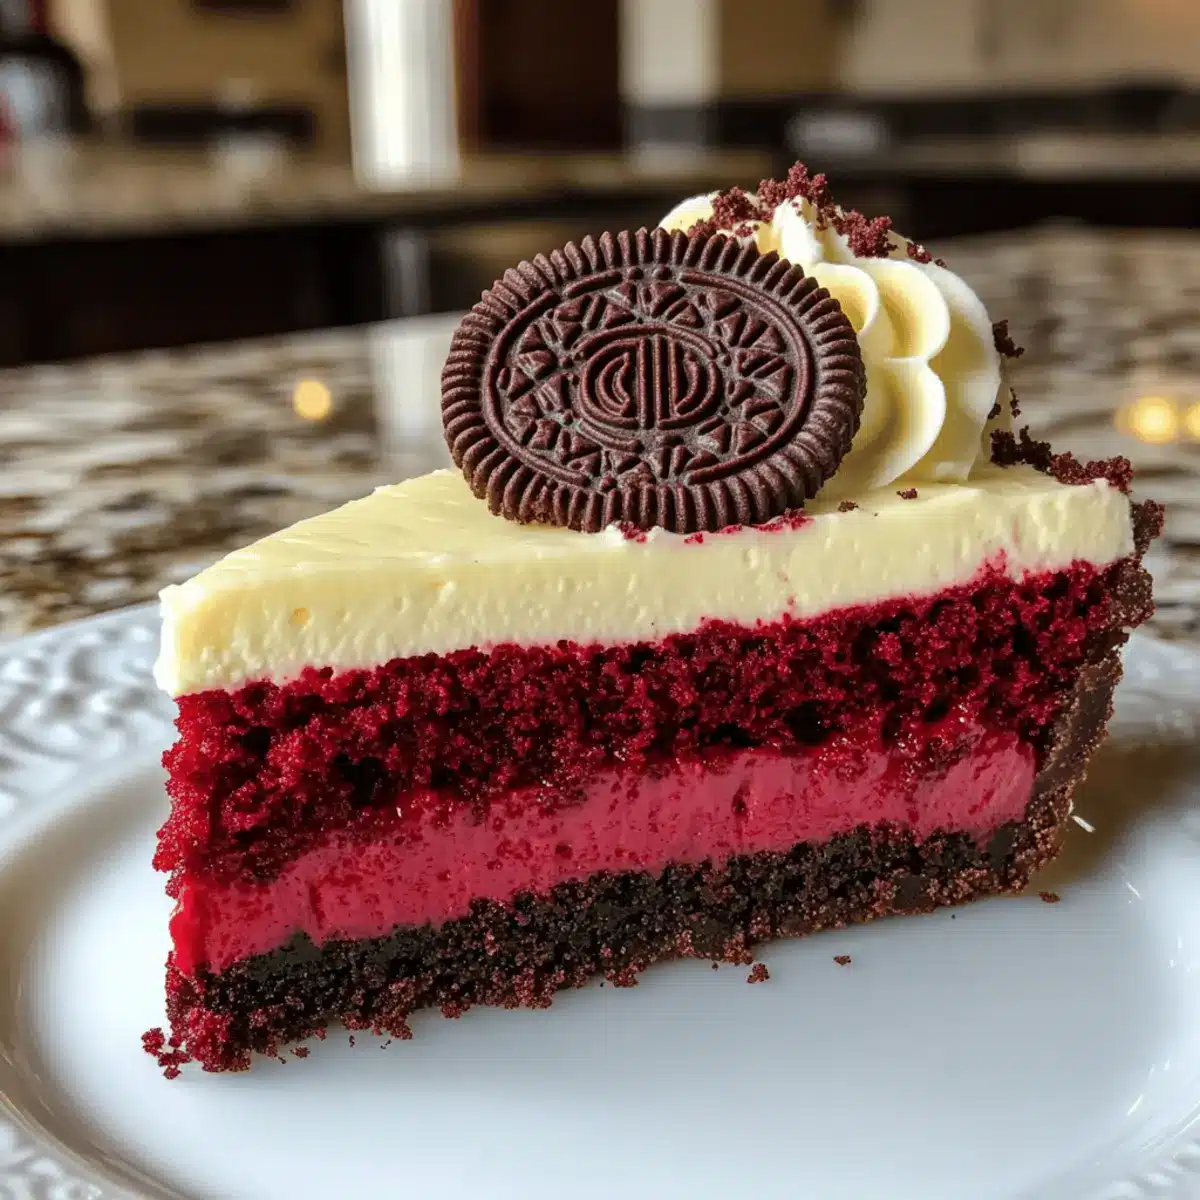
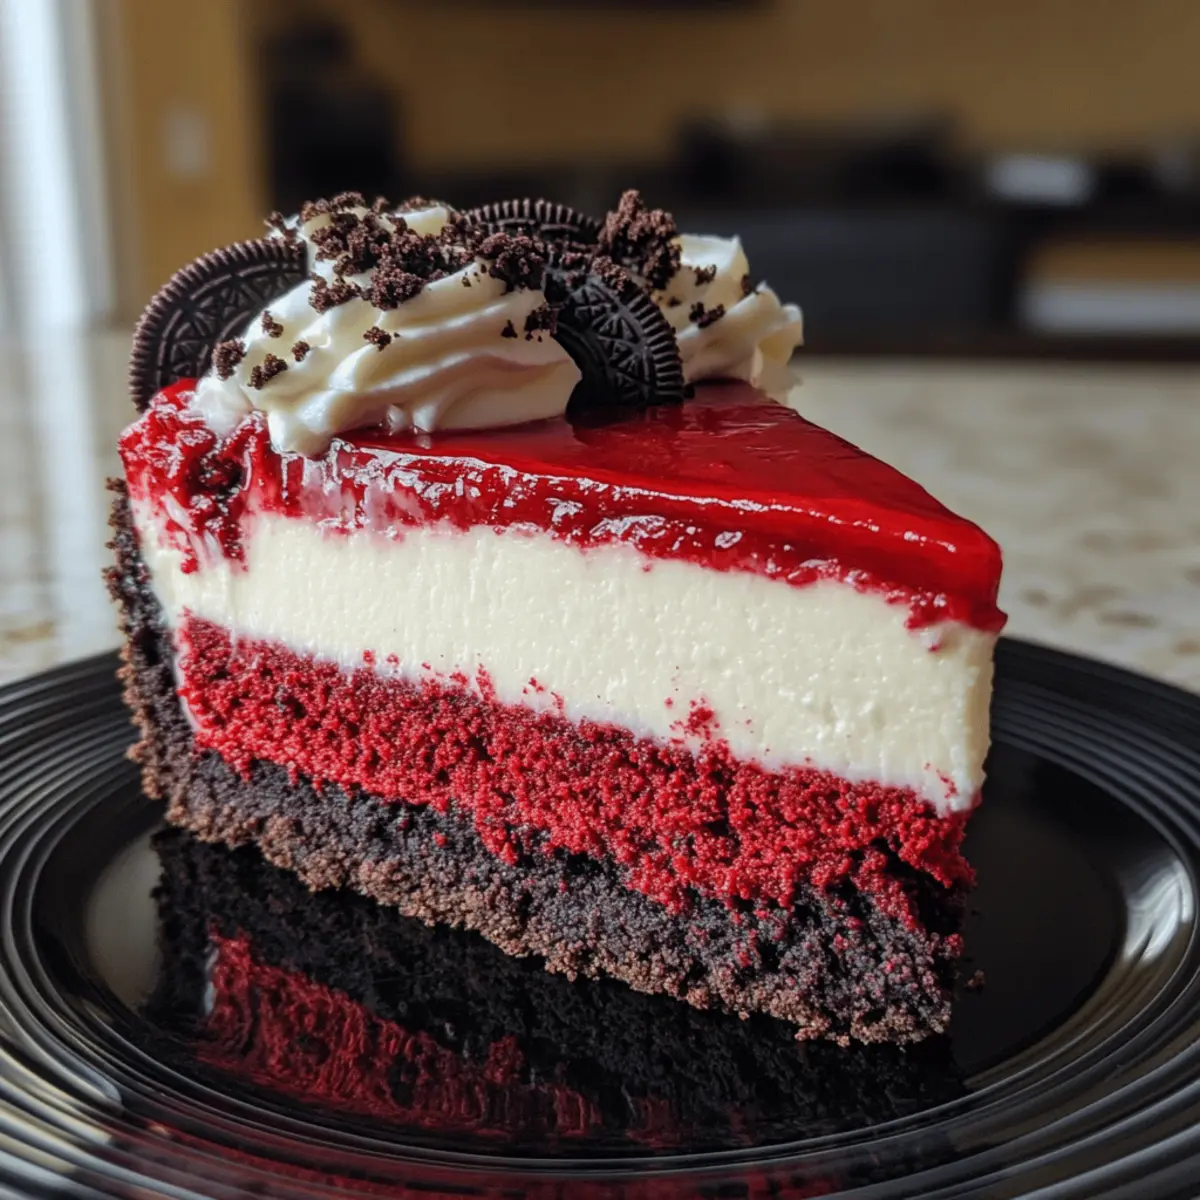
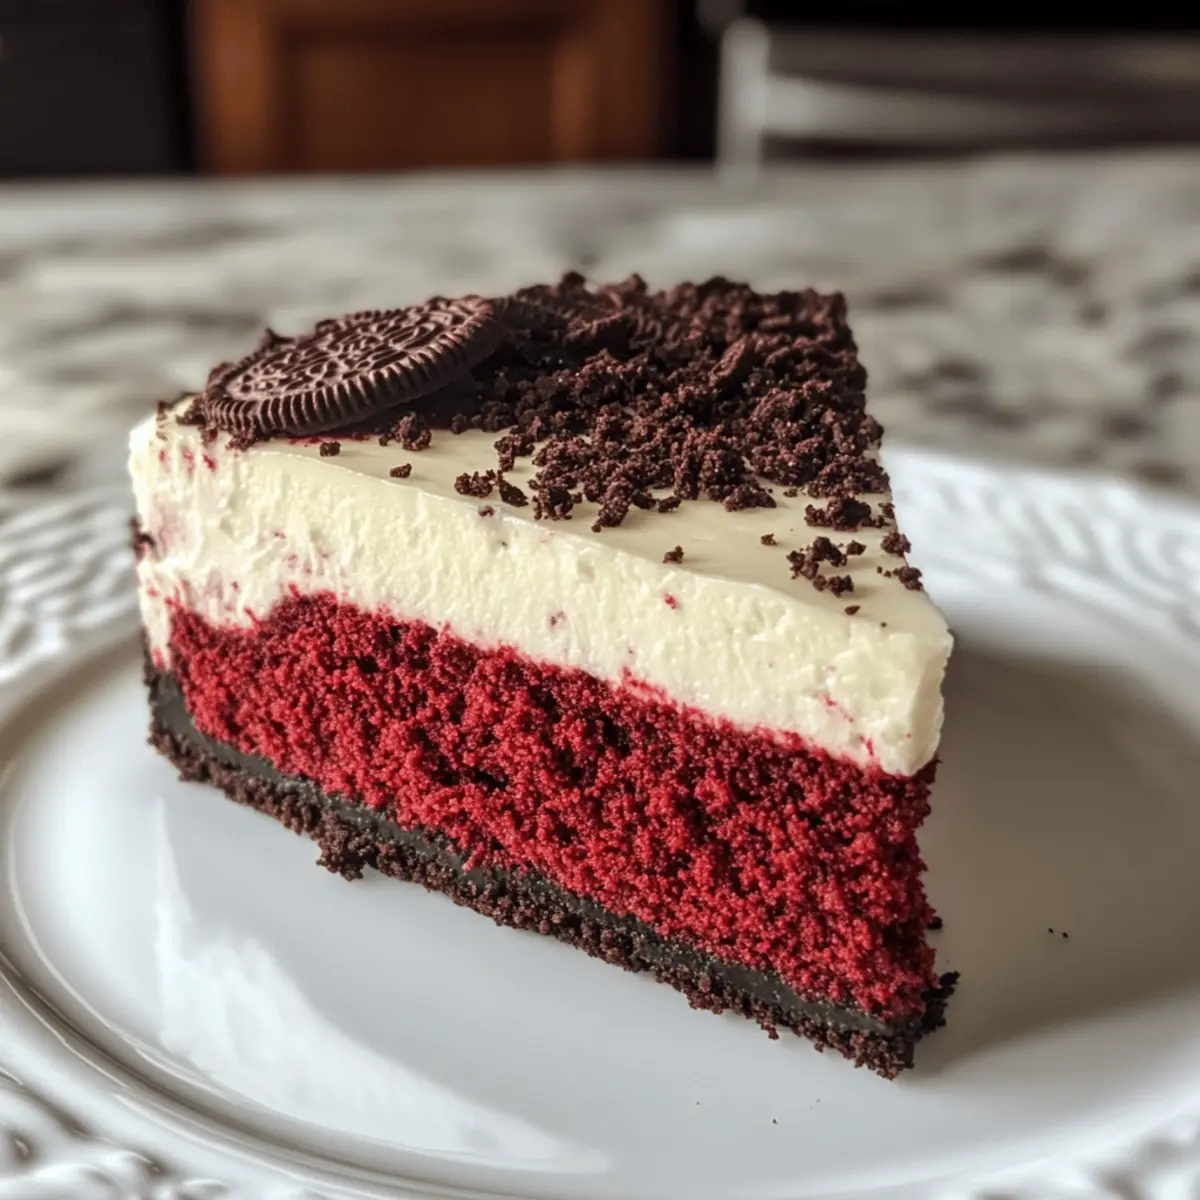
Visual Stunner: The vibrant red contrasted with the dark Oreo crust makes this cheesecake a feast for the eyes—ideal for gatherings or special occasions.
Crowd-Pleasing Appeal: From kids to adults, this mashup is sure to win over any crowd. Try pairing it with a dollop of whipped cream or opt for variations like incorporating chocolate chips for added texture!
Red Velvet Oreo Cheesecake Ingredients
For the Crust
• Oreo Cookies – Essential for creating a crunchy, chocolatey foundation; use gluten-free varieties for a safe option.
• Butter – Acts as a binder for the crust; choose unsalted butter for enhanced flavor.
For the Cheesecake Filling
• Cream Cheese – The base that gives the cheesecake its rich, luscious texture; ensure it’s at room temperature for smooth mixing.
• Granulated Sugar – Sweetens to balance the tang of the cream cheese; feel free to substitute with a sugar alternative if desired.
• Red Velvet Cake Mix – Infuses the cheesecake with that signature red velvet flavor and hue; opt for gluten-free cake mix for a gluten-free treat.
• Eggs – Help bind the mixture and set the cheesecake; make sure they’re at room temperature for optimal blending.
• Vanilla Extract – Enhances the overall flavor; pure vanilla gives the best results.
• Cocoa Powder – Adds a deep chocolate flavor to the red velvet mix; Dutch-processed cocoa provides extra richness.
For the Topping
• Whipped Cream – Adds a light, fluffy finish to the cheesecake; substitute with non-dairy whipped topping if preferred.
This Red Velvet Oreo Cheesecake is ready to make an impression at your next gathering, combining elegance and deliciousness in a way that’s truly unforgettable!
Step‑by‑Step Instructions for Red Velvet Oreo Cheesecake
Step 1: Preheat the Oven and Prepare the Pan
Begin by preheating your oven to 325°F (160°C). While it warms up, take a springform pan and grease the base with a bit of butter to prevent sticking. This will ensure your Red Velvet Oreo Cheesecake comes out perfectly when it’s time to serve.
Step 2: Make the Oreo Crust
Crush the Oreo cookies into fine crumbs using a food processor or by placing them in a resealable bag and rolling over them with a rolling pin. Melt some unsalted butter in the microwave and combine it with the crushed cookies until well mixed. Press this mixture firmly into the bottom of the prepared springform pan to create a solid crust.
Step 3: Mix the Cheesecake Filling
In a large mixing bowl, beat the cream cheese with an electric mixer until smooth and creamy. Gradually add the granulated sugar, mixing until fully combined. Make sure there are no lumps, as a smooth base is key to a luscious Red Velvet Oreo Cheesecake.
Step 4: Incorporate Eggs and Flavorings
Add the eggs one at a time to the cream cheese mixture, mixing gently after each addition to maintain a smooth texture. Once fully incorporated, add the red velvet cake mix, cocoa powder, and vanilla extract. Blend on low speed just until everything is combined, avoiding overmixing for the best results.
Step 5: Pour the Filling Over the Crust
Carefully pour the smooth cheesecake filling over the prepared Oreo crust in the springform pan. Use a spatula to spread it evenly, ensuring every inch of the crust is covered. This layer of creamy goodness will transform the cheesecake into a decadent treat.
Step 6: Bake the Cheesecake
Place the springform pan into the preheated oven and bake for 60-75 minutes. You’ll know it’s done when the edges are set, but the center still has a slight wobble. This balance is crucial for a perfectly rich and creamy Red Velvet Oreo Cheesecake.
Step 7: Cool and Refrigerate
Once baked, turn off the oven and let the cheesecake cool inside for about an hour. This gentle cooling helps prevent cracks. After cooling, transfer the cheesecake to the refrigerator and chill for at least 6 hours, or preferably overnight, to let it firm up completely.
Step 8: Serve and Enjoy
After chilling, remove the cheesecake from the springform pan, and it’s time to serve! Top it with whipped cream and maybe some chocolate shavings or fresh berries for an extra touch. Your Red Velvet Oreo Cheesecake is ready to impress everyone with its beautiful look and delightful flavor!
What to Serve with Red Velvet Oreo Cheesecake?
Indulging in this creamy delight calls for some equally enjoyable pairings to create a memorable meal experience.
- Fresh Berries: A handful of raspberries or strawberries adds a burst of freshness and a beautiful contrast to the rich cheesecake.
- Chocolate-Covered Strawberries: Their sweet flavor and chocolatey richness enhance the dessert’s indulgent appeal. They’re also a perfect visual complement!
- Vanilla Ice Cream: The creamy, smooth texture of classic vanilla ice cream elevates every bite of cheesecake, providing a delightful temperature contrast.
- Whipped Cream: A generous dollop of lightly sweetened whipped cream adds lightness while enhancing the already luscious texture of the cheesecake.
- Coffee: A warm cup of coffee balances the sweetness and complements the chocolate notes, making for a delightful pairing that stimulates the senses.
- Champagne or Sparkling Wine: Bubbles elevate any special occasion. Their refreshing acidity cuts through the cheesecake’s richness beautifully, making for a celebratory touch!
- Decadent Hot Chocolate: For those cozy evenings, a rich hot chocolate brings warmth and comfort, harmonizing wonderfully with the flavors of the dessert.
- Chocolate Shavings: Sprinkling some chocolate shavings on top adds an element of elegance and an extra touch of chocolatey goodness to the visual appeal.
- Nutty Biscotti: Crunchy, nutty biscotti paired with a cup of tea creates a lovely texture contrast and is perfect for keeping snacks light.
Variations & Substitutions for Red Velvet Oreo Cheesecake
Customize your cheesecake with these fun and delicious twists that elevate your baking experience!
- Gluten-Free: Use gluten-free Oreo cookies and a gluten-free cake mix to accommodate dietary needs without sacrificing flavor.
- Cake Layer: Transform your cheesecake into a layered dessert by adding a red velvet cake layer beneath the cheesecake for added texture and indulgence.
- Chocolate Lovers: Fold in semi-sweet chocolate chips to the cheesecake filling for an extra rich, chocolatey bite.
- Nutty Crunch: Incorporate finely chopped nuts, like pecans or walnuts, into the crust for a delightful crunch and flavor contrast.
- Fruity Layer: Swap some of the filling for a layer of berry puree, like raspberry or strawberry, for a pop of fruity flavor that brilliantly complements the richness.
- Spiced Up: Add a dash of cinnamon or nutmeg to the cheesecake mix to bring warmth and spice into the flavor profile—perfect for cozy occasions.
- Zesty Twist: Incorporate a bit of citrus zest, such as lemon or orange, to the filling for a zesty contrast that brightens the dessert.
- Whipped Topping Options: Instead of traditional whipped cream, try a flavored version like almond or coconut for a fun and unexpected twist that pairs beautifully with the red velvet flavor.
Explore these variations to make your Red Velvet Oreo Cheesecake a personal masterpiece. For more delicious cheesecake ideas, check out my other indulgent recipes like Oreo Cheesecake Cookie or the delightful Fried Strawberry Cheesecake. Enjoy diving into these sweet delights!
Tips for the Best Red Velvet Oreo Cheesecake
-
Room Temperature Ingredients: Ensure your cream cheese and eggs are at room temperature. This prevents lumps and facilitates smooth mixing, crucial for a creamy cheesecake.
-
Avoid Overmixing: When incorporating the red velvet cake mix and other ingredients, mix on low speed. Overmixing can lead to cracks in your Red Velvet Oreo Cheesecake during baking.
-
Water Bath Tip: Consider using a water bath while baking. This can help maintain moisture and further reduce the risk of cracks on the surface, achieving a perfect texture.
-
Chill and Set: Allow the cheesecake to cool in the oven after baking for about an hour. Then refrigerate for at least 6 hours or overnight to ensure it sets properly.
-
Crust Firmness: Press the Oreo crust firmly and evenly into the pan. A well-formed crust holds the cheesecake together better and enhances the overall texture.
Make Ahead Options
These Red Velvet Oreo Cheesecakes are perfect for busy home cooks looking to save time without compromising on taste! You can prepare the Oreo crust and the cheesecake filling up to 24 hours in advance. Simply make the crust by crushing the Oreo cookies and mixing them with melted butter, then press it into your springform pan. Next, whip up the cheesecake filling and pour it over the crust. Cover tightly and refrigerate until you’re ready to bake. When you’re ready to serve, bake the cheesecake as directed and allow it to chill for at least 6 hours—this ensures it’ll be just as delicious and perfectly set, making your preparation stress-free and delightful!
How to Store and Freeze Red Velvet Oreo Cheesecake
Fridge: Store leftover cheesecake covered in plastic wrap or aluminum foil in the refrigerator for up to 5 days to maintain freshness and flavor.
Freezer: For longer storage, freeze individual slices wrapped tightly in plastic wrap and then in foil for up to 3 months.
Thawing: When ready to enjoy, thaw the cheesecake in the fridge overnight for best results, then serve chilled for the perfect treat.
Reheating: There’s no need to reheat cheesecake, but if you prefer it slightly warmed, place it in a microwave for 10-15 seconds.
Red Velvet Oreo Cheesecake Recipe FAQs
How do I choose the best ingredients for the cheesecake?
Absolutely! For the best results, select high-quality cream cheese that’s full-fat and at room temperature. Look for fresh Oreos (or gluten-free cookies) without any dark spots, which can indicate age. Choose a pure vanilla extract for a fuller flavor, and opt for a gluten-free red velvet cake mix if dietary restrictions are a concern.
How should I store leftover Red Velvet Oreo Cheesecake?
Very easy! Cover your leftover cheesecake tightly with plastic wrap or aluminum foil in the refrigerator. It will stay fresh for about 5 days. Make sure it’s stored on a flat, stable surface to avoid any mishaps!
Can I freeze Red Velvet Oreo Cheesecake?
Certainly! For freezing, slice the cheesecake into individual portions and wrap each slice tightly in plastic wrap, followed by aluminum foil. This way, you can enjoy a piece anytime for up to 3 months! When ready to indulge, simply thaw in the refrigerator overnight, and it’s deliciously ready to serve.
What if my cheesecake cracks while baking?
No worries, it happens to the best of us! To prevent cracks, avoid overmixing the filling and consider using a water bath technique. To fix a crack, simply add a layer of whipped cream or chocolate drizzle on top—it can be a beautiful disguise! Keep in mind, letting the cheesecake cool gradually in the oven is essential.
Is this cheesecake safe for pets, and does it contain common allergens?
Great question! The Red Velvet Oreo Cheesecake is not pet-friendly, as it contains sugar and dairy, which can be harmful to animals. Additionally, the recipe includes gluten, dairy, and eggs, so please be mindful of these common allergens when serving it to guests. If you need gluten-free options, just ensure to use gluten-free cookies and cake mix, as mentioned in the ingredients!
Indulge in Red Velvet Oreo Cheesecake: A Creamy Dream!
Ingredients
Equipment
Method
- Preheat the oven to 325°F (160°C). Grease the base of a springform pan with butter.
- Crush the Oreo cookies into fine crumbs. Melt the unsalted butter and combine it with the cookie crumbs. Press into the bottom of the springform pan to form the crust.
- In a bowl, beat the cream cheese until smooth. Gradually add the sugar until combined.
- Incorporate eggs one at a time, then add red velvet cake mix, cocoa powder, and vanilla. Mix on low speed until combined.
- Pour the cheesecake filling over the crust and spread it evenly.
- Bake in the oven for 60-75 minutes until the edges are set but the center has a slight wobble.
- Cool in the oven for 1 hour, then refrigerate for at least 6 hours or overnight.
- Remove from the springform pan and serve with whipped cream, chocolate shavings, or fresh berries.
Leave a Reply