
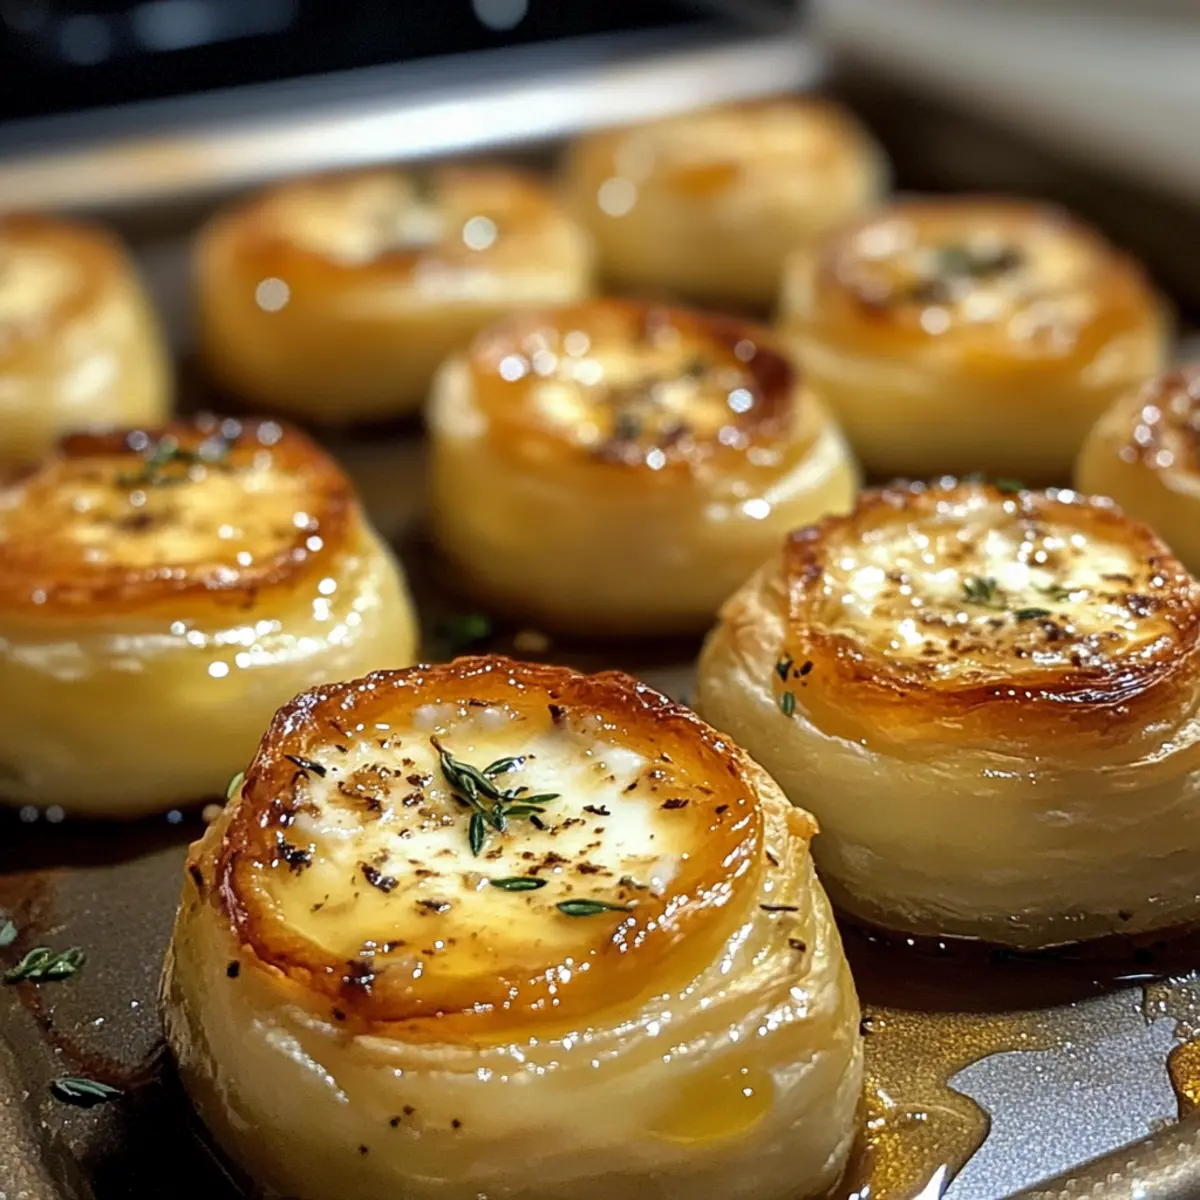
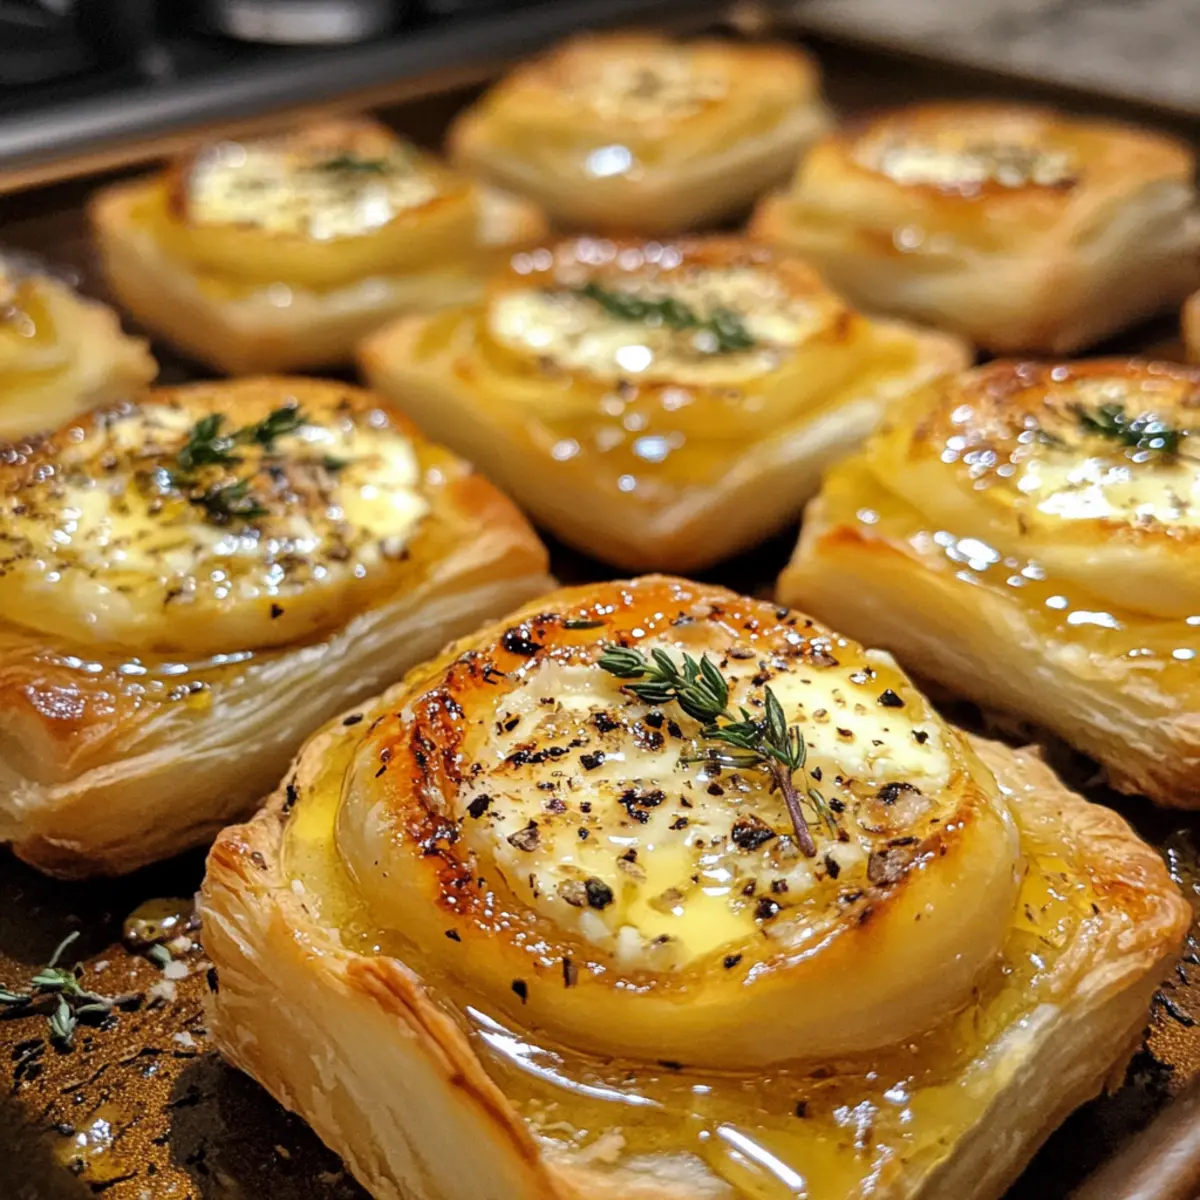
Walking into the kitchen, I find myself enveloped in the comforting scent of melting cheese and the irresistible sweetness of honey. These Goat Cheese and Honey Bites are my go-to appetizer for any gathering—simple yet elegant, and all it takes is four ingredients! In just 20 minutes, you can create a delightful vegetarian treat that’s perfect for impressing guests without spending all day cooking. Plus, they’re make-ahead friendly, allowing you to enjoy your own party while serving a dish that’s sure to steal the show. Curious about how to whip up these crowd-pleasers and customize them to your taste? Let’s dive into the recipe!
Why are Goat Cheese and Honey Bites a Must-Try?
Elevated Simplicity: These Goat Cheese and Honey Bites are not only easy to make but also impressively sophisticated, perfect for any occasion.
Quick Preparation: With only 20 minutes needed, you can whip up this delightful vegetarian appetizer in no time—ideal for spontaneous gatherings!
Customizable Options: Tailor the flavors to your liking by adding herbs or fruits, making each batch uniquely yours.
Crowd-Pleasing Appeal: The combination of creamy cheese and sweet honey wrapped in flaky pastry is a guaranteed hit that will leave your guests wanting more!
Perfect Pairings: Serve with a light salad or a selection of wines to create a memorable dining experience. If you enjoy inventive appetizers, you might also love Strawberry Cheesecake Sandwiches or our flavorful Baked Cream Cheese Pasta.
Goat Cheese and Honey Bites Ingredients
• Prepare to impress with these delightful bites!
For the Bites
- Goat Cheese – Provides a creamy texture and tangy flavor; soften it at room temperature for easier handling.
- Puff Pastry – Creates a light, flaky base that makes these goat cheese and honey bites simply exquisite; remember to thaw before use and roll out slightly for best results.
For Garnishing
- Honey – Adds a lovely sweetness and is best when using quality honey for maximum flavor impact.
- Fresh Thyme – Offers an aromatic touch that brightens the dish; if fresh isn’t available, you can substitute with dried thyme.
Step‑by‑Step Instructions for Goat Cheese and Honey Bites
Step 1: Preheat the Oven
Begin by preheating your oven to 400°F (200°C) while preparing your baking sheets. Line two baking sheets with parchment paper to ensure the Goat Cheese and Honey Bites do not stick and clean-up is easy. This will help create a nice, even baking surface for your pastries, allowing them to puff up beautifully.
Step 2: Prepare the Puff Pastry
On a lightly floured surface, roll out the thawed puff pastry to enhance its structure for baking. Using a 2-inch round cutter, cut the pastry into about 12 rounds per sheet, ensuring even shapes for a polished look. Keep the dough chilled until you’re ready to fill it, as this will keep the pastry flaky while baking.
Step 3: Arrange the Pastry Rounds
Transfer the pastry rounds to the lined baking sheets, spacing them about 1 inch apart. This spacing is crucial for allowing the Goat Cheese and Honey Bites to rise without sticking together. Using your fingertip or the back of a spoon, create a small indentation in the center of each round to hold the cheese filling beautifully.
Step 4: Fill with Goat Cheese
Take your softened goat cheese and spoon approximately 1 tablespoon into each indentation you created. The goat cheese should be creamy and dolloped generously so that it melts slightly while baking, creating a deliciously rich center in each of your Goat Cheese and Honey Bites. Spread it evenly within the indentations for the best presentation.
Step 5: Bake to Perfection
Place the baking sheets in your preheated oven and bake for 8-10 minutes. Keep an eye on them as they bake; you’re looking for a lovely golden brown color and puffy texture, key visual cues that indicate the pastry is done. The aroma of melting cheese and baked pastry will fill your kitchen.
Step 6: Garnish and Serve
Once out of the oven, allow the bites to cool slightly before garnishing. Drizzle honey over each warm bite and sprinkle fresh thyme on top for an aromatic touch. Serve these Goat Cheese and Honey Bites warm, and watch as they become the star of your appetizer table, delighting both your eyes and palate.

How to Store and Freeze Goat Cheese and Honey Bites
-
Fridge: Store leftover Goat Cheese and Honey Bites in an airtight container for up to 2 days. Reheat them in the oven at 350°F (175°C) for about 5-7 minutes to restore their crispness.
-
Freezer: For long-term storage, freeze assembled but unbaked bites on a baking sheet until solid, then transfer to an airtight container or freezer bag. They can be stored for up to 3 months.
-
Baking from Frozen: Bake frozen bites directly from the freezer at 400°F (200°C) for an additional 2-3 minutes, keeping an eye on them to achieve the perfect golden puff.
-
Make-Ahead Tip: Prepare the pastry rounds and filling in advance. Assemble just before baking to ensure maximum flakiness and flavor in your Goat Cheese and Honey Bites.
Expert Tips for Goat Cheese and Honey Bites
-
Perfectly Thawed: Ensure your puff pastry is completely thawed before rolling; it helps maintain proper texture and prevents tearing.
-
Close Monitoring: Watch the bites closely while baking to avoid overbaking. They should be golden brown and puffed, not burnt!
-
Clean Filling Method: Use a piping bag for a neat filling of goat cheese—this makes for a presentation that wows guests without extra mess.
-
Customization Freedom: Feel free to swap goat cheese with ricotta or feta to suit your flavor preference; experiment with herbs for delightful variations!
-
Make-Ahead Convenience: Prepare the filling and pastry rounds in advance. Assemble and bake just before serving for the best texture in your goat cheese and honey bites.
Make Ahead Options
These Goat Cheese and Honey Bites are fantastic for busy cooks looking to save time without sacrificing flavor! You can prepare the puff pastry rounds and fill them with goat cheese up to 24 hours in advance. Simply assemble them, cover tightly with plastic wrap, and refrigerate to keep them fresh. To ensure they bake perfectly, only drizzle the honey and sprinkle the thyme on top right before serving. For even longer storage, you can freeze the assembled but unbaked bites; just bake them directly from frozen, adding an extra minute or two to the baking time. This way, you’ll have an easy appetizer ready to impress at a moment’s notice!
What to Serve with Goat Cheese and Honey Bites
Elevate your gathering with this lovely, harmonious spread that perfectly complements the sweet and savory notes of your bites.
- Light Green Salad: A fresh mix of arugula and spinach drizzled with lemon vinaigrette offers a crisp contrast to the creamy bites.
- Fruit Platter: Include seasonal fruits like figs and grapes to balance the richness of the goat cheese and enhance sweetness.
- Cheese Board: Pair with a variety of cheeses for a delightful grazing experience; the creaminess of brie and sharpness of cheddar bring depth.
- Sparkling Cider: The bubbles of sparkling cider refresh the palate and add a touch of celebration to your appetizer.
- Charcuterie Board: Salty prosciutto and a selection of nuts will provide a delicious crunch that complements the silky goat cheese.
- Honey Drizzled Crostini: Toasted bread topped with honey and herbs will echo the honey notes of the bites while adding a textural contrast.
- Grilled Vegetables: Smoky flavors from grilled zucchini or bell peppers create a savory background that contrasts beautifully with the sweet honey.
- Chardonnay: A chilled glass of oaked Chardonnay enhances the dish’s flavors without overpowering the delightful tones of goat cheese.
- Chocolate Dipped Strawberries: For a sweet finish, these will add a gourmet touch that mirrors the elegance of your appetizer.
Goat Cheese and Honey Bites Variations
Feel free to get creative with these bites and let your taste buds guide you!
-
Fruity Twist: Add a slice of pear or fig on top of the goat cheese for a delightful burst of sweetness. The combination of flavors creates a lovely balance that enhances each bite.
-
Nutty Crunch: Incorporate a sprinkle of crushed walnuts before baking for added texture and a nutty flavor. This will provide a satisfying crunch that contrasts beautifully with the creaminess of the cheese.
-
Herbed Upgrade: Swap in fresh basil or rosemary instead of thyme for a fragrant twist. These herbs add a refreshing punch that elevates the overall flavor profile of the bites.
-
Spicy Kick: Mix in a pinch of red pepper flakes with the goat cheese for a hint of heat. This subtle spicy element can give your appetizer a delightful zing that your guests will remember.
-
Cheese Swap: Give ricotta or creamy feta a try instead of goat cheese. These alternatives bring their unique flavors, making each filling experience a new adventure in taste.
-
Sweet Drizzle: Experiment with flavored honey, such as lavender or chili-infused options, for a unique take. This simple change can have a major impact, making every bite a journey of flavors!
-
Savory Layer: Top each filled pastry with a layer of caramelized onions before baking for an extra depth of flavor. This addition introduces sweetness and a rich savory note that complements the cheese beautifully.
-
Miniature Versions: Create bite-sized versions by cutting the puff pastry into smaller circles. Perfect for parties, these mini bites allow for easy snacking alongside other appetizers, like Jalapeno Honey Sandwich or even Salted Honey Pie.
No matter how you choose to customize your Goat Cheese and Honey Bites, they’re sure to impress with their flavor and elegance!

Goat Cheese and Honey Bites Recipe FAQs
What kind of goat cheese should I use for the bites?
I recommend using creamy, fresh goat cheese for the best flavor and texture. Look for a log or a tub of softened goat cheese, which allows for easier spreading into the puff pastry rounds. Avoid overly crumbly varieties as they won’t provide that luscious, creamy center that makes these Goat Cheese and Honey Bites so delightful.
How should I store leftover Goat Cheese and Honey Bites?
To keep your leftovers fresh, store the Goat Cheese and Honey Bites in an airtight container in the refrigerator for up to 2 days. Reheat them in the oven at 350°F (175°C) for about 5-7 minutes to restore their wonderful crispiness without losing the cheesy goodness.
Can I freeze Goat Cheese and Honey Bites?
Absolutely! You can freeze assembled but unbaked bites on a baking sheet until they’re solid, then transfer them to an airtight container or freezer bag for up to 3 months. When you’re ready to enjoy, bake them directly from the freezer at 400°F (200°C); just add an extra 2-3 minutes to the baking time while keeping a close eye to achieve that perfect golden puff.
What can I do if my puff pastry tears while rolling?
No worries! Puff pastry can be quite forgiving. If it tears, simply wet your fingers and gently pinch the edges back together. Alternatively, roll the pastry slightly thicker at the torn areas to reinforce the structure, ensuring your Goat Cheese and Honey Bites still end up beautifully flaky.
Are Goat Cheese and Honey Bites suitable for those with dairy allergies?
These bites contain dairy from goat cheese, so they’re not suitable for individuals with dairy allergies. However, you can make delicious alternatives using dairy-free cream cheese or non-dairy cheese substitutes. Just blend in a touch of maple syrup instead of honey to maintain that sweet flavor!
Irresistible Goat Cheese and Honey Bites in Just 20 Minutes
Ingredients
Equipment
Method
- Preheat your oven to 400°F (200°C) and line two baking sheets with parchment paper.
- Roll out the thawed puff pastry on a lightly floured surface and cut into about 12 rounds per sheet.
- Transfer the pastry rounds to the baking sheets, spacing them 1 inch apart, and create a small indentation in the center of each round.
- Fill each indentation with approximately 1 tablespoon of softened goat cheese.
- Bake in the preheated oven for 8-10 minutes until golden brown and puffy.
- Allow to cool slightly, drizzle honey over each bite, and sprinkle fresh thyme on top before serving warm.
Leave a Reply