
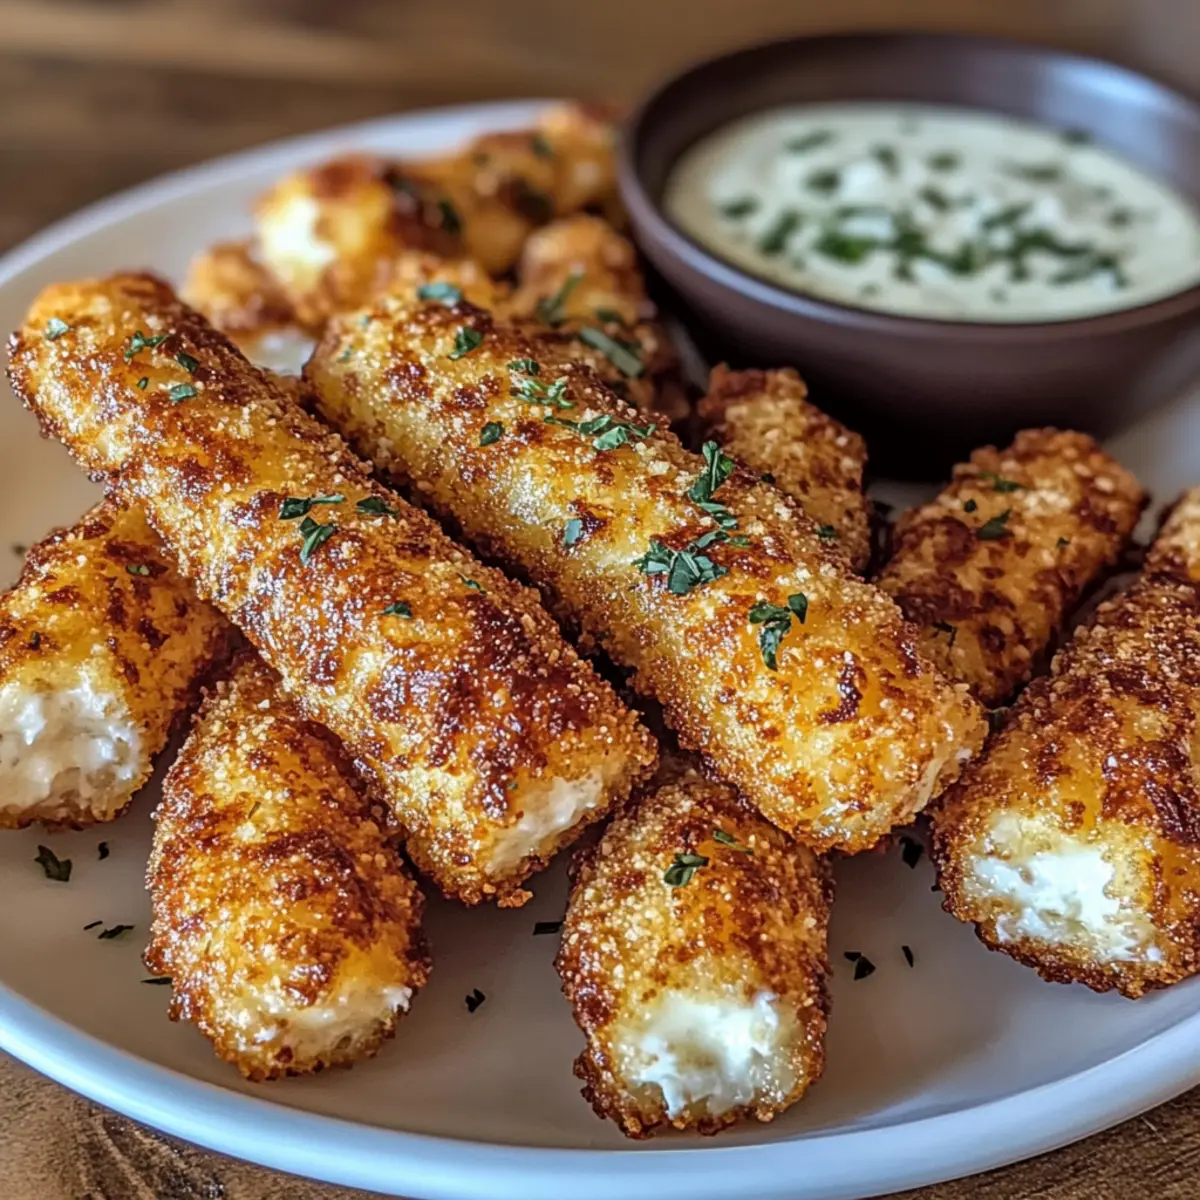
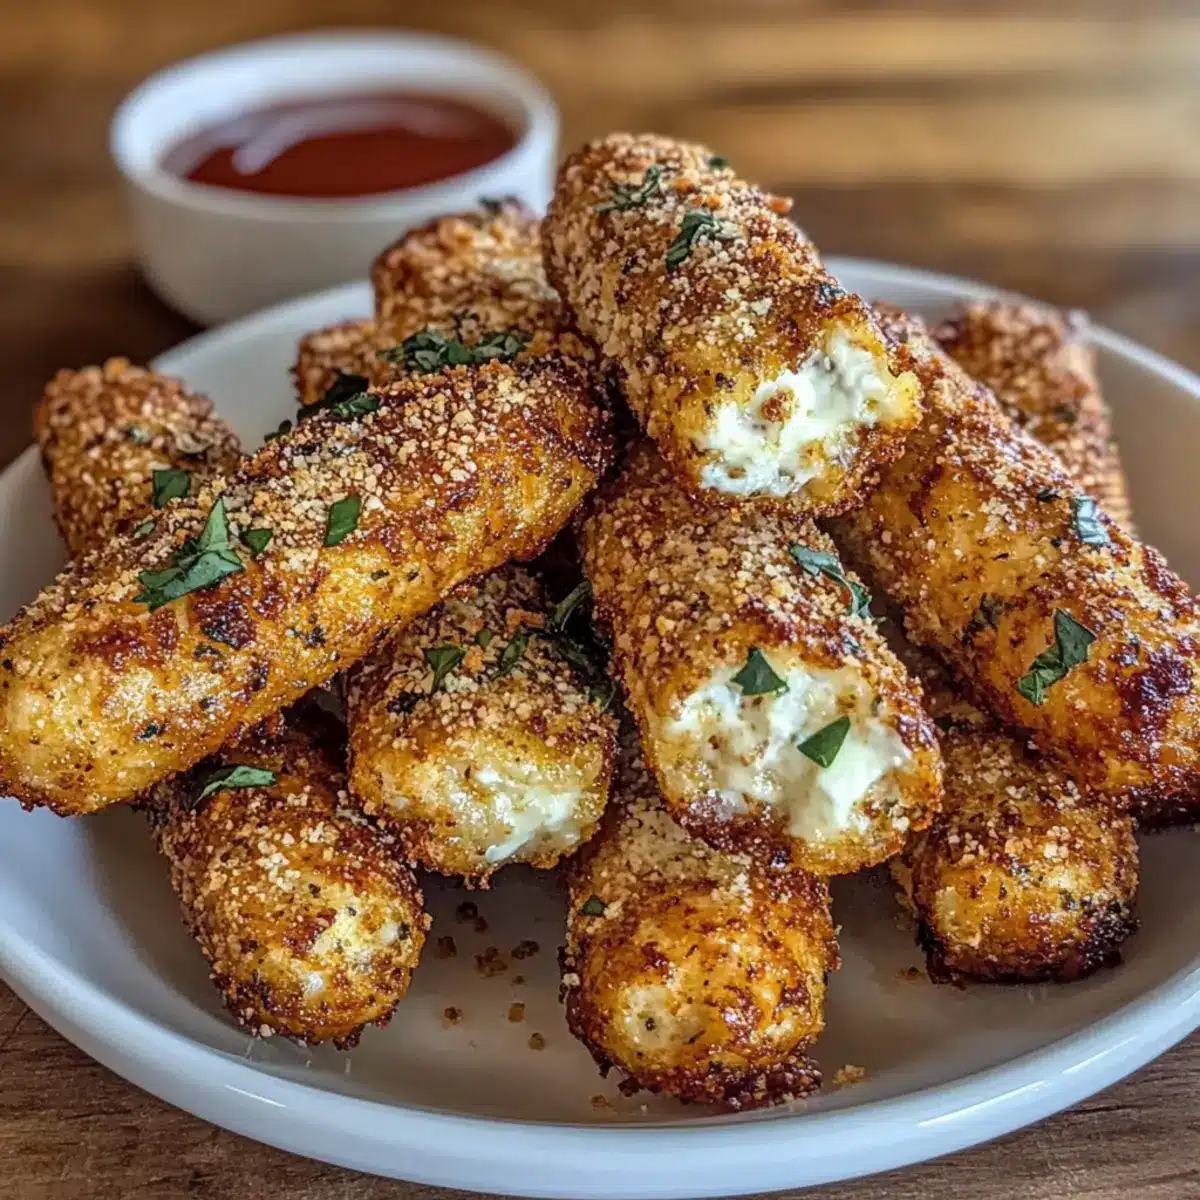
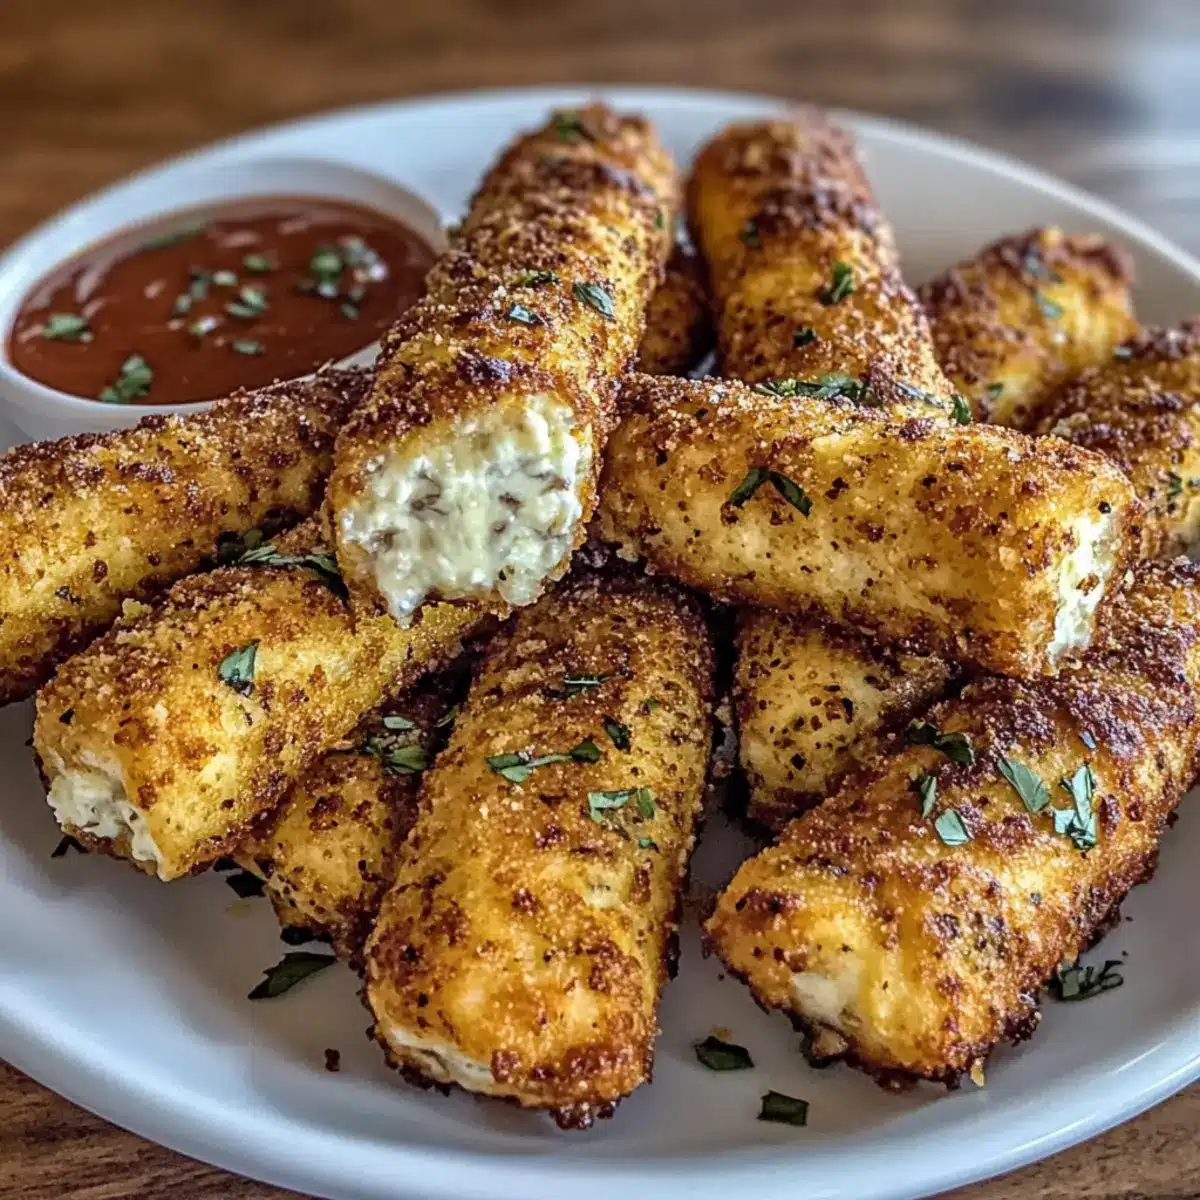
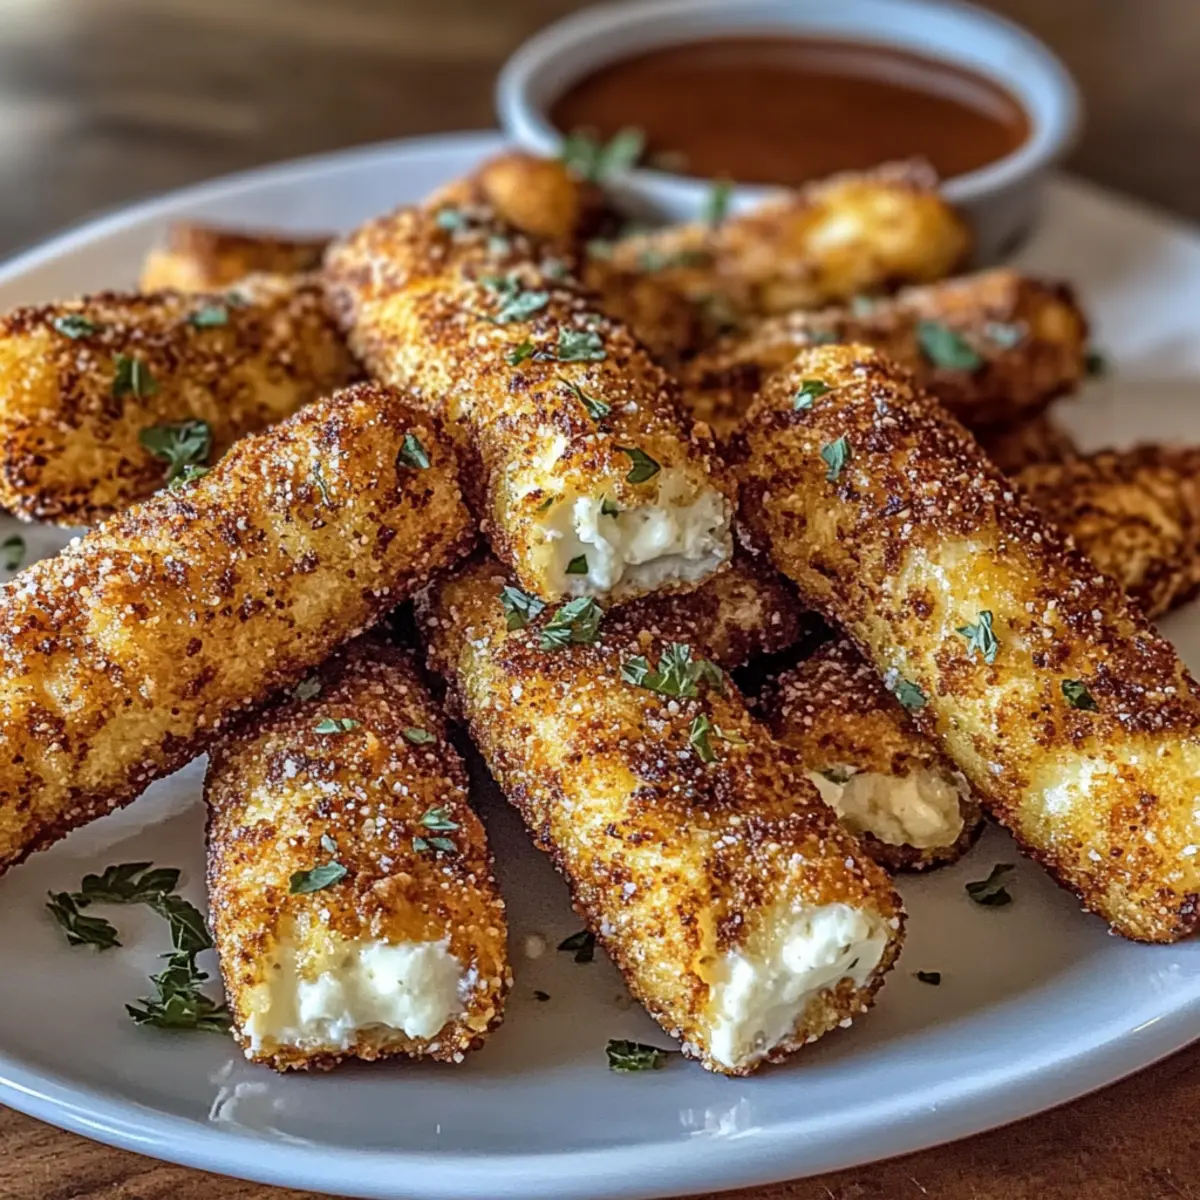
As I stood in my kitchen, the aroma of toasted breadcrumbs wafting through the air, I couldn’t help but feel a wave of comfort wash over me. This is the scene where magic happens—where simple ingredients transform into something extraordinary. Allow me to introduce you to my latest obsession: Cheesy Cottage Cheese Sticks. With just five easily accessible ingredients, this recipe is a game-changer for those of us juggling hectic schedules. These sticks not only satisfy that pesky snack craving but also pack a protein punch, making them a wholesome choice for any occasion. Whether you’re prepping snacks for a busy week or adding a fun appetizer to your next gathering, these Cheesy Cottage Cheese Sticks fit the bill. Why settle for fast food when you can whip up a guilt-free, high-protein treat in no time? Curious about how to bring this crunchy goodness to your table? Let’s dive in!
Why Are These Sticks So Irresistible?
Simplicity at Its Finest: With only five ingredients needed, these Cheesy Cottage Cheese Sticks are incredibly easy to whip up, making them ideal for busy weeknights or last-minute gatherings.
Health-Conscious Indulgence: Packed with protein and offering gluten-free options, you can enjoy a guilt-free treat that doesn’t compromise on flavor.
Crunchy and Gooey Balance: The crispy exterior perfectly complements the melty interior, delivering a delightful mouthful every time.
Versatile Dip Pairing: Serve with marinara, ranch, or your favorite sauce to enhance the flavor experience even further. If you love vibrant side dishes, consider adding colorful veggie sticks for a refreshing twist!
Meal Prep Friendly: These sticks can be made ahead and freeze beautifully, ensuring you always have a satisfying snack at your fingertips.
Whether you’re looking for a quick bite or a fun party appetizer, these Cheesy Cottage Cheese Sticks will elevate your snacking game! For more delicious ideas, don’t miss out on the Spicy Southern Cheesy and Baked Cream Cheese recipes.
Cheesy Cottage Cheese Sticks Ingredients
For the Base
- Cottage Cheese – Provides a creamy base and a high-protein component. Can use low-fat or dairy-free alternatives for a lighter version.
- Mozzarella Cheese – Adds gooeyness and flavor. Use part-skim mozzarella or a dairy-free mozzarella alternative for a different taste.
- Egg – Binds the mixture together for structure. A flax egg can be used for a vegan option.
For the Coating
- Almond Flour/Breadcrumbs – Creates a crispy coating around the sticks. Use exclusively almond flour for gluten-free or gluten-free breadcrumb blends for a traditional texture.
For Flavor Enhancement
- Garlic Powder – Enhances the flavor profile with a savory kick.
- Onion Powder – Pairs with garlic to deepen the overall taste. No direct substitutions, but fresh herbs can be added for variety.
These Cheesy Cottage Cheese Sticks are not just a treat; they’re a kitchen adventure waiting to happen!
Step‑by‑Step Instructions for Cheesy Cottage Cheese Sticks
Step 1: Preheat the Oven
Begin by preheating your oven to 400°F (205°C). While the oven warms up, line a baking sheet with parchment paper, ensuring a non-stick surface for your Cheesy Cottage Cheese Sticks. This preparation will help achieve that golden crispiness without sticking when baked.
Step 2: Blend Base
In a blender, add the cottage cheese and blend until smooth, achieving a creamy consistency. This will serve as the luscious base for your Cheesy Cottage Cheese Sticks. Ensure there are no lumps, as this will create a better texture. This blending process takes about 1-2 minutes.
Step 3: Mix Ingredients
In a large mixing bowl, combine the smooth cottage cheese with shredded mozzarella, egg, almond flour, garlic powder, onion powder, salt, and pepper. Gently fold the ingredients together until just combined, taking care not to overmix, as this could lead to tough sticks. Aim for a cohesive mixture ready for forming.
Step 4: Chill Mixture
Cover the bowl with plastic wrap or a clean kitchen towel and place the mixture in the refrigerator for about 10 minutes. Chilling will firm up the mixture, making it easier to shape into sticks and improving the overall texture of the Cheesy Cottage Cheese Sticks once baked.
Step 5: Shape Sticks
After chilling, scoop portions of the mixture and roll them into sticks, roughly 3 inches long and ½ inch thick. As you work, keep your hands slightly damp to prevent sticking. Lay the formed sticks on a plate or clean surface, ensuring they are close but not touching.
Step 6: Coat Sticks
Prepare your coating by placing breadcrumbs or almond flour in a shallow dish. Roll each stick carefully in the coating, ensuring an even layer covers all sides. This step is crucial for that satisfying crunch once the Cheesy Cottage Cheese Sticks are baked.
Step 7: Bake
Transfer the coated sticks to your prepared baking sheet, spacing them out evenly. Bake in the preheated oven for 18–20 minutes, flipping them halfway through for an even golden-brown finish. Keep an eye out for that crispy exterior; they’re done when they’re golden and crunchy.
Step 8: Rest and Serve
Once baked, remove the Cheesy Cottage Cheese Sticks from the oven and allow them to rest for a couple of minutes. This brief cooling period helps them hold their shape. Serve them warm with your favorite dips, such as marinara or ranch, and enjoy the melty, gooey goodness!
Make Ahead Options
These Cheesy Cottage Cheese Sticks are perfect for meal prep enthusiasts looking to save time! You can prepare the mixture up to 24 hours in advance; simply blend the cottage cheese and combine it with the other ingredients as directed, then refrigerate the mixture in an airtight container. Additionally, you can shape the sticks and freeze them for up to 3 months; just place them on a parchment-lined tray until solid, then transfer them to a freezer bag. When ready to bake, simply preheat your oven and add an extra 2-4 minutes to the baking time for frozen sticks. This way, you’ll have delicious, protein-packed snacks ready whenever the craving strikes without sacrificing quality!
Helpful Tricks for Cheesy Cottage Cheese Sticks
Blend Smoothly: Ensure the cottage cheese is completely blended until smooth to achieve the best texture in your Cheesy Cottage Cheese Sticks.
Chill Well: Refrigerate the mixture for at least 10 minutes before shaping; this makes it easier to handle and helps the sticks hold together better during baking.
Even Coating: When rolling the sticks in breadcrumbs or almond flour, cover all surfaces evenly to enhance that desirable crunch.
Watch the Bake Time: Keep an eye on your oven’s temperature and adjust the baking time as necessary, especially if your oven runs hot, to avoid over-browning.
Add Flavor: Incorporate fresh herbs or spices into the cheese mixture for a personalized twist that elevates your Cheesy Cottage Cheese Sticks.
Cheesy Cottage Cheese Sticks Variations
Feel free to let your creativity shine through with these delightful variations that will elevate your Cheesy Cottage Cheese Sticks experience!
-
Herb-Infused: Add fresh herbs like parsley or chives to the cheese mixture for a pop of flavor and freshness. This simple twist can take your snack to the next level and brighten each bite.
-
Spice It Up: Incorporate spices such as paprika, chili powder, or cayenne for an extra kick. A little heat can transform ordinary sticks into a bold and exciting snack that keeps you coming back for more.
-
Nutty Crunch: Substitute the almond flour with crushed nuts for a unique texture and flavor. This swap adds an extra crunch and a hint of nuttiness that complements the cheesy goodness beautifully.
-
Dairy-Free Delight: Use dairy-free cheeses and a flax egg for a vegan version. You’ll enjoy the same crispy exterior and gooey interior while adhering to your plant-based lifestyle!
-
Zesty Dip Pairing: Serve with a variety of dips like guacamole or a tangy yogurt sauce. Changing up your dip can really enhance the overall flavor profile and create an enjoyable tasting experience.
-
Cheesy Loaded: Mix in some shredded cheddar or pepper jack cheese with the base for a rich, cheesy explosion. This extra layer of flavor pairs wonderfully with the cottage cheese.
-
Sweet Twist: For an unexpected dessert version, add a touch of cinnamon and sugar to the batter, then serve with a dip of warm chocolate sauce. It’s a fun way to indulge your sweet tooth!
-
Fun Shapes: Instead of sticks, try shaping the mixture into bite-sized balls or larger patties. This not only makes them more playful but also allows for better dipping options!
For more mouthwatering ideas, don’t miss out on my Cheesy Ground Beef and Cheesy Meat Potato recipes to explore rich flavors and diverse textures!
Storage Tips for Cheesy Cottage Cheese Sticks
-
Fridge: Keep your Cheesy Cottage Cheese Sticks stored in an airtight container in the refrigerator for up to 3 days. This helps maintain their crispy texture and delicious flavor.
-
Freezer: To freeze, place assembled sticks on a parchment-lined tray, freeze until solid, then transfer to a zip-top bag. They can be stored for up to 3 months; bake from frozen, adding 2-4 minutes to the cooking time.
-
Reheating: When reheating, place the sticks in a preheated oven at 350°F (175°C) for 5–7 minutes until they’re warmed through and regain some crispiness. Avoid microwaving, as this may make them soggy.
What to Serve with Cheesy Cottage Cheese Sticks
Picture a delightful spread where crispy, golden Cheesy Cottage Cheese Sticks take center stage, inviting you to savor every moment of your meal.
-
Marinara Sauce: A classic dip that provides a zesty contrast to the creamy cheese, enhancing the overall flavor experience. The tanginess of marinara pairs beautifully with the sticks, making each bite more delightful.
-
Fresh Veggie Sticks: Crisp carrot and cucumber sticks offer a refreshing crunch that balances the rich cheese, creating a colorful and healthy side. Add a vibrant platter to the table, inviting everyone to munch on these crunchy companions!
-
Ranch Dressing: Creamy and herby, ranch dressing complements the savory flavors of the sticks while adding a cool, refreshing element. This duo is perfect for dipping, making it a family favorite during game nights!
-
Sweet Chili Sauce: For a sweet and spicy kick, try sweet chili sauce. Its bold flavor enhances the cheesy goodness, introducing a delightful twist that will have your guests reaching for another stick.
-
Garlic Bread: The warm, buttery crunch of garlic bread adds a satisfying contrast to your cheesy snack. Paired together, they create a comforting combination that’ll transport you to a cozy Italian bistro.
-
Fruit Salad: A fresh medley of fruits like pineapple, strawberries, and melon delivers a sweet and juicy contrast to the savory sticks. This refreshing side can lighten your plate, making for a delightful balance of flavors.
-
Soda or Iced Tea: Pair your Cheesy Cottage Cheese Sticks with a chilled soda or sweet iced tea to keep things refreshing. These drinks perfectly complement the rich, cheesy flavor, making each bite even more enjoyable.
Whichever pairing you choose, these Cheesy Cottage Cheese Sticks are sure to shine as the star of your meal!
Cheesy Cottage Cheese Sticks Recipe FAQs
What type of cottage cheese should I use for the best results?
For the best flavor and texture, I recommend using full-fat cottage cheese, as it provides a creamy base and adds to the richness. If you’re looking for a lighter option, low-fat or even dairy-free alternatives can work well, but be sure to blend them until completely smooth for the best consistency.
How should I store leftover Cheesy Cottage Cheese Sticks?
Store your Cheesy Cottage Cheese Sticks in an airtight container in the refrigerator for up to 3 days. This method will help maintain their crispiness and flavor. When you’re ready to enjoy them again, simply reheat them in a preheated oven at 350°F (175°C) for about 5–7 minutes until warmed through.
Can I freeze Cheesy Cottage Cheese Sticks?
Absolutely! To freeze, place the assembled, uncooked sticks on a parchment-lined tray and freeze them until solid. Once frozen, transfer them to a zip-top freezer bag, where they can be stored for up to 3 months. When you’re ready to bake them, you can cook them directly from frozen, adding an extra 2-4 minutes to the baking time for perfect results.
What can I do if my sticks fall apart while shaping?
If you find that your Cheesy Cottage Cheese Sticks are falling apart, it may be because the mixture is too warm or not chilled long enough. To fix this, return the bowl to the refrigerator for an additional 10-15 minutes to firm up the mixture more. Alternatively, ensure you’re using enough binding agents like the egg, as this will help hold everything together better.
Are these Cheesy Cottage Cheese Sticks suitable for kids with allergies?
While these Cheesy Cottage Cheese Sticks are packed with protein and are generally kid-friendly, it’s important to note their ingredients. If your child has dairy allergies, you can substitute the cottage cheese and mozzarella with dairy-free alternatives. Additionally, ensure the almond flour or breadcrumbs used are gluten-free if necessary.
Can I add other flavors or spices to the mixture?
Very! You can customize the flavor of your Cheesy Cottage Cheese Sticks by adding a variety of spices or herbs. Consider mixing in a teaspoon of dried herbs like oregano or thyme for a more aromatic blend. You can also kick it up a notch with chili powder or cayenne for a little heat!
Cheesy Cottage Cheese Sticks: Crispy, Gooey Protein Snack Bliss
Ingredients
Equipment
Method
- Preheat your oven to 400°F (205°C) and line a baking sheet with parchment paper.
- Blend the cottage cheese until smooth to create a creamy base.
- Combine the blended cottage cheese with mozzarella, egg, almond flour, garlic powder, onion powder, salt, and pepper in a mixing bowl and fold together until just combined.
- Chill the mixture in the refrigerator for about 10 minutes.
- Shape the chilled mixture into sticks, approximately 3 inches long and ½ inch thick.
- Roll each stick in breadcrumbs or almond flour to coat evenly.
- Transfer the coated sticks to the baking sheet and bake for 18-20 minutes, flipping halfway through.
- Allow to rest for a couple of minutes before serving warm with your favorite dips.
Leave a Reply