
As I sat down with a cup of tea, I couldn’t help but imagine the delightful blend of chewy and sweet coming together in my kitchen. That’s when the idea hit me: why not combine my love for traditional Japanese sweets with the irresistible crunch of Oreos? This Chewy Oreo Mochi Recipe makes that dream a reality! It offers a playful twist on a beloved classic, and the best part? It’s incredibly easy to make and requires no baking at all. In just a short time, you can whip up these delightful treats that satisfy your sweet cravings and impress your family and friends. Ready to dive into a world of chewy goodness? Let’s get started!
Why is this Oreo Mochi Recipe a must-try?
Unique Twist: Combining traditional mochi with crunchy Oreos, this recipe offers an exciting flavor that stands out from typical desserts.
No Baking Required: Perfect for anyone short on time, this easy recipe lets you whip up treats without the oven!
Chewy Perfection: The delightful texture of mochi paired with the rich chocolatey taste of Oreos creates a satisfying indulgence.
Quick to Make: From mixing to rolling, you can create these delightful treats in just a fraction of your day.
Versatile Enjoyment: Serve them at gatherings, share with friends, or simply enjoy them with a cup of tea for a sweet escape. Pair this with other popular recipes like Oreo Cheesecake Cookie for a delightful dessert spread!
Oreo Mochi Recipe Ingredients
For the Mochi Base
• Glutinous Rice Flour – Forms the chewy texture, crucial for authentic flavor.
• Cornstarch – Helps achieve a lighter texture; substitute with potato starch if needed.
• Cocoa Powder – Adds enriched chocolate flavor to the mochi; unsweetened chocolate powder works as well.
• White Sugar – Sweetens the mochi; can be swapped with coconut sugar for a healthier touch.
• Corn Oil – Provides moisture to keep the mochi smooth; vegetable oil is a suitable alternative.
• Milk – Hydrates the batter and enhances softness; opt for almond or oat milk for a dairy-free option.
For the Filling
• Oreo Cookies (crushed) – Delivers the signature flavor and crunch; feel free to use any chocolate sandwich cookies if desired.
Step‑by‑Step Instructions for Oreo Mochi Recipe
Step 1: Mix Ingredients
In a large bowl, combine glutinous rice flour, cornstarch, cocoa powder, white sugar, corn oil, and milk. Using a whisk, stir the mixture until smooth, ensuring there are no lumps. This will create the base for your Oreo mochi, so take your time to mix well until you achieve a lovely, uniform batter.
Step 2: Sift the Batter
Once you’ve mixed the ingredients, sift the batter through a fine mesh strainer to remove any remaining lumps. This step ensures a silky smooth texture, which is crucial for the mochi’s mouthfeel. After sifting, pour the strained batter into a non-stick pot, preparing it for cooking.
Step 3: Heat and Stir
Place the pot over low heat and continuously stir the batter with a wooden spoon or spatula. Cook for about 8-10 minutes until the mixture thickens and pulls away from the sides of the pot, forming a sticky dough-like consistency. As it cooks, you should see the batter turn glossy, indicating it’s ready for the next step.
Step 4: Pull the Dough
Once the batter has thickened, transfer the sticky dough to a clean surface dusted with cornstarch. Allow it to cool for a few minutes, then start stretching and pulling the dough with your hands. Work it for about 10 minutes until it becomes smooth and elastic, which enhances the chewy texture of your finished Oreo mochi.
Step 5: Form Mochi Balls
After achieving the desired consistency, divide the elastic dough into small portions about the size of a golf ball. Roll each portion in your hands to create smooth, round shapes. Make sure each piece is about the same size for even cooking and a lovely presentation in your Oreo mochi sweet treats.
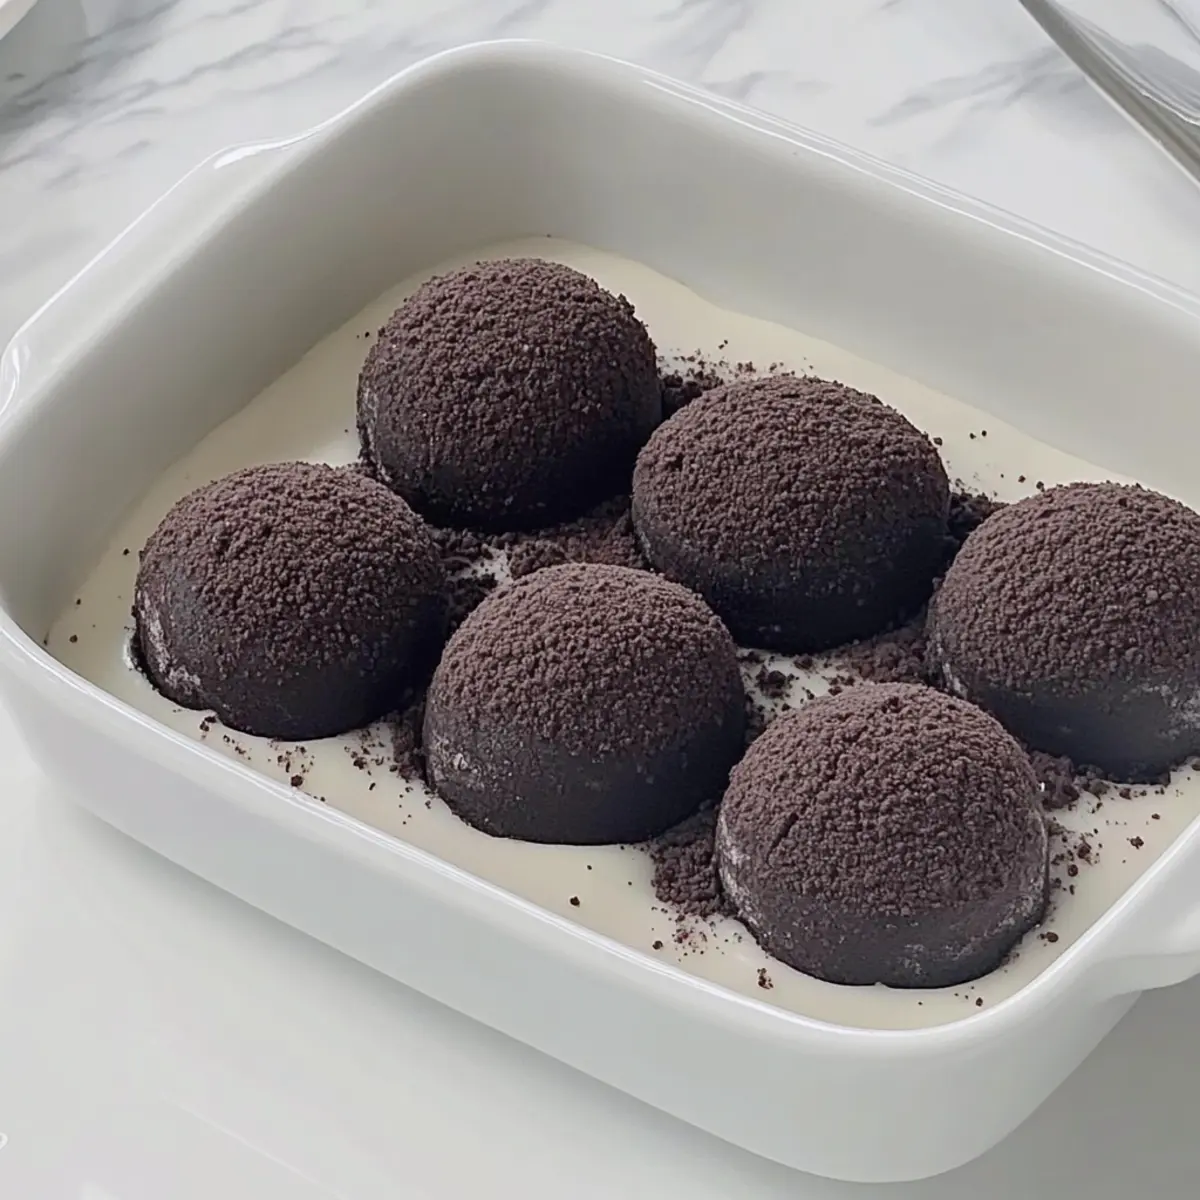
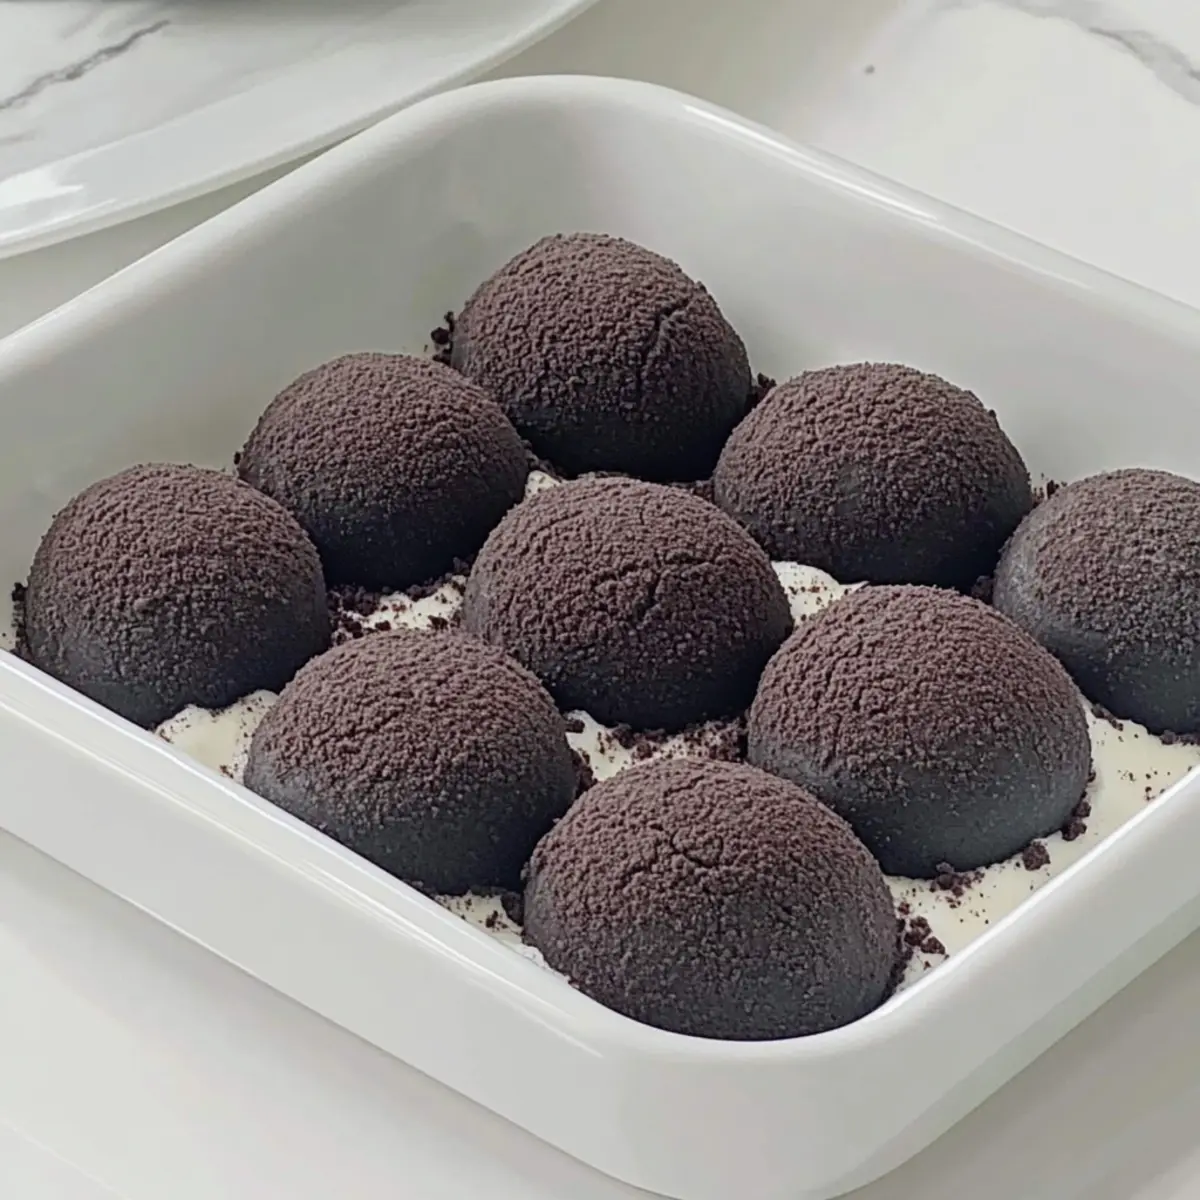
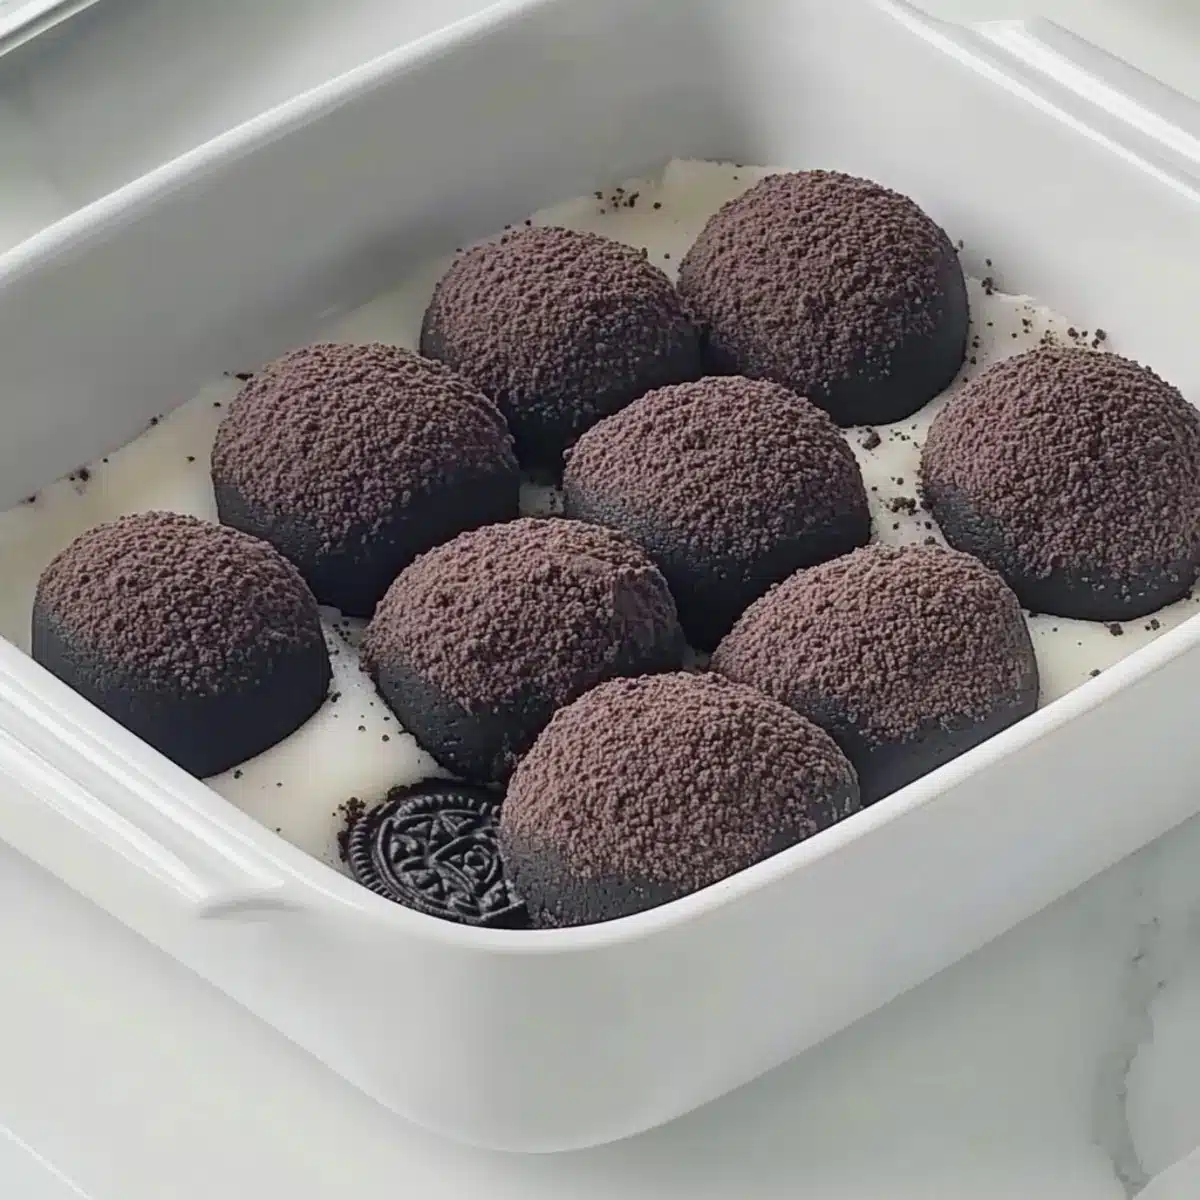
Step 6: Coat with Oreo Crumbs
Finally, take your crushed Oreo cookies and place them in a shallow dish. Roll each mochi ball in the Oreo crumbs until they are fully coated, providing a delightful crunch on the outside. This step not only adds flavor but also gives a fun and visually appealing contrast to the chewy mochi inside.
What to Serve with Chewy Oreo Mochi?
Indulging in these chewy delights opens up a world of pairing possibilities that will elevate your dessert experience.
-
Green Tea Ice Cream: The creamy, soothing flavor of green tea ice cream adds a refreshing contrast to the rich chocolatey mochi, enhancing its taste in every bite.
-
Fruit Platter: A vibrant mix of fresh fruits like strawberries and mangoes offers a refreshing, sweet balance against the mochi’s chewy texture while bringing brightness to your plate.
-
Japanese Tea: Serve with a warm cup of matcha or hojicha for a comforting experience that beautifully complements the dessert’s sweetness and adds an authentic Japanese touch.
-
Chocolate Dipping Sauce: Drizzle warm chocolate sauce over your mochi for an extra indulgent treat that will thrill chocolate lovers and create an irresistible flavor explosion.
-
Coconut Milk: The richness of coconut milk pairs well with the Oreo mochi, offering a delightful tropical twist that elevates the dessert to new heights of deliciousness.
-
Crushed Nuts: Sprinkling crushed almonds or pistachios on top adds a satisfying crunch and a nutty flavor that contrasts beautifully with the soft mochi inside.
-
Coffee: A bold cup of coffee works wonders, cutting through the sweetness and providing a delightful, balanced finish to your dessert experience.
-
Sweet Red Bean Paste: For an authentic touch, serving with sweet red bean paste introduces a delightful sweetness that complements the chewy texture of the mochi.
Expert Tips for Oreo Mochi Recipe
• Non-Stick Pan: Use a non-stick pan to prevent the dough from sticking, ensuring even cooking and an effortless transfer.
• Be Patient with Dough: For the best texture, pull the dough slowly for around 10 minutes; this builds elasticity and chewiness in your Oreo mochi.
• Crushing Oreos: Consider using store-bought Oreo crumbs for convenience, or place Oreos in a ziplock bag and crush them with a rolling pin for a fresher texture.
• Proper Cooling: Let the dough cool slightly before handling. This prevents burns and makes it easier to stretch and shape your mochi.
• Consistent Size: Ensure each mochi ball is consistent in size for even cooking. This also creates an appealing presentation for your delicious treats!
Storage Tips for Oreo Mochi
Room Temperature: Keep your Oreo mochi at room temperature in an airtight container for up to 2-3 days to maintain freshness.
Fridge: For longer storage, place the mochi in the refrigerator. They’ll stay fresh for up to a week, but make sure they’re sealed to prevent drying out.
Freezer: Freezing is a great option for extended storage! Wrap the mochi tightly in plastic wrap and store in an airtight container for up to a month.
Reheating: To enjoy, simply let the frozen mochi thaw at room temperature for a few minutes before serving. This Oreo mochi recipe is a sweet treat that’s perfect for quick snacking anytime!
Oreo Mochi Recipe Variations
Feel free to personalize your Oreo mochi experience with these delightful twists that will elevate your sweet treats to the next level!
-
Flavorful Cookie Crumbs: Experiment with different flavored cookie crumbs, like peanut butter or mint chocolate cookies, to create unique mochi. Each variation offers a delightful surprise that makes tasting even more fun!
-
Sweeter Indulgence: Adjust sweetness level by mixing in a bit more sugar if you prefer a noticeably sweeter mochi. This quick swap will cater to a sweeter tooth and enhance that delightful taste.
-
Dairy-Free Delight: Swap regular milk for almond or oat milk to make this recipe dairy-free. These alternatives will still provide the creamy consistency you crave without any dairy products.
-
Nutty Twist: Incorporate finely ground nuts such as almonds or cashews into the mochi mixture for a crunchy texture boost. Adding nuts not only enhances flavor but also brings an interesting twist to the traditional mochi experience.
-
Fruity Surprise: Add some fresh fruit puree, like strawberry or mango, to the mix for a vibrant fruity punch. The combination of flavors adds a lively touch that brightens each bite!
-
Chocolate-Lover’s Dream: For an extra rich experience, fold in mini chocolate chips along with the crushed Oreos. It’s a dessert within a dessert that’s perfect for chocoholics!
-
Spice it Up: Introduce a dash of cinnamon or even a hint of chili powder for a warm, unexpected kick. This simple addition transforms your mochi into an adventurous treat that pairs beautifully with tea.
-
Serving Suggestions: Pair your Oreo mochi with a cup of tea or coffee for a wonderfully comforting snack. For a fun dessert spread, consider serving them with delicious options like Neapolitan Cake for a colorful buffet of flavors!
Make Ahead Options
These Chewy Oreo Mochi are perfect for busy home cooks looking to save time! You can prepare the mochi dough up to 24 hours in advance—just follow the mixing and cooking steps, then allow the dough to cool completely. Wrap it tightly in plastic wrap and refrigerate to maintain its quality. When you’re ready to serve, simply pull the dough out, let it sit at room temperature for a few minutes to soften, then divide, roll into balls, and coat them with crushed Oreos. This way, you’ll have fresh, delectable treats with minimal effort, just as delightful as when made right away!
Oreo Mochi Recipe FAQs
How do I select the best glutinous rice flour for this Oreo mochi recipe?
Choosing a high-quality glutinous rice flour is crucial for achieving the perfect chewy texture. Look for brands that specifically list “glutinous rice flour” (also known as sweet rice flour) without any additives. You can find it in many Asian grocery stores or online. Avoid regular rice flour, as it will not produce the desired result!
What’s the best way to store leftover Oreo mochi?
To keep your Oreo mochi fresh, store it in an airtight container at room temperature for 2-3 days. If you want to extend its life, refrigerate it for up to one week—but remember to seal it well to prevent it from drying out. For longer storage, wrap each piece in plastic wrap, place them in an airtight container, and freeze for up to 3 months.
Can I freeze Oreo mochi, and if so, how?
Absolutely! Freezing is a great option for keeping your Oreo mochi longer. Here’s how:
- Allow the mochi to cool completely after preparing it.
- Wrap each piece individually in plastic wrap to prevent freezer burn.
- Place the wrapped mochi into an airtight container or freezer bag.
- Label with the date, and you can freeze them for up to 3 months. When you’re ready to enjoy, simply thaw at room temperature for a few minutes!
What should I do if my mochi dough turns out too sticky?
If your mochi dough is too sticky, this could be due to several factors such as using too much milk or not cooking it long enough. To troubleshoot, sprinkle a little cornstarch on your workspace while handling the dough. This will help manage the stickiness. Additionally, make sure you’re cooking the dough until it thickens into a solid, dough-like consistency that pulls away from the pot’s sides.
Are there any dietary considerations with Oreo mochi?
Certainly! If you have dietary restrictions, this Oreo mochi recipe can be adapted. For gluten-free options, ensure that you’re using gluten-free cookies and check that your glutinous rice flour is suitable for your needs. For dairy-free variations, you can easily substitute regular milk with almond or oat milk. Always check ingredients for allergens to make sure your mochi is safe for everyone!

Chewy Oreo Mochi Recipe: Easy, No-Bake Delight!
Ingredients
Equipment
Method
- In a large bowl, combine glutinous rice flour, cornstarch, cocoa powder, white sugar, corn oil, and milk. Stir until smooth.
- Sift the batter through a fine mesh strainer to remove lumps, then pour into a non-stick pot.
- Place the pot over low heat and continuously stir the batter for about 8-10 minutes until thick and glossy.
- Transfer the sticky dough to a cornstarch-dusted surface. Allow it to cool slightly, then stretch and pull for about 10 minutes.
- Divide the dough into small portions, rolling each into golf-ball-sized shapes.
- Roll each mochi ball in the crushed Oreo cookies until fully coated.
Leave a Reply