
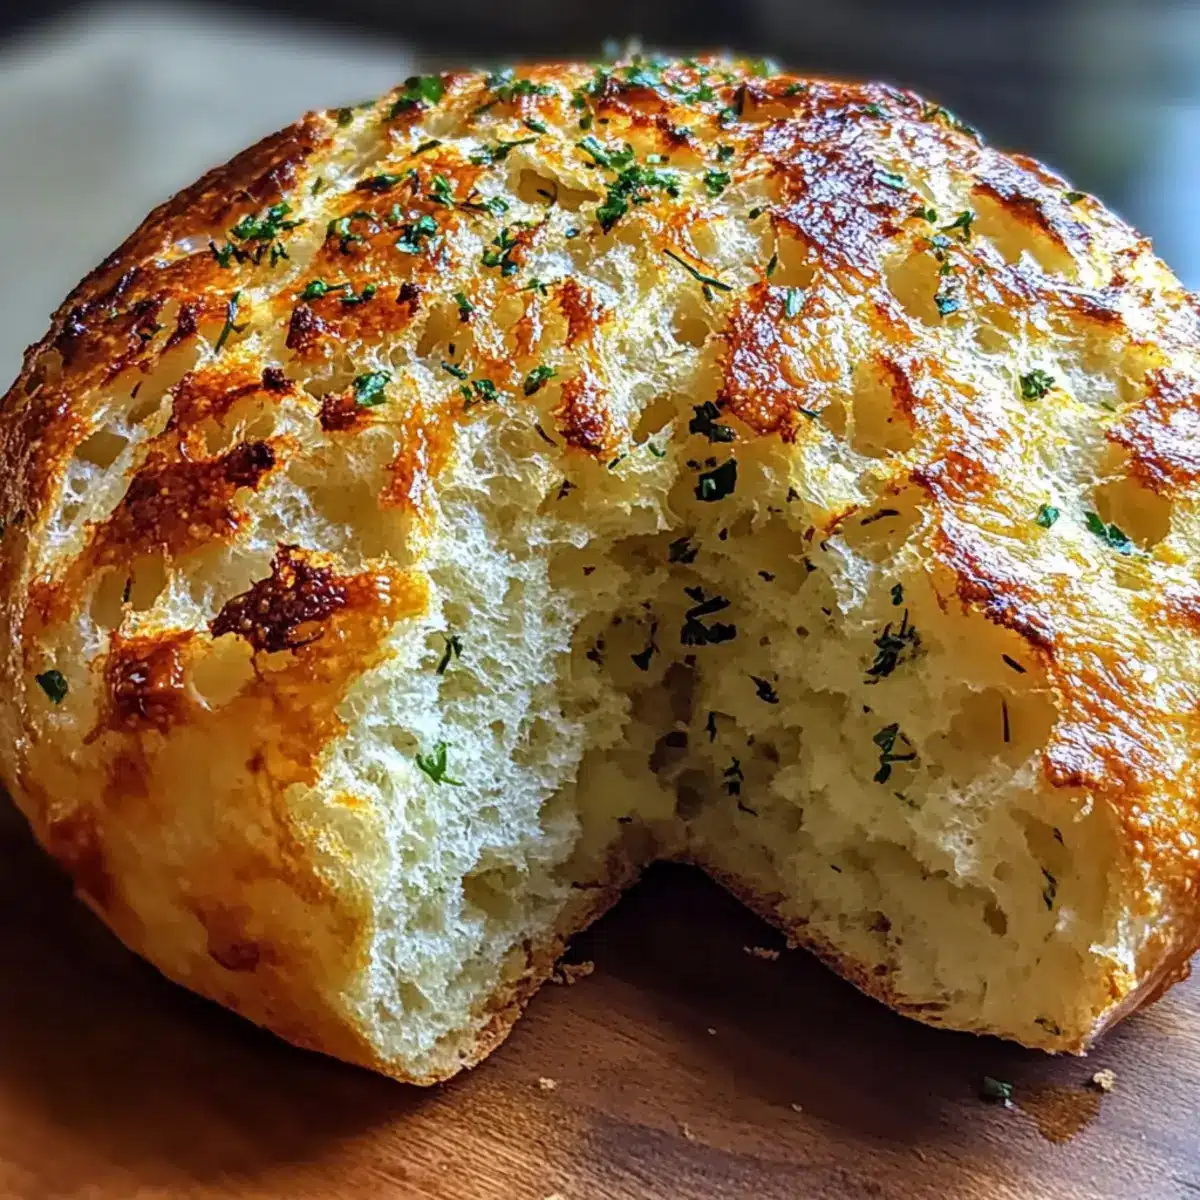
There’s something magical about the aroma of freshly baked bread wafting through your kitchen. I’ve found that nothing quite compares to the warm, welcoming scent of Soft and Crusty Garlic Herb Dutch Oven Bread as it slowly rises overnight. This recipe transforms simple ingredients into an artisan loaf that’s both easy to make and incredibly satisfying. Not only does it reward you with a golden crust that cracks beautifully upon tearing, but the tender, herb-infused interior is a delight to the senses. Plus, it’s a fantastic way to impress guests or simply enjoy the comfort of homemade goodness on a cozy night in. With a little patience, you’ll have a crusty, flavorful bread that pairs perfectly with soups, salads, or just a hearty spread of butter. Ready to fill your home with irresistible aromas and enjoy a timeless classic? Let’s dive into the details!
Why is this bread so irresistible?
Unmatched Aroma: The scent of garlic and fresh herbs wafting through your kitchen creates an inviting atmosphere that makes your mouth water.
Artisan Quality: This soft and crusty garlic herb bread boasts a bakery-level crust and tender interior, elevating your homemade bread game effortlessly.
Easy Technique: With a hands-off overnight rise, you can enjoy artisan-quality bread without extensive kneading or fuss, making it perfect for home bakers of all skill levels.
Versatile Pairing: Whether enjoyed with a bowl of soup, alongside a fresh salad, or as delicious sandwich bread, this loaf adapts seamlessly to any meal. Looking to explore more garlic-infused delights? Check out my Garlic Parmesan Crockpot Chicken and Potatoes for a main dish that complements this heavenly bread!
Crowd-Please: Impress your family and friends at gatherings with this delightful bread that will surely be the star of the show. Who wouldn’t love warm, homemade bread?
Soft and Crusty Garlic Herb Bread Ingredients
For the Bread
• All-Purpose Flour – Provides structure and texture to the bread; you can substitute with bread flour for a chewier texture.
• Salt – Enhances flavor and controls yeast activity; it’s essential for seasoning.
• Instant Yeast – Leavens the dough for a light rise; its quick-rising feature means no need to activate.
• Warm Water – Hydrates the flour and activates the yeast; ensure it’s about 110°F (43°C) for best results.
• Olive Oil – Adds moisture and flavor; opt for extra virgin for a richer taste.
For the Herbs
• Garlic (minced) – Infuses the loaf with aromatic flavor; fresh garlic is preferred, but garlic powder can work in a pinch.
• Fresh Rosemary – Imparts a fragrant herb flavor; you can replace it with 1 teaspoon of dried rosemary if necessary.
• Fresh Thyme – Complements garlic and rosemary perfectly; use 1 teaspoon of dried thyme as a substitute.
• Dried Oregano – Adds an earthy flavor; adjust to taste, and feel free to leave it out if you prefer.
• Black Pepper – Enhances overall flavor; swap with white pepper for a milder taste.
For Topping
• Optional Herbs/Sea Salt – Adds flavor and visual appeal; sprinkle atop the loaf before baking for an extra touch.
This Soft and Crusty Garlic Herb bread is the perfect introduction to the world of artisan baking—get ready to fill your home with cozy aromas!
Step‑by‑Step Instructions for Soft and Crusty Garlic Herb
Step 1: Combine Dry Ingredients
In a large mixing bowl, whisk together 3 cups of all-purpose flour with 1.5 teaspoons of salt and 1 teaspoon of instant yeast. This blend lays the foundation for your Soft and Crusty Garlic Herb bread. Ensure that your dry ingredients are well combined to promote even rising. Set aside as you prepare the wet ingredients.
Step 2: Prepare Wet Ingredients
In a separate bowl, whisk together 1.5 cups of warm water (around 110°F or 43°C), 1 tablespoon of olive oil, and the minced garlic. Add 1 tablespoon each of fresh rosemary and thyme, along with 1 teaspoon of dried oregano and black pepper. This aromatic blend will infuse your bread with delightful flavors.
Step 3: Mix Dough Together
Pour the wet mixture into the bowl with the dry ingredients, stirring until it all comes together into a sticky dough. Don’t worry about perfect smoothness; the texture will improve during the rise. Cover the bowl with plastic wrap or a clean kitchen towel and let it rest at room temperature for about 12 to 18 hours, allowing the dough to double in size.
Step 4: Shape the Dough
Once the dough has risen, lightly flour your work surface and gently turn the sticky dough onto it. With floured hands, shape it into a round boule without overworking it. This method retains the structure created during fermentation, crucial for the Soft and Crusty Garlic Herb bread. Cover it loosely with a towel and allow it to rest for 1 hour.
Step 5: Preheat the Dutch Oven
While your dough rests, preheat your oven to 450°F (232°C) and place your empty Dutch oven inside to heat for 30 minutes. This preheating step is vital for developing that beautifully crispy crust your artisan bread deserves.
Step 6: Transfer Dough
Carefully remove the hot Dutch oven from the oven, and drizzle about 1 tablespoon of olive oil inside to prevent sticking. Gently place your shaped dough into the Dutch oven. For an extra touch, sprinkle any remaining herbs and a pinch of sea salt on top to enhance the flavor and appearance.
Step 7: Bake Covered
Cover the Dutch oven with its lid and bake for 30 minutes. This initial covered baking phase allows steam to build up inside the pot, creating that gorgeous crust that is so essential to Soft and Crusty Garlic Herb bread.
Step 8: Bake Uncovered
After 30 minutes, carefully remove the lid and continue baking for another 15 to 20 minutes. Look for a deep golden-brown color on the crust. This final step achieves that lovely crackle when you tear into your loaf, revealing its soft and herb-infused interior.
Step 9: Cool and Serve
Once baked, transfer the bread to a wire rack, allowing it to cool for at least 30 minutes before slicing. This cooling period helps the bread set, ensuring you enjoy the best texture possible when you cut into your Soft and Crusty Garlic Herb creation.
Soft and Crusty Garlic Herb Variations
Feel free to tailor this recipe to your taste and preferences by trying out these delicious variations!
-
Herb Blends: Experiment with different combinations of herbs like basil, sage, or parsley for unique flavors that surprise your palate. Each herb brings its own character and can transform the bread experience.
-
Spicy Kick: Add a pinch of crushed red pepper flakes to the dough for a zesty flavor boost. The warmth from the spice beautifully complements the garlic and herbs.
-
Cheesy Goodness: Mix in shredded cheese, such as mozzarella or cheddar, for an indulgent twist. The melted cheese adds a rich, savory layer that’s simply irresistible.
-
Olive Oil Drizzle: Before serving, drizzle the bread with high-quality extra virgin olive oil for a luxurious finish. The oil enhances the flavors while adding a smooth, silky texture.
-
Garlic Lovers: For those who crave extra garlic, roast a bulb of garlic and mash it into the dough. This will create an even richer garlic flavor that truly captivates the senses.
-
Sweet Twist: Try sprinkling a tablespoon of honey or sugar into the dough for a slightly sweet undertone. This unexpected addition works particularly well with savory spreads.
-
Seed Toppings: Give your loaf a delightful crunch by sprinkling sunflower or sesame seeds on top before baking. This not only adds texture but also creates an eye-catching finish.
If you’re on the hunt for more delectable garlic-infused recipes, why not check out my Garlic Butter Meatballs or try making some heavenly Sticky Garlic Chicken? These dishes pair beautifully with the Soft and Crusty Garlic Herb Bread and are sure to impress your guests!
How to Store and Freeze Soft and Crusty Garlic Herb Bread
Airtight Container: Store the bread in an airtight container at room temperature for up to 3 days to maintain its softness and flavor.
Freezer: For longer storage, slice the bread and freeze it in an airtight bag or container for up to 3 months. Toast directly from frozen for a quick snack!
Reheating: To reheat, wrap the bread in foil and warm it in a 350°F (175°C) oven for about 10-15 minutes, restoring its crusty exterior and soft interior.
Avoid Moisture: Keep the bread away from damp areas to prevent becoming stale; ensure it is completely cool before wrapping for storage.
Expert Tips for Soft and Crusty Garlic Herb Bread
-
Long Rise Time: Allow the dough to rise for the full 12-18 hours to develop the rich flavors essential for the Soft and Crusty Garlic Herb bread.
-
Hot Dutch Oven: Always preheat your Dutch oven for at least 30 minutes; this step is crucial for achieving that desirable crispy crust.
-
Dough Hydration: If your dough feels too dry or is not sticky, add a little more warm water; this prevents dense bread and enhances the crumb structure.
-
Gentle Handling: Avoid overworking the dough while shaping. This maintains the air bubbles created during fermentation, essential for a soft texture.
-
Cool Properly: Let the bread cool for 30 minutes on a wire rack before slicing to set the texture. Cutting too early can lead to gummy slices.
Make Ahead Options
These Soft and Crusty Garlic Herb Dutch Oven Bread loaves are perfect for meal prep, making your busy weeknights a lot easier! You can mix the dry ingredients (flour, salt, and yeast) and store them in an airtight container for up to 3 days. Additionally, the dough can be prepared and allowed to rise for 12-18 hours before shaping, meaning you can have it resting overnight to be ready for baking the next day. Just remember to cover the bowl with plastic wrap to maintain its quality during the rise. When you’re ready to bake, shape and rest your dough for 1 hour, and then follow the baking instructions for a delightfully fresh loaf, just as delicious as if made on the spot!
What to Serve with Irresistibly Soft and Crusty Garlic Herb Dutch Oven Bread
Imagine a cozy dinner where warm, artisan bread is the star of your meal—comforting, fragrant, and utterly satisfying.
- Creamy Tomato Soup: A classic pairing that offers a delightful contrast to the bread’s crust. Dip for a satisfying mix of flavors.
- Zesty Green Salad: Fresh greens tossed with tangy vinaigrette balance the rich, herb-infused loaf, making every bite refreshing.
- Savory Cheese Platter: Pair with a selection of cheeses for a gourmet experience. The creamy textures and strong flavors beautifully complement the garlic bread.
- Slow-Cooked Chili: The hearty spices of chili harmonize with the aromatic nature of the bread, creating a comforting meal perfect for chilly nights.
- Herbed Olive Oil Dip: A simple mix of olive oil and herbs enhances the bread’s flavors. Just pour and enjoy with warm slices!
- Roasted Vegetables: The sweetness of roasted carrots, peppers, and zucchini adds a delightful contrast to the savory bread.
- Buttery Garlic Mashed Potatoes: A winning combination providing a symphony of garlic flavors that echo throughout the meal.
- Sweet Dessert Wine: A lightly sweet wine can create a lovely finish after your savory meal, rounding off the experience perfectly.
- Classic Caesar Salad: The anchovy and parmesan flavors in the dressing pair beautifully with the garlic bread, adding a rich dimension to your meal.
Soft and Crusty Garlic Herb Bread Recipe FAQs
What type of flour should I use for this bread?
For the best texture and structure, I recommend using all-purpose flour, which works beautifully. If you’re looking for a chewier bite, you can substitute with bread flour. Just keep in mind that this may slightly alter the hydration level, so watch the dough consistency!
How do I store Soft and Crusty Garlic Herb bread?
To keep your bread fresh, store it in an airtight container at room temperature for up to 3 days. This helps maintain its softness and flavor. If you want to keep it longer, slice the bread and freeze it in an airtight bag or container for up to 3 months. You can toast frozen slices directly from the freezer when you’re ready to enjoy.
Can I freeze the dough before baking?
Absolutely! To freeze the dough, shape it after the initial rise and wrap it tightly in plastic wrap, then place it in a freezer bag. It can be frozen for up to 3 months. When ready to bake, allow it to thaw overnight in the fridge and let it rise at room temperature before baking as instructed.
Is there a way to troubleshoot dense bread?
If your Soft and Crusty Garlic Herb bread turns out dense, there are a few fixes to explore. Ensure that the dough was sticky before covering it for its long rise; a well-hydrated dough is key to airy loaf. If it still feels dense post-baking, check that you used enough yeast, and remember that oven temperatures can vary, so using an oven thermometer can help ensure you’re hitting the right temperature.
How can I adjust this recipe for dietary restrictions?
If you’re cooking for someone with allergies, avoid garlic or any specific herbs that may trigger reactions. You can substitute the olive oil with a different oil if needed. For those watching gluten intake, you can experiment with a gluten-free flour blend, though you may need to adjust the hydration level and rising times.
Soft and Crusty Garlic Herb Bread That Will Steal the Show
Ingredients
Equipment
Method
- Combine dry ingredients: Whisk together 3 cups flour, 1.5 teaspoons salt, and 1 teaspoon yeast in a large mixing bowl.
- Prepare wet ingredients: In a separate bowl, whisk together 1.5 cups warm water, 1 tablespoon olive oil, and minced garlic, with herbs.
- Mix dough together: Pour wet mixture into dry ingredients, stirring until a sticky dough forms. Let it rest covered for 12-18 hours.
- Shape the dough: Turn the sticky dough onto a floured surface, shaping it into a round boule. Allow it to rest for 1 hour.
- Preheat the Dutch oven: Heat your oven to 450°F (232°C) and place the Dutch oven inside for 30 minutes.
- Transfer dough: Remove hot Dutch oven, drizzle with olive oil, and place shaped dough inside. Optionally sprinkle with herbs and sea salt.
- Bake covered: Cover the Dutch oven and bake for 30 minutes to build steam for the crust.
- Bake uncovered: Remove the lid and bake for an additional 15-20 minutes until golden brown.
- Cool and serve: Transfer the bread to a wire rack and cool for at least 30 minutes before slicing.
Leave a Reply